2006 CHEVROLET EXPRESS PASSANGER wheel
[x] Cancel search: wheelPage 112 of 406
Automatic Transmission Operation
There are several different positions for your shift lever.
PARK (P):This position locks your rear wheels. It is
the best position to use when you start your engine
because your vehicle cannot move easily.
{CAUTION:
It is dangerous to get out of your vehicle if the
shift lever is not fully in PARK (P) with the
parking brake �rmly set. Your vehicle can roll.
Do not leave your vehicle when the engine is
running unless you have to. If you have left
the engine running, the vehicle can move
suddenly. You or others could be injured.
To be sure your vehicle will not move, even
when you are on fairly level ground, always
set your parking brake and move the shift
lever to PARK (P). SeeShifting Into Park (P)
on page 2-25. If you are pulling a trailer, see
Towing a Trailer on page 4-37.Ensure the shift lever is fully in PARK (P) before starting
the engine. Your vehicle has an automatic transmission
shift lock control system. With the ignition in RUN,
you must fully apply your regular brakes before you can
shift from PARK (P).
If you cannot shift out of PARK (P), ease pressure on
the shift lever and push the shift lever all the way into
PARK (P) as you continue pressing the brake pedal.
Then move the shift lever into the gear you want.
SeeShifting Out of Park (P) on page 2-26.
REVERSE (R):Use this gear to back up.
Notice:Shifting to REVERSE (R) while your vehicle
is moving forward could damage the transmission.
The repairs would not be covered by your warranty.
Shift to REVERSE (R) only after your vehicle is
stopped.
To rock your vehicle back and forth to get out of snow,
ice or sand without damaging your transmission,
seeIf Your Vehicle is Stuck in Sand, Mud, Ice, or Snow
on page 4-29.
2-22
Page 113 of 406
NEUTRAL (N):In this position, your engine does not
connect with the wheels. To restart when you are
already moving, use NEUTRAL (N) only. Also, use
NEUTRAL (N) when your vehicle is being towed.
{CAUTION:
Shifting into a drive gear while your engine is
running at high speed is dangerous. Unless
your foot is �rmly on the brake pedal, your
vehicle could move very rapidly. You could
lose control and hit people or objects. Do not
shift into a drive gear while your engine is
running at high speed.
Notice:Shifting out of PARK (P) or NEUTRAL (N)
with the engine running at high speed may damage
the transmission. The repairs would not be
covered by your warranty. Be sure the engine is not
running at high speed when shifting your vehicle.DRIVE (D):This position is for normal driving. If you
need more power for passing, and you are:
•Going less than about 35 mph (55 km/h), push your
accelerator pedal about halfway down.
•Going about 35 mph (55 km/h) or more, push the
accelerator all the way down.
You will shift down to the next gear and have more
power.
THIRD (3):This position is also used for normal
driving, however, it offers more power and lower fuel
economy than DRIVE (D). You should use THIRD (3)
when carrying a heavy load or driving on steep hills.
You should use THIRD (3) (or, as you need to, a lower
gear) when towing a trailer to minimize heat build-up
and extend the life of your transmission.
2-23
Page 114 of 406
SECOND (2):This position gives you more power but
lower fuel economy than THIRD (3). You can use
SECOND (2) on hills. It can help control your speed as
you go down steep mountain roads, but then you would
also want to use your brakes off and on. If you manually
select SECOND (2), the transmission will drive in
SECOND (2). You may use this feature for reducing
torque to the rear wheels when you are trying to start your
vehicle from a stop on slippery road surfaces.
FIRST (1):This position gives you even more power
but lower fuel economy than SECOND (2). You can
use it on very steep hills, or in deep snow or mud.
If the shift lever is put in FIRST (1), the transmission
will not shift into first gear until the vehicle is going
slowly enough.
Notice:Spinning the tires or holding the vehicle
in one place on a hill using only the accelerator
pedal may damage the transmission. If you
are stuck, do not spin the tires. When stopping on
a hill, use the brakes to hold the vehicle in place.Parking Brake
To set the parking brake, hold the regular brake pedal
down with your right foot. Push down the parking
brake pedal with your left foot.
If the ignition is on, the brake system warning light will
come on.
To release the parking brake, hold the regular brake
pedal down. Pull the handle, located just above
the parking brake pedal, marked BRAKE RELEASE
to release the parking brake.
If the ignition is on when the parking brake is released,
the brake system warning light will go off.
Notice:Driving with the parking brake on can
overheat the brake system and cause premature
wear or damage to brake system parts. Verify that
the parking brake is fully released and the brake
warning light is off before driving.
If you are towing a trailer and are parking on any hill,
seeTowing a Trailer on page 4-37. That section shows
what to do first to keep the trailer from moving.
2-24
Page 125 of 406

Instrument Panel Overview...............................3-4
Hazard Warning Flashers................................3-6
Other Warning Devices...................................3-6
Horn .............................................................3-6
Tilt Wheel.....................................................3-6
Turn Signal/Multifunction Lever.........................3-7
Turn and Lane-Change Signals........................3-8
Headlamp High/Low-Beam Changer..................3-8
Flash-to-Pass.................................................3-9
Windshield Wipers..........................................3-9
Windshield Washer.......................................3-10
Cruise Control..............................................3-10
Exterior Lamps.............................................3-13
Headlamps on Reminder................................3-14
Daytime Running Lamps (DRL).......................3-14
Instrument Panel Brightness...........................3-15
Dome Lamps ...............................................3-15
Dome Lamp Override....................................3-15
Entry Lighting...............................................3-16
Exit Lighting.................................................3-16
Reading Lamps............................................3-16
Battery Run-Down Protection..........................3-16
Accessory Power Outlet(s).............................3-16
Ashtray(s) and Cigarette Lighter......................3-17Climate Controls............................................3-18
Climate Control System.................................3-18
Outlet Adjustment.........................................3-20
Rear Heating System....................................3-21
Rear Air Conditioning and Heating System.......3-21
Warning Lights, Gages, and Indicators............3-23
Instrument Panel Cluster................................3-24
Speedometer and Odometer...........................3-25
Trip Odometer..............................................3-25
Safety Belt Reminder Light.............................3-26
Passenger Safety Belt Reminder Light.............3-26
Airbag Readiness Light..................................3-27
Airbag Off Light............................................3-28
Passenger Airbag Status Indicator...................3-29
Charging System Light..................................3-32
Voltmeter Gage............................................3-32
Brake System Warning Light..........................3-33
Anti-Lock Brake System Warning Light.............3-34
StabiliTrak
®Not Ready Light..........................3-35
StabiliTrak®Indicator Light..............................3-35
Engine Coolant Temperature Gage..................3-36
Malfunction Indicator Lamp.............................3-36
Section 3 Instrument Panel
3-1
Page 130 of 406
Hazard Warning Flashers
The hazard warning flashers warn others. They also let
police know you have a problem. Your front and rear
turn signal lamps will flash on and off.
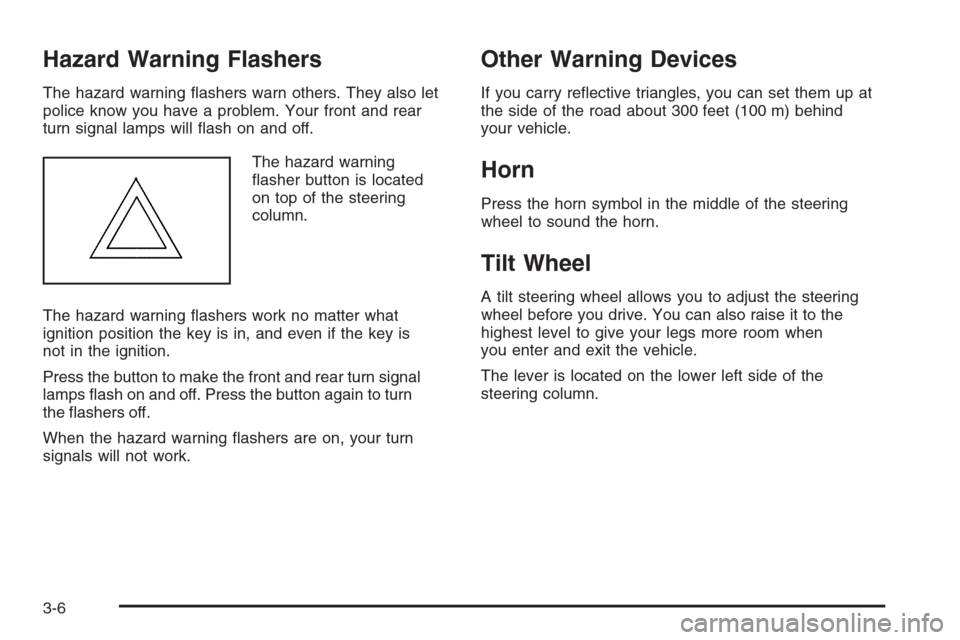
The hazard warning
flasher button is located
on top of the steering
column.
The hazard warning flashers work no matter what
ignition position the key is in, and even if the key is
not in the ignition.
Press the button to make the front and rear turn signal
lamps flash on and off. Press the button again to turn
the flashers off.
When the hazard warning flashers are on, your turn
signals will not work.
Other Warning Devices
If you carry reflective triangles, you can set them up at
the side of the road about 300 feet (100 m) behind
your vehicle.
Horn
Press the horn symbol in the middle of the steering
wheel to sound the horn.
Tilt Wheel
A tilt steering wheel allows you to adjust the steering
wheel before you drive. You can also raise it to the
highest level to give your legs more room when
you enter and exit the vehicle.
The lever is located on the lower left side of the
steering column.
3-6
Page 131 of 406

To tilt the wheel, hold the steering wheel and pull the
lever. Move the steering wheel to a comfortable level,
then release the lever to lock the wheel in place.
Turn Signal/Multifunction Lever
The lever on the left side of the steering column
includes the following:
•GTurn and Lane Change Signals.Turn and
Lane-Change Signals on page 3-8.
•53Headlamp High/Low-Beam Changer.
Headlamp High/Low-Beam Changer on page 3-8.
•Flash-to-Pass Feature. SeeFlash-to-Pass
on page 3-9.
•NWindshield Wipers. SeeWindshield Wipers
on page 3-9.
•LWindshield Washer. SeeWindshield Washer on
page 3-10.
•ICruise Control.Cruise Control on page 3-10.
For information on the exterior lamps, seeExterior
Lamps on page 3-13later in this section.
3-7
Page 134 of 406
Windshield Washer
L(Washer Fluid):There is a paddle marked with the
windshield washer symbol at the top of the multifunction
lever. To spray washer fluid on the windshield, push
the paddle. The wipers will clear the window and then
either stop or return to your preset speed.
{CAUTION:
In freezing weather, do not use your washer
until the windshield is warmed. Otherwise the
washer �uid can form ice on the windshield,
blocking your vision.
Cruise Control
If your vehicle has cruise control, you can maintain a
speed of about 25 mph (40 km/h) or more without
keeping your foot on the accelerator. This can really
help on long trips. Cruise control does not work at
speeds below about 25 mph (40 km/h).
If you apply your brakes, the cruise control will
disengage.
{CAUTION:
Cruise control can be dangerous where you
cannot drive safely at a steady speed. So, do
not use your cruise control on winding roads
or in heavy traffic.
Cruise control can be dangerous on slippery
roads. On such roads, fast changes in tire
traction can cause excessive wheel slip, and
you could lose control. Do not use cruise
control on slippery roads.
3-10
Page 145 of 406
Rear Heating System
Your vehicle may have a rear heating system that
allows you to adjust the amount of air flowing into the
rear of the vehicle, from the front-seating area. This
feature works with the main climate-control system in
your vehicle.
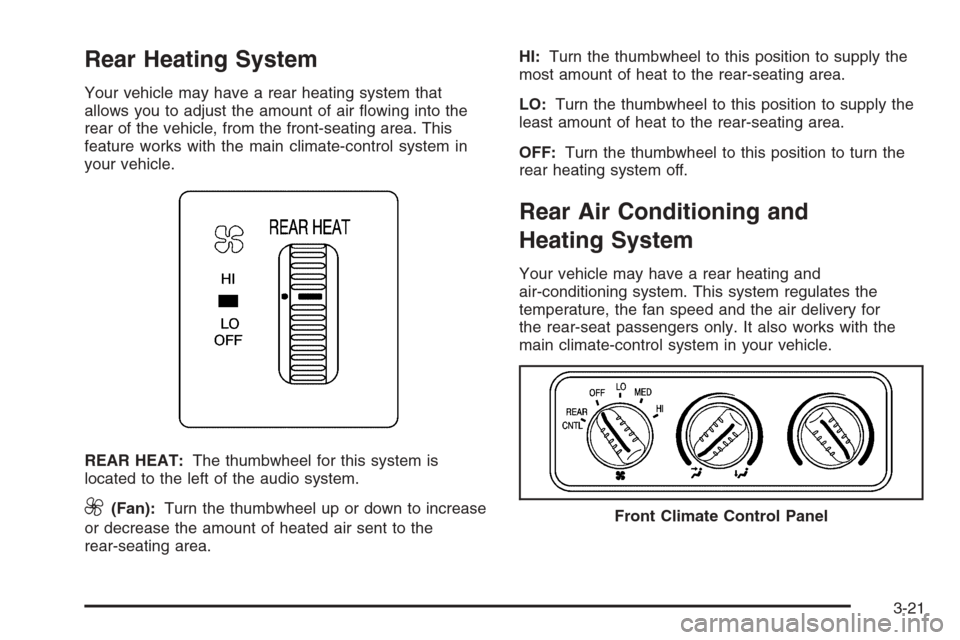
REAR HEAT:The thumbwheel for this system is
located to the left of the audio system.
9(Fan):Turn the thumbwheel up or down to increase
or decrease the amount of heated air sent to the
rear-seating area.HI:Turn the thumbwheel to this position to supply the
most amount of heat to the rear-seating area.
LO:Turn the thumbwheel to this position to supply the
least amount of heat to the rear-seating area.
OFF:Turn the thumbwheel to this position to turn the
rear heating system off.
Rear Air Conditioning and
Heating System
Your vehicle may have a rear heating and
air-conditioning system. This system regulates the
temperature, the fan speed and the air delivery for
the rear-seat passengers only. It also works with the
main climate-control system in your vehicle.
Front Climate Control Panel
3-21