2006 CHEVROLET EXPRESS PASSANGER wheel
[x] Cancel search: wheelPage 146 of 406

Use this control panel when you would like to maintain
a separate temperature setting. Adjust the direction
of the airflow or adjust the fan speed for the rear seat
passenger(s).
If your vehicle has a 135 inch (343 cm) wheelbase, a
rear control panel for this system is located in the
second row behind the driver in the rear of your vehicle.
A rear seat passenger can use this control panel to
personally adjust the temperature, the direction of the
airflow and the fan speed for the rear seating area.
The fan knob located on the front climate control panel
must be turned to REAR CNTL to allow a rear seat
passenger to use the control panel in the rear seating
area. Performing this action disables the front control
panel. To return control to this panel, move the fan knob
out of REAR CNTL.
Turn the center knob clockwise or counterclockwise
to change the direction of the airflow in the rear
seating area.To change the current mode, select one of the following:
H(Vent):Use this mode to direct air to the upper
outlets, with a little air directed to the floor outlets.
2(Floor):Use this mode to direct most of the air to
the floor outlets.
9(Fan):Turn the left knob clockwise or
counterclockwise to HIGH, MED (Medium) or LOW to
increase or decrease the fan speed in the rear-seating
area. Turn the knob to OFF to turn off the fan.
Temperature Control:To increase or decrease the
temperature for the rear of the vehicle, turn the
right knob located on the climate-control panel.
The air-conditioning system on the main climate control
panel must be turned on to direct cooled air to the rear of
the vehicle. If it is not on, then the temperature in the rear
of the vehicle will remain at cabin temperature.
Be sure to keep the area under the front seats clear of
any objects so that the air inside of your vehicle can
circulate effectively.
For information on how to use the main climate control
system, seeClimate Control System on page 3-18.
For information on ventilation, seeOutlet Adjustment on
page 3-20. Rear Climate Control Panel
3-22
Page 168 of 406

Audio System(s)
If your vehicle came without a radio, the wiring
provisions for a radio and an antenna were installed at
the assembly plant, so that if you want, a radio can
be installed at the dealer.
Determine which radio your vehicle has and then read
the pages following to familiarize yourself with its
features.
Driving without distraction is a necessity for a safer
driving experience. SeeDefensive Driving on page 4-2.
By taking a few moments to read this manual and
get familiar with your vehicle’s audio system, you can
use it with less effort, as well as take advantage of
its features. While your vehicle is parked, set up your
audio system by presetting your favorite radio stations,
setting the tone and adjusting the speakers. Then,
when driving conditions permit, you can tune to your
favorite stations using the presets and steering
wheel controls if the vehicle has them.{CAUTION:
This system provides you with a far greater
access to audio stations and song listings.
Giving extended attention to entertainment
tasks while driving can cause a crash and you
or others can be injured or killed. Always keep
your eyes on the road and your mind on the
drive — avoid engaging in extended searching
while driving.
Keeping your mind on the drive is important for safe
driving. For more information, seeDefensive Driving
on page 4-2.
Here are some ways in which you can help avoid
distraction while driving.
3-44
Page 169 of 406

While your vehicle is parked:
•Familiarize yourself with all of its controls.
•Familiarize yourself with its operation.
•Set up your audio system by presetting your
favorite radio stations, setting the tone, and
adjusting the speakers. Then, when driving
conditions permit, you can tune to your favorite
radio stations using the presets and steering wheel
controls if the vehicle has them.
Notice:Before adding any sound equipment to
your vehicle, such as an audio system, CD player,
CB radio, mobile telephone, or two-way radio, make
sure that it can be added by checking with your
dealer. Also, check federal rules covering mobile
radio and telephone units. If sound equipment can
be added, it is very important to do it properly.
Added sound equipment may interfere with
the operation of your vehicle’s engine, radio,
or other systems, and even damage them. Your
vehicle’s systems may interfere with the operation
of sound equipment that has been added.
Your vehicle may have a feature called Retained
Accessory Power (RAP). With RAP, the audio system
can be played even after the ignition is turned off.
SeeRetained Accessory Power (RAP) on page 2-19
for more information.
Setting the Time for Radios without
Radio Data Systems (RDS)
Press and hold the HR or MIN arrow for two seconds.
Then press HR until the correct hour appears on the
display. Press and hold MIN until the correct minute
appears on the display. The time may be set with the
ignition on or off.
Setting the Time for Radios with
Radio Data Systems (RDS)
The radio may have a button marked with an H or HR to
represent hours and an M or MN to represent minutes.
Press and hold the hour button until the correct hour
appears on the display. Press and hold the minute button
until the correct minute appears on the display. The time
can be set with the ignition on or off.
To synchronize the time with an FM station broadcasting
Radio Data System (RDS) information, press and hold
the hour and minute buttons at the same time until RDS
TIME appears on the display. To accept this time, press
and hold the hour and minute buttons, at the same time,
for another two seconds. If the time is not available from
the station, NO UPDAT will appear on the display.
RDS time is broadcast once a minute. After tuning to an
RDS broadcast station, it may take a few minutes for
the time to update.
3-45
Page 205 of 406

Your Driving, the Road, and Your Vehicle..........4-2
Defensive Driving...........................................4-2
Drunken Driving.............................................4-3
Control of a Vehicle........................................4-6
Braking.........................................................4-6
Anti-Lock Brake System (ABS).........................4-7
Braking in Emergencies...................................4-8
Locking Rear Axle..........................................4-8
StabiliTrak
®System........................................4-9
All-Wheel Drive (AWD) System.......................4-11
Steering......................................................4-11
Off-Road Recovery.......................................4-14
Passing.......................................................4-14
Loss of Control.............................................4-16
Driving at Night............................................4-17
Driving in Rain and on Wet Roads..................4-18City Driving..................................................4-20
Freeway Driving...........................................4-21
Before Leaving on a Long Trip.......................4-22
Highway Hypnosis........................................4-23
Hill and Mountain Roads................................4-24
Winter Driving..............................................4-25
If Your Vehicle is Stuck in Sand, Mud,
Ice, or Snow.............................................4-29
Rocking Your Vehicle to Get It Out.................4-30
Loading Your Vehicle....................................4-30
Towing..........................................................4-35
Towing Your Vehicle.....................................4-35
Recreational Vehicle Towing...........................4-35
Towing a Trailer...........................................4-37
Section 4 Driving Your Vehicle
4-1
Page 211 of 406

If your engine ever stops while you are driving, brake
normally but do not pump your brakes. If you do,
the pedal may get harder to push down. If your engine
stops, you will still have some power brake assist.
But you will use it when you brake. Once the power
assist is used up, it may take longer to stop and
the brake pedal will be harder to push.
Adding non-GM accessories can affect your vehicle’s
performance. SeeAccessories and Modi�cations
on page 5-3.
Anti-Lock Brake System (ABS)
Your vehicle has the Anti-Lock Brake System (ABS),
an advanced electronic braking system that will
help prevent a braking skid.
When you start your engine and begin to drive away,
ABS will check itself. You may hear a momentary
motor or clicking noise while this test is going on.
This is normal.
If there is a problem with
the ABS, this warning
light will stay on. See
Anti-Lock Brake System
Warning Light on
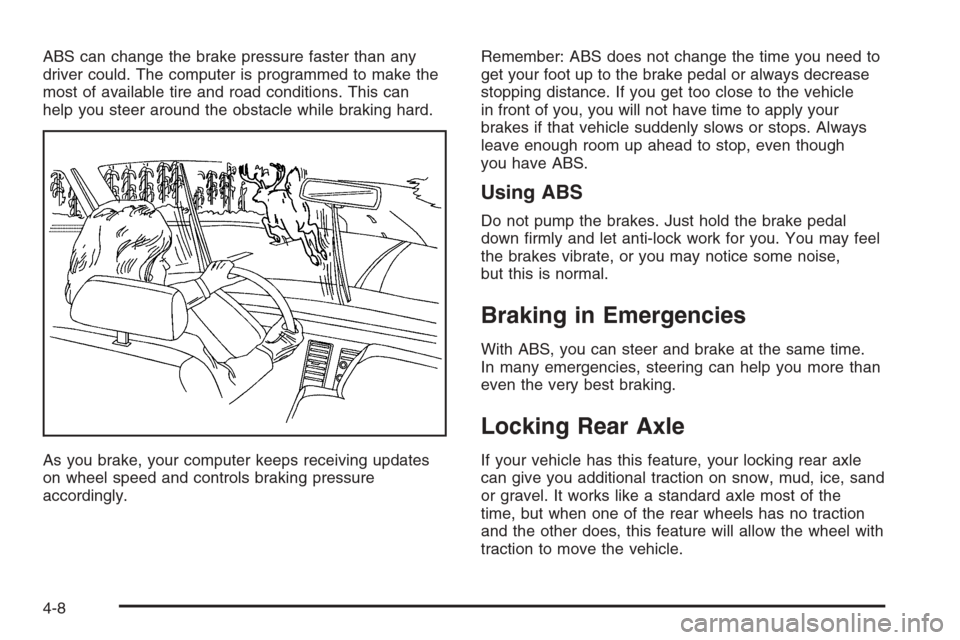
page 3-34.Let us say the road is wet and you are driving safely.
Suddenly, an animal jumps out in front of you. You slam
on the brakes and continue braking. Here is what
happens with ABS:
A computer senses that wheels are slowing down.
If one of the wheels is about to stop rolling, the computer
will separately work the brakes at each front wheel
and at both rear wheels.
4-7
Page 212 of 406

ABS can change the brake pressure faster than any
driver could. The computer is programmed to make the
most of available tire and road conditions. This can
help you steer around the obstacle while braking hard.
As you brake, your computer keeps receiving updates
on wheel speed and controls braking pressure
accordingly.Remember: ABS does not change the time you need to
get your foot up to the brake pedal or always decrease
stopping distance. If you get too close to the vehicle
in front of you, you will not have time to apply your
brakes if that vehicle suddenly slows or stops. Always
leave enough room up ahead to stop, even though
you have ABS.
Using ABS
Do not pump the brakes. Just hold the brake pedal
down firmly and let anti-lock work for you. You may feel
the brakes vibrate, or you may notice some noise,
but this is normal.
Braking in Emergencies
With ABS, you can steer and brake at the same time.
In many emergencies, steering can help you more than
even the very best braking.
Locking Rear Axle
If your vehicle has this feature, your locking rear axle
can give you additional traction on snow, mud, ice, sand
or gravel. It works like a standard axle most of the
time, but when one of the rear wheels has no traction
and the other does, this feature will allow the wheel with
traction to move the vehicle.
4-8
Page 214 of 406

For more information, seeStabiliTrak®Not Ready Light
on page 3-35andStabiliTrak®Indicator Light on
page 3-35.
Pressing and holding the
StabiliTrak
®button located
on the instrument panel
for more than five seconds
can turn off StabiliTrak
®
and part of the traction
control system.
For your safety, the system can only be disabled when
the vehicle speed is less than 20 mph (32 km/h).
You will hear three chimes and the StabiliTrak
®not
ready light will come on.
To turn on the StabiliTrak
®system, press the
StabiliTrak®button again. StabiliTrak®will automatically
turn back on when the vehicle speed exceeds 20 mph
(32 km/h). You will hear one chime and the StabiliTrak
®
not ready light will turn off.
When the StabiliTrak
®system has been turned off
you may still hear system noises as a result of
the brake-traction control coming on.It is recommended to leave the system on for normal
driving conditions, but it may be necessary to turn
the system off if your vehicle is stuck in sand, mud, ice
or snow, and you want to “rock” your vehicle to attempt
to free it. SeeIf Your Vehicle is Stuck in Sand, Mud,
Ice, or Snow on page 4-29.
StabiliTrak®System Operation
The StabiliTrak®system is normally on, except when
the system is initializing or has been disabled with
the StabiliTrak
®button. The StabiliTrak®system will
automatically activate to assist the driver in maintaining
vehicle directional control in most driving conditions.
When activated, the StabiliTrak
®system may reduce
engine power to the wheels and apply braking to
individual wheels as necessary to assist the driver with
vehicle directional control. If your vehicle is in cruise
control when the system activates, the StabiliTrak
®
indicator light on the instrument panel will flash, and
the cruise control will automatically disengage. When
the StabiliTrak
®system is no longer active, you
may re-engage the cruise control. SeeCruise Control
on page 3-10.
The StabiliTrak
®system may also turn off automatically
if it determines that a problem exists with the system.
If the problem does not clear itself after restarting
the vehicle, you should see your dealer for service.
4-10
Page 215 of 406

Traction Control Operation
The traction control system is part of the StabiliTrak®
system. Traction control limits wheel spin by reducing
engine power to the wheels (engine speed
management) and by applying brakes to each individual
wheel (brake-traction control) as necessary.
If the brake-traction control system activates constantly
or if the brakes have heated up due to high speed
braking, the brake-traction control will be automatically
disabled. The system will come back on after the
brakes have cooled. This can take up to two minutes
or longer depending on brake usage.
The traction control system may activate on dry or
rough roads or under conditions such as heavy
acceleration while turning or abrupt upshifts/downshifts
of the transmission. When this happens you may
notice a reduction in acceleration, or may hear a noise
or vibration. This is normal.
Adding non-GM accessories can affect your vehicle’s
performance. SeeAccessories and Modi�cations
on page 5-3for more information.
All-Wheel Drive (AWD) System
If your vehicle has all-wheel drive, your engine’s driving
power is sent to all four wheels for extra traction
when needed.
This is like four-wheel drive, but there is no separate
lever or switch to engage or disengage the front axle.
It is fully automatic, and adjusts itself as needed for road
conditions.
You may experience a brief vehicle vibration upon
acceleration when driving in slippery conditions. This is
normal and is an indication that the all-wheel drive
system is functioning properly.
Steering
Power Steering
If you lose power steering assist because the engine
stops or the system is not functioning, you can steer but
it will take much more effort.
4-11