2006 CHEVROLET EQUINOX change time
[x] Cancel search: change timePage 209 of 382
Remember: ABS not change the time you need to get
your foot up to the brake pedal or always decrease
stopping distance. If you get too close to the vehicle
in front of you, you will not have time to apply your
brakes if that vehicle suddenly slows or stops. Always
leave enough room up ahead to stop, even though
you have ABS.
Using ABS
Do not pump the brakes. Just hold the brake pedal
down �rmly and let anti-lock work for you. You may feel
a slight brake pedal pulsation or notice some noise,
but this is normal.
Braking in Emergencies
At some time, nearly every driver gets into a situation
that requires hard braking.
If you have ABS, you can steer and brake at
the same time. However, if you do not have ABS,
your �rst reaction — to hit the brake pedal hard and
hold it down — may be the wrong thing to do.Your wheels can stop rolling. Once they do, the vehicle
cannot respond to your steering. Momentum will carry it
in whatever direction it was headed when the wheels
stopped rolling. That could be off the road, into the very
thing you were trying to avoid, or into traffic.
If you do not have ABS, use a “squeeze” braking
technique. This will give you maximum braking while
maintaining steering control. You can do this by pushing
on the brake pedal with steadily increasing pressure.
In an emergency, you will probably want to squeeze the
brakes hard without locking the wheels. If you hear or feel
the wheels sliding, ease off the brake pedal. This will help
you retain steering control. If you do have ABS, it is
different. SeeAnti-Lock Brake System (ABS) on
page 4-7.
In many emergencies, steering can help you more than
even the very best braking.
4-9
Page 211 of 382
All-Wheel Drive (AWD) System
If your vehicle has all-wheel drive (AWD), the AWD
system operates automatically without any action
required by the driver. If the front drive wheels begin
to slip, the rear wheels will automatically begin to
drive the vehicle as required. There may be a slight
engagement noise during hard use but this is normal.
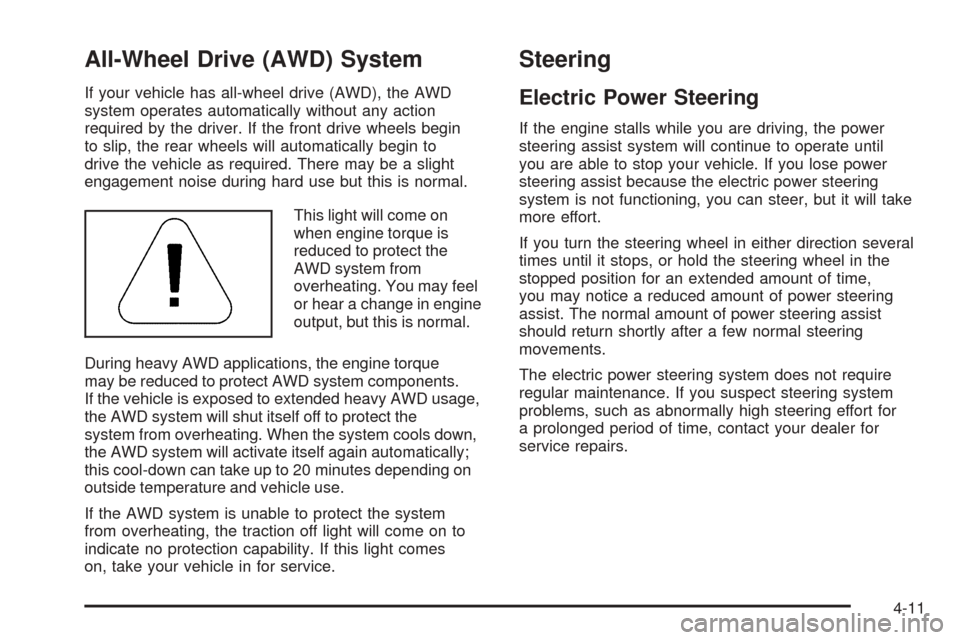
This light will come on
when engine torque is
reduced to protect the
AWD system from
overheating. You may feel
or hear a change in engine
output, but this is normal.
During heavy AWD applications, the engine torque
may be reduced to protect AWD system components.
If the vehicle is exposed to extended heavy AWD usage,
the AWD system will shut itself off to protect the
system from overheating. When the system cools down,
the AWD system will activate itself again automatically;
this cool-down can take up to 20 minutes depending on
outside temperature and vehicle use.
If the AWD system is unable to protect the system
from overheating, the traction off light will come on to
indicate no protection capability. If this light comes
on, take your vehicle in for service.
Steering
Electric Power Steering
If the engine stalls while you are driving, the power
steering assist system will continue to operate until
you are able to stop your vehicle. If you lose power
steering assist because the electric power steering
system is not functioning, you can steer, but it will take
more effort.
If you turn the steering wheel in either direction several
times until it stops, or hold the steering wheel in the
stopped position for an extended amount of time,
you may notice a reduced amount of power steering
assist. The normal amount of power steering assist
should return shortly after a few normal steering
movements.
The electric power steering system does not require
regular maintenance. If you suspect steering system
problems, such as abnormally high steering effort for
a prolonged period of time, contact your dealer for
service repairs.
4-11
Page 215 of 382
Do not get too close to the vehicle you want to
pass while you are awaiting an opportunity.
For one thing, following too closely reduces your
area of vision, especially if you are following a larger
vehicle. Also, you will not have adequate space if
the vehicle ahead suddenly slows or stops.
Keep back a reasonable distance.
When it looks like a chance to pass is coming up,
start to accelerate but stay in the right lane and
do not get too close. Time your move so you will be
increasing speed as the time comes to move into
the other lane. If the way is clear to pass, you will
have a running start that more than makes up
for the distance you would lose by dropping back.
And if something happens to cause you to
cancel your pass, you need only slow down and
drop back again and wait for another opportunity.
If other vehicles are lined up to pass a slow vehicle,
wait your turn. But take care that someone is not
trying to pass you as you pull out to pass the slow
vehicle. Remember to glance over your shoulder and
check the blind spot.
Check your mirrors, glance over your shoulder,
and start your left lane change signal before
moving out of the right lane to pass.When you are far enough ahead of the passed
vehicle to see its front in your inside mirror, activate
your right lane change signal and move back into
the right lane. Remember that your passenger side
outside mirror is convex. The vehicle you just passed
may seem to be farther away from you than it
really is.
Try not to pass more than one vehicle at a time on
two-lane roads. Reconsider before passing the next
vehicle.
Do not overtake a slowly moving vehicle too rapidly.
Even though the brake lamps are not �ashing,
it may be slowing down or starting to turn.
If you are being passed, make it easy for the
following driver to get ahead of you. Perhaps you can
ease a little to the right.
Loss of Control
Let us review what driving experts say about what
happens when the three control systems — brakes,
steering, and acceleration — do not have enough friction
where the tires meet the road to do what the driver has
asked.
In any emergency, do not give up. Keep trying to steer
and constantly seek an escape route or area of less
danger.
4-15
Page 239 of 382
To identify the trailering capacity of your vehicle, you
should read the information in “Weight of the Trailer”
that appears later in this section. Trailering is different
than just driving your vehicle by itself. Trailering
means changes in handling, acceleration, braking,
durability, and fuel economy. Successful, safe trailering
takes correct equipment, and it has to be used
properly.
That is the reason for this section. In it are many
time-tested, important trailering tips and safety rules.
Many of these are important for your safety and that of
your passengers. So please read this section carefully
before you pull a trailer.If You Do Decide To Pull A Trailer
If you do, here are some important points:
There are many different laws, including speed limit
restrictions, having to do with trailering. Make sure
your rig will be legal, not only where you live
but also where you will be driving. A good source
for this information can be state or provincial police.
Consider using a sway control. See “Hitches” later in
this section.
Do not tow a trailer at all during the �rst 500 miles
(800 km) your new vehicle is driven. Your engine,
axle or other parts could be damaged.
During the �rst 500 miles (800 km) that you tow a
trailer, do not drive over 50 mph (80 km/h) and do
not make starts at full throttle. This helps your
engine and other parts of your vehicle wear in at
the heavier loads.
4-39
Page 262 of 382
Notice:Use only engine oil identi�ed as meeting
GM Standard GM6094M and showing the American
Petroleum Institute Certi�ed For Gasoline Engines
starburst symbol. Failure to use the recommended
oil can result in engine damage not covered by
your warranty.
GM Goodwrench
®oil meets all the requirements for
your vehicle.
If you are in an area of extreme cold, where the
temperature falls below−20°F (−29°C), it is
recommended that you use either an SAE 5W-30
synthetic oil or an SAE 0W-30 oil. Both will provide
easier cold starting and better protection for your engine
at extremely low temperatures.
Engine Oil Additives
Do not add anything to your oil. The recommended oils
with the starburst symbol that meet GM Standard
GM6094M are all you will need for good performance
and engine protection.
Engine Oil Life System
When to Change Engine Oil
Your vehicle has a computer system that lets you know
when to change the engine oil and �lter. This is based
on engine revolutions and engine temperature, and not
on mileage. Based on driving conditions, the mileage
at which an oil change will be indicated can vary
considerably. For the oil life system to work properly,
you must reset the system every time the oil is changed.
When the system has calculated that oil life has been
diminished, it will indicate that an oil change is
necessary. A change engine oil light will come on.
Change your oil as soon as possible within the next
600 miles (1 000 km). It is possible that, if you are
driving under the best conditions, the oil life system may
not indicate that an oil change is necessary for over
a year. However, your engine oil and �lter must
be changed at least once a year and at this time the
system must be reset. Your dealer has GM-trained
service people who will perform this work using genuine
GM parts and reset the system. It is also important to
check your oil regularly and keep it at the proper level.
If the system is ever reset accidentally, you must
change your oil at 3,000 miles (5 000 km) since your
last oil change. Remember to reset the oil life system
whenever the oil is changed.
5-16
Page 263 of 382
How to Reset the Engine Oil Life
System
The Engine Oil Life System calculates when to change
your engine oil and �lter based on vehicle use. Anytime
your oil is changed, reset the system so it can calculate
when the next oil change is required. If a situation occurs
where you change your oil prior to a change engine oil
light being turned on, reset the system.
1. Turn the ignition key to RUN with the engine off.
2. Fully press and release the accelerator pedal
three times within �ve seconds.
The change engine oil light will �ash while the
system is resetting.
3. Turn the key to LOCK.
If the change engine oil light comes back on and stays
on when you start your vehicle, the engine oil life
system has not reset. Repeat the procedure.
What to Do with Used Oil
Used engine oil contains certain elements that may be
unhealthy for your skin and could even cause cancer.
Do not let used oil stay on your skin for very long. Clean
your skin and nails with soap and water, or a good
hand cleaner. Wash or properly dispose of clothing or
rags containing used engine oil. See the manufacturer’s
warnings about the use and disposal of oil products.
Used oil can be a threat to the environment. If you
change your own oil, be sure to drain all the oil from the
�lter before disposal. Never dispose of oil by putting it
in the trash, pouring it on the ground, into sewers, or
into streams or bodies of water. Instead, recycle it
by taking it to a place that collects used oil. If you have
a problem properly disposing of your used oil, ask
your dealer, a service station, or a local recycling center
for help.
5-17
Page 280 of 382
Replacing Brake System Parts
The braking system on a vehicle is complex. Its many
parts have to be of top quality and work well together
if the vehicle is to have really good braking. Your
vehicle was designed and tested with top-quality GM
brake parts. When you replace parts of your braking
system — for example, when your brake linings
wear down and you need new ones put in — be sure
you get new approved GM replacement parts. If you do
not, your brakes may no longer work properly. For
example, if someone puts in brake linings that are wrong
for your vehicle, the balance between your front and
rear brakes can change — for the worse. The braking
performance you have come to expect can change
in many other ways if someone puts in the wrong
replacement brake parts.
Battery
Your vehicle has a maintenance free battery. When it is
time for a new battery, get one that has the replacement
number shown on the original battery’s label. We
recommend an ACDelco
®replacement battery.
For battery replacement, see your dealer or the service
manual. To purchase a service manual, seeService
and Owner PublicationsinService Publications Ordering
Information on page 7-14.Warning:Battery posts, terminals, and related
accessories contain lead and lead compounds,
chemicals known to the State of California to cause
cancer and reproductive harm. Wash hands after
handling.
Vehicle Storage
If you are not going to drive your vehicle for 25 days
or more, remove the black, negative (-) cable from
the battery. This will help keep your battery from
running down.
{CAUTION:
Batteries have acid that can burn you and gas
that can explode. You can be badly hurt if you
are not careful. SeeJump Starting on page 5-35
for tips on working around a battery without
getting hurt.
You must close all doors and the liftgate before
reconnecting the battery. After reconnecting the battery,
you must press the unlock button on the remote keyless
entry transmitter. Failure to follow this procedure may
result in a sounding alarm. Pressing unlock on the remote
keyless entry transmitter would stop the sounding alarm.
5-34
Page 301 of 382
Do not include the compact spare tire in your tire
rotation.
After the tires have been rotated, adjust the front and
rear in�ation pressures as shown on the Tire and
Loading Information label.
Make certain that all wheel nuts are properly tightened.
See “Wheel Nut Torque” underCapacities and
Speci�cations on page 5-89.
{CAUTION:
Rust or dirt on a wheel, or on the parts to
which it is fastened, can make wheel nuts
become loose after a time. The wheel could
come off and cause an accident. When you
change a wheel, remove any rust or dirt from
places where the wheel attaches to the vehicle.
In an emergency, you can use a cloth or a
paper towel to do this; but be sure to use a
scraper or wire brush later, if needed, to get all
the rust or dirt off. SeeChanging a Flat Tire on
page 5-63.
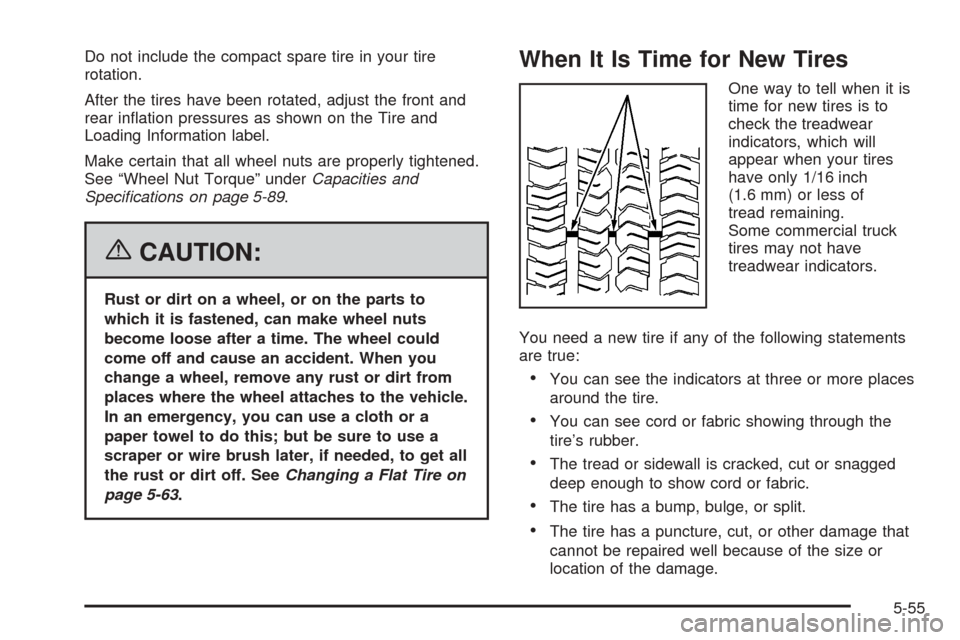
When It Is Time for New Tires
One way to tell when it is
time for new tires is to
check the treadwear
indicators, which will
appear when your tires
have only 1/16 inch
(1.6 mm) or less of
tread remaining.
Some commercial truck
tires may not have
treadwear indicators.
You need a new tire if any of the following statements
are true:
You can see the indicators at three or more places
around the tire.
You can see cord or fabric showing through the
tire’s rubber.
The tread or sidewall is cracked, cut or snagged
deep enough to show cord or fabric.
The tire has a bump, bulge, or split.
The tire has a puncture, cut, or other damage that
cannot be repaired well because of the size or
location of the damage.
5-55