2006 CHEVROLET EPICA fog light
[x] Cancel search: fog lightPage 107 of 368
Instrument Panel Overview...............................3-4
Hazard Warning Flashers................................3-6
Other Warning Devices...................................3-6
Horn .............................................................3-6
Tilt Wheel.....................................................3-6
Turn Signal/Multifunction Lever.........................3-7
Turn and Lane-Change Signals........................3-7
Headlamp High/Low-Beam Changer..................3-8
Flash-to-Pass.................................................3-8
Windshield Wipers..........................................3-8
Windshield Washer.........................................3-9
Cruise Control..............................................3-10
Exterior Lamps.............................................3-12
Headlamps on Reminder................................3-13
Daytime Running Lamps (DRL).......................3-13
Fog Lamps ..................................................3-14
Instrument Panel Brightness...........................3-15
Dome Lamp .................................................3-15
Entry Lighting...............................................3-16
Map Lamps .................................................3-16
Accessory Power Outlet(s).............................3-16
Ashtray(s) and Cigarette Lighter......................3-17
Clock..........................................................3-18Climate Controls............................................3-19
Climate Control System.................................3-19
Automatic Climate Control System...................3-22
Outlet Adjustment.........................................3-27
Passenger Compartment Air Filter...................3-28
Warning Lights, Gages, and Indicators............3-29
Instrument Panel Cluster................................3-30
Speedometer and Odometer...........................3-31
Trip Odometer..............................................3-31
Tachometer.................................................3-31
Safety Belt Reminder Light.............................3-32
Safety Belt Reminder Tone............................3-32
Airbag Readiness Light..................................3-32
Passenger Airbag Status Indicator...................3-33
Charging System Light..................................3-35
Brake System Warning Light..........................3-36
Anti-Lock Brake System
Warning Light...........................................3-37
Speed Sensitive Power
Steering (SSPS) Warning Light....................3-37
Traction Control System (TCS)
Warning Light...........................................3-38
Section 3 Instrument Panel
3-1
Page 120 of 368
An indicator light on the instrument panel cluster will
come on when the DRL are on. SeeDaytime Running
Lamps (DRL) Indicator Light on page 3-44.
The DRL system will turn off when one of the following
conditions are met:
•The ignition is off.
•The parking brakes are on.
•The high-beam headlamps are on.
•The low-beam headlamps are on.
As with any vehicle, you should turn on the regular
headlamp system when you need it.
Fog Lamps
If your vehicle has this feature, use your fog lamps for
better visibility in foggy or misty conditions.
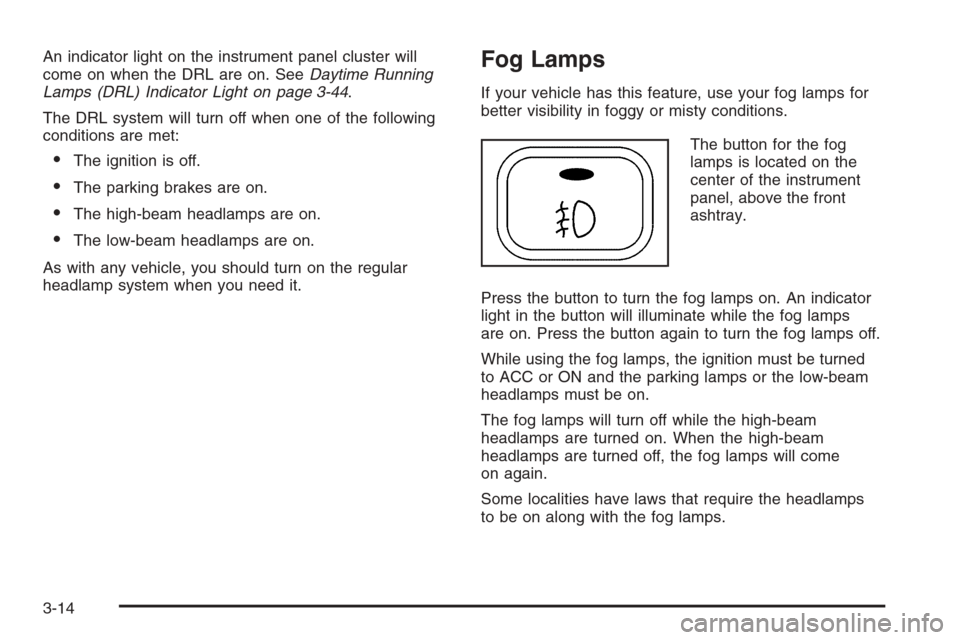
The button for the fog
lamps is located on the
center of the instrument
panel, above the front
ashtray.
Press the button to turn the fog lamps on. An indicator
light in the button will illuminate while the fog lamps
are on. Press the button again to turn the fog lamps off.
While using the fog lamps, the ignition must be turned
to ACC or ON and the parking lamps or the low-beam
headlamps must be on.
The fog lamps will turn off while the high-beam
headlamps are turned on. When the high-beam
headlamps are turned off, the fog lamps will come
on again.
Some localities have laws that require the headlamps
to be on along with the fog lamps.
3-14
Page 126 of 368
?(Recirculation):This mode keeps outside air
from coming in the vehicle. It can be used to prevent
outside air and odors from entering your vehicle or
to help heat or cool the air inside your vehicle more
quickly. Press this button to turn the recirculation mode
on or off. When the button is pressed, an indicator
light in the button will come on. Using the recirculation
mode for extended periods may cause your windows
to fog. If this happens, select the defrost mode.
A/C (Air Conditioning):Press this button to turn the
air conditioning compressor on and off. When A/C
is pressed, an indicator light in the button will come on
to let you know that air conditioning is activated.
On hot days, open the windows to let hot inside air
escape; then close them. This helps to reduce the time
it takes for your vehicle to cool down. It also helps
the system to operate more efficiently.
For quick cool down on hot days, do the following:
1. Select the vent mode.
2. Select the highest fan speed.
3. Press the A/C button.
4. Select the recirculation mode.
5. Select the coolest temperature.Using these settings together for long periods of time
may cause the air inside of your vehicle to become too
dry. To prevent this from happening, after the air in
your vehicle has cooled, turn the recirculation mode off.
The air conditioning system removes moisture from
the air, so you may sometimes notice a small amount of
water dripping underneath your vehicle while idling or
after turning off the engine. This is normal.
Defogging and Defrosting
Fog on the inside of windows is a result of high humidity
or moisture condensing on the cool window glass.
This can be minimized if the climate control system is
used properly. There are two modes to clear fog or frost
from your windshield. Use the defog mode to clear
the windows of fog or moisture and warm the
passengers. Use the defrost mode to remove fog or
frost from the windshield more quickly.
Select one of these available modes from the right knob.
É(Defog):This mode directs most of the air to the
windshield and the floor outlets. A small amount of air
is also directed to the outboard outlets for the side
windows and to the instrument panel side outlets.
When you select this mode, the system runs the
air-conditioning compressor. To defog the windows
faster, turn the temperature control knob clockwise
to the warmest setting.
3-20
Page 127 of 368
0(Defrost):This mode directs most of the air
to the windshield and the outboard outlets for the
side windows. A small amount of air is also directed
to the instrument panel side outlets. When you select
this mode, the system runs the air-conditioning
compressor. To defrost the windows faster, turn
the temperature control knob clockwise to the
warmest setting.
Do not drive the vehicle until all windows are clear.
Rear Window and Outside Mirror
Defogger
Your vehicle has a rear window and outside mirror
defogger. This feature will only work when the ignition
is turned to ON.
The rear window defogger uses a warming grid to
remove fog or frost from the rear window. Before
using this feature, clear as much snow from the rear
window as possible.
button is located below the audio system. An indicator
light in the button will come on to let your know that
the feature is activated.The rear window and outside mirror defogger will turn
off about 10 minutes after the button is pressed.
The defogger can also be turned off by pressing the
button again or by turning off the engine.
Notice:Do not use anything sharp on the inside
of the rear window. If you do, you could cut or
damage the warming grid, and the repairs would
not be covered by your warranty. Do not attach
a temporary vehicle license, tape, a decal or
anything similar to the defogger grid.
Front Heated Windshield
Your vehicle may have a heated front windshield
which can be used to defrost it. This feature will
only work when the ignition is turned to ON.
There is a heated element along the bottom of the
windshield used to heat the windshield.
system. An indicator light in the button will come on
to let your know that the feature is activated.
The front windshield heater will turn off about 10 minutes
after the button is pressed. It can also be turned off
by pressing the button again or by turning off the engine.
3-21
Page 129 of 368
Do not cover the solar sensor located in the center of
the instrument panel, near the windshield. For more
information on the solar sensor, see “Sensors” later
in this section.
Manual Operation
w9x
(Fan):Press the up arrow to increase the fan
speed and the down arrow to decrease the fan speed.
AUTO mode is cancelled when this button is pressed.
MODE:Press this button repeatedly to cycle through
and choose the mode of air delivery into the vehicle. The
system will stay in the selected mode until MODE is
pressed again or until the AUTO button is pressed.
Whenever MODE is pressed, the display will show
the current system settings for five seconds before
returning the display to the exterior temperature.
E(Vent):This mode directs air to the instrument
panel outlets.
((Bi-level):This mode directs about half of the air
to the instrument panel outlets, and then directs
the remaining air to the floor outlets.
5(Floor):This mode directs most of the air to the
floor outlets. If your vehicle has rear outlets, some of the
air will also be directed to them. Be sure to keep the
area under the front seats clear to allow the flow of air
to the rear compartment.The mode button can also be used to select the defog
mode. Information on defogging and defrosting can
be found later in this section.
?(Recirculation):Press this button to keep outside
air from coming in the vehicle. It can be used to
prevent outside air and odors from entering your vehicle
or to help heat or cool the air inside your vehicle
more quickly. Press this button to turn the recirculation
mode on or off.
Using the recirculation mode for extended periods may
cause your windows to fog. If this happens, select
the defrost mode.
A/C (Air Conditioning):Press this button to override
the automatic system and turn the air conditioning
system on or off. When A/C is pressed, the indicator
light on the display panel will come on to let you know
that it is activated.
Press this button again to turn the air conditioning
system off, or press the OFF button to turn the entire
system off.
On hot days, open the windows to let hot inside air
escape; then close them. This helps to reduce the
time it takes for your vehicle to cool down. It also
helps the system to operate more efficiently.
3-23
Page 132 of 368
1(Defrost):Press the defrost button to select the
defrost function.
Pressing this button directs the air to the windshield and
the outboard outlets for the side windows.
To help clear the windshield quickly, do the following:
1. Select the defrost mode.
2. Select the highest temperature.
3. Select the highest fan speed.
Do not drive the vehicle until all windows are clear.
To cancel defrost, press the MODE or AUTO buttons.
If you press the AUTO button, the system will operate
automatically.Rear Window and Outside Mirror
Defogger
Your vehicle has a rear window and outside mirror
defogger. This feature will only work when the ignition
is turned to ON.
The rear window defogger uses a warming grid to
remove fog or frost from the rear window. Before
using this feature, clear as much snow from the rear
window as possible.
button is located below the audio system. An indicator
light in the button will come on to let you know that
the feature is activated.
The rear window and outside mirror defogger will
turn off about 15 minutes after the button is pressed.
The defogger can also be turned off by pressing
the button again or by turning off the engine.
Notice:Do not use anything sharp on the inside
of the rear window. If you do, you could cut or
damage the warming grid, and the repairs would
not be covered by your warranty. Do not attach
a temporary vehicle license, tape, a decal or
anything similar to the defogger grid.
3-26
Page 186 of 368
Care of Your CDs
Handle CDs carefully. Store them in their original
cases or other protective cases and away from direct
sunlight and dust. The CD player scans the bottom
surface of the disc. If the surface of a CD is damaged,
such as cracked, broken, or scratched, the CD will
not play properly or not at all. If the surface of a CD is
soiled, take a soft, lint free cloth or dampen a clean,
soft cloth in a mild, neutral detergent solution mixed with
water, and clean it. Make sure the wiping process
starts from the center to the edge.
Do not touch the bottom side of a CD while handling
it; this could damage the surface. Pick up CDs by
grasping the outer edges or the edge of the hole and
the outer edge.
Care of the CD Player
The use of CD lens cleaners for CD players is not
advised, due to the risk of contaminating the internal
lens of the CD optics with lubricants.
Backglass Antenna (Sedan Models)
For the Sedan models, the antenna is integrated
with the rear window defogger, located in the rear
window.
Make sure the inside surface of the rear window glass
is not scratched and that the lines on the glass are
not damaged. If the inside surface is damaged, it
could interfere with radio reception. For proper radio
reception, the antenna connector at the top-center of
the rear window glass needs to be properly attached to
the post on the glass.
Notice:Using a razor blade or sharp object to
clear the inside rear window may damage the rear
window antenna and/or the rear window defogger.
Repairs would not be covered by your warranty.
Do not clear the inside rear window with sharp
objects.
3-80
Page 292 of 368
Appearance Care
Cleaning the Inside of Your Vehicle
Your vehicle’s interior will continue to look its best if it is
cleaned often. Although not always visible, dust and dirt
can accumulate on your upholstery. Dirt can damage
carpet, fabric, leather, and plastic surfaces. Regular
vacuuming is recommended to remove particles from
your upholstery. It is important to keep your upholstery
from becoming and remaining heavily soiled. Soils
should be removed as quickly as possible. Your vehicle’s
interior may experience extremes of heat that could
cause stains to set rapidly.
Lighter colored interiors may require more frequent
cleaning. Use care because newspapers and garments
that transfer color to your home furnishings may also
transfer color to your vehicle’s interior.
When cleaning your vehicle’s interior, only use cleaners
specifically designed for the surfaces being cleaned.
Permanent damage may result from using cleaners on
surfaces for which they were not intended. Use glass
cleaner only on glass. Remove any accidental over-spray
from other surfaces immediately. To prevent over-spray,
apply cleaner directly to the cleaning cloth.Notice:If you use abrasive cleaners when cleaning
glass surfaces on your vehicle, you could scratch
the glass and/or cause damage to the integrated
radio antenna and the rear window defogger. When
cleaning the glass on your vehicle, use only a
soft cloth and glass cleaner.
Many cleaners contain solvents that may become
concentrated in your vehicle’s breathing space. Before
using cleaners, read and adhere to all safety instructions
on the label. While cleaning your vehicle’s interior,
maintain adequate ventilation by opening your vehicle’s
doors and windows.
Dust may be removed from small buttons and knobs
using a small brush with soft bristles.
Your GM dealer has a product for cleaning your
vehicle’s glass. Should it become necessary, you can
also obtain a product from your GM dealer to remove
odors from your vehicle’s upholstery.
Do not clean your vehicle using the following cleaners
or techniques:
•Never use a knife or any other sharp object to
remove a soil from any interior surface.
•Never use a stiff brush. It can cause damage to
your vehicle’s interior surfaces.
5-68