2006 CHEVROLET EPICA display
[x] Cancel search: displayPage 88 of 368
Ignition Positions
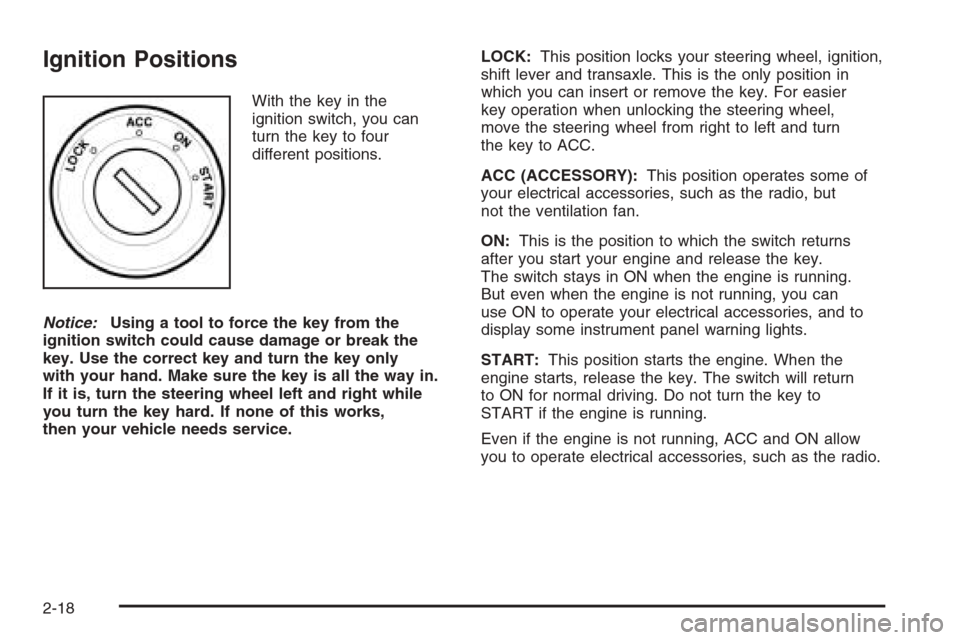
With the key in the
ignition switch, you can
turn the key to four
different positions.
Notice:Using a tool to force the key from the
ignition switch could cause damage or break the
key. Use the correct key and turn the key only
with your hand. Make sure the key is all the way in.
If it is, turn the steering wheel left and right while
you turn the key hard. If none of this works,
then your vehicle needs service.LOCK:This position locks your steering wheel, ignition,
shift lever and transaxle. This is the only position in
which you can insert or remove the key. For easier
key operation when unlocking the steering wheel,
move the steering wheel from right to left and turn
the key to ACC.
ACC (ACCESSORY):This position operates some of
your electrical accessories, such as the radio, but
not the ventilation fan.
ON:This is the position to which the switch returns
after you start your engine and release the key.
The switch stays in ON when the engine is running.
But even when the engine is not running, you can
use ON to operate your electrical accessories, and to
display some instrument panel warning lights.
START:This position starts the engine. When the
engine starts, release the key. The switch will return
to ON for normal driving. Do not turn the key to
START if the engine is running.
Even if the engine is not running, ACC and ON allow
you to operate electrical accessories, such as the radio.
2-18
Page 108 of 368
Traction Control System
Active Light..............................................3-38
Traction Off Light..........................................3-39
Hold Mode Light...........................................3-39
Engine Coolant Temperature Gage..................3-40
Malfunction Indicator Lamp.............................3-40
Oil Pressure Light.........................................3-43
Cruise Control Light......................................3-43
Highbeam On Light.......................................3-44
Daytime Running Lamps (DRL)
Indicator Light...........................................3-44
Door Ajar Light.............................................3-44
Trunk Ajar Light............................................3-44
Fuel Gage...................................................3-45
Low Fuel Warning Light.................................3-46Audio System(s).............................................3-46
Radio with CD
(Single Display, Base Level).......................3-48
Radio with CD
(Single Display, MP3).................................3-52
Radio with CD
(Double Display, MP3/WMA).......................3-59
Radio with Six-Disc CD
(Double Display, MP3/WMA).......................3-67
Trunk-Mounted CD Changer...........................3-75
Audio Steering Wheel Controls.......................3-78
Radio Reception...........................................3-79
Care of Your CDs.........................................3-80
Care of the CD Player...................................3-80
Backglass Antenna (Sedan Models).................3-80
Integrated Windshield Antenna
(Hatchback and Wagon Models)..................3-81
Section 3 Instrument Panel
3-2
Page 124 of 368
Clock
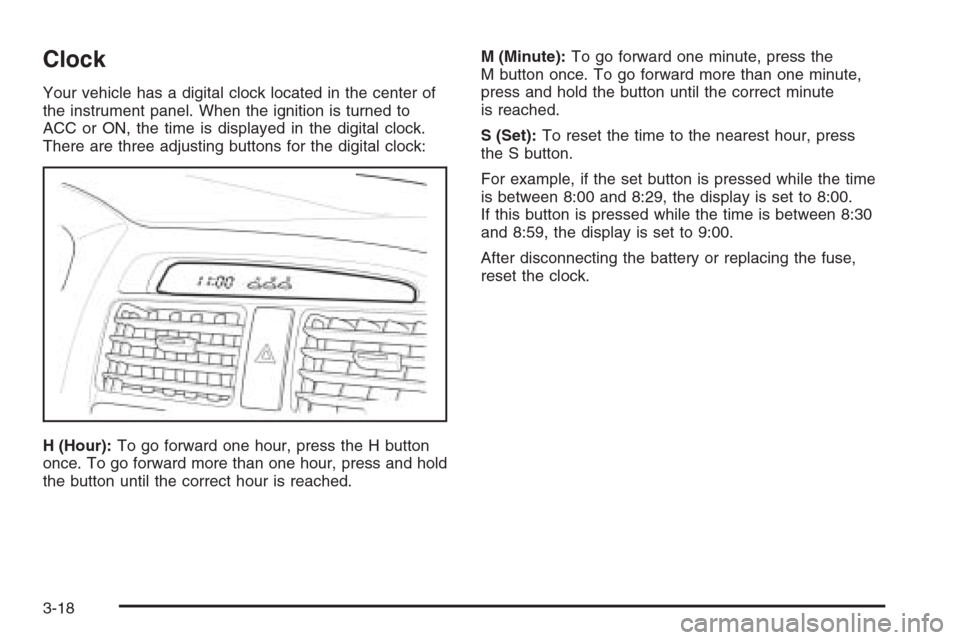
Your vehicle has a digital clock located in the center of
the instrument panel. When the ignition is turned to
ACC or ON, the time is displayed in the digital clock.
There are three adjusting buttons for the digital clock:
H (Hour):To go forward one hour, press the H button
once. To go forward more than one hour, press and hold
the button until the correct hour is reached.M (Minute):To go forward one minute, press the
M button once. To go forward more than one minute,
press and hold the button until the correct minute
is reached.
S (Set):To reset the time to the nearest hour, press
the S button.
For example, if the set button is pressed while the time
is between 8:00 and 8:29, the display is set to 8:00.
If this button is pressed while the time is between 8:30
and 8:59, the display is set to 9:00.
After disconnecting the battery or replacing the fuse,
reset the clock.
3-18
Page 128 of 368
Automatic Climate Control System
Your vehicle may have an automatic climate control
system. With this system you can control the heating,
cooling and ventilation for your vehicle.
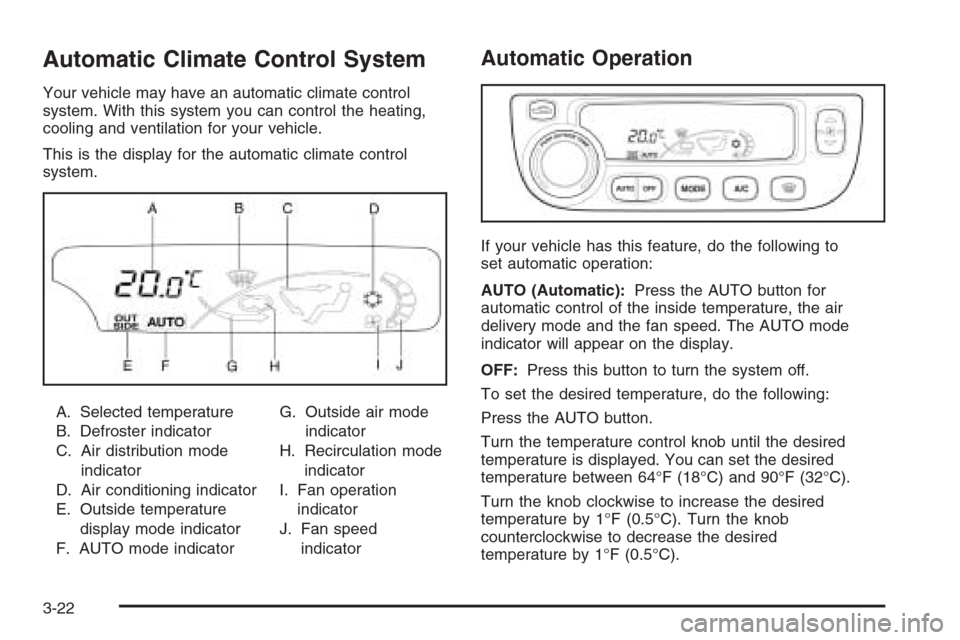
This is the display for the automatic climate control
system.
A. Selected temperature
B. Defroster indicator
C. Air distribution mode
indicator
D. Air conditioning indicator
E. Outside temperature
display mode indicator
F. AUTO mode indicatorG. Outside air mode
indicator
H. Recirculation mode
indicator
I. Fan operation
indicator
J. Fan speed
indicator
Automatic Operation
If your vehicle has this feature, do the following to
set automatic operation:
AUTO (Automatic):Press the AUTO button for
automatic control of the inside temperature, the air
delivery mode and the fan speed. The AUTO mode
indicator will appear on the display.
OFF:Press this button to turn the system off.
To set the desired temperature, do the following:
Press the AUTO button.
Turn the temperature control knob until the desired
temperature is displayed. You can set the desired
temperature between 64°F (18°C) and 90°F (32°C).
Turn the knob clockwise to increase the desired
temperature by 1°F (0.5°C). Turn the knob
counterclockwise to decrease the desired
temperature by 1°F (0.5°C).
3-22
Page 129 of 368
Do not cover the solar sensor located in the center of
the instrument panel, near the windshield. For more
information on the solar sensor, see “Sensors” later
in this section.
Manual Operation
w9x
(Fan):Press the up arrow to increase the fan
speed and the down arrow to decrease the fan speed.
AUTO mode is cancelled when this button is pressed.
MODE:Press this button repeatedly to cycle through
and choose the mode of air delivery into the vehicle. The
system will stay in the selected mode until MODE is
pressed again or until the AUTO button is pressed.
Whenever MODE is pressed, the display will show
the current system settings for five seconds before
returning the display to the exterior temperature.
E(Vent):This mode directs air to the instrument
panel outlets.
((Bi-level):This mode directs about half of the air
to the instrument panel outlets, and then directs
the remaining air to the floor outlets.
5(Floor):This mode directs most of the air to the
floor outlets. If your vehicle has rear outlets, some of the
air will also be directed to them. Be sure to keep the
area under the front seats clear to allow the flow of air
to the rear compartment.The mode button can also be used to select the defog
mode. Information on defogging and defrosting can
be found later in this section.
?(Recirculation):Press this button to keep outside
air from coming in the vehicle. It can be used to
prevent outside air and odors from entering your vehicle
or to help heat or cool the air inside your vehicle
more quickly. Press this button to turn the recirculation
mode on or off.
Using the recirculation mode for extended periods may
cause your windows to fog. If this happens, select
the defrost mode.
A/C (Air Conditioning):Press this button to override
the automatic system and turn the air conditioning
system on or off. When A/C is pressed, the indicator
light on the display panel will come on to let you know
that it is activated.
Press this button again to turn the air conditioning
system off, or press the OFF button to turn the entire
system off.
On hot days, open the windows to let hot inside air
escape; then close them. This helps to reduce the
time it takes for your vehicle to cool down. It also
helps the system to operate more efficiently.
3-23
Page 130 of 368
For quick cool down on hot days, press the AUTO
button and the system will automatically enter
recirculation mode and the temperature will be at
the full cold position for maximum cooling.
Using these settings together for long periods of time
may cause the air inside of your vehicle to become too
dry. To prevent this from happening, after the air in
your vehicle has cooled, turn the recirculation mode off.
The air conditioning system removes moisture from
the air, so you may sometimes notice a small amount
of water dripping underneath your vehicle while idling
or after turning off the engine. This is normal.
Outside Temperature:To display the outside
temperature, press the temperature control knob.
Pressing this knob again will cancel the outside
temperature display, otherwise the display will return
to the temperature inside of the vehicle after about
five seconds.
The outside temperature sensor is located near the
front bumper, so the displayed temperature may
be affected by road or engine heat while the vehicle is
idling or traveling at slow speeds. For this reason,
the displayed temperature will be most accurate at
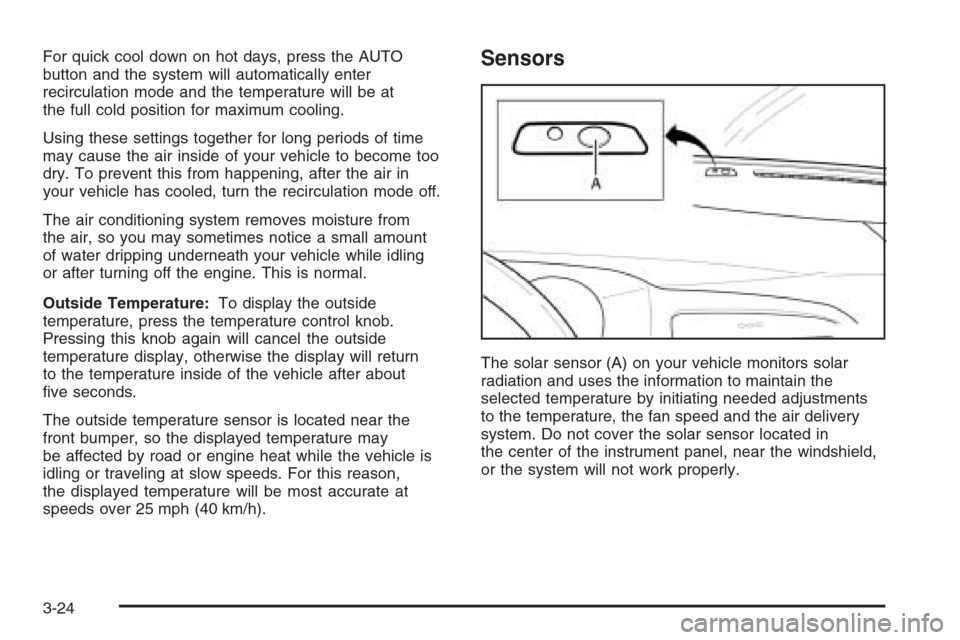
speeds over 25 mph (40 km/h).Sensors
The solar sensor (A) on your vehicle monitors solar
radiation and uses the information to maintain the
selected temperature by initiating needed adjustments
to the temperature, the fan speed and the air delivery
system. Do not cover the solar sensor located in
the center of the instrument panel, near the windshield,
or the system will not work properly.
3-24
Page 131 of 368
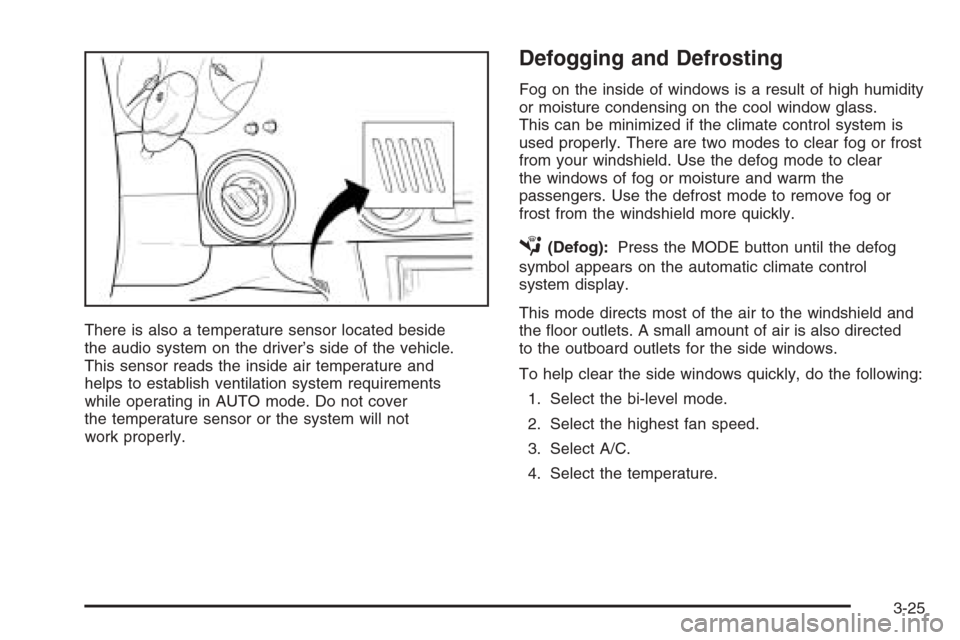
There is also a temperature sensor located beside
the audio system on the driver’s side of the vehicle.
This sensor reads the inside air temperature and
helps to establish ventilation system requirements
while operating in AUTO mode. Do not cover
the temperature sensor or the system will not
work properly.
Defogging and Defrosting
Fog on the inside of windows is a result of high humidity
or moisture condensing on the cool window glass.
This can be minimized if the climate control system is
used properly. There are two modes to clear fog or frost
from your windshield. Use the defog mode to clear
the windows of fog or moisture and warm the
passengers. Use the defrost mode to remove fog or
frost from the windshield more quickly.
É(Defog):Press the MODE button until the defog
symbol appears on the automatic climate control
system display.
This mode directs most of the air to the windshield and
the floor outlets. A small amount of air is also directed
to the outboard outlets for the side windows.
To help clear the side windows quickly, do the following:
1. Select the bi-level mode.
2. Select the highest fan speed.
3. Select A/C.
4. Select the temperature.
3-25
Page 137 of 368
Speedometer and Odometer
Your speedometer lets you see your speed in both
miles per hour (mph) and kilometers per hour (km/h).
Your odometer shows how far your vehicle has
been driven in kilometers.
Trip Odometer
The trip odometer can record the number of kilometers
traveled for up to two trips.
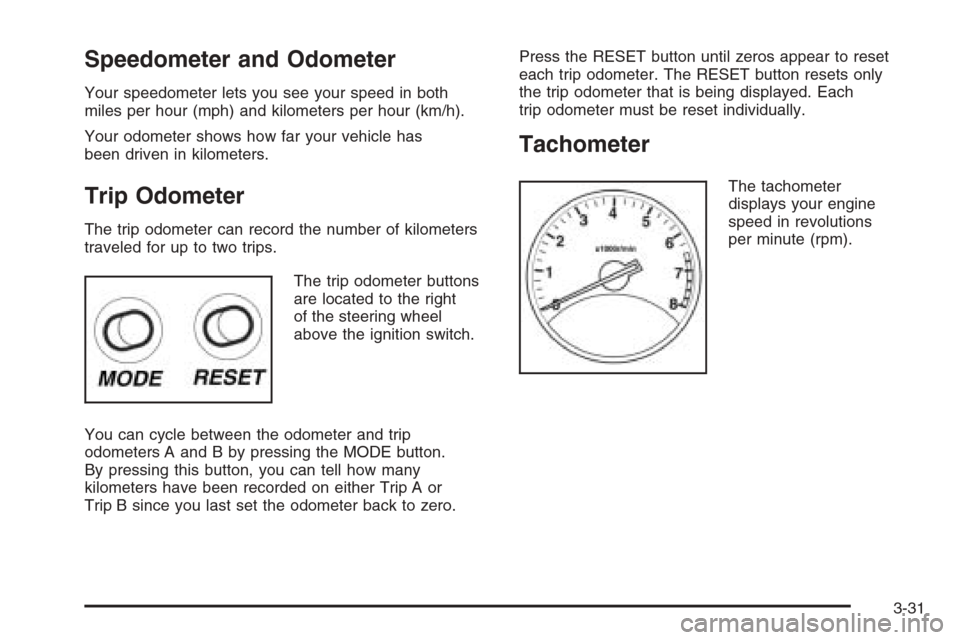
The trip odometer buttons
are located to the right
of the steering wheel
above the ignition switch.
You can cycle between the odometer and trip
odometers A and B by pressing the MODE button.
By pressing this button, you can tell how many
kilometers have been recorded on either Trip A or
Trip B since you last set the odometer back to zero.Press the RESET button until zeros appear to reset
each trip odometer. The RESET button resets only
the trip odometer that is being displayed. Each
trip odometer must be reset individually.
Tachometer
The tachometer
displays your engine
speed in revolutions
per minute (rpm).
3-31