2006 CHEVROLET AVALANCHE clock
[x] Cancel search: clockPage 94 of 532
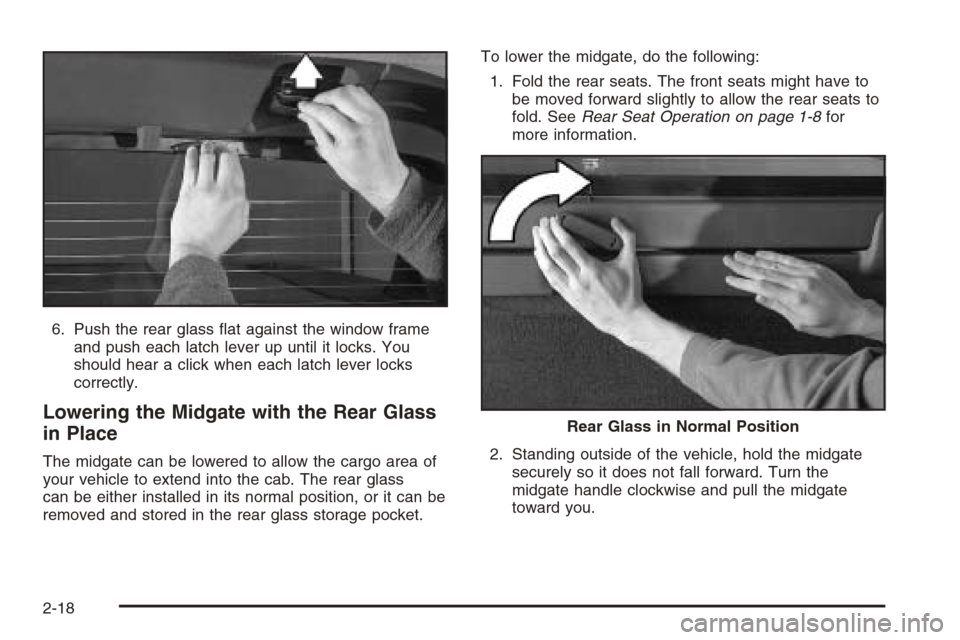
6. Push the rear glass �at against the window frame
and push each latch lever up until it locks. You
should hear a click when each latch lever locks
correctly.
Lowering the Midgate with the Rear Glass
in Place
The midgate can be lowered to allow the cargo area of
your vehicle to extend into the cab. The rear glass
can be either installed in its normal position, or it can be
removed and stored in the rear glass storage pocket.To lower the midgate, do the following:
1. Fold the rear seats. The front seats might have to
be moved forward slightly to allow the rear seats to
fold. SeeRear Seat Operation on page 1-8for
more information.
2. Standing outside of the vehicle, hold the midgate
securely so it does not fall forward. Turn the
midgate handle clockwise and pull the midgate
toward you.
Rear Glass in Normal Position
2-18
Page 190 of 532
Climate Controls
Dual Climate Control System
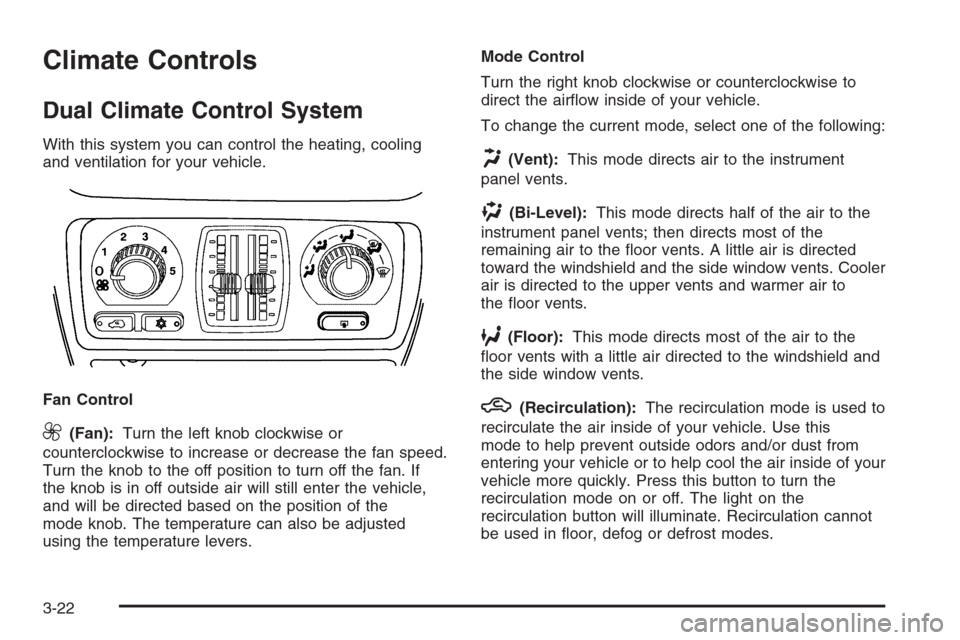
With this system you can control the heating, cooling
and ventilation for your vehicle.
Fan Control
9(Fan):Turn the left knob clockwise or
counterclockwise to increase or decrease the fan speed.
Turn the knob to the off position to turn off the fan. If
the knob is in off outside air will still enter the vehicle,
and will be directed based on the position of the
mode knob. The temperature can also be adjusted
using the temperature levers.Mode Control
Turn the right knob clockwise or counterclockwise to
direct the air�ow inside of your vehicle.
To change the current mode, select one of the following:
H(Vent):This mode directs air to the instrument
panel vents.
)(Bi-Level):This mode directs half of the air to the
instrument panel vents; then directs most of the
remaining air to the �oor vents. A little air is directed
toward the windshield and the side window vents. Cooler
air is directed to the upper vents and warmer air to
the �oor vents.
6(Floor):This mode directs most of the air to the
�oor vents with a little air directed to the windshield and
the side window vents.
h(Recirculation):The recirculation mode is used to
recirculate the air inside of your vehicle. Use this
mode to help prevent outside odors and/or dust from
entering your vehicle or to help cool the air inside of your
vehicle more quickly. Press this button to turn the
recirculation mode on or off. The light on the
recirculation button will illuminate. Recirculation cannot
be used in �oor, defog or defrost modes.
3-22
Page 191 of 532
An indicator on the button will light up, �ash three times
and turn off when recirculation is selected in these
modes. The air-conditioning compressor will also come
on when this mode is activated. While in recirculation
mode the windows may fog when the weather is
cold and damp. To clear the fog, select either the defog
or defrost mode and increase fan speed.
Temperature Control
Driver’s Side:The lever on the left side of the climate
control panel is used to raise or lower the temperature
on the driver’s side of the vehicle. This lever also adjusts
the temperature to the center console outlets (if
equipped).
Passenger’s Side:The lever on the right side of the
climate control panel is used to raise or lower the
temperature on the passenger’s side of the vehicle.
#(Air Conditioning):Press this button to turn
the air-conditioning system on or off. When the button is
pressed, an indicator light will come on and the
system will begin to cool and dehumidify the air inside
of your vehicle. You may notice a slight change in
engine performance when the air conditioning
compressor shuts off and turns on again. This is
normal.
Defogging and Defrosting
There are two modes to choose from to clear fog or
frost from your windshield. Use the defog mode to clear
the windows of fog or moisture and warm the
passengers. Use the defrost mode to remove fog or
frost from the windshield more quickly.
Turn the right knob clockwise or counterclockwise to
select one of the following modes:
-(Defog):This mode directs the air to the �oor
outlets, windshield and the side window vents. The air
conditioning compressor will run automatically to
dehumidify the air to prevent window fogging. The
recirculation mode cannot be selected while in the
defog mode.
1(Defrost):This mode directs most of the air to the
windshield and the side window vents, with only a
little air directed to the �oor vents. The air conditioning
compressor will run automatically to dehumidify the
air to prevent window fogging. The recirculation mode
cannot be selected while in defrost mode.
3-23
Page 193 of 532

Driver’s Side Temperature Knob
The driver’s side knob is used to adjust the temperature
of the air coming through the system on the driver’s
side. The temperature can be adjusted even if the
system is turned off. This is possible since outside air
will always �ow through the system as the vehicle
is moving forward unless it is set to recirculation mode.
See “Recirculation” later in this section.
Turn the knob counterclockwise or clockwise to lower or
increase the cabin temperature. The display will show
the temperature setting decreasing or increasing and an
arrow pointing to the driver will be displayed under
and to the left of the temperature setting.
Passenger’s Side Temperature Knob
The passenger’s side knob can be used to change the
temperature of the air coming through the system
on the passenger’s side of the vehicle. The temperature
can be adjusted even if the system is turned off. This
is possible since outside air will always �ow through the
system as the vehicle is moving forward unless it is
set to recirculation mode. See “Recirculation” later in this
section.
Turn the knob counterclockwise or clockwise to lower or
increase the cabin temperature. The display will show
the temperature setting decreasing or increasing and an
arrow pointing to the passenger will be displayed
under and to the right of the temperature setting.The passenger’s temperature setting can be set to
match the driver’s temperature setting by pressing and
holding the AUTO button for four seconds. Both the
driver and passenger arrows will be displayed.
Automatic Operation
AUTO (Automatic):When automatic operation is
active the system will control the inside temperature, the
air delivery, and the fan speed.
Use the steps below to place the entire system in
automatic mode:
1. Press the AUTO button.
When AUTO is selected, the display will change to
show the current driver’s set temperature, delivery
mode and fan speed. Press the AUTO button again
within �ve seconds to display the passenger’s set
temperature.
If the driver’s and passenger’s temperature settings
are the same when AUTO is pressed, the
temperature setting and both arrows will be
displayed for �ve seconds along with the automatic
air delivery mode and fan speed. After the
�ve-second update, the display will change to show
the temperature setting, both arrows and AUTO.
3-25
Page 297 of 532
Steering in Emergencies
There are times when steering can be more effective
than braking. For example, you come over a hill and �nd
a truck stopped in your lane, or a car suddenly pulls
out from nowhere, or a child darts out from between
parked cars and stops right in front of you. You
can avoid these problems by braking — if you can stop
in time. But sometimes you cannot; there is not room.
That is the time for evasive action — steering around the
problem.
Your vehicle can perform very well in emergencies like
these. First apply your brakes.
SeeBraking on page 4-6. It is better to remove as much
speed as you can from a possible collision. Then
steer around the problem, to the left or right depending
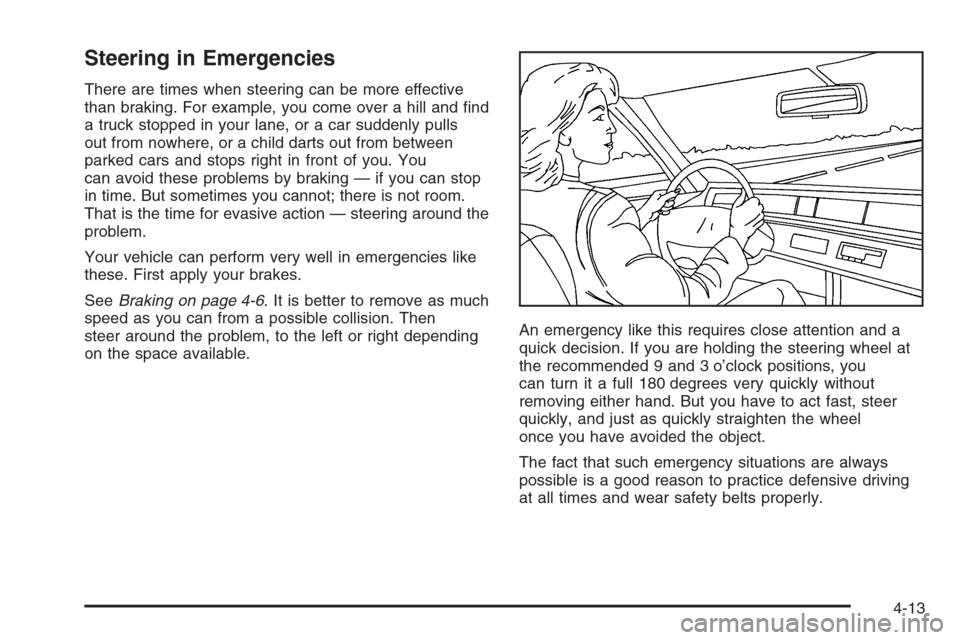
on the space available.An emergency like this requires close attention and a
quick decision. If you are holding the steering wheel at
the recommended 9 and 3 o’clock positions, you
can turn it a full 180 degrees very quickly without
removing either hand. But you have to act fast, steer
quickly, and just as quickly straighten the wheel
once you have avoided the object.
The fact that such emergency situations are always
possible is a good reason to practice defensive driving
at all times and wear safety belts properly.
4-13
Page 307 of 532

Ease up on your speed as you approach the top of
the hill.
Attach a �ag to the vehicle to make you more
visible to approaching traffic on trails or hills.
Sound the horn as you approach the top of the hill
to let opposing traffic know you are there.
Use your headlamps even during the day. They
make you more visible to oncoming traffic.
{CAUTION:
Driving to the top (crest) of a hill at full speed
can cause an accident. There could be a
drop-off, embankment, cliff, or even another
vehicle. You could be seriously injured or
killed. As you near the top of a hill, slow down
and stay alert.
Q:What should I do if my vehicle stalls, or is about
to stall, and I cannot make it up the hill?
A:If this happens, there are some things you should
do, and there are some things you must not do.
First, here is what youshoulddo:
Push the brake pedal to stop the vehicle and keep
it from rolling backwards. Also, apply the parking
brake.
If the engine is still running, shift the transmission to
REVERSE (R), release the parking brake, and
slowly back down the hill in REVERSE (R).
If the engine has stopped running, you will need to
restart it. With the brake pedal pressed and the
parking brake still applied, shift the transmission to
PARK (P) and restart the engine. Then, shift to
REVERSE (R), release the parking brake, and
slowly back down the hill as straight as possible in
REVERSE (R).
As you are backing down the hill, put your left hand
on the steering wheel at the 12 o’clock position.
This way, you will be able to tell if the wheels are
straight and maneuver as you back down. It is
best that you back down the hill with the wheels
straight rather than in the left or right direction.
Turning the wheel too far to the left or right
will increase the possibility of a rollover.
4-23
Page 369 of 532
Filling the Tank
{CAUTION:
Fuel vapor burns violently and a fuel �re can
cause bad injuries. To help avoid injuries to
you and others, read and follow all the
instructions on the pump island. Turn off your
engine when you are refueling. Do not smoke
if you are near fuel or refueling your vehicle.
Keep sparks, �ames, and smoking materials
away from fuel. Do not leave the fuel pump
unattended when refueling your vehicle — this
is against the law in some places. Keep
children away from the fuel pump; never let
children pump fuel.
The tethered fuel cap is located behind a hinged fuel
door on the driver’s side of the vehicle.To remove the fuel cap, turn it slowly counterclockwise.
It will require more effort to turn the fuel cap on the
last turn as you loosen it.
{CAUTION:
If you spill fuel and then something ignites it,
you could be badly burned. Fuel can spray out
on you if you open the fuel cap too quickly.
This spray can happen if your tank is nearly
full, and is more likely in hot weather. Open
the fuel cap slowly and wait for any hiss noise
to stop. Then unscrew the cap all the way.
Be careful not to spill fuel. Do not top off or over�ll the
tank and wait a few seconds after you have �nished
pumping before removing the nozzle. Clean fuel
from painted surfaces as soon as possible. See
Washing Your Vehicle on page 5-107.
5-9
Page 370 of 532

When replacing the fuel cap, turn it clockwise until it
clicks. It will require more effort to turn the fuel cap on
the last turn as you tighten it. Make sure the cap is
fully installed. The diagnostic system can determine if
the fuel cap has been left off or improperly installed.
This would allow fuel to evaporate into the atmosphere.
SeeMalfunction Indicator Lamp on page 3-43.
The TIGHTEN FUEL CAP message will be displayed on
the Driver Information Center (DIC) if the fuel cap is
not properly installed. SeeDIC Warnings and Messages
on page 3-53for more information.
{CAUTION:
If a �re starts while you are refueling, do not
remove the nozzle. Shut off the �ow of fuel by
shutting off the pump or by notifying the
station attendant. Leave the area immediately.
Notice:If you need a new fuel cap, be sure to get
the right type. Your dealer can get one for you.
If you get the wrong type, it may not �t properly.
This may cause your malfunction indicator lamp to
light and may damage your fuel tank and emissions
system. SeeMalfunction Indicator Lamp on
page 3-43.
5-10