2006 BMW X5 3.0I engine
[x] Cancel search: enginePage 24 of 202

24n
Warning triangle
*
First-aid kit
*
Refueling
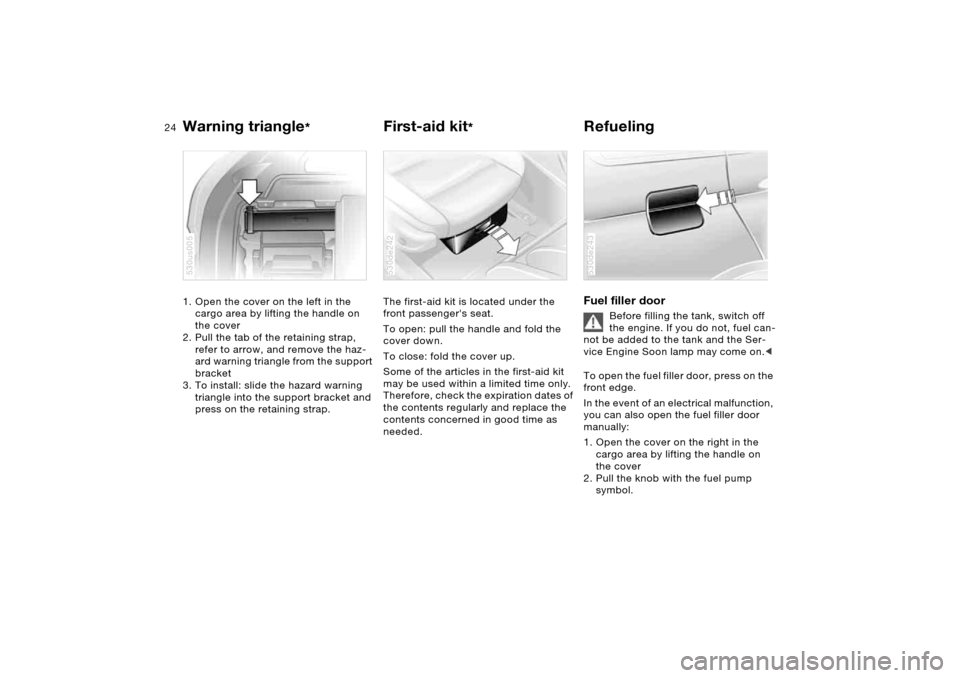
1. Open the cover on the left in the
cargo area by lifting the handle on
the cover
2. Pull the tab of the retaining strap,
refer to arrow, and remove the haz-
ard warning triangle from the support
bracket
3. To install: slide the hazard warning
triangle into the support bracket and
press on the retaining strap.530us005
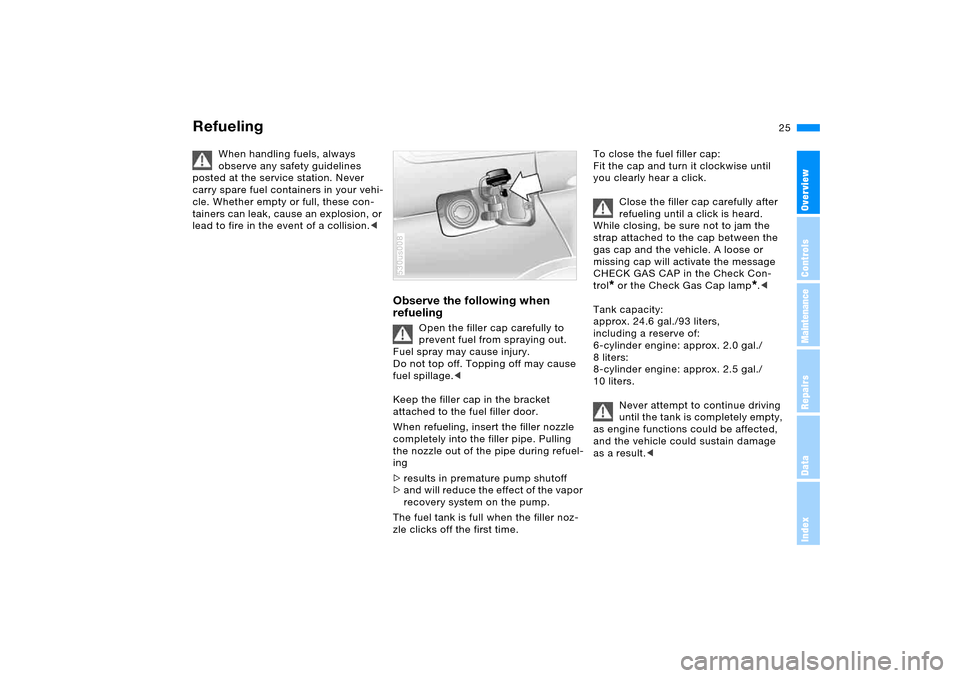
The first-aid kit is located under the
front passenger's seat.
To open: pull the handle and fold the
cover down.
To close: fold the cover up.
Some of the articles in the first-aid kit
may be used within a limited time only.
Therefore, check the expiration dates of
the contents regularly and replace the
contents concerned in good time as
needed.530de242
Fuel filler door
Before filling the tank, switch off
the engine. If you do not, fuel can-
not be added to the tank and the Ser-
vice Engine Soon lamp may come on.<
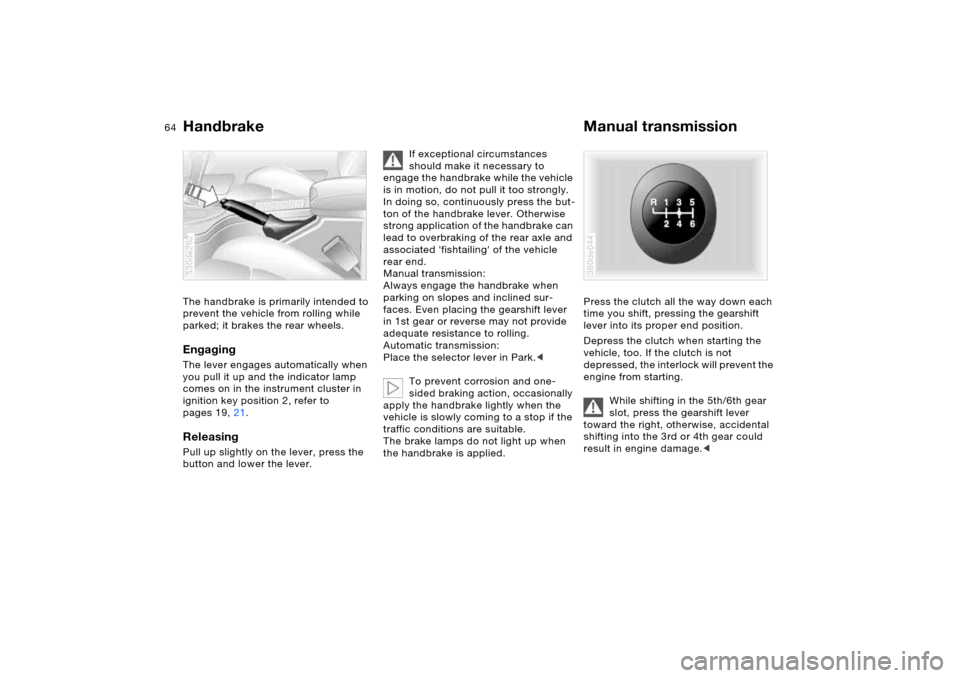
To open the fuel filler door, press on the
front edge.
In the event of an electrical malfunction,
you can also open the fuel filler door
manually:
1. Open the cover on the right in the
cargo area by lifting the handle on
the cover
2. Pull the knob with the fuel pump
symbol.
530de243
Page 25 of 202

25n
OverviewControlsMaintenanceRepairsDataIndex
Refueling
When handling fuels, always
observe any safety guidelines
posted at the service station. Never
carry spare fuel containers in your vehi-
cle. Whether empty or full, these con-
tainers can leak, cause an explosion, or
lead to fire in the event of a collision.<
Observe the following when
refueling
Open the filler cap carefully to
prevent fuel from spraying out.
Fuel spray may cause injury.
Do not top off. Topping off may cause
fuel spillage.<
Keep the filler cap in the bracket
attached to the fuel filler door.
When refueling, insert the filler nozzle
completely into the filler pipe. Pulling
the nozzle out of the pipe during refuel-
ing
>results in premature pump shutoff
>and will reduce the effect of the vapor
recovery system on the pump.
The fuel tank is full when the filler noz-
zle clicks off the first time.
530us008
To close the fuel filler cap:
Fit the cap and turn it clockwise until
you clearly hear a click.
Close the filler cap carefully after
refueling until a click is heard.
While closing, be sure not to jam the
strap attached to the cap between the
gas cap and the vehicle. A loose or
missing cap will activate the message
CHECK GAS CAP in the Check Con-
trol
* or the Check Gas Cap lamp
*.<
Tank capacity:
approx. 24.6 gal./93 liters,
including a reserve of:
6-cylinder engine: approx. 2.0 gal./
8 liters:
8-cylinder engine: approx. 2.5 gal./
10 liters.
Never attempt to continue driving
until the tank is completely empty,
as engine functions could be affected,
and the vehicle could sustain damage
as a result.<
Page 26 of 202

26n
Fuel specifications The engine uses lead-free gasoline
only.Required fuelPremium Unleaded Gasoline,
Minimum Octane Rating: 91.
Minimum Octane Rating corresponds to
the Anti Knock Index AKI and is deter-
mined according to the so-called
(R+M)/2 method.
Do not use leaded gasoline: use of
leaded fuel will permanently dam-
age the lambda probe and catalytic
converter of your vehicle.<
Use high-quality brandsField experience has indicated signifi-
cant differences in fuel quality: volatility,
composition, additives, etc., among
gasolines offered for sale in the United
States and Canada. Fuels containing up
to and including 10 % ethanol or other
oxygenates with up to 2.8 % oxygen by
weight, that is, 15 % MTBE or 3 % meth-
anol plus an equivalent amount of co-
solvent, will not void the applicable
warranties with respect to defects in
materials or workmanship.The use of poor-quality fuels may
result in drivability, starting and
stalling problems, especially under cer-
tain environmental conditions such as
high ambient temperature and high alti-
tude.
Should you encounter drivability prob-
lems that you suspect could be related
to the fuel you are using, we recom-
mend that you respond by switching to
a recognized high-quality brand.
Failure to comply with these recom-
mendations may also result in unsched-
uled maintenance.<
Page 62 of 202

62n
Ignition lock Starting engine Ignition key positions 0 Steering lock engaged
1Steering lock disengaged
2 Ignition on
3Starting engineSteering lock engaged The key can only be inserted or
removed in this position.
After removing the key, turn the steer-
ing wheel slightly to the left or right until
you hear the lock engage.
If the key is not removed, an acoustic
signal sounds after the driver's door is
opened.390de010
Automatic transmission:
Only move the selector lever from
position P with the engine running.
To turn the key back to position 0 or to
remove it, first place the selector lever
in position P: interlock.<
Steering lock disengaged Slightly moving the steering often
makes it easier to turn the key from 0
to 1.
Individual electrical devices are ready
for operation. Starting engine
Manual transmission:
Depress the clutch when starting
the engine. If you do not, a lock pre-
vents the engine from starting.<
Before starting >Engage the handbrake
>Be sure that the gearshift lever is in
Neutral or the selector lever in Park if
the vehicle is equipped with an auto-
matic transmission
>Depress the clutch.
If the clutch is not depressed, the
engine cannot be started
>Press the footbrake with an auto-
matic transmission.
Do not run the engine in closed
rooms, otherwise the inhalation of
toxic exhaust gases can cause uncon-
sciousness and death. The exhaust
gases contain carbon monoxide, an
odorless and colorless, but highly toxic
gas.
Never leave an unattended vehicle with
the engine running, as such a vehicle
represents a potential safety hazard.
To prevent the vehicle from rolling,
always select neutral or the position P
and engage the handbrake before leav-
ing the vehicle with the engine run-
ning.<
When starting the engine, do not press
the accelerator pedal.
Page 63 of 202

OverviewControlsMaintenanceRepairsDataIndex
63n
Starting engine Switching off engineDo not allow the engine to warm up by
leaving it running while the vehicle
remains stationary. Instead, begin to
drive immediately at a moderate engine
speed.
X5 3.0i:
Do not end the starting procedure too
soon, but do not continue for longer
than approx. 20 seconds. Release the
ignition key immediately as soon as the
engine starts.
X5 4.4i, 4.8is:
Your BMW is equipped with the conve-
nience starting feature. With this fea-
ture, it is sufficient to turn the ignition
key only briefly to position 3 'Start
engine' and to let go of it right away.
The starter actuation continues to oper-
ate automatically for a certain period of
time and is stopped automatically as
soon as the engine has started.
The automatic starting mode will not
operate or will be canceled if the bat-
tery voltage is insufficient. The engine
can be jump started, refer to page174.Should the engine fail to start on the
first attempt, if it is very hot or cold, for
instance:
>Press the accelerator pedal halfway
down while engaging the starter.
Cold starts at altitudes above 3,300 ft/
1,000 meters and at very low tempera-
tures, from approx. +57/–156:
>For the initial starting attempt, allow
the starter to remain engaged some-
what longer, approx. 10 seconds.
Engine idle speed is controlled by the
engine computer system. Increased
speeds at startup are normal and
should decrease as the engine warms
up. If engine speed does not decrease,
service is required.
To prevent the battery from being
drained, always switch off electrical
devices that are not in use. Switch the
ignition off when the vehicle is not
being driven.
Extended starting attempts, char-
acterized by excessively frequent
or long periods with the starter
engaged, can lead to damage of the
catalytic converter.<
Manual transmission:
1. Turn the ignition key to position 1
or 0
2. Shift into first gear or reverse.
Automatic transmission:
1. Shift into selector lever position P
2. Turn the ignition key to position 1
or 0.
Do not remove the ignition key
when the vehicle is moving, other-
wise, the steering could lock.
When leaving the vehicle, always
remove the ignition key and lock the
steering.
Manual transmission:
Always engage the handbrake when
parking on slopes and inclined sur-
faces. Even placing the gearshift lever
in 1st gear or reverse may not provide
adequate resistance to rolling.
Automatic transmission:
Place the selector lever in the P posi-
tion.<
Automatic transmission:
The vehicle must be stationary and the
selector lever in Park before you can
remove the ignition key.
Page 64 of 202

64n
Handbrake Manual transmissionThe handbrake is primarily intended to
prevent the vehicle from rolling while
parked; it brakes the rear wheels.EngagingThe lever engages automatically when
you pull it up and the indicator lamp
comes on in the instrument cluster in
ignition key position 2, refer to
pages 19, 21.Releasing Pull up slightly on the lever, press the
button and lower the lever. 530de262
If exceptional circumstances
should make it necessary to
engage the handbrake while the vehicle
is in motion, do not pull it too strongly.
In doing so, continuously press the but-
ton of the handbrake lever. Otherwise
strong application of the handbrake can
lead to overbraking of the rear axle and
associated 'fishtailing' of the vehicle
rear end.
Manual transmission:
Always engage the handbrake when
parking on slopes and inclined sur-
faces. Even placing the gearshift lever
in 1st gear or reverse may not provide
adequate resistance to rolling.
Automatic transmission:
Place the selector lever in Park.<
To prevent corrosion and one-
sided braking action, occasionally
apply the handbrake lightly when the
vehicle is slowly coming to a stop if the
traffic conditions are suitable.
The brake lamps do not light up when
the handbrake is applied.
Press the clutch all the way down each
time you shift, pressing the gearshift
lever into its proper end position.
Depress the clutch when starting the
vehicle, too. If the clutch is not
depressed, the interlock will prevent the
engine from starting.
While shifting in the 5th/6th gear
slot, press the gearshift lever
toward the right, otherwise, accidental
shifting into the 3rd or 4th gear could
result in engine damage.< 380de044
Page 65 of 202

OverviewControlsMaintenanceRepairsDataIndex
65n
Manual transmission Automatic transmission with Steptronic
*
Reverse Select only when the vehicle is station-
ary. Press the gearshift lever to the left
to overcome the resistance.
As you do this, the backup lamps will
turn on automatically when the ignition
key is in position 2.
In addition to fully automatic operation,
you can also manually shift with the
Steptronic, refer to page67.
Under normal operating conditions, fuel
consumption is lowest when driving in
position D.
530us238
Selector lever positions
P R N D M/S
The transmission range display varies in
accordance with the equipment of your
vehicle.
Starting engine The engine can only be started in the
selector lever position Park or Neutral. 530us239
Page 66 of 202

66n
Automatic transmission with Steptronic
*
Range selection >The selector lever can be moved out
of the P position with the ignition
switched on or the engine running:
interlock
>With the vehicle stationary, press the
footbrake before shifting out of P
or N, otherwise, the selector lever is
blocked: shiftlock.
Keep the brake pedal pressed down
until you start off. The vehicle will oth-
erwise creep when a drive position is
engaged.A lock prevents accidentally shifting
into the selector lever positions R
and P. To deactivate the lock, press
the button on the front of the selector
lever knob, refer to arrow.
P Park Select only when the vehicle is station-
ary. The transmission locks to prevent
the rear wheels from turning.R Reverse Select only when the vehicle is station-
ary. N Neutral, idle For example, engage in automatic car
washes. The vehicle can roll.530de263
D Drive, automatic driving
positionThis position is designed for driving
under all normal operating conditions.
All forward gears are available. Kick-down The kick-down mode provides maxi-
mum acceleration.
Depress the accelerator pedal past the
increased resistance point at the full-
throttle position.