2006 BMW MOTORRAD K 1200 GT ignition
[x] Cancel search: ignitionPage 4 of 172
Table of ContentsYou can also consult the in-
dex at the end of this Rider's
Manual if you want to find a
particular topic or item of in-
formation.
1 General instructions . . . 5
Overview . ................ 6
Abbreviations and
symbols . . . ............... 6
Equipment ............... 7
Technical data ........... 7
Currency . . ............... 7
2 General views . . . . . .... 9
General view, left side . . . 11
General view, right
side ..................... 13
Underneath the seat . . . . . 15
Handlebar fitting, left . . . . . 16
Handlebar fitting, right . . . 17
Instrument cluster . . . . . . . 18
Headlight . .............. 19 3 Status indicators . . . . . 21
Multifunction display . . . . . 22
Warning and telltale
lights . . . . .
.............. 23
ABS warning light . . . . . . . 23
Telltale light, cruise
control
OE
................ 23
Function indicators . . . . . . 23
Warnings, general . . . . . . . 24
Warnings issued by the
tyre pressure monitoring
system (RDC)
OE
......... 32
ABS warnings . .......... 36
ASC warnings
OE
......... 38
4 Operation . . . .......... 41
Ignition switch and
steering lock . . .......... 43
Electronic immobiliser . . . 44
Hazard warning
flashers . . . .............. 45
Odometer and
tripmeters . .............. 46
Multifunction display . . . . . 47 Clock . . . . .
.............. 47
Tyre pressure control
RDC
OE
.................. 48
Residual range .......... 49
On-board computer
OE
... 49
Cruise-control
system
OE
............... 53
Emergency off switch (kill
switch) . . . . .............. 55
Grip heatingOE
........... 56
Seat heatingOE
.......... 57
Clutch . . . . .............. 58
Brakes . . . . .............. 59
Handlebars .............. 59
Lights . . . . . .............. 60
Headlight . .............. 61
Turn indicators .......... 62
Stowage compartment . . . 63
Automatic Stability Control
ASC
OE
.................. 64
Front and rear seats . . . . . 65
Helmet holder . .......... 68
Mirrors . . . . .............. 68
Windscreen . . . .......... 69
Page 29 of 172
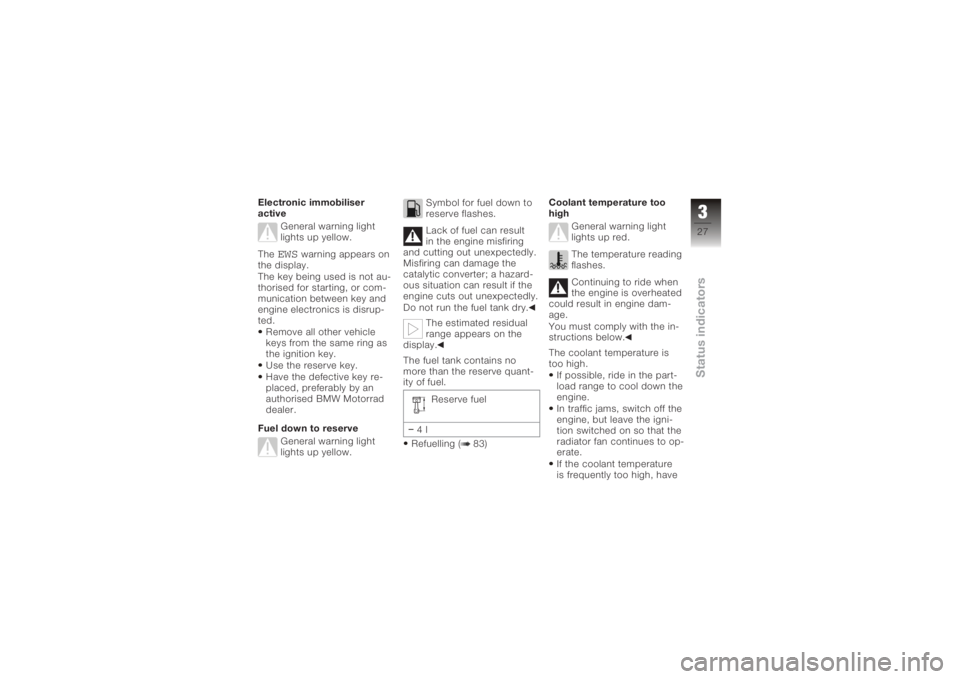
Electronic immobiliser
activeGeneral warning light
lights up yellow.
The
EWS
warning appears on
the display.
The key being used is not au-
thorised for starting, or com-
munication between key and
engine electronics is disrup-
ted.
Remove all other vehicle
keys from the same ring as
the ignition key.
Use the reserve key.
Have the defective key re-
placed, preferably by an
authorised BMW Motorrad
dealer.
Fuel down to reserve General warning light
lights up yellow. Symbol for fuel down to
reserve flashes.
Lack of fuel can result
in the engine misfiring
and cutting out unexpectedly.
Misfiring can damage the
catalytic converter; a hazard-
ous situation can result if the
engine cuts out unexpectedly.
Do not run the fuel tank dry.
The estimated residual
range appears on the
display.
The fuel tank contains no
more than the reserve quant-
ity of fuel.
Reserve fuel
4l
Refuelling ( 83) Coolant temperature too
high
General warning light
lights up red.
The temperature reading
flashes.
Continuing to ride when
the engine is overheated
could result in engine dam-
age.
You must comply with the in-
structions below.
The coolant temperature is
too high.
If possible, ride in the part-
load range to cool down the
engine.
In traffic jams, switch off the
engine, but leave the igni-
tion switched on so that the
radiator fan continues to op-
erate.
If the coolant temperature
is frequently too high, have
327zStatus indicators
Page 43 of 172
Operation
Ignition switch and steering
lock . . . . . . . . . . . . . . . . . . . . . . . . . . . 43
Electronic immobiliser . . . . . . . . . 44
Hazard warning flashers . . . . . . . 45
Odometer and tripmeters . . . . . . 46
Multifunction display . . . . . . . . . . . 47
Clock . . . . . . . . . . . . . . . . . . . . . . . . . 47
Tyre pressure control RDC
OE
.. 48
Residual range . . . . . . . . . . . . . . . . 49
On-board computer
OE
......... 49
Cruise-control systemOE
....... 53
Emergency off switch (kill
switch) . . . . . . . . . . . . . . . . . . . . . . . . 55
Grip heating
OE
................ 56
Seat heating
OE
................ 57
Clutch . . . . . . . . . . . . . . . . . . . . . . . . 58 Brakes . . . . . . . . . . . . . . . . . . . . . . . . 59
Handlebars . . . . . . . . . . . . . . . . . . . 59
Lights . . . . . . . . . . . . . . . . . . . . . . . . . 60
Headlight . . . . . . . . . . . . . . . . . . . . . 61
Turn indicators . . . . . . . . . . . . . . . . 62
Stowage compartment . . . . . . . . 63
Automatic Stability Control
ASC
OE
........................ 64
Front and rear seats . . . . . . . . . . . 65
Helmet holder . . . . . . . . . . . . . . . . . 68
Mirrors . . . . . . . . . . . . . . . . . . . . . . . . 68
Windscreen . . . . . . . . . . . . . . . . . . . 69
Spring preload . . . . . . . . . . . . . . . . 69
Shock absorbers . . . . . . . . . . . . . . 70
Electronic Suspension
Adjustment ESA
OE
............ 71
441zOperation
Page 45 of 172
Ignition switch and
steering lockKeysYou receive one master key
and one spare key. Please
consult the information on
the electronic immobiliser
(EWS) if a key is lost or mis-
laid ( 44).Ignition switch and steer-
ing lock, tank filler cap
lock and the seat and case
locks are all operated with
the same key. On request,
the topcase available as an
optional accessory can be ar-
ranged to lock with the same
key.
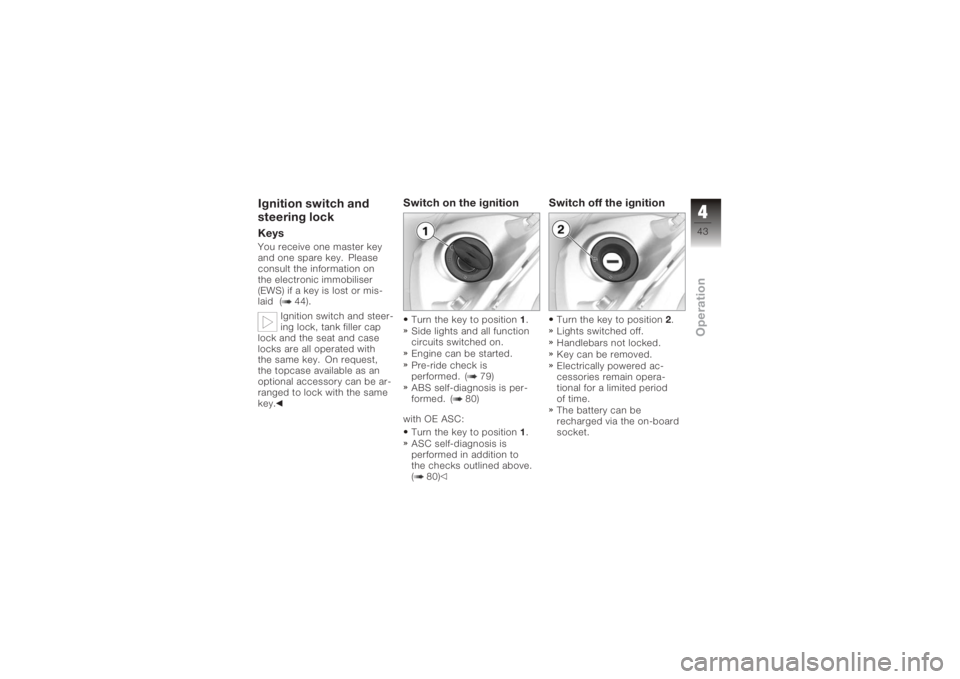
Switch on the ignitionTurn the key to position 1.
Side lights and all function
circuits switched on.
Engine can be started.
Pre-ride check is
performed. ( 79)
ABS self-diagnosis is per-
formed. ( 80)
with OE ASC: Turn the key to position 1.
ASC self-diagnosis is
performed in addition to
the checks outlined above.
( 80)
Switch off the ignitionTurn the key to position 2.
Lights switched off.
Handlebars not locked.
Key can be removed.
Electrically powered ac-
cessories remain opera-
tional for a limited period
of time.
The battery can be
recharged via the on-board
socket.
443zOperation
Page 46 of 172
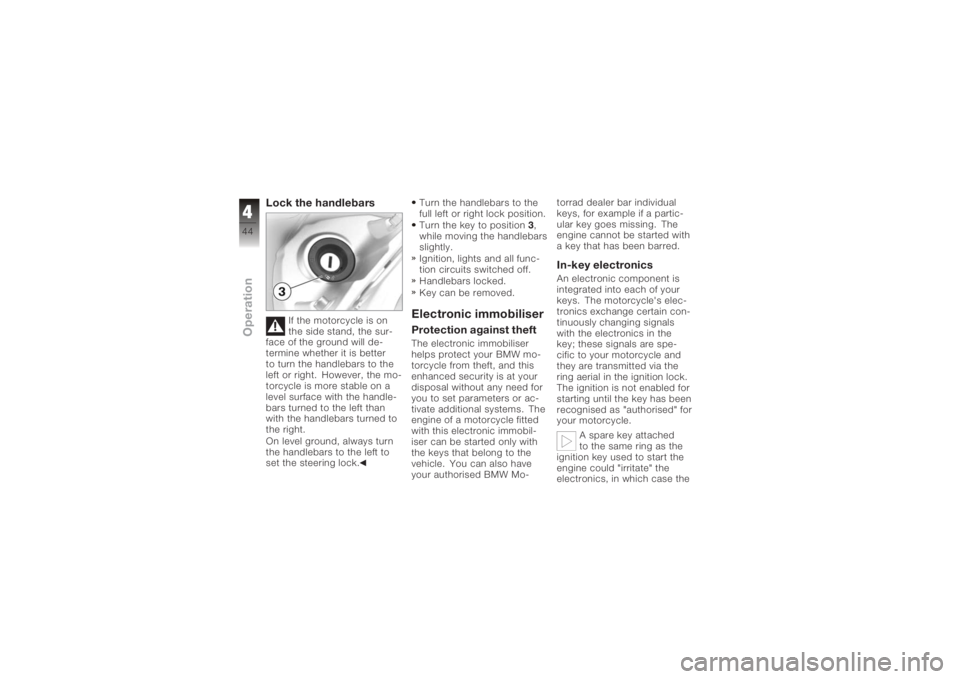
Lock the handlebars
If the motorcycle is on
the side stand, the sur-
face of the ground will de-
termine whether it is better
to turn the handlebars to the
left or right. However, the mo-
torcycle is more stable on a
level surface with the handle-
bars turned to the left than
with the handlebars turned to
the right.
On level ground, always turn
the handlebars to the left to
set the steering lock. Turn the handlebars to the
full left or right lock position.
Turn the key to position
3,
while moving the handlebars
slightly.
Ignition, lights and all func-
tion circuits switched off.
Handlebars locked.
Key can be removed.
Electronic immobiliserProtection against theftThe electronic immobiliser
helps protect your BMW mo-
torcycle from theft, and this
enhanced security is at your
disposal without any need for
you to set parameters or ac-
tivate additional systems. The
engine of a motorcycle fitted
with this electronic immobil-
iser can be started only with
the keys that belong to the
vehicle. You can also have
your authorised BMW Mo- torrad dealer bar individual
keys, for example if a partic-
ular key goes missing. The
engine cannot be started with
a key that has been barred.
In-key electronicsAn electronic component is
integrated into each of your
keys. The motorcycle's elec-
tronics exchange certain con-
tinuously changing signals
with the electronics in the
key; these signals are spe-
cific to your motorcycle and
they are transmitted via the
ring aerial in the ignition lock.
The ignition is not enabled for
starting until the key has been
recognised as "authorised" for
your motorcycle.
A spare key attached
to the same ring as the
ignition key used to start the
engine could "irritate" the
electronics, in which case the
444zOperation
Page 47 of 172
enabling signal for starting is
not issued. The
EWS
warning
appears in the multifunction
display.
Always keep the spare key
separately from the ignition
key.
Replacement and extra
keysYou can obtain replace-
ment/extra keys only through
an authorised BMW Motorrad
dealer. The keys are part
of an integrated security
system, so the dealer is under
an obligation to check the
legitimacy of all applications
for replacement/extra keys. If
you want to have a lost key
barred, you have to bring with
you all the other keys that
belong to the motorcycle. A
key that has been barred can
subsequently be cleared and
reactivated for use.
Hazard warning
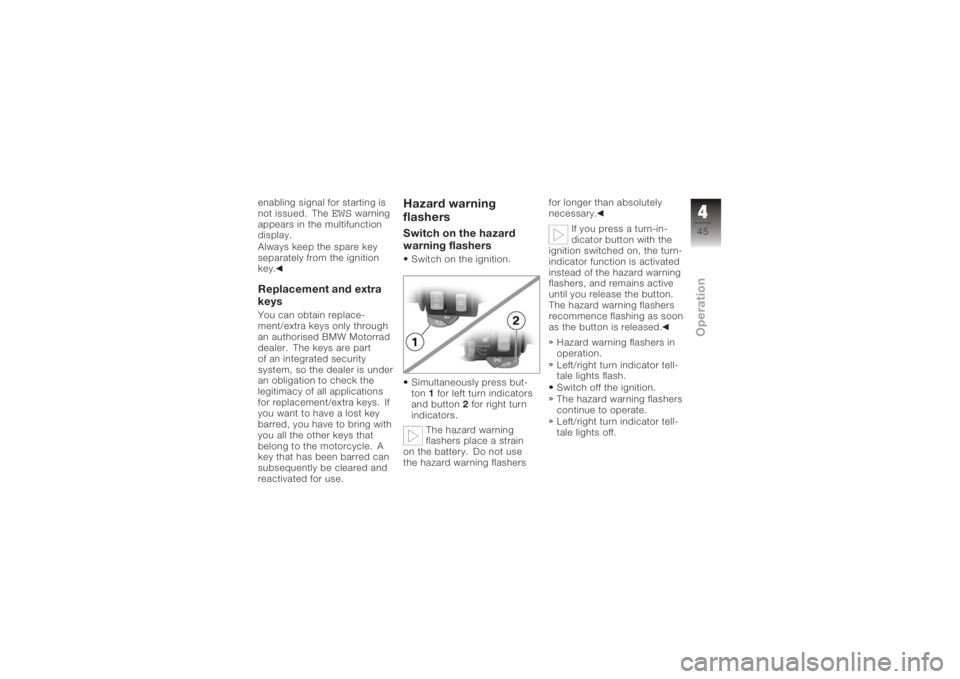
flashersSwitch on the hazard
warning flashersSwitch on the ignition.
Simultaneously press but-
ton 1for left turn indicators
and button 2for right turn
indicators.
The hazard warning
flashers place a strain
on the battery. Do not use
the hazard warning flashers for longer than absolutely
necessary.
If you press a turn-in-
dicator button with the
ignition switched on, the turn-
indicator function is activated
instead of the hazard warning
flashers, and remains active
until you release the button.
The hazard warning flashers
recommence flashing as soon
as the button is released.
Hazard warning flashers in
operation.
Left/right turn indicator tell-
tale lights flash.
Switch off the ignition.
The hazard warning flashers
continue to operate.
Left/right turn indicator tell-
tale lights off.
445zOperation
Page 48 of 172
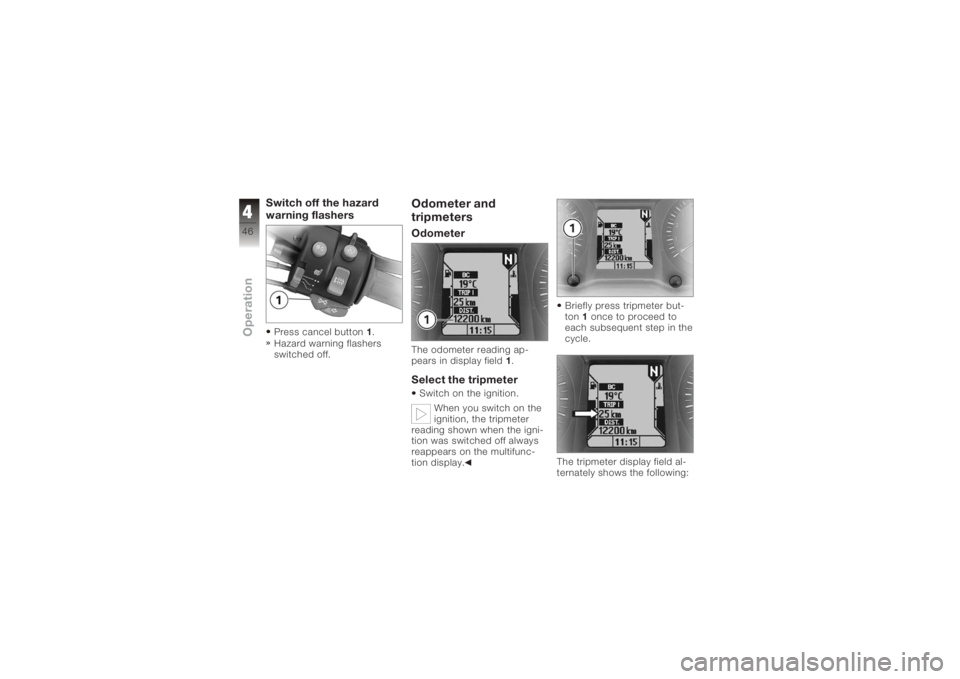
Switch off the hazard
warning flashersPress cancel button1.
Hazard warning flashers
switched off.
Odometer and
tripmetersOdometerThe odometer reading ap-
pears in display field 1.Select the tripmeterSwitch on the ignition.
When you switch on the
ignition, the tripmeter
reading shown when the igni-
tion was switched off always
reappears on the multifunc-
tion display. Briefly press tripmeter but-
ton
1once to proceed to
each subsequent step in the
cycle.
The tripmeter display field al-
ternately shows the following:
446zOperation
Page 49 of 172
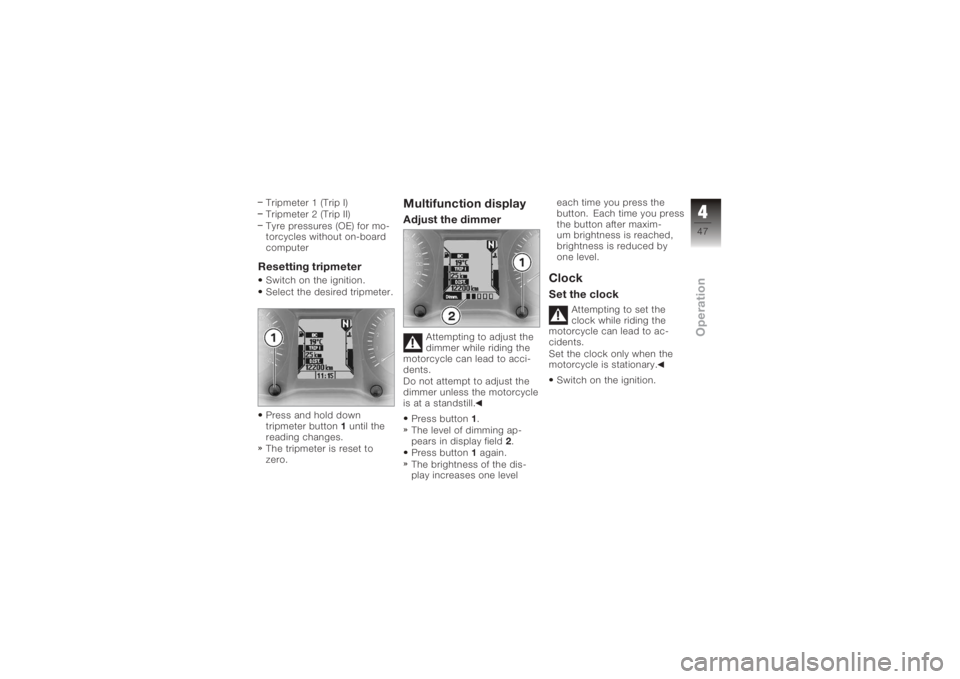
Tripmeter 1 (Trip I)
Tripmeter 2 (Trip II)
Tyre pressures (OE) for mo-
torcycles without on-board
computerResetting tripmeterSwitch on the ignition.
Select the desired tripmeter.
Press and hold down
tripmeter button1until the
reading changes.
The tripmeter is reset to
zero.
Multifunction displayAdjust the dimmer
Attempting to adjust the
dimmer while riding the
motorcycle can lead to acci-
dents.
Do not attempt to adjust the
dimmer unless the motorcycle
is at a standstill.
Press button 1.
The level of dimming ap-
pears in display field 2.
Press button 1again.
The brightness of the dis-
play increases one level each time you press the
button. Each time you press
the button after maxim-
um brightness is reached,
brightness is reduced by
one level.
ClockSet the clock
Attempting to set the
clock while riding the
motorcycle can lead to ac-
cidents.
Set the clock only when the
motorcycle is stationary.
Switch on the ignition.
447zOperation