2006 BMW 750I display
[x] Cancel search: displayPage 145 of 247
Navigation
Driving tips
143Reference
At a glance
Controls
Communications
Entertainment
Mobility
Route guidance
Starting route guidance
The route guidance is started for the first desti-
nation in the destination list, refer to page137.
There must be at least one destination in the
destination list.
iDrive, for principle details, refer to page16.
1.Press the button to open the start
menu.
2.Move the controller toward "Navigation".
3.Press the controller as needed.
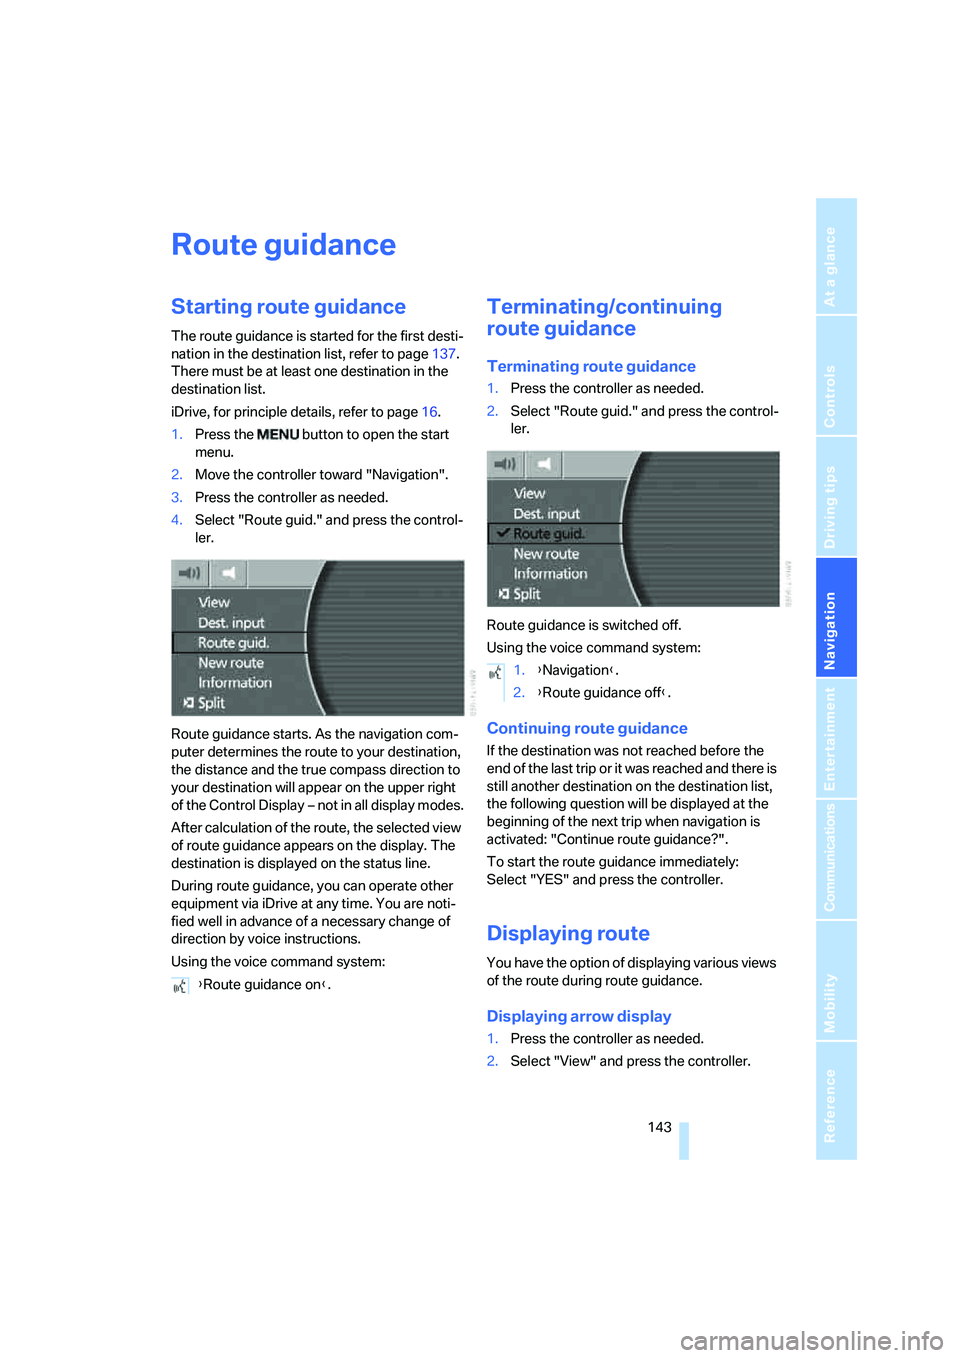
4.Select "Route guid." and press the control-
ler.
Route guidance starts. As the navigation com-
puter determines the route to your destination,
the distance and the true compass direction to
your destination will appear on the upper right
of the Control Display – not in all display modes.
After calculation of the route, the selected view
of route guidance appears on the display. The
destination is displayed on the status line.
During route guidance, you can operate other
equipment via iDrive at any time. You are noti-
fied well in advance of a necessary change of
direction by voice instructions.
Using the voice command system:
Terminating/continuing
route guidance
Terminating route guidance
1.Press the controller as needed.
2.Select "Route guid." and press the control-
ler.
Route guidance is switched off.
Using the voice command system:
Continuing route guidance
If the destination was not reached before the
end of the last trip or it was reached and there is
still another destination on the destination list,
the following question will be displayed at the
beginning of the next trip when navigation is
activated: "Continue route guidance?".
To start the route guidance immediately:
Select "YES" and press the controller.
Displaying route
You have the option of displaying various views
of the route during route guidance.
Displaying arrow display
1.Press the controller as needed.
2.Select "View" and press the controller. {Route guidance on}.
1.{Navigation}.
2.{Route guidance off}.
Page 146 of 247
Route guidance
144 3.Select "Arrow display" and press the con-
troller.
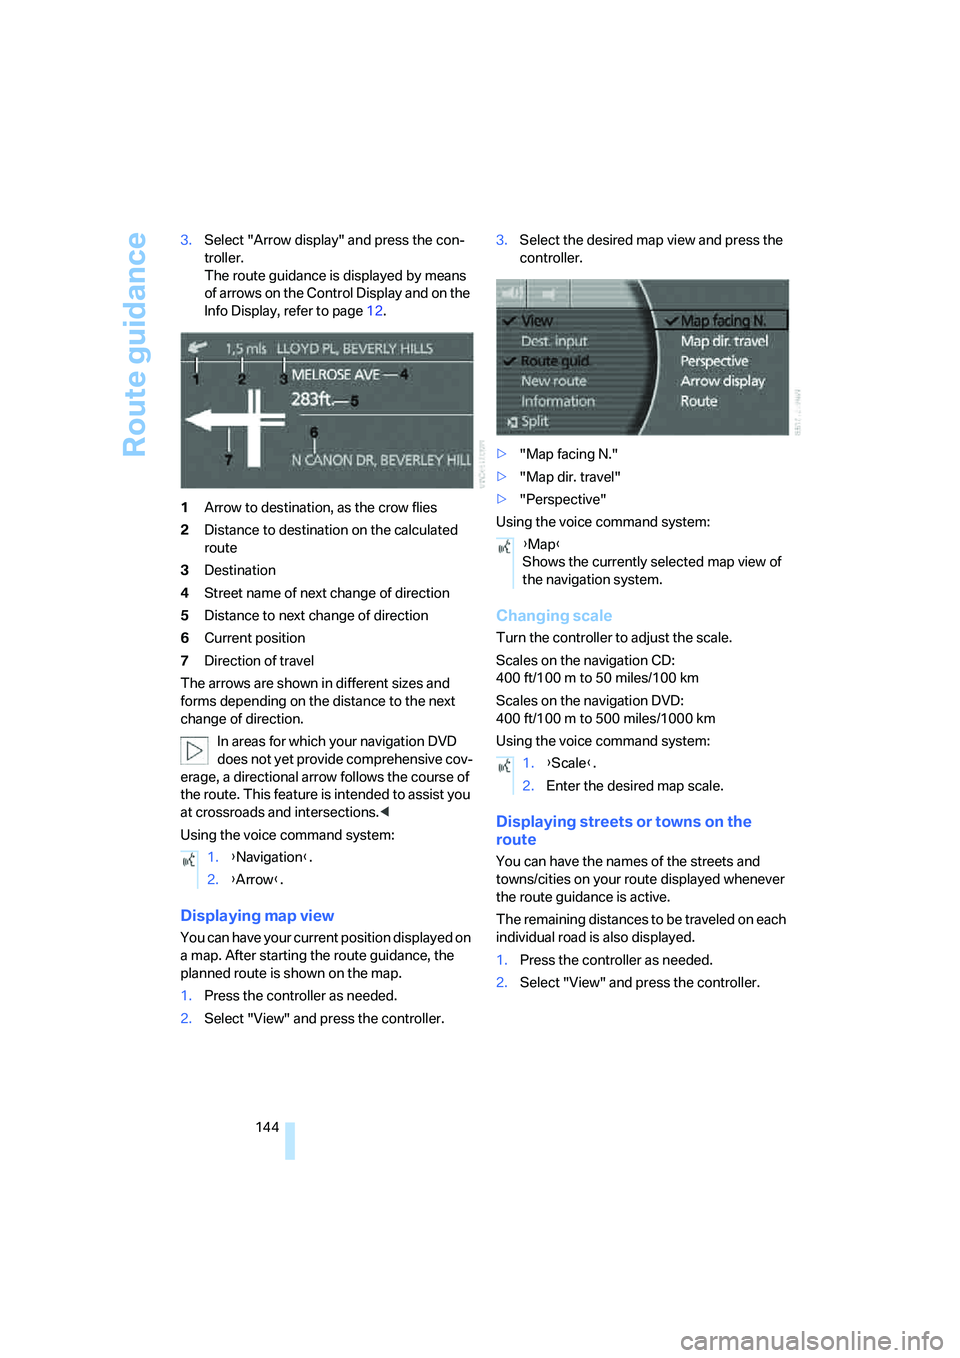
The route guidance is displayed by means
of arrows on the Control Display and on the
Info Display, refer to page12.
1Arrow to destination, as the crow flies
2Distance to destination on the calculated
route
3Destination
4Street name of next change of direction
5Distance to next change of direction
6Current position
7Direction of travel
The arrows are shown in different sizes and
forms depending on the distance to the next
change of direction.
In areas for which your navigation DVD
does not yet provide comprehensive cov-
erage, a directional arrow follows the course of
the route. This feature is intended to assist you
at crossroads and intersections.<
Using the voice command system:
Displaying map view
You can have your current position displayed on
a map. After starting the route guidance, the
planned route is shown on the map.
1.Press the controller as needed.
2.Select "View" and press the controller.3.Select the desired map view and press the
controller.
>"Map facing N."
>"Map dir. travel"
>"Perspective"
Using the voice command system:
Changing scale
Turn the controller to adjust the scale.
Scales on the navigation CD:
400 ft/100 m to 50 miles/100 km
Scales on the navigation DVD:
400ft/100m to 500miles/1000km
Using the voice command system:
Displaying streets or towns on the
route
You can have the names of the streets and
towns/cities on your route displayed whenever
the route guidance is active.
The remaining distances to be traveled on each
individual road is also displayed.
1.Press the controller as needed.
2.Select "View" and press the controller. 1.{Navigation}.
2.{Arrow}.
{Map}
Shows the currently selected map view of
the navigation system.
1.{Scale}.
2.Enter the desired map scale.
Page 148 of 247
Route guidance
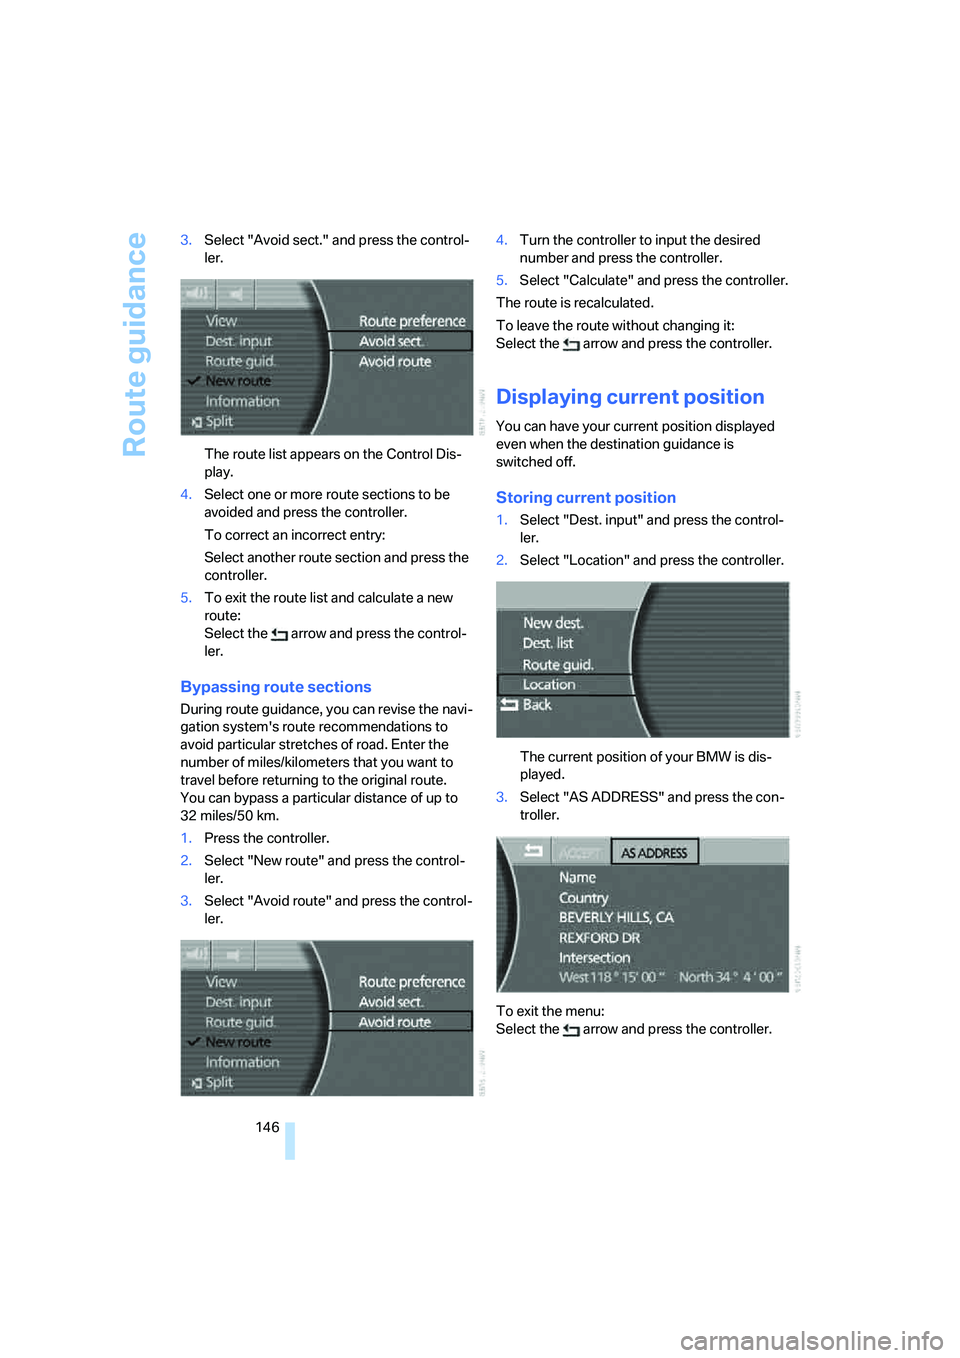
146 3.Select "Avoid sect." and press the control-
ler.
The route list appears on the Control Dis-
play.
4.Select one or more route sections to be
avoided and press the controller.
To correct an incorrect entry:
Select another route section and press the
controller.
5.To exit the route list and calculate a new
route:
Select the arrow and press the control-
ler.
Bypassing route sections
During route guidance, you can revise the navi-
gation system's route recommendations to
avoid particular stretches of road. Enter the
number of miles/kilometers that you want to
travel before returning to the original route.
You can bypass a particular distance of up to
32 miles/50 km.
1.Press the controller.
2.Select "New route" and press the control-
ler.
3.Select "Avoid route" and press the control-
ler.4.Turn the controller to input the desired
number and press the controller.
5.Select "Calculate" and press the controller.
The route is recalculated.
To leave the route without changing it:
Select the arrow and press the controller.
Displaying current position
You can have your current position displayed
even when the destination guidance is
switched off.
Storing current position
1.Select "Dest. input" and press the control-
ler.
2.Select "Location" and press the controller.
The current position of your BMW is dis-
played.
3.Select "AS ADDRESS" and press the con-
troller.
To exit the menu:
Select the arrow and press the controller.
Page 149 of 247
Navigation
Driving tips
147Reference
At a glance
Controls
Communications
Entertainment
Mobility
Correcting current position
If the navigation system cannot place the cur-
rent position, e.g.if you are currently in a parking
structure, then in addition to the country and
city, only longitude and latitude are displayed.
You can then correct your current position, e.g.
by entering the name of the adjacent street or
intersection.
1.Select "Dest. input" and press the control-
ler.
2.Select "Location" and press the controller.
3.Select "Street" or "Intersection" and press
the controller.
A list of possible street names is displayed.
4.Select the desired street and press the con-
troller.
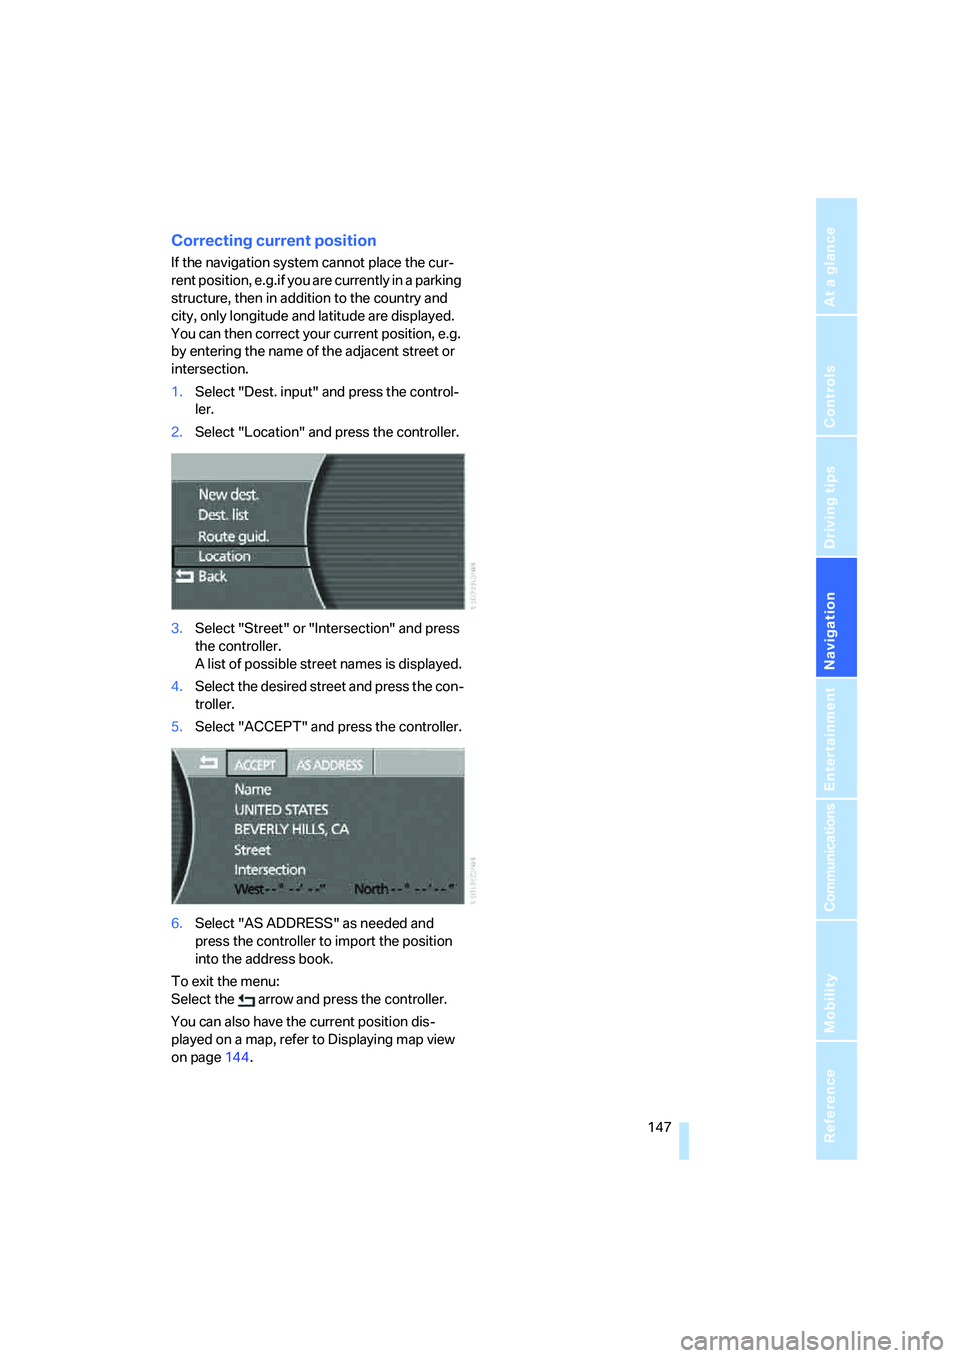
5.Select "ACCEPT" and press the controller.
6.Select "AS ADDRESS" as needed and
press the controller to import the position
into the address book.
To exit the menu:
Select the arrow and press the controller.
You can also have the current position dis-
played on a map, refer to Displaying map view
on page144.
Page 150 of 247
What to do if …
148
What to do if …
What to do if …
>a navigation DVD is inserted, but an instruc-
tion to insert the DVD appears on the Con-
trol Display?
The navigation DVD may not be the right
DVD for the navigation system. The DVD is
labeled accordingly.
>you request the current position of your
vehicle, but do not receive a precise dis-
play?
The system is unable to receive enough
GPS signals at your current position due to
obstructions, your position is not yet avail-
able on your navigation DVD, or the system
is in the process of calculating your posi-
tion. Please wait and then try again a little
later.
>the route guidance does not accept a desti-
nation?
The data of the destination is not stored on
the navigation DVD that is loaded. Select a
destination that is as close as possible to
the original.
>the route guidance does not accept an
address without the street?
On the navigation DVD, no downtown area
can be determined for the city or town
entered. Enter any street, or a destination
such as the railway station etc., then start
the route guidance.
>you want to enter an address for the route
guidance, but it is not possible to select the
letters for your desired entry?
The data of the destination is not stored on
the navigation DVD that is loaded. In this
case, the system will not offer you any let-
ters to choose from. Select a destination
that is as close as possible to the original.>the system stops furnishing directions on
which way to turn as you approach intersec-
tions?
You are driving in an area that has not yet
been completely recorded on the naviga-
tion DVD. Instead of an arrow indicating a
turn, you will see an arrow which indicates
the general direction of your planned route.
Or you have left the recommended route
and the system requires a few seconds to
calculate a new recommended route.
>the navigation system does not react to
entries?
If the battery was disconnected, it then
takes up to 10 minutes before the system is
once again operational.
Page 157 of 247
Navigation
Entertainment
Driving tips
155Reference
At a glance
Controls
Communications
Mobility
Radio
Your radio is equipped to receive the FM and
AM wavebands.
Listening to radio
Switch on audio or video sources, refer to
page153.
iDrive, for principle details, refer to page16.
1.Press the button to open the start
menu.
2.Move the controller toward "Entertain-
ment".
3.Select "FM" or "AM" and press the control-
ler.
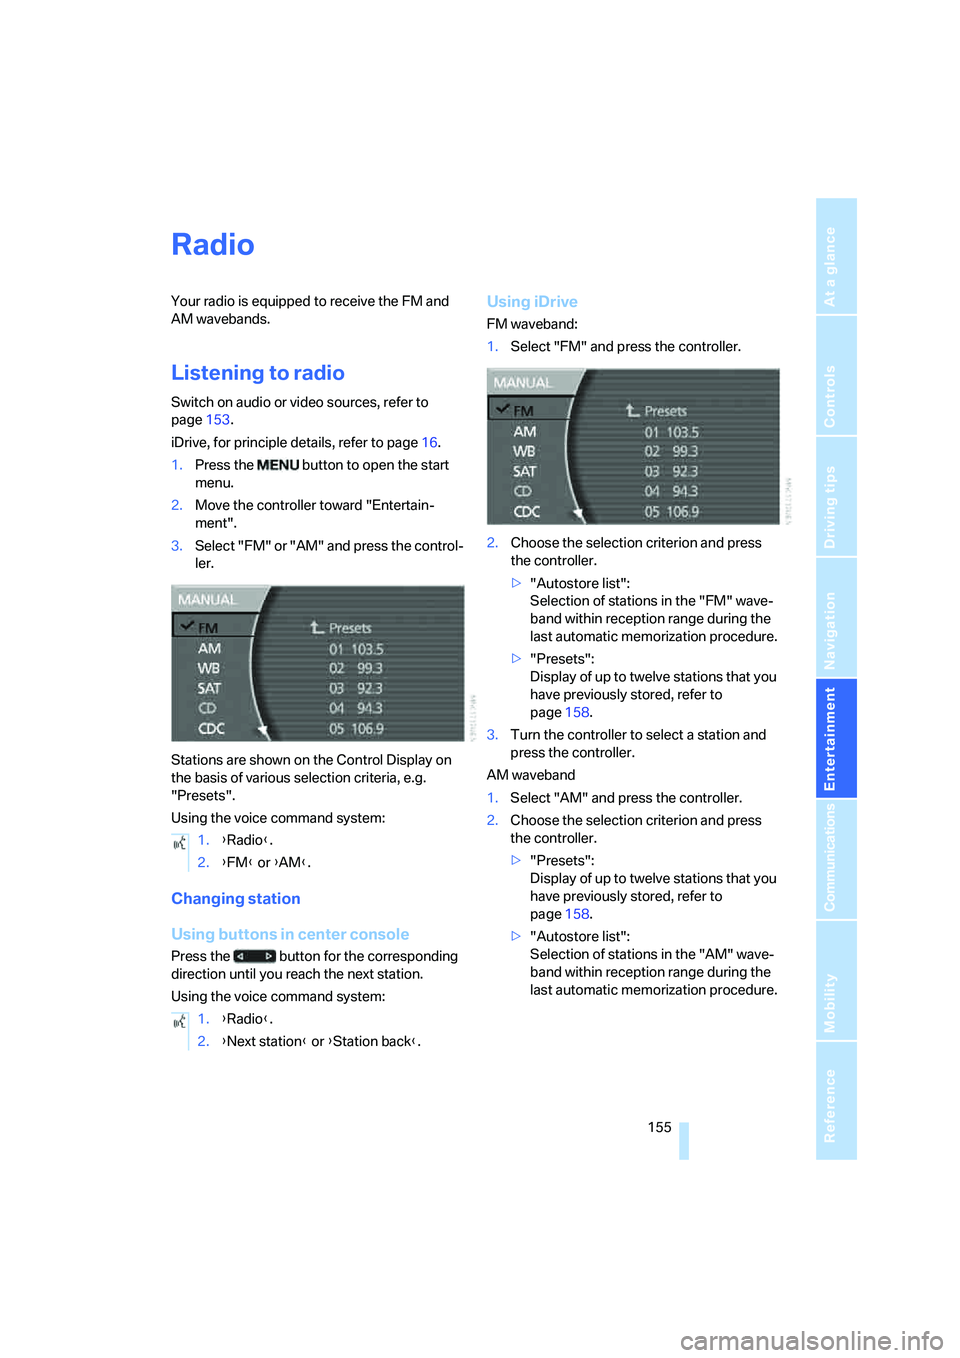
Stations are shown on the Control Display on
the basis of various selection criteria, e.g.
"Presets".
Using the voice command system:
Changing station
Using buttons in center console
Press the button for the corresponding
direction until you reach the next station.
Using the voice command system:
Using iDrive
FM waveband:
1.Select "FM" and press the controller.
2.Choose the selection criterion and press
the controller.
>"Autostore list":
Selection of stations in the "FM" wave-
band within reception range during the
last automatic memorization procedure.
>"Presets":
Display of up to twelve stations that you
have previously stored, refer to
page158.
3.Turn the controller to select a station and
press the controller.
AM waveband
1.Select "AM" and press the controller.
2.Choose the selection criterion and press
the controller.
>"Presets":
Display of up to twelve stations that you
have previously stored, refer to
page158.
>"Autostore list":
Selection of stations in the "AM" wave-
band within reception range during the
last automatic memorization procedure. 1.{Radio}.
2.{FM} or {AM}.
1.{Radio}.
2.{Next station} or {Station back}.
Page 158 of 247
Radio
156 3.Turn the controller to select a station and
press the controller.
Sampling stations, scan
The system automatically plays a brief sample
from each of the stations on the current wave-
band.
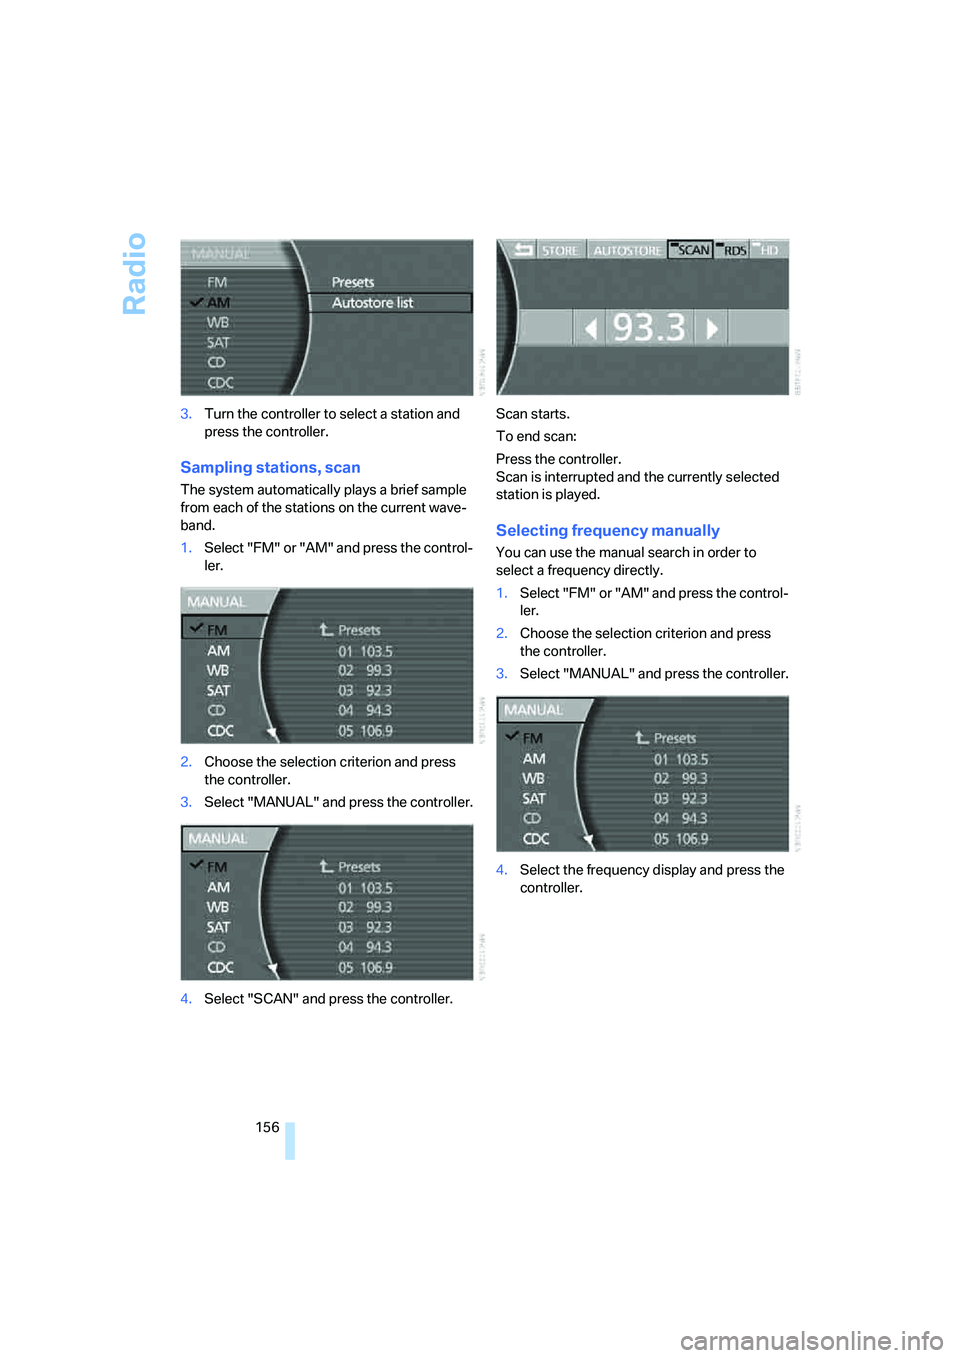
1.Select "FM" or "AM" and press the control-
ler.
2.Choose the selection criterion and press
the controller.
3.Select "MANUAL" and press the controller.
4.Select "SCAN" and press the controller.Scan starts.
To end scan:
Press the controller.
Scan is interrupted and the currently selected
station is played.
Selecting frequency manually
You can use the manual search in order to
select a frequency directly.
1.Select "FM" or "AM" and press the control-
ler.
2.Choose the selection criterion and press
the controller.
3.Select "MANUAL" and press the controller.
4.Select the frequency display and press the
controller.
Page 159 of 247
Navigation
Entertainment
Driving tips
157Reference
At a glance
Controls
Communications
Mobility
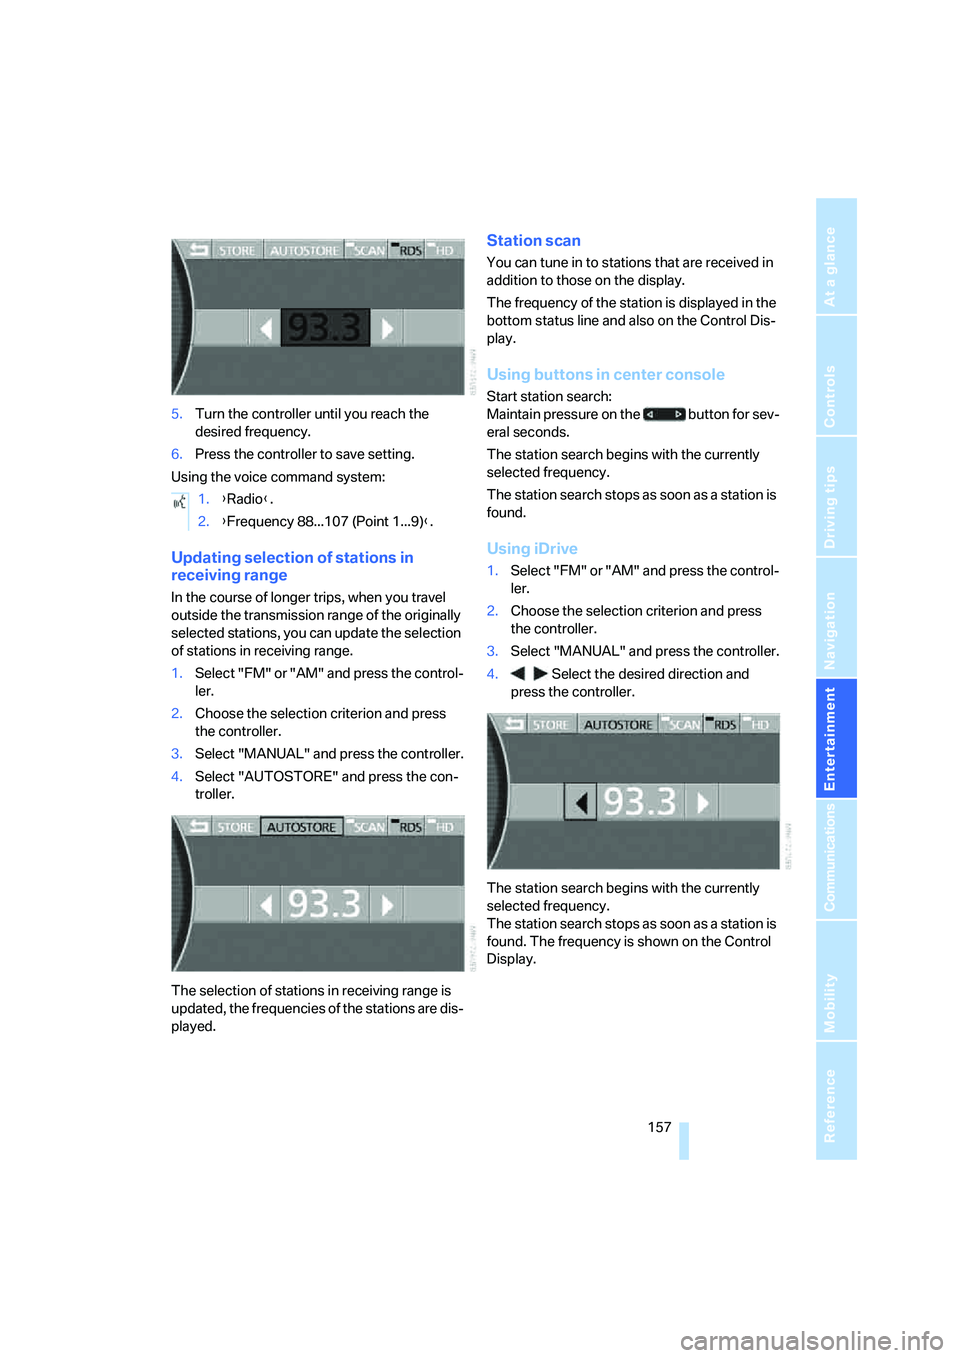
5.Turn the controller until you reach the
desired frequency.
6.Press the controller to save setting.
Using the voice command system:
Updating selection of stations in
receiving range
In the course of longer trips, when you travel
outside the transmission range of the originally
selected stations, you can update the selection
of stations in receiving range.
1.Select "FM" or "AM" and press the control-
ler.
2.Choose the selection criterion and press
the controller.
3.Select "MANUAL" and press the controller.
4.Select "AUTOSTORE" and press the con-
troller.
The selection of stations in receiving range is
updated, the frequencies of the stations are dis-
played.
Station scan
You can tune in to stations that are received in
addition to those on the display.
The frequency of the station is displayed in the
bottom status line and also on the Control Dis-
play.
Using buttons in center console
Start station search:
Maintain pressure on the button for sev-
eral seconds.
The station search begins with the currently
selected frequency.
The station search stops as soon as a station is
found.
Using iDrive
1.Select "FM" or "AM" and press the control-
ler.
2.Choose the selection criterion and press
the controller.
3.Select "MANUAL" and press the controller.
4. Select the desired direction and
press the controller.
The station search begins with the currently
selected frequency.
The station search stops as soon as a station is
found. The frequency is shown on the Control
Display. 1.{Radio}.
2.{Frequency 88...107 (Point 1...9)}.