2006 BMW 650I COUPE navigation
[x] Cancel search: navigationPage 77 of 236
Everything under control
76 tances, refer to Displays on Control Display or
Trip computer.
To reset the average fuel consumption: press
the BC button in the turn signal lever for approx.
2seconds.
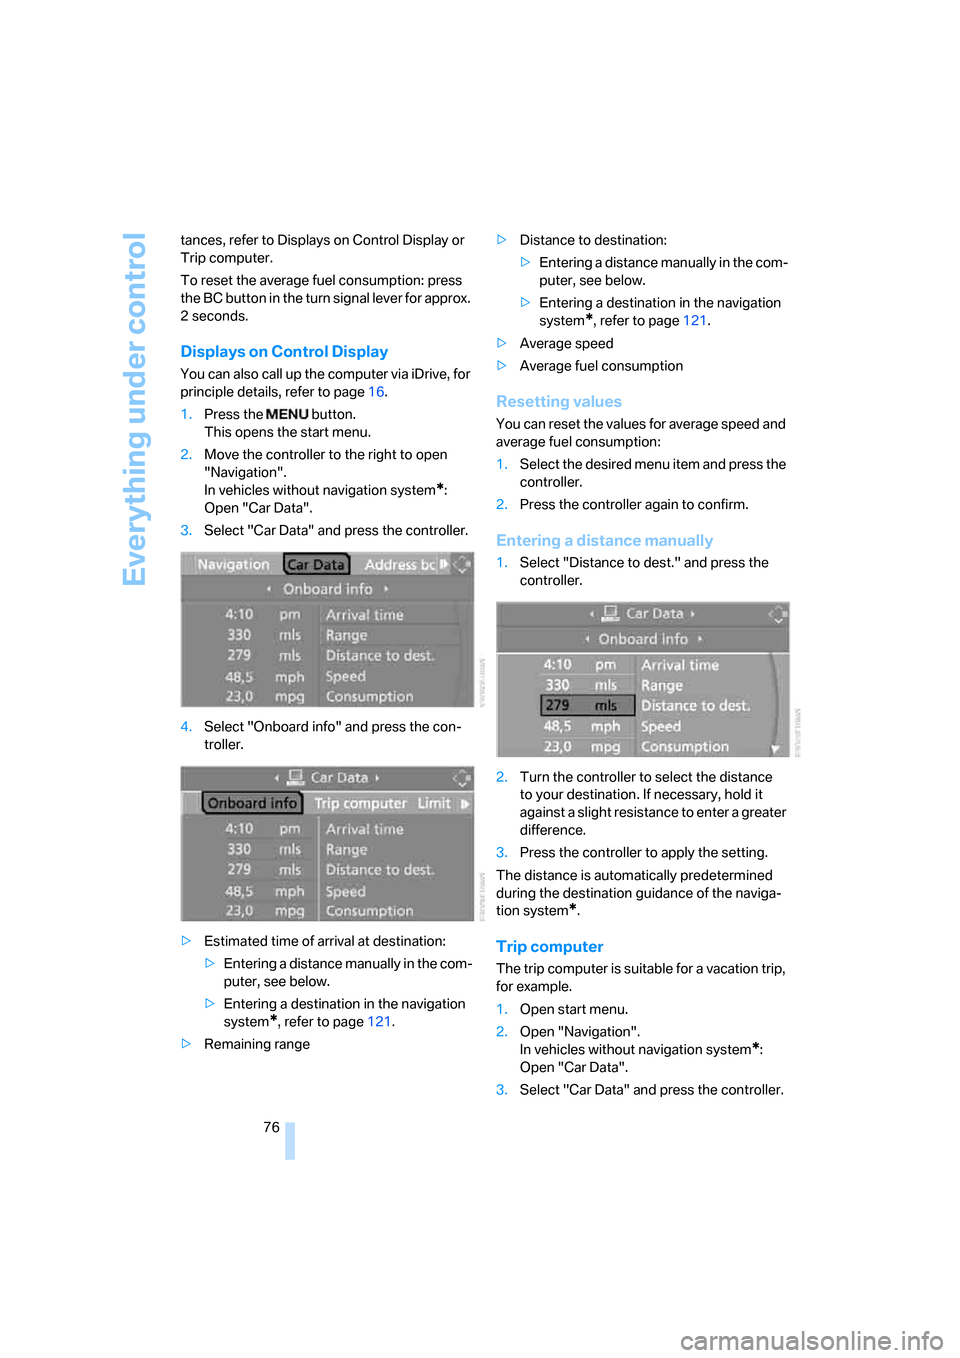
Displays on Control Display
You can also call up the computer via iDrive, for
principle details, refer to page16.
1.Press the button.
This opens the start menu.
2.Move the controller to the right to open
"Navigation".
In vehicles without navigation system
*:
Open "Car Data".
3.Select "Car Data" and press the controller.
4.Select "Onboard info" and press the con-
troller.
>Estimated time of arrival at destination:
>Entering a distance manually in the com-
puter, see below.
>Entering a destination in the navigation
system
*, refer to page121.
>Remaining range>Distance to destination:
>Entering a distance manually in the com-
puter, see below.
>Entering a destination in the navigation
system
*, refer to page121.
>Average speed
>Average fuel consumption
Resetting values
You can reset the values for average speed and
average fuel consumption:
1.Select the desired menu item and press the
controller.
2.Press the controller again to confirm.
Entering a distance manually
1.Select "Distance to dest." and press the
controller.
2.Turn the controller to select the distance
to your destination. If necessary, hold it
against a slight resistance to enter a greater
difference.
3.Press the controller to apply the setting.
The distance is automatically predetermined
during the destination guidance of the naviga-
tion system
*.
Trip computer
The trip computer is suitable for a vacation trip,
for example.
1.Open start menu.
2.Open "Navigation".
In vehicles without navigation system
*:
Open "Car Data".
3.Select "Car Data" and press the controller.
Page 78 of 236

Controls
77Reference
At a glance
Driving tips
Communications
Navigation
Entertainment
Mobility
4.Select "Trip computer" and press the con-
troller.
>Departure time
>Driving time
>Distance traveled
>Average speed
>Average fuel consumption
Switching trip computer on/off and resetting
all values:
1.Select "Set" and press the controller.
2.Select the desired menu item and press the
controller.
Display options
You can display the computer or the trip com-
puter in the assistance window.
1.Move the controller to the right to switch to
the assistance window and press the con-
troller.
2.Select a menu item:
>"Onboard info"
>"Trip computer".3.Press the controller.
Service requirements
The remaining driving distance and the date for
the next maintenance are displayed briefly with
the ignition switched on.
Your BMW Service Advisor can deter-
mine your vehicle's current service
requirements by reading out the data stored in
the remote control.<
Additional information
You can view more detailed information by
using the Control Display, principle details, refer
to page16.
1.Open start menu.
2.Press the controller to open the menu.
3.Select "Service" and press the controller.
Page 80 of 236
Controls
79Reference
At a glance
Driving tips
Communications
Navigation
Entertainment
Mobility
9.Press the controller to apply the setting.
The year is highlighted.
10.Turn the controller to make the adjustment.
11.Press the controller to apply the setting.
The date entry is stored.
To exit from the menu:
Select the arrow and press the controller.
Check Control
The concept
The Check Control monitors functions in the
vehicle and issues a message if there is a mal-
function in the monitored systems. A Check
Control message of this kind includes indicator
or warning lamps in the instrument cluster, pos-
sibly an acoustic signal, and text messages at
the bottom of the Control Display.
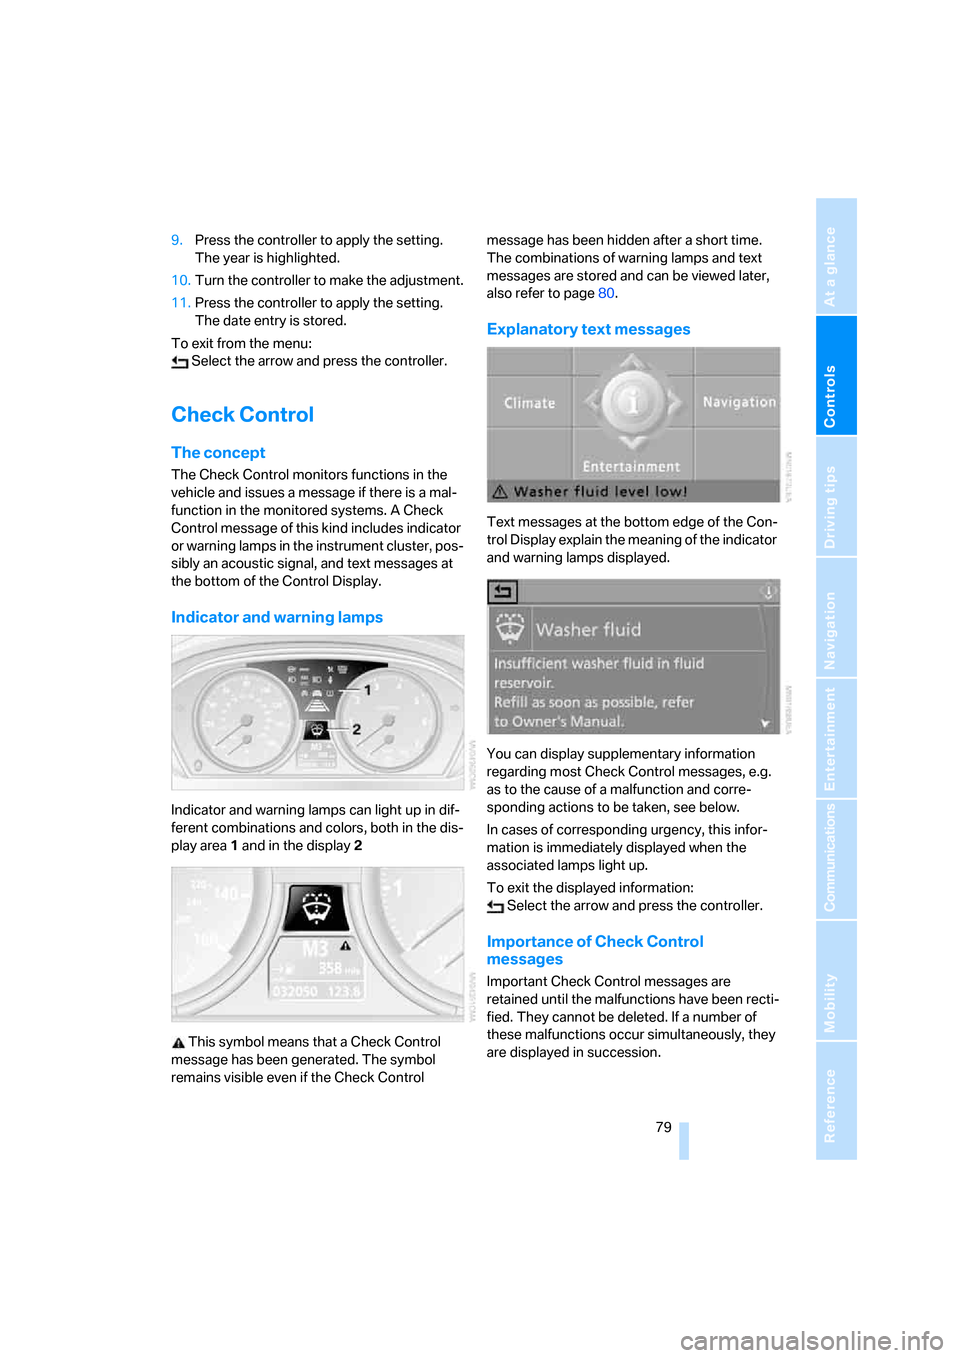
Indicator and warning lamps
Indicator and warning lamps can light up in dif-
ferent combinations and colors, both in the dis-
play area1 and in the display2
This symbol means that a Check Control
message has been generated. The symbol
remains visible even if the Check Control message has been hidden after a short time.
The combinations of warning lamps and text
messages are stored and can be viewed later,
also refer to page80.
Explanatory text messages
Text messages at the bottom edge of the Con-
trol Display explain the meaning of the indicator
and warning lamps displayed.
You can display supplementary information
regarding most Check Control messages, e.g.
as to the cause of a malfunction and corre-
sponding actions to be taken, see below.
In cases of corresponding urgency, this infor-
mation is immediately displayed when the
associated lamps light up.
To exit the displayed information:
Select the arrow and press the controller.
Importance of Check Control
messages
Important Check Control messages are
retained until the malfunctions have been recti-
fied. They cannot be deleted. If a number of
these malfunctions occur simultaneously, they
are displayed in succession.
Page 82 of 236
Controls
81Reference
At a glance
Driving tips
Communications
Navigation
Entertainment
Mobility
Displays after completion of trip
Malfunction reports generated during the trip
are shown consecutively when you switch off
the ignition.
Before the display disappears, you can display
the messages once again. Press the CHECK
button for approx. 2 seconds. If several mes-
sages are present, you can press the CHECK
button repeatedly.
The display:
>turns off automatically after a brief period
>can be turned off at any time by pressing
the CHECK button again for approx. 2 sec-
onds
Speed limit
You can enter a speed and a Check Control
message indicates when you have reached
this speed. This enables you, for example, to
receive warnings if you exceed a speed limit in
an urban area.
You are only warned of reaching this speed a
second time if your vehicle has fallen at least
3 mph/5 km/h below it in the meantime.
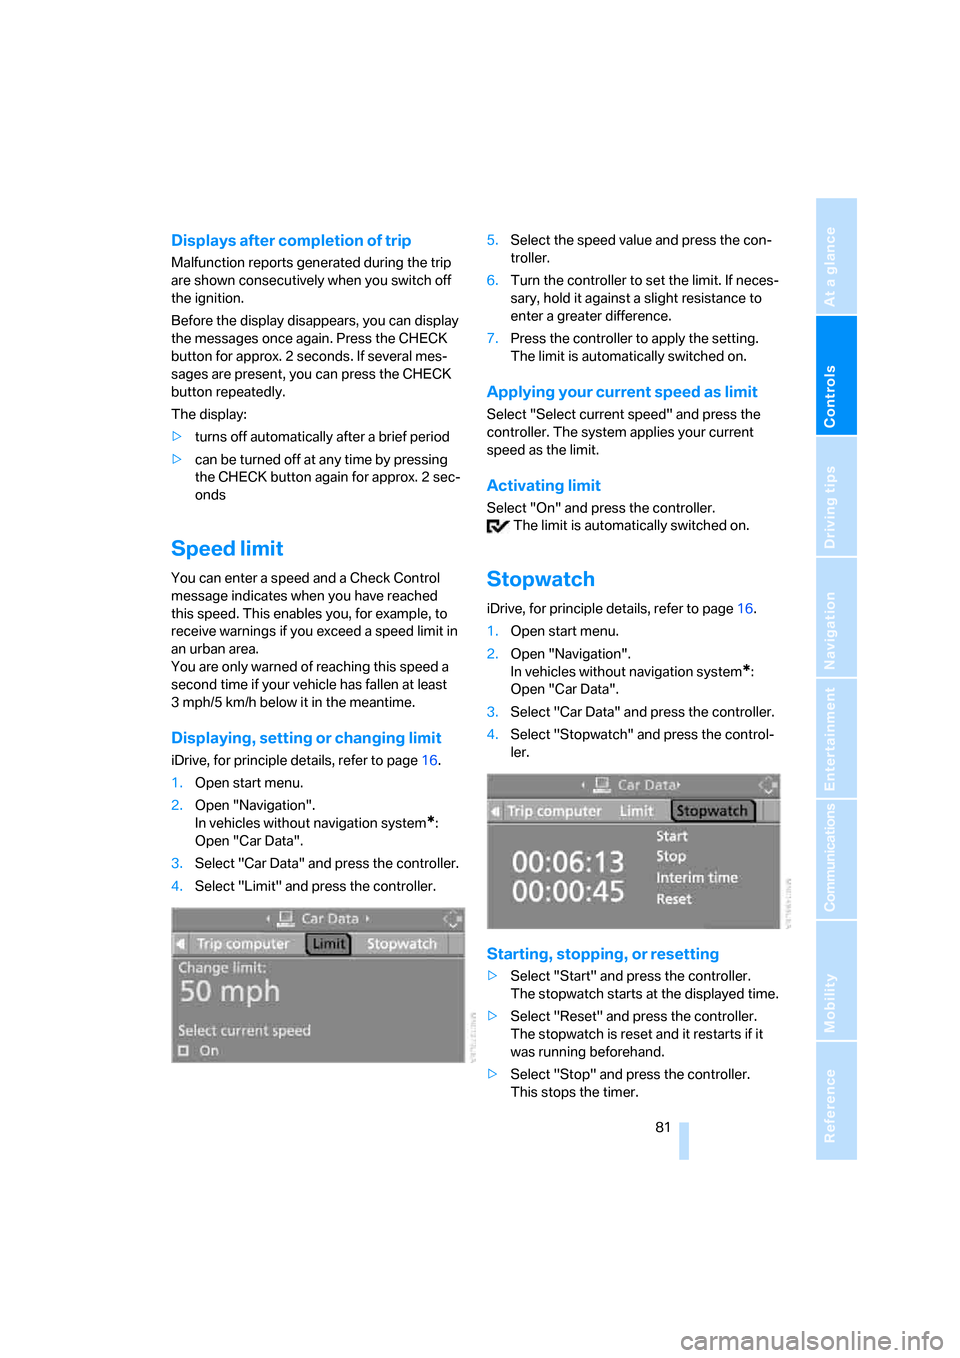
Displaying, setting or changing limit
iDrive, for principle details, refer to page16.
1.Open start menu.
2.Open "Navigation".
In vehicles without navigation system
*:
Open "Car Data".
3.Select "Car Data" and press the controller.
4.Select "Limit" and press the controller.5.Select the speed value and press the con-
troller.
6.Turn the controller to set the limit. If neces-
sary, hold it against a slight resistance to
enter a greater difference.
7.Press the controller to apply the setting.
The limit is automatically switched on.
Applying your current speed as limit
Select "Select current speed" and press the
controller. The system applies your current
speed as the limit.
Activating limit
Select "On" and press the controller.
The limit is automatically switched on.
Stopwatch
iDrive, for principle details, refer to page16.
1.Open start menu.
2.Open "Navigation".
In vehicles without navigation system
*:
Open "Car Data".
3.Select "Car Data" and press the controller.
4.Select "Stopwatch" and press the control-
ler.
Starting, stopping, or resetting
>Select "Start" and press the controller.
The stopwatch starts at the displayed time.
>Select "Reset" and press the controller.
The stopwatch is reset and it restarts if it
was running beforehand.
>Select "Stop" and press the controller.
This stops the timer.
Page 84 of 236
Controls
83Reference
At a glance
Driving tips
Communications
Navigation
Entertainment
Mobility
Activating hour signal*
You will hear three tones just before each full
hour.
Select "Hour memo" and press the controller.
The hour signal is activated.
Setting time format
1.Select "Time format" and press the control-
ler.
2.Select the desired format and press the
controller.
The setting is stored for the remote control cur-
rently in use.
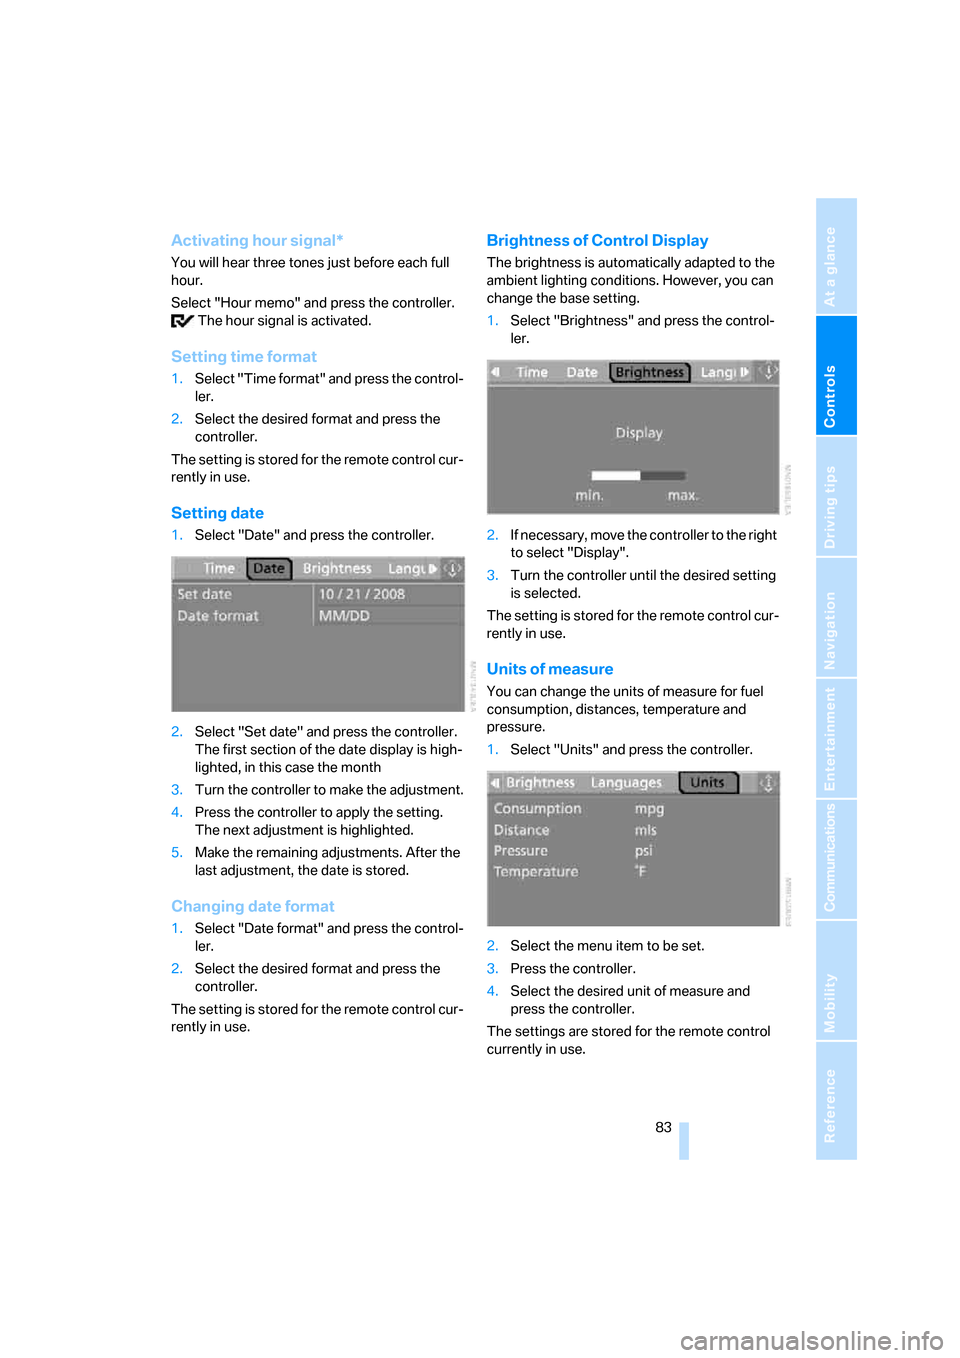
Setting date
1.Select "Date" and press the controller.
2.Select "Set date" and press the controller.
The first section of the date display is high-
lighted, in this case the month
3.Turn the controller to make the adjustment.
4.Press the controller to apply the setting.
The next adjustment is highlighted.
5.Make the remaining adjustments. After the
last adjustment, the date is stored.
Changing date format
1.Select "Date format" and press the control-
ler.
2.Select the desired format and press the
controller.
The setting is stored for the remote control cur-
rently in use.
Brightness of Control Display
The brightness is automatically adapted to the
ambient lighting conditions. However, you can
change the base setting.
1.Select "Brightness" and press the control-
ler.
2.If necessary, move the controller to the right
to select "Display".
3.Turn the controller until the desired setting
is selected.
The setting is stored for the remote control cur-
rently in use.
Units of measure
You can change the units of measure for fuel
consumption, distances, temperature and
pressure.
1.Select "Units" and press the controller.
2.Select the menu item to be set.
3.Press the controller.
4.Select the desired unit of measure and
press the controller.
The settings are stored for the remote control
currently in use.
Page 86 of 236

Controls
85Reference
At a glance
Driving tips
Communications
Navigation
Entertainment
Mobility
Technology for comfort, convenience and
safety
PDC Park Distance Control*
The concept
The PDC assists you when you are parking.
Acoustic signals and an optical display
* alert
you to the approach of an object from behind
your vehicle. To measure the distance, there
are four ultrasonic sensors in each bumper.
The range of these sensors is approx. 7 ft/2 m.
But an acoustic warning first sounds at approx.
24 in/60 cm for the sensors at the front and two
rear corners and at approx. 5 ft/1,50 m for the
center rear sensors.
PDC is a parking aid that can indicate the
presence of objects when they are being
approached slowly, as is usually the case when
parking. Avoid approaching an object at high
speed; otherwise, the physical circumstances
could cause the system warning to be activated
too late.<
Automatically activating
With the engine running or the ignition switched
on, the system starts to operate automatically
approx. 1 second after you shift into reverse.
Wait this short period before driving.
Switching on manually
Press the button; the LED lights up.
Switching off manually
Press the button again; the LED goes out.
After driving approx. 165 ft/50 m or at over
approx. 20 mph/30 km/h, the system is
switched off and the LED goes out. You can
reactivate the system manually as needed.
Signal tones
An intermittent signal indicates the distance of
the vehicle from an object being approached.
Thus, an object detected to the left rear of the
vehicle will be indicated by a signal tone from
the left rear speaker, etc. As the distance
between vehicle and object decreases, the
intervals between the tones become shorter.
The signal tone becomes continuous once the
distance to the nearest object falls to below
roughly 1 ft/30 cm.
An intermittent tone is interrupted after approx.
3seconds:
>if you remain in front of an object that was
only detected by one of the corner sensors
>if you drive parallel to a wall
Malfunction
The LED in the button flashes and a message
appears on the Control Display. PDC is mal-
functioning. Have the system checked.
As a preventive measure, keep the sensors
clean and free of ice or snow in order to ensure
that they will continue to operate effectively. Do
not spray the sensors with high-pressure wash-
ers for prolonged intervals and always keep the
nozzle at least 4 in/10 cm from the sensors.
PDC with visual warning*
You can also enjoy the option of having the sys-
tem show the approach to an object on the
Control Display. Objects that are farther away
are already shown there before a signal tone
sounds.
Page 88 of 236
Controls
87Reference
At a glance
Driving tips
Communications
Navigation
Entertainment
Mobility
The DSC is operational every time you start the
engine.
The laws of physics cannot be repealed,
even with DSC. An appropriate driving
style always remains the responsibility of the
driver. Do not reduce the additional safety mar-
gin of the system by taking risks.<
Deactivating DSC
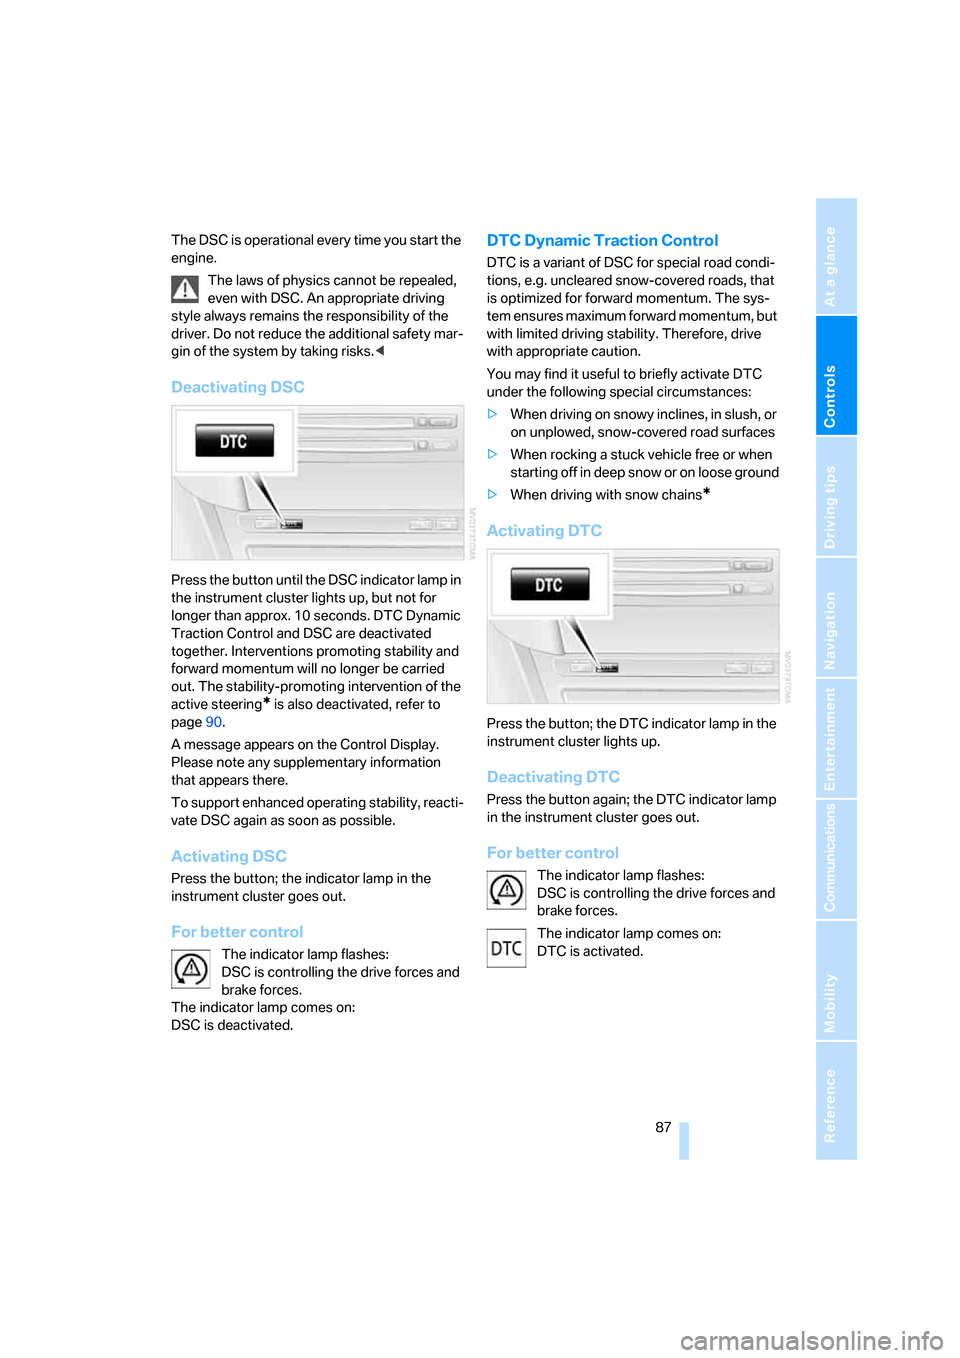
Press the button until the DSC indicator lamp in
the instrument cluster lights up, but not for
longer than approx. 10 seconds. DTC Dynamic
Traction Control and DSC are deactivated
together. Interventions promoting stability and
forward momentum will no longer be carried
out. The stability-promoting intervention of the
active steering
* is also deactivated, refer to
page90.
A message appears on the Control Display.
Please note any supplementary information
that appears there.
To support enhanced operating stability, reacti-
vate DSC again as soon as possible.
Activating DSC
Press the button; the indicator lamp in the
instrument cluster goes out.
For better control
The indicator lamp flashes:
DSC is controlling the drive forces and
brake forces.
The indicator lamp comes on:
DSC is deactivated.
DTC Dynamic Traction Control
DTC is a variant of DSC for special road condi-
tions, e.g. uncleared snow-covered roads, that
is optimized for forward momentum. The sys-
tem ensures maximum forward momentum, but
with limited driving stability. Therefore, drive
with appropriate caution.
You may find it useful to briefly activate DTC
under the following special circumstances:
>When driving on snowy inclines, in slush, or
on unplowed, snow-covered road surfaces
>When rocking a stuck vehicle free or when
starting off in deep snow or on loose ground
>When driving with snow chains
*
Activating DTC
Press the button; the DTC indicator lamp in the
instrument cluster lights up.
Deactivating DTC
Press the button again; the DTC indicator lamp
in the instrument cluster goes out.
For better control
The indicator lamp flashes:
DSC is controlling the drive forces and
brake forces.
The indicator lamp comes on:
DTC is activated.
Page 90 of 236
Controls
89Reference
At a glance
Driving tips
Communications
Navigation
Entertainment
Mobility
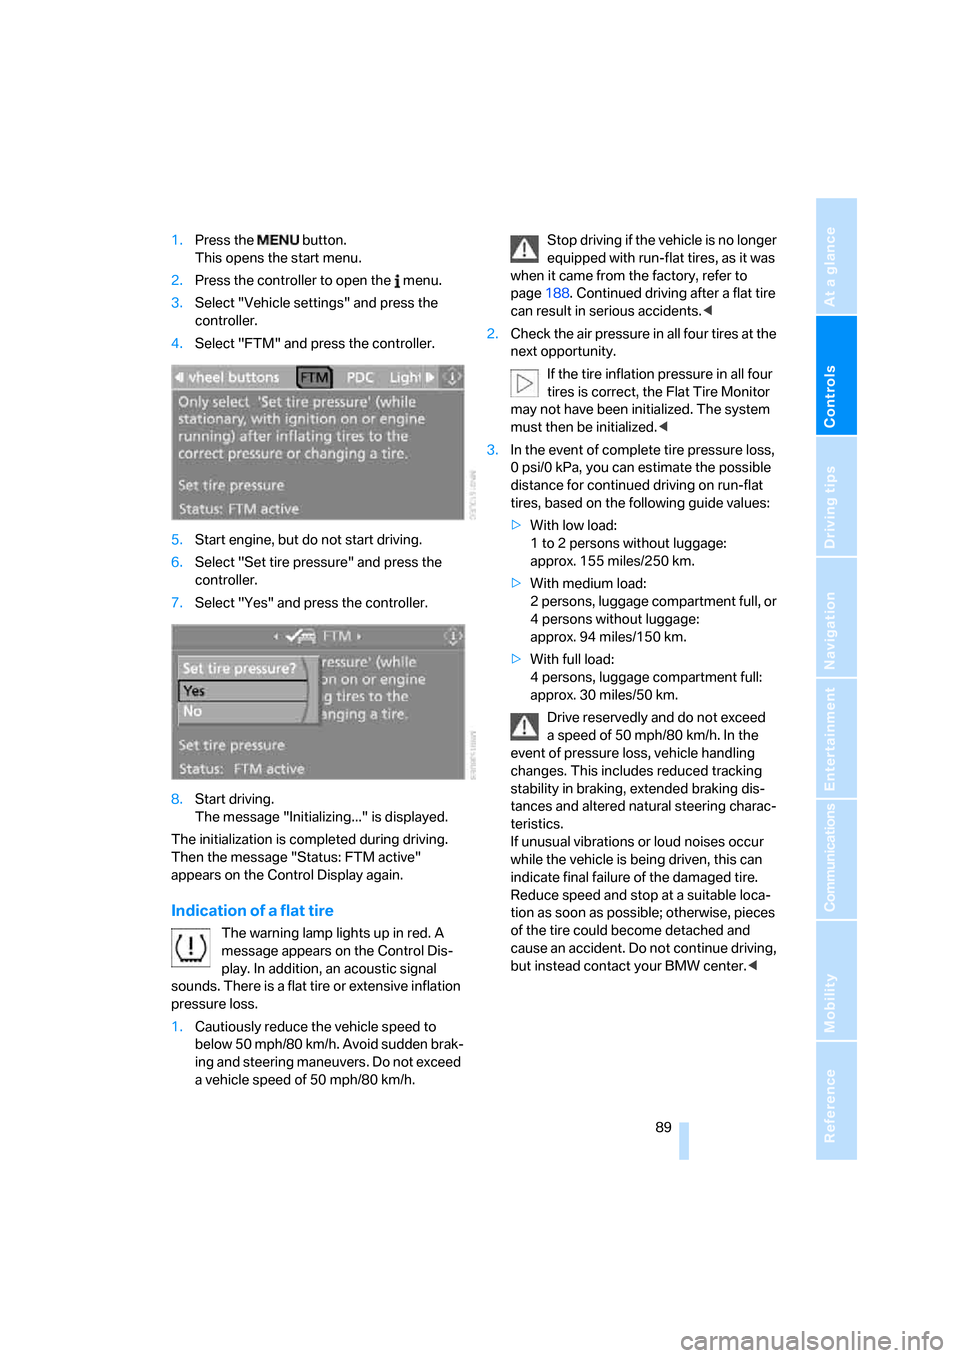
1.Press the button.
This opens the start menu.
2.Press the controller to open the menu.
3.Select "Vehicle settings" and press the
controller.
4.Select "FTM" and press the controller.
5.Start engine, but do not start driving.
6.Select "Set tire pressure" and press the
controller.
7.Select "Yes" and press the controller.
8.Start driving.
The message "Initializing..." is displayed.
The initialization is completed during driving.
Then the message "Status: FTM active"
appears on the Control Display again.
Indication of a flat tire
The warning lamp lights up in red. A
message appears on the Control Dis-
play. In addition, an acoustic signal
sounds. There is a flat tire or extensive inflation
pressure loss.
1.Cautiously reduce the vehicle speed to
below 50 mph/80 km/h. Avoid sudden brak-
ing and steering maneuvers. Do not exceed
a vehicle speed of 50 mph/80 km/h.Stop driving if the vehicle is no longer
equipped with run-flat tires, as it was
when it came from the factory, refer to
page188. Continued driving after a flat tire
can result in serious accidents.<
2.Check the air pressure in all four tires at the
next opportunity.
If the tire inflation pressure in all four
tires is correct, the Flat Tire Monitor
may not have been initialized. The system
must then be initialized.<
3.In the event of complete tire pressure loss,
0 psi/0 kPa, you can estimate the possible
distance for continued driving on run-flat
tires, based on the following guide values:
>With low load:
1 to 2 persons without luggage:
approx. 155 miles/250 km.
>With medium load:
2 persons, luggage compartment full, or
4 persons without luggage:
approx. 94 miles/150 km.
>With full load:
4 persons, luggage compartment full:
approx. 30 miles/50 km.
Drive reservedly and do not exceed
a speed of 50 mph/80 km/h. In the
event of pressure loss, vehicle handling
changes. This includes reduced tracking
stability in braking, extended braking dis-
tances and altered natural steering charac-
teristics.
If unusual vibrations or loud noises occur
while the vehicle is being driven, this can
indicate final failure of the damaged tire.
Reduce speed and stop at a suitable loca-
tion as soon as possible; otherwise, pieces
of the tire could become detached and
cause an accident. Do not continue driving,
but instead contact your BMW center.<