2006 BMW 650I COUPE driver seat adjustment
[x] Cancel search: driver seat adjustmentPage 50 of 236
Controls
49Reference
At a glance
Driving tips
Communications
Navigation
Entertainment
Mobility
Seat, mirror and steering
wheel memory
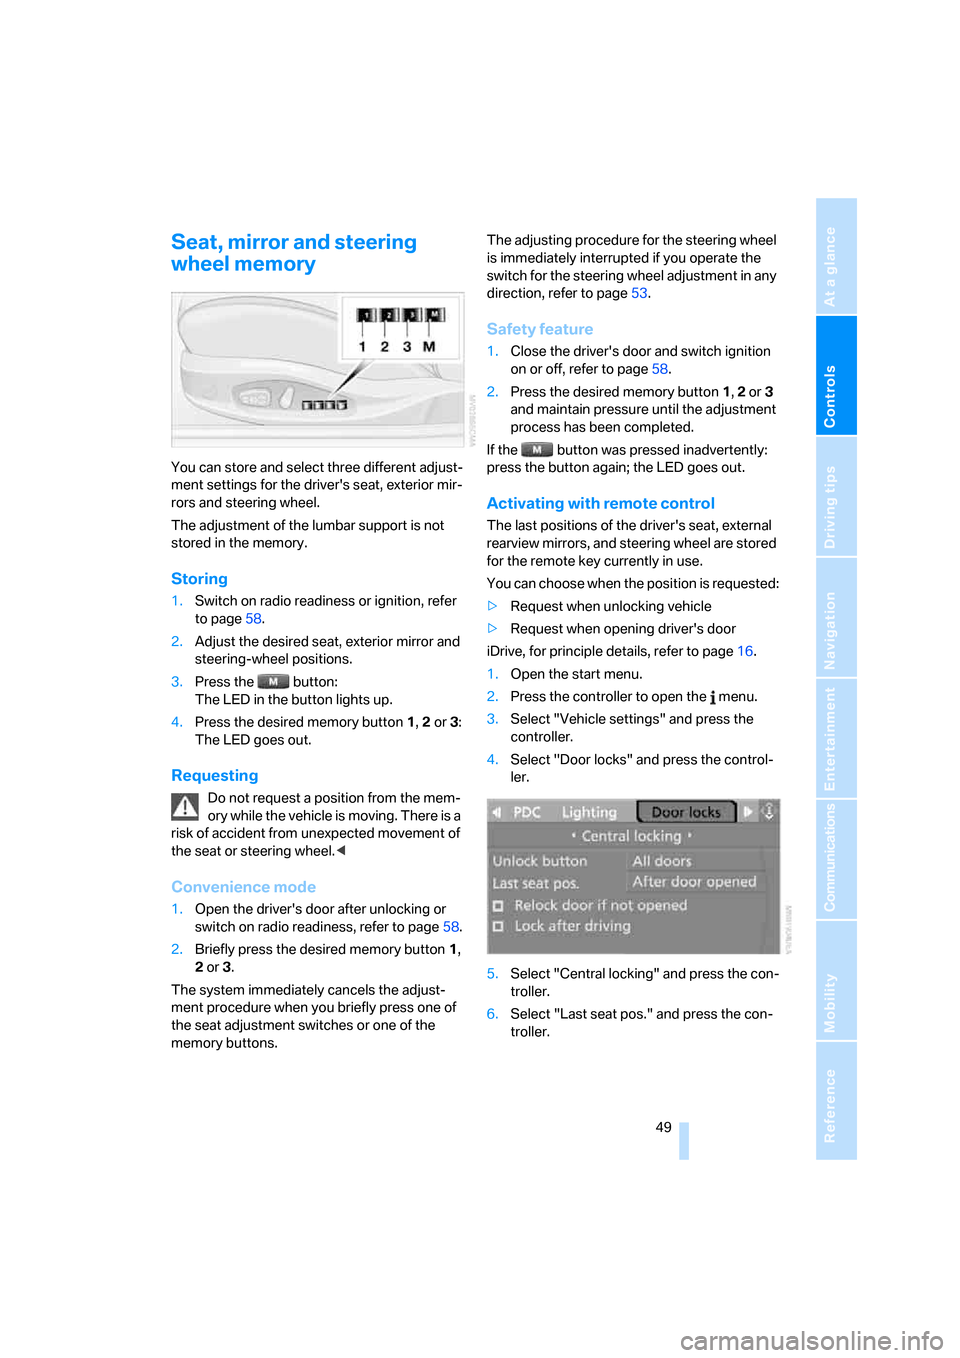
You can store and select three different adjust-
ment settings for the driver's seat, exterior mir-
rors and steering wheel.
The adjustment of the lumbar support is not
stored in the memory.
Storing
1.Switch on radio readiness or ignition, refer
to page58.
2.Adjust the desired seat, exterior mirror and
steering-wheel positions.
3.Press the button:
The LED in the button lights up.
4.Press the desired memory button 1, 2 or3:
The LED goes out.
Requesting
Do not request a position from the mem-
ory while the vehicle is moving. There is a
risk of accident from unexpected movement of
the seat or steering wheel.<
Convenience mode
1.Open the driver's door after unlocking or
switch on radio readiness, refer to page58.
2.Briefly press the desired memory button1,
2 or3.
The system immediately cancels the adjust-
ment procedure when you briefly press one of
the seat adjustment switches or one of the
memory buttons.The adjusting procedure for the steering wheel
is immediately interrupted if you operate the
switch for the steering wheel adjustment in any
direction, refer to page53.
Safety feature
1.Close the driver's door and switch ignition
on or off, refer to page58.
2.Press the desired memory button 1, 2 or3
and maintain pressure until the adjustment
process has been completed.
If the button was pressed inadvertently:
press the button again; the LED goes out.
Activating with remote control
The last positions of the driver's seat, external
rearview mirrors, and steering wheel are stored
for the remote key currently in use.
You can choose when the position is requested:
>Request when unlocking vehicle
>Request when opening driver's door
iDrive, for principle details, refer to page16.
1.Open the start menu.
2.Press the controller to open the menu.
3.Select "Vehicle settings" and press the
controller.
4.Select "Door locks" and press the control-
ler.
5.Select "Central locking" and press the con-
troller.
6.Select "Last seat pos." and press the con-
troller.
Page 51 of 236
Adjustments
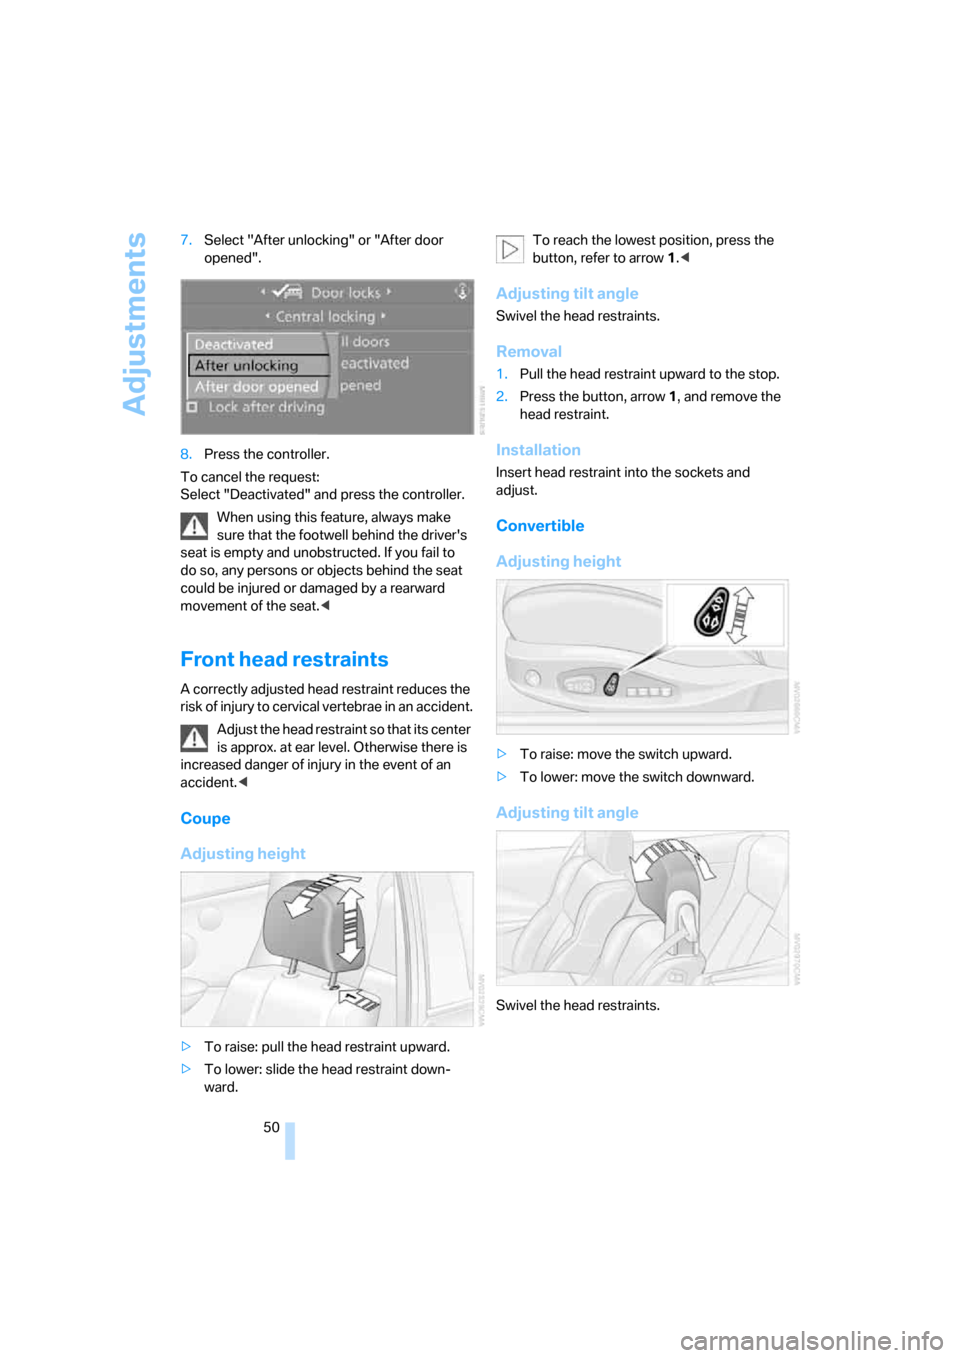
50 7.Select "After unlocking" or "After door
opened".
8.Press the controller.
To cancel the request:
Select "Deactivated" and press the controller.
When using this feature, always make
sure that the footwell behind the driver's
seat is empty and unobstructed. If you fail to
do so, any persons or objects behind the seat
could be injured or damaged by a rearward
movement of the seat.<
Front head restraints
A correctly adjusted head restraint reduces the
risk of injury to cervical vertebrae in an accident.
Adjust the head restraint so that its center
is approx. at ear level. Otherwise there is
increased danger of injury in the event of an
accident.<
Coupe
Adjusting height
>To raise: pull the head restraint upward.
>To lower: slide the head restraint down-
ward.To reach the lowest position, press the
button, refer to arrow 1.<
Adjusting tilt angle
Swivel the head restraints.
Removal
1.Pull the head restraint upward to the stop.
2.Press the button, arrow1, and remove the
head restraint.
Installation
Insert head restraint into the sockets and
adjust.
Convertible
Adjusting height
>To raise: move the switch upward.
>To lower: move the switch downward.
Adjusting tilt angle
Swivel the head restraints.
Page 53 of 236
Adjustments
52
Releasing
1.Hold the belt firmly.
2.Press the red button in the belt buckle.
3.Guide the belt into its reel.
The shoulder strap's anchorage point will be in
the correct position for adults of every build if
the seat is correctly adjusted, refer to page48.
Safety belt reminder for driver's seat
and passenger seat*
The indicator lamp lights up and a sig-
nal sounds. At the same time, an addi-
tional message appears on the Control
Display. Please check whether safety belts are
being worn correctly.
The safety belt reminder is operative at speeds
above approx. 5 mph/8 km/h. It can also be acti-
vated if objects are placed onto the passenger
seat.
Damage to safety belts
In case of strain due to an accident or
damage, replace the belt system includ-
ing the safety belt tensioners and have the belt
anchor points checked. Have this work carried
out only by a BMW center or a workshop that
works according to BMW repair procedures
with appropriately trained personnel. Otherwise
correct operation of this safety equipment is not
guaranteed.<
Heated seats
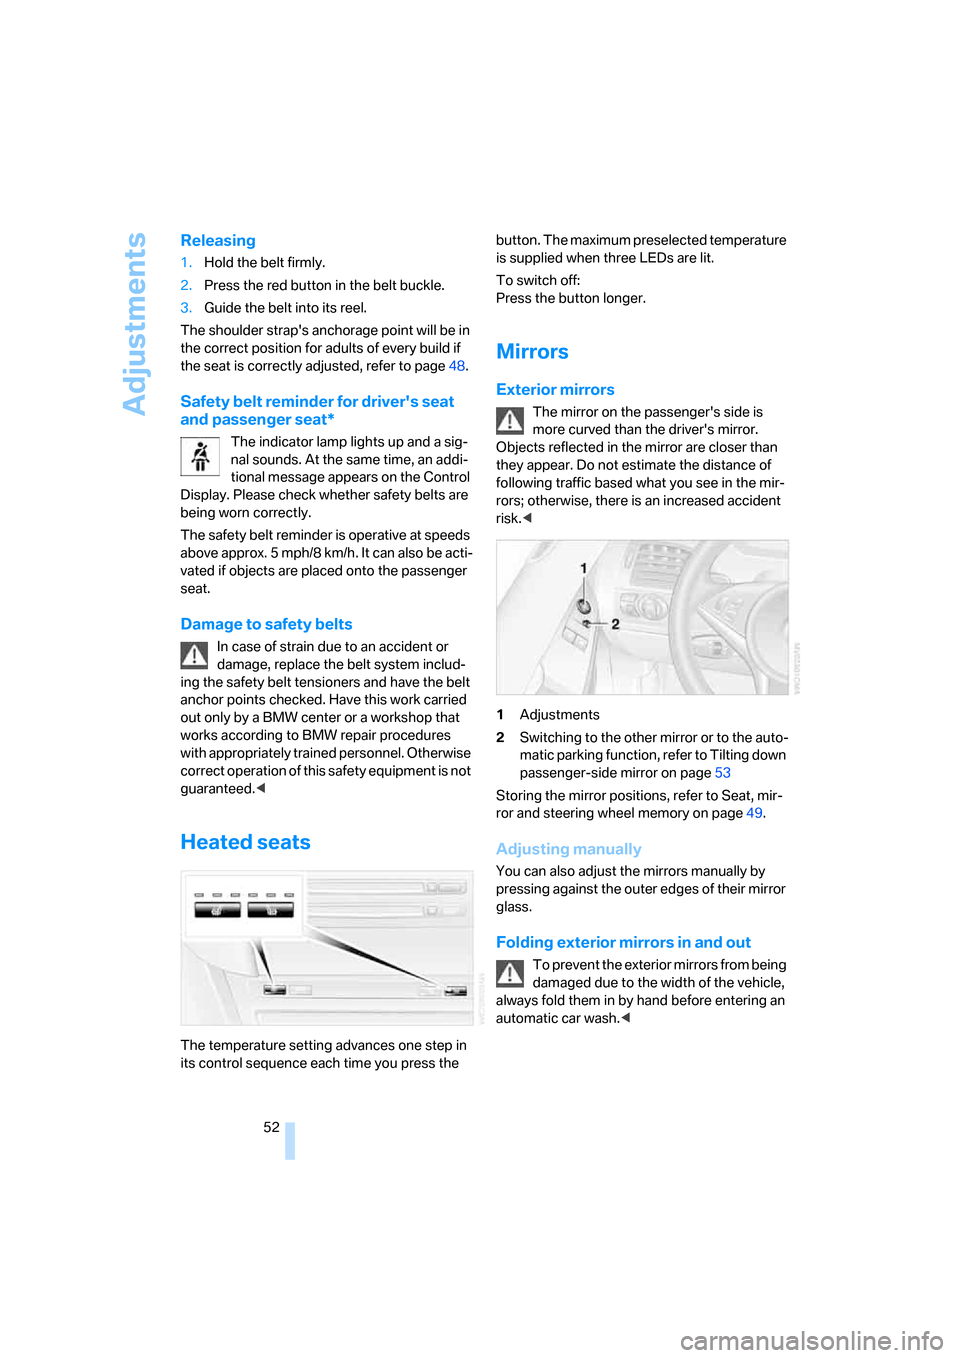
The temperature setting advances one step in
its control sequence each time you press the button. The maximum preselected temperature
is supplied when three LEDs are lit.
To switch off:
Press the button longer.
Mirrors
Exterior mirrors
The mirror on the passenger's side is
more curved than the driver's mirror.
Objects reflected in the mirror are closer than
they appear. Do not estimate the distance of
following traffic based what you see in the mir-
rors; otherwise, there is an increased accident
risk.<
1Adjustments
2Switching to the other mirror or to the auto-
matic parking function, refer to Tilting down
passenger-side mirror on page53
Storing the mirror positions, refer to Seat, mir-
ror and steering wheel memory on page49.
Adjusting manually
You can also adjust the mirrors manually by
pressing against the outer edges of their mirror
glass.
Folding exterior mirrors in and out
To prevent the exterior mirrors from being
damaged due to the width of the vehicle,
always fold them in by hand before entering an
automatic car wash.<
Page 54 of 236
Controls
53Reference
At a glance
Driving tips
Communications
Navigation
Entertainment
Mobility
Automatic functions
>Both exterior mirrors are automatically
heated when the engine is running or the
ignition is switched on.
>When the vehicle is moving forward, the
interior and exterior mirrors dim as a func-
tion of the incoming light.
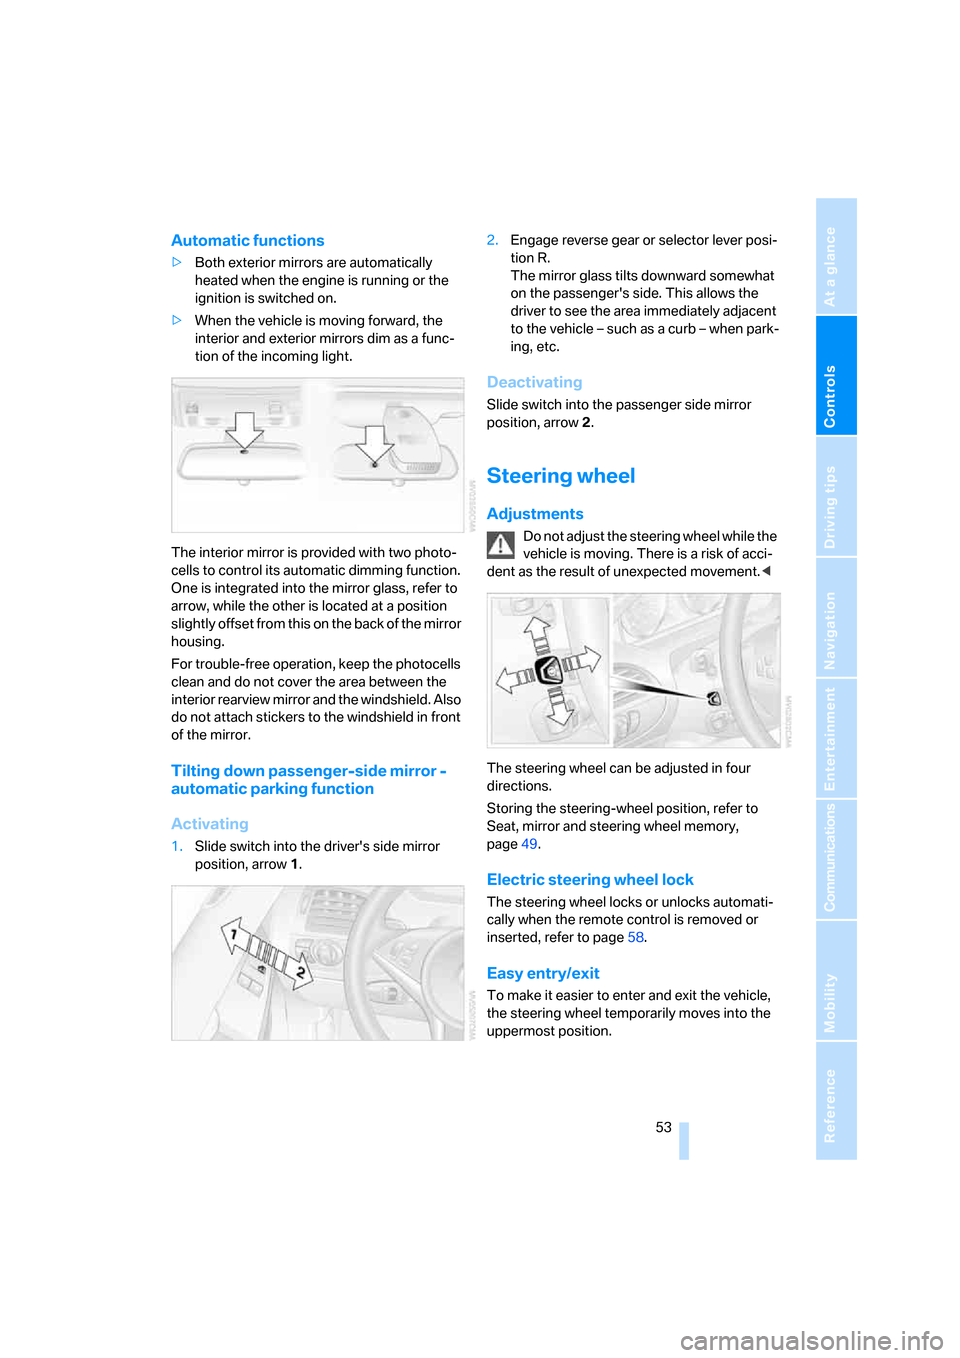
The interior mirror is provided with two photo-
cells to control its automatic dimming function.
One is integrated into the mirror glass, refer to
arrow, while the other is located at a position
slightly offset from this on the back of the mirror
housing.
For trouble-free operation, keep the photocells
clean and do not cover the area between the
interior rearview mirror and the windshield. Also
do not attach stickers to the windshield in front
of the mirror.
Tilting down passenger-side mirror -
automatic parking function
Activating
1.Slide switch into the driver's side mirror
position, arrow 1.2.Engage reverse gear or selector lever posi-
tion R.
The mirror glass tilts downward somewhat
on the passenger's side. This allows the
driver to see the area immediately adjacent
to the vehicle – such as a curb – when park-
ing, etc.
Deactivating
Slide switch into the passenger side mirror
position, arrow 2.
Steering wheel
Adjustments
Do not adjust the steering wheel while the
vehicle is moving. There is a risk of acci-
dent as the result of unexpected movement.<
The steering wheel can be adjusted in four
directions.
Storing the steering-wheel position, refer to
Seat, mirror and steering wheel memory,
page49.
Electric steering wheel lock
The steering wheel locks or unlocks automati-
cally when the remote control is removed or
inserted, refer to page58.
Easy entry/exit
To make it easier to enter and exit the vehicle,
the steering wheel temporarily moves into the
uppermost position.
Page 92 of 236
Controls
91Reference
At a glance
Driving tips
Communications
Navigation
Entertainment
Mobility
Protective action
To ensure that the safety systems con-
tinue to provide optimized protection,
please follow the adjustment instructions on
page47.<
The front airbags help protect the driver and
front passenger by responding to frontal
impacts in which safety belts alone cannot pro-
vide adequate restraint. When needed, the
head and side airbags help provide protection in
the event of a side impact. The relevant side air-
bag supports the side upper body area. The
head airbag supports the head. The knee airbag
protects the legs from colliding with the cockpit.
The airbags are deliberately not triggered in
every impact situation, e. g. less severe acci-
dents or rear-end collisions.
For details on the correct seat position, refer to
page47.
Do not apply adhesive materials to the
cover panels of the airbags, cover them or
modify them in any other way.
Do not attempt to remove the airbag retention
system from the vehicle. Do not modify or
tamper with either the wiring or the individual
components in the airbag system.This category
includes the upholstery in the center of the
steering wheel, on the instrument panel, the
side trim panels on the doors and on the Coupe,
the roof pillars along with the sides of the head-
liner. Do not attempt to remove or dismantle the
steering wheel.
Do not touch the individual components
directly after the system has been triggered,
because there is a danger of burns.
In the event of malfunctions, deactivation, or
triggering of the airbag restraint system, have
the testing, repair, removal, and disposal of air-
bag generators carried out only by a BMW cen-
ter or a workshop that works according to BMW
repair procedures with appropriately trained
personnel and has the required explosives
licenses. Unprofessional attempts to service
the system could lead to failure in an emer-
gency or undesired airbag activation, either of
which could result in personal injury.
Automatic deactivation of front
passenger airbags
The occupation of the seat is detected by eval-
uating the impression on the occupied seat sur-
face of the front passenger seat. The system
correspondingly activates or deactivates the
front, knee and side airbag on the front passen-
ger side.
The current status of the front passenger
airbag, i.e. deactivated or activated, is
indicated by the indicator lamp over the interior
rearview mirror, refer to Operating state of front
passenger airbags below.<
Before transporting a child in the front
passenger seat, read the safety informa-
tion and follow the instructions under Trans-
porting children safely, refer to page56.
The front, knee and side airbag on the front pas-
senger side can be deactivated for teenagers
and adults in certain seat positions; the indica-
tor lamp for the front passenger airbags lights
up when this occurs. In these cases, change the
seat position so that the front passenger air-
bags are activated and the indicator lamp goes
out. If the desired status cannot be produced by
changing the seat position, transport the corre-
sponding person in the rear seat.
Do not fit seat covers, seat cushion padding,
beaded mats or other items onto the front pas-
senger seat unless they are specifically recom-
mended by BMW. Do not place objects under
the seat which could press against the seat
from below. Otherwise a correct evaluation of
the occupied seat surface cannot be ensured.<
Page 227 of 236
Everything from A to Z
226 Malfunction
– convertible top43
– door lock32
– fuel filler door182
– glass sunroof41
– hotel function33
– luggage compartment lid34
Malfunction warnings, refer to
Check Control79
Manual air distribution102
Manual mode with automatic
transmission with
Steptronic63
"Manual" on the radio145
Manual operation
– convertible top43
– door lock32
– driver's door32
– fuel filler door182
– glass sunroof41
– hotel function33
– luggage compartment lid34
– selector lever interlock,
Automatic transmission63
Manual transmission60
"Map direction of travel"134
"Map facing north"134
Map for navigation
– changing scale134
– destination entry125
Map view133
Map view facing north133
Master key, refer to Keys/
remote control28
Maximum cooling103
Maximum speed with winter
tires189
Memory, refer to Seat, mirror
and steering wheel
memory49
Menus, refer to iDrive16
Microfilter104
Microphone
– for mobile phone14
– for voice command
system14
Mirror dimming feature53Mirrors52
– automatic curb monitor53
– heating53
– memory, refer to Seat, mirror
and steering wheel
memory49
"Missed calls"168
Missed calls168
Mobile communications
devices in vehicle115
Mobile phone
– accepted calls168
– adjusting volume
166
– calling167
– ending call167
– missed calls168
– operation via iDrive166
– redialing168
– refer to separate Owner's
Manual
– Top 8168
– touch tone dialing169
Mobile phones
– use in vehicle, refer to Mobile
communications devices in
vehicle115
Mobile Service, refer to
Roadside Assistance203
Monitor, refer to iDrive16
Monitoring pressure of tires,
refer to Flat Tire Monitor88
"Monitor on / off"54
Most recent mobile phone
numbers168
MP3, refer to Compressed
audio files153
Multi-function steering wheel,
refer to Buttons on steering
wheel11
Multifunction switch
– refer to Turn signals/
headlamp flasher64
– refer to Wiper/washer
system65
"Mute on / off"54
MW, waveband144
N
"Navigation"76,121
Navigation destination
– manual entry121,124
– selecting via map125
Navigation drive, installation
location120
Navigation DVD120
Navigation instructions, refer
to Switching voice instruc-
tions on/off135
Navigation system120
– address book128
– bypassing route
sections136
– destination entry121
– destination guidance in
assistance window120
– destination list127
– displaying current
position136
– entering a destination
manually121,124
– last destinations127
– looking for interesting
destination126
– route display133
– route list134
– selecting destination using
information126
– selecting destination via
map125
– selecting route criteria130
– starting121
– starting destination
guidance132
– switching off, refer to Termi-
nating/continuing desti-
nation guidance132
– terminating/continuing
destination guidance132
– voice instructions135
– volume adjustment135
"Navigation voice
instructions"54
"Navigation voice instructions
on"135