2006 BMW 650I COUPE ECU
[x] Cancel search: ECUPage 62 of 236
Controls
61Reference
At a glance
Driving tips
Communications
Navigation
Entertainment
Mobility
Reverse gear
Select only when the vehicle is stationary.
Press the gearshift lever to the left, overcoming
a slight resistance.
The backup lamps switch on automatically with
the ignition switched on.
SMG Sequential Manual
Gearbox*
The concept
The SMG Sequential Manual Gearbox is an
automated manual transmission in which an
electrohydraulic system handles the clutching
and gear changes.
You operate the SMG using the selector-lever
in the center console and two shift paddles on
the steering wheel.
It offers the following functions:
>Choice of manual or automatic mode:
Sequential mode or Drive mode
>Choice of two drive programs: Normal or
Sport, refer to Dynamic Driving Control
page64
>Automatic downshifting and protection
against incorrect shifting even in sequential
operation
>Acceleration assistant, refer to page64.
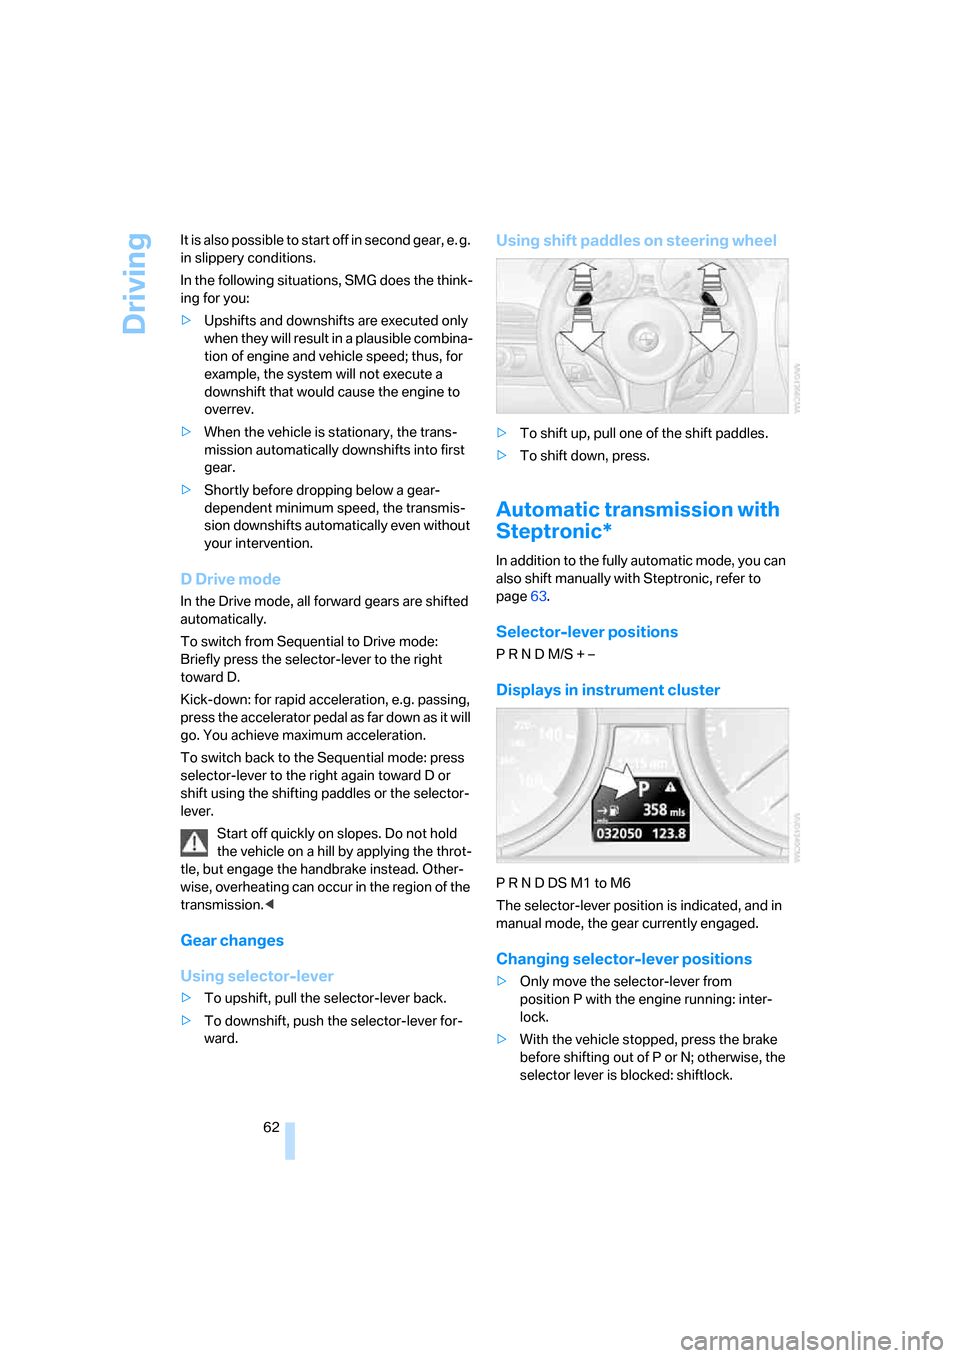
Selector-lever positions
The current selector-lever position is displayed
in the center console.
>R: Reverse gear
>N: Neutral, idle>One-touch functions for Sequential mode:
+: manual upshifting
–: manual downshifting
>D: activate/deactivate the Drive mode
The transmission automatically shifts
into N if the driver's door is opened with
the engine running and neither the pedals, the
shift paddles nor the selector-lever are oper-
ated.
This is indicated by an acoustic signal and the
flashing display N in the instrument cluster.<
Gear display
R N 1 to 6
The currently engaged gear is displayed pre-
ceded by a D in Drive mode.
This display is your only way to be sure
the desired selector lever position is actu-
ally engaged.<
Shiftlock
Press the brake pedal before shifting out of N;
the shift command will not be executed unless
the brake is applied.
R Reverse
Select only when the vehicle is stationary.
Sequential mode
After every engine start, as soon as the selector
lever is pushed to the right and the brake pedal
is pressed, the Sequential mode is activated.
You can shift up and down using the shifting
paddles or the selector-lever. You do not need
to remove your foot from the accelerator to
do so.
Page 63 of 236
Driving
62 It is also possible to start off in second gear, e. g.
in slippery conditions.
In the following situations, SMG does the think-
ing for you:
>Upshifts and downshifts are executed only
when they will result in a plausible combina-
tion of engine and vehicle speed; thus, for
example, the system will not execute a
downshift that would cause the engine to
overrev.
>When the vehicle is stationary, the trans-
mission automatically downshifts into first
gear.
>Shortly before dropping below a gear-
dependent minimum speed, the transmis-
sion downshifts automatically even without
your intervention.
D Drive mode
In the Drive mode, all forward gears are shifted
automatically.
To switch from Sequential to Drive mode:
Briefly press the selector-lever to the right
toward D.
Kick-down: for rapid acceleration, e.g. passing,
press the accelerator pedal as far down as it will
go. You achieve maximum acceleration.
To switch back to the Sequential mode: press
selector-lever to the right again toward D or
shift using the shifting paddles or the selector-
lever.
Start off quickly on slopes. Do not hold
the vehicle on a hill by applying the throt-
tle, but engage the handbrake instead. Other-
wise, overheating can occur in the region of the
transmission.<
Gear changes
Using selector-lever
>To upshift, pull the selector-lever back.
>To downshift, push the selector-lever for-
ward.
Using shift paddles on steering wheel
>To shift up, pull one of the shift paddles.
>To shift down, press.
Automatic transmission with
Steptronic*
In addition to the fully automatic mode, you can
also shift manually with Steptronic, refer to
page63.
Selector-lever positions
P R N D M/S + –
Displays in instrument cluster
P R N D DS M1 to M6
The selector-lever position is indicated, and in
manual mode, the gear currently engaged.
Changing selector-lever positions
>Only move the selector-lever from
position P with the engine running: inter-
lock.
>With the vehicle stopped, press the brake
before shifting out of P or N; otherwise, the
selector lever is blocked: shiftlock.
Page 64 of 236
Controls
63Reference
At a glance
Driving tips
Communications
Navigation
Entertainment
Mobility
To prevent the vehicle from creeping
after you select a driving position,
maintain pressure on the brake pedal until
you are ready to start.<
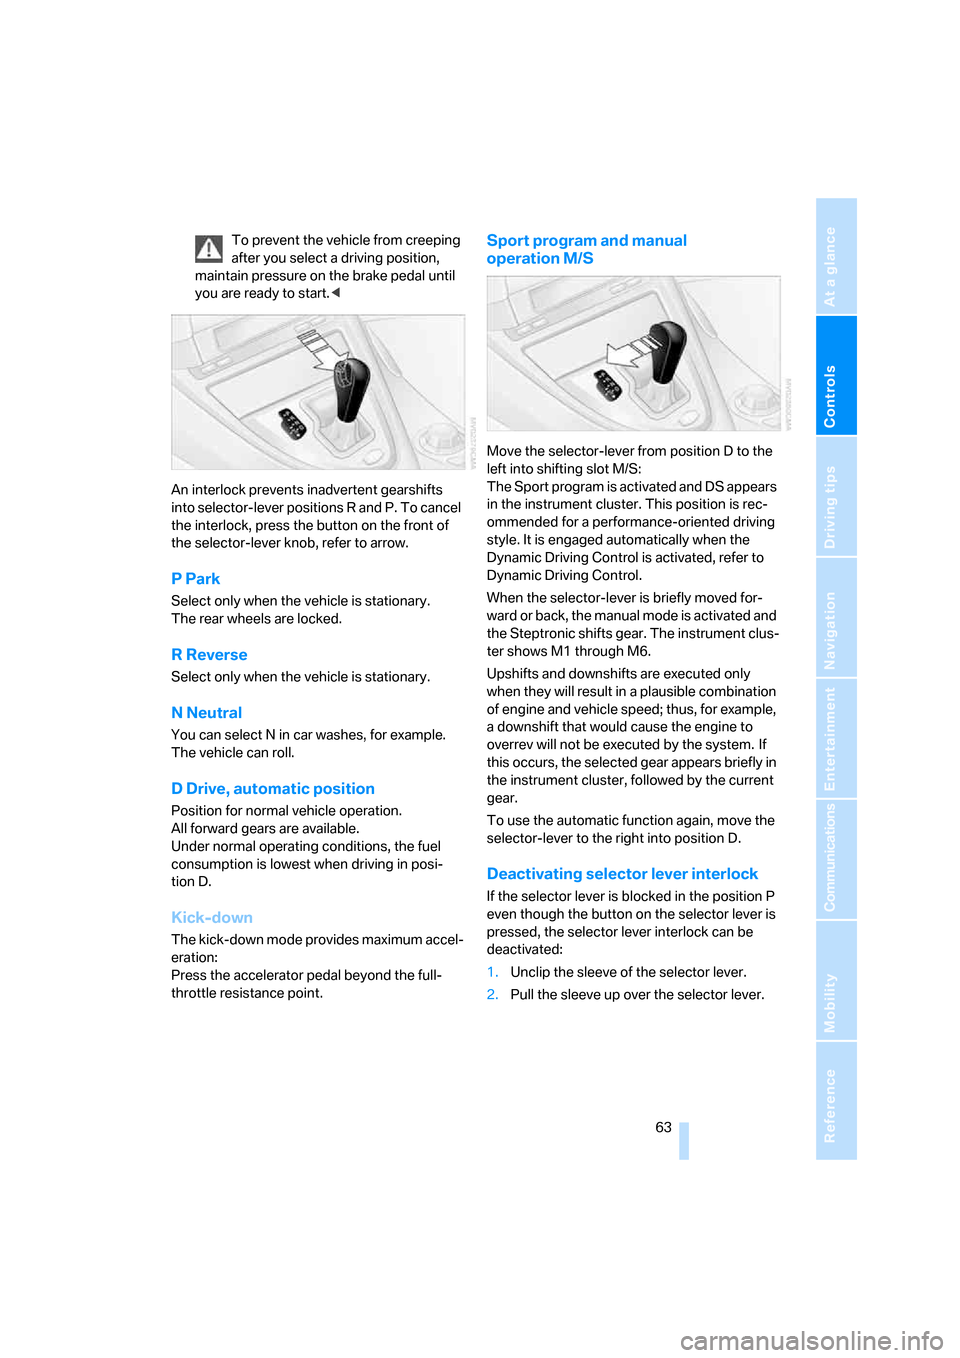
An interlock prevents inadvertent gearshifts
into selector-lever positions R and P. To cancel
the interlock, press the button on the front of
the selector-lever knob, refer to arrow.
P Park
Select only when the vehicle is stationary.
The rear wheels are locked.
R Reverse
Select only when the vehicle is stationary.
N Neutral
You can select N in car washes, for example.
The vehicle can roll.
D Drive, automatic position
Position for normal vehicle operation.
All forward gears are available.
Under normal operating conditions, the fuel
consumption is lowest when driving in posi-
tion D.
Kick-down
The kick-down mode provides maximum accel-
eration:
Press the accelerator pedal beyond the full-
throttle resistance point.
Sport program and manual
operation M/S
Move the selector-lever from position D to the
left into shifting slot M/S:
The Sport program is activated and DS appears
in the instrument cluster. This position is rec-
ommended for a performance-oriented driving
style. It is engaged automatically when the
Dynamic Driving Control is activated, refer to
Dynamic Driving Control.
When the selector-lever is briefly moved for-
ward or back, the manual mode is activated and
the Steptronic shifts gear. The instrument clus-
ter shows M1 through M6.
Upshifts and downshifts are executed only
when they will result in a plausible combination
of engine and vehicle speed; thus, for example,
a downshift that would cause the engine to
overrev will not be executed by the system. If
this occurs, the selected gear appears briefly in
the instrument cluster, followed by the current
gear.
To use the automatic function again, move the
selector-lever to the right into position D.
Deactivating selector lever interlock
If the selector lever is blocked in the position P
even though the button on the selector lever is
pressed, the selector lever interlock can be
deactivated:
1.Unclip the sleeve of the selector lever.
2.Pull the sleeve up over the selector lever.
Page 72 of 236
Controls
71Reference
At a glance
Driving tips
Communications
Navigation
Entertainment
Mobility
If the display ACC --- mph/km/h briefly
appears in the instrument cluster, it might
be that conditions necessary for operation are
not currently being met. To call up Check Con-
trol messages, refer to page79.<
Warning lamps
The display2 flashes red and a sig-
nal sounds.
The system is warning you to inter-
vene by braking or executing an
evasive maneuver. The active
cruise control cannot automatically restore the
distance to the vehicle driving ahead.
This display does not, however, relieve the
driver of the responsibility for adapting desired
speed and driving style to traffic conditions.
The display2 flashes yellow.
Automatic intervention by ABS or
DSC. The active cruise control
intervenes by braking until you
actively take over.
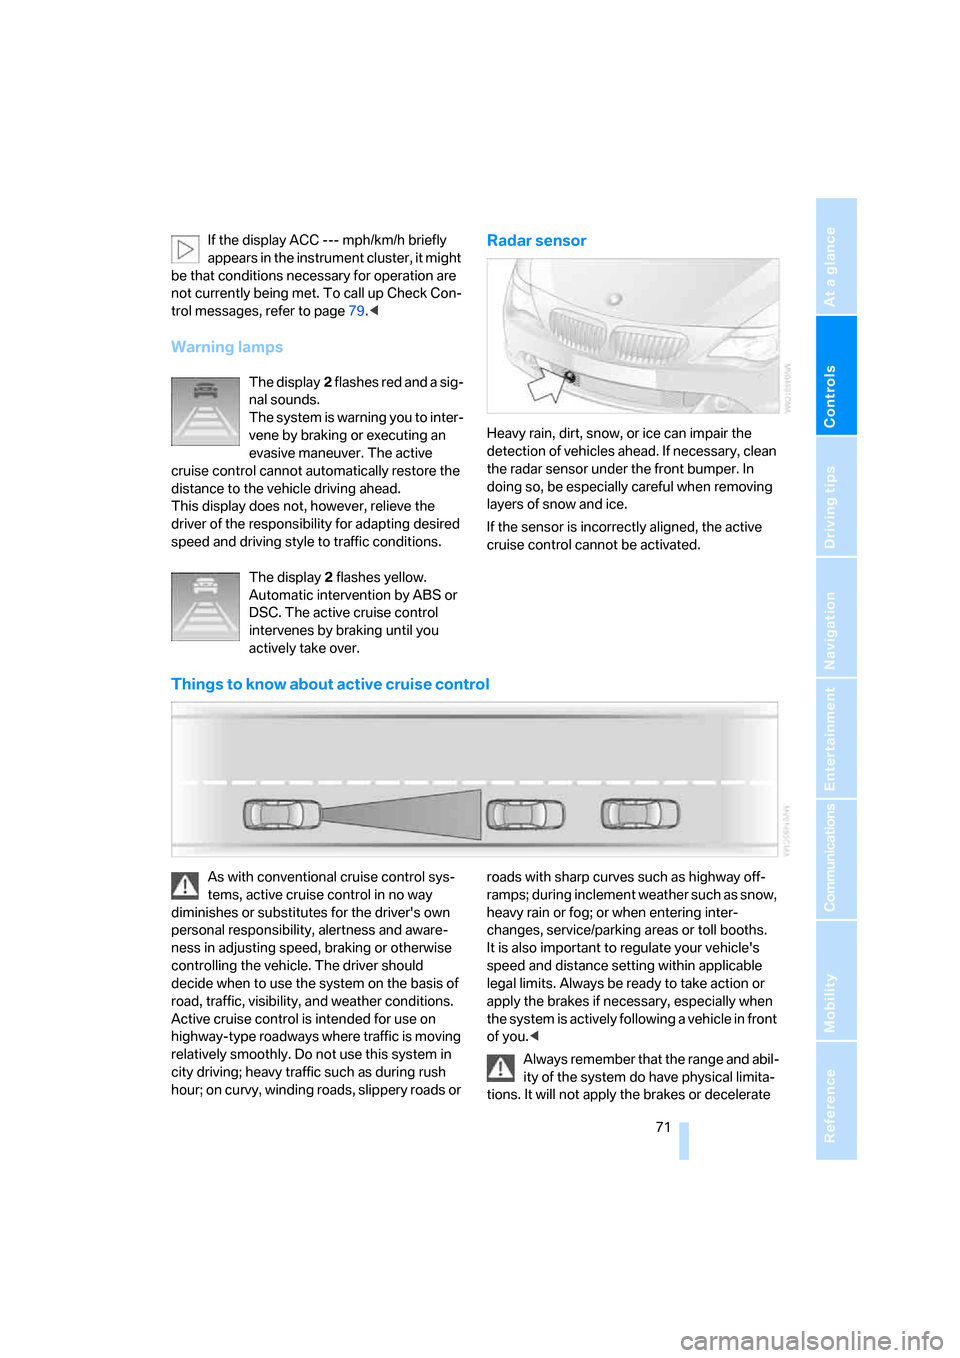
Radar sensor
Heavy rain, dirt, snow, or ice can impair the
detection of vehicles ahead. If necessary, clean
the radar sensor under the front bumper. In
doing so, be especially careful when removing
layers of snow and ice.
If the sensor is incorrectly aligned, the active
cruise control cannot be activated.
Things to know about active cruise control
As with conventional cruise control sys-
tems, active cruise control in no way
diminishes or substitutes for the driver's own
personal responsibility, alertness and aware-
ness in adjusting speed, braking or otherwise
controlling the vehicle. The driver should
decide when to use the system on the basis of
road, traffic, visibility, and weather conditions.
Active cruise control is intended for use on
highway-type roadways where traffic is moving
relatively smoothly. Do not use this system in
city driving; heavy traffic such as during rush
hour; on curvy, winding roads, slippery roads or roads with sharp curves such as highway off-
ramps; during inclement weather such as snow,
heavy rain or fog; or when entering inter-
changes, service/parking areas or toll booths.
It is also important to regulate your vehicle's
speed and distance setting within applicable
legal limits. Always be ready to take action or
apply the brakes if necessary, especially when
the system is actively following a vehicle in front
of you.<
Always remember that the range and abil-
ity of the system do have physical limita-
tions. It will not apply the brakes or decelerate
Page 82 of 236
Controls
81Reference
At a glance
Driving tips
Communications
Navigation
Entertainment
Mobility
Displays after completion of trip
Malfunction reports generated during the trip
are shown consecutively when you switch off
the ignition.
Before the display disappears, you can display
the messages once again. Press the CHECK
button for approx. 2 seconds. If several mes-
sages are present, you can press the CHECK
button repeatedly.
The display:
>turns off automatically after a brief period
>can be turned off at any time by pressing
the CHECK button again for approx. 2 sec-
onds
Speed limit
You can enter a speed and a Check Control
message indicates when you have reached
this speed. This enables you, for example, to
receive warnings if you exceed a speed limit in
an urban area.
You are only warned of reaching this speed a
second time if your vehicle has fallen at least
3 mph/5 km/h below it in the meantime.
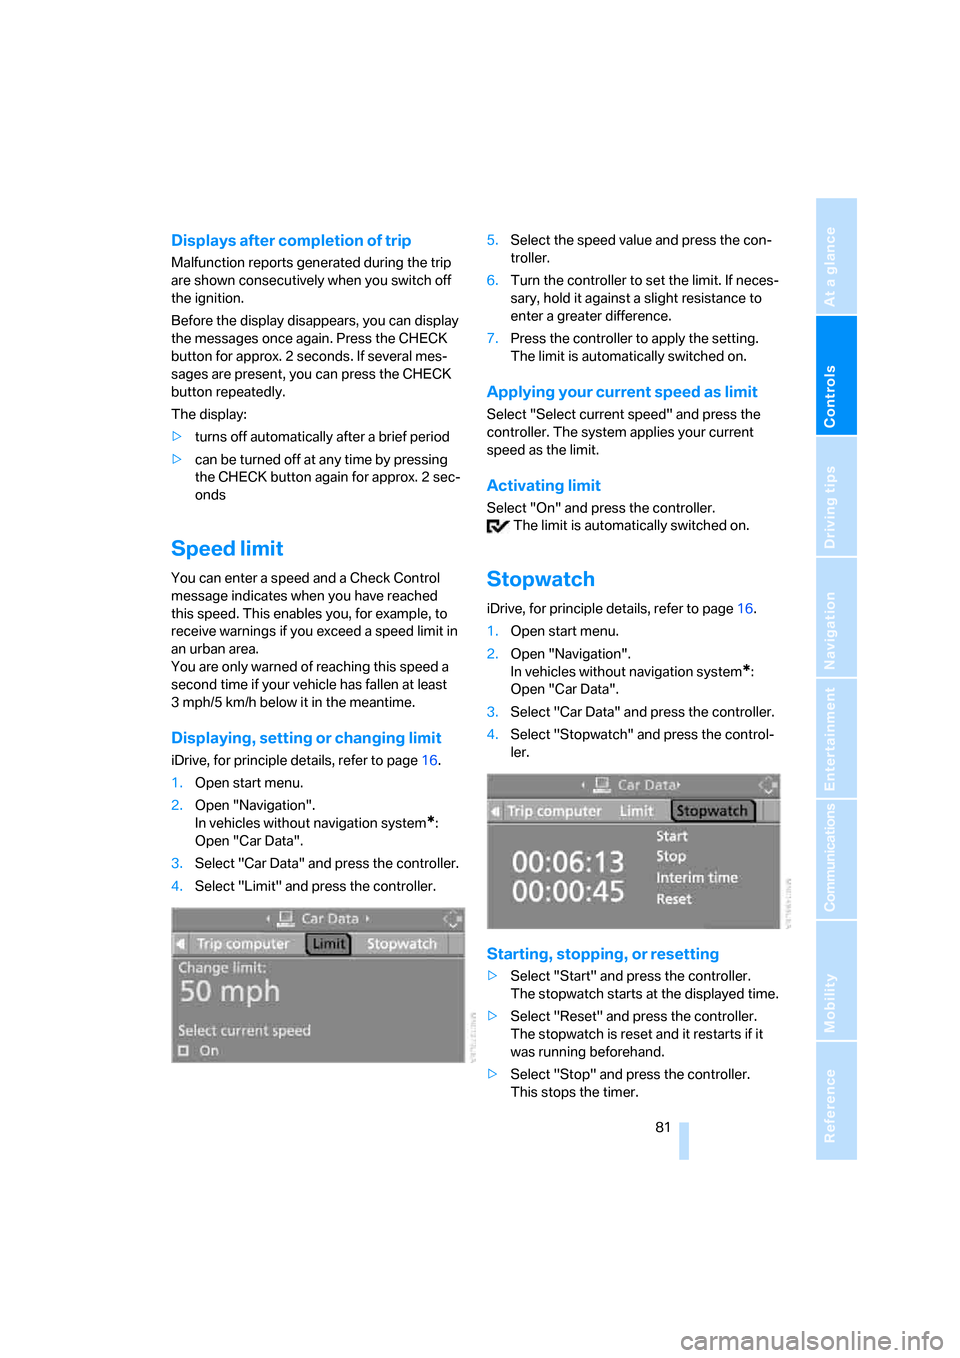
Displaying, setting or changing limit
iDrive, for principle details, refer to page16.
1.Open start menu.
2.Open "Navigation".
In vehicles without navigation system
*:
Open "Car Data".
3.Select "Car Data" and press the controller.
4.Select "Limit" and press the controller.5.Select the speed value and press the con-
troller.
6.Turn the controller to set the limit. If neces-
sary, hold it against a slight resistance to
enter a greater difference.
7.Press the controller to apply the setting.
The limit is automatically switched on.
Applying your current speed as limit
Select "Select current speed" and press the
controller. The system applies your current
speed as the limit.
Activating limit
Select "On" and press the controller.
The limit is automatically switched on.
Stopwatch
iDrive, for principle details, refer to page16.
1.Open start menu.
2.Open "Navigation".
In vehicles without navigation system
*:
Open "Car Data".
3.Select "Car Data" and press the controller.
4.Select "Stopwatch" and press the control-
ler.
Starting, stopping, or resetting
>Select "Start" and press the controller.
The stopwatch starts at the displayed time.
>Select "Reset" and press the controller.
The stopwatch is reset and it restarts if it
was running beforehand.
>Select "Stop" and press the controller.
This stops the timer.
Page 107 of 236
Practical interior accessories
106
Practical interior accessories
Integrated universal remote
control*
The concept
The integrated universal remote control
replaces up to three different hand-held trans-
mitters for various items of radio-controlled
equipment such as door openers and house
alarm systems. The integrated universal remote
control registers and stores signals from the
original hand-held transmitters.
The signal of an original hand-held transmitter
can be programmed on one of the three mem-
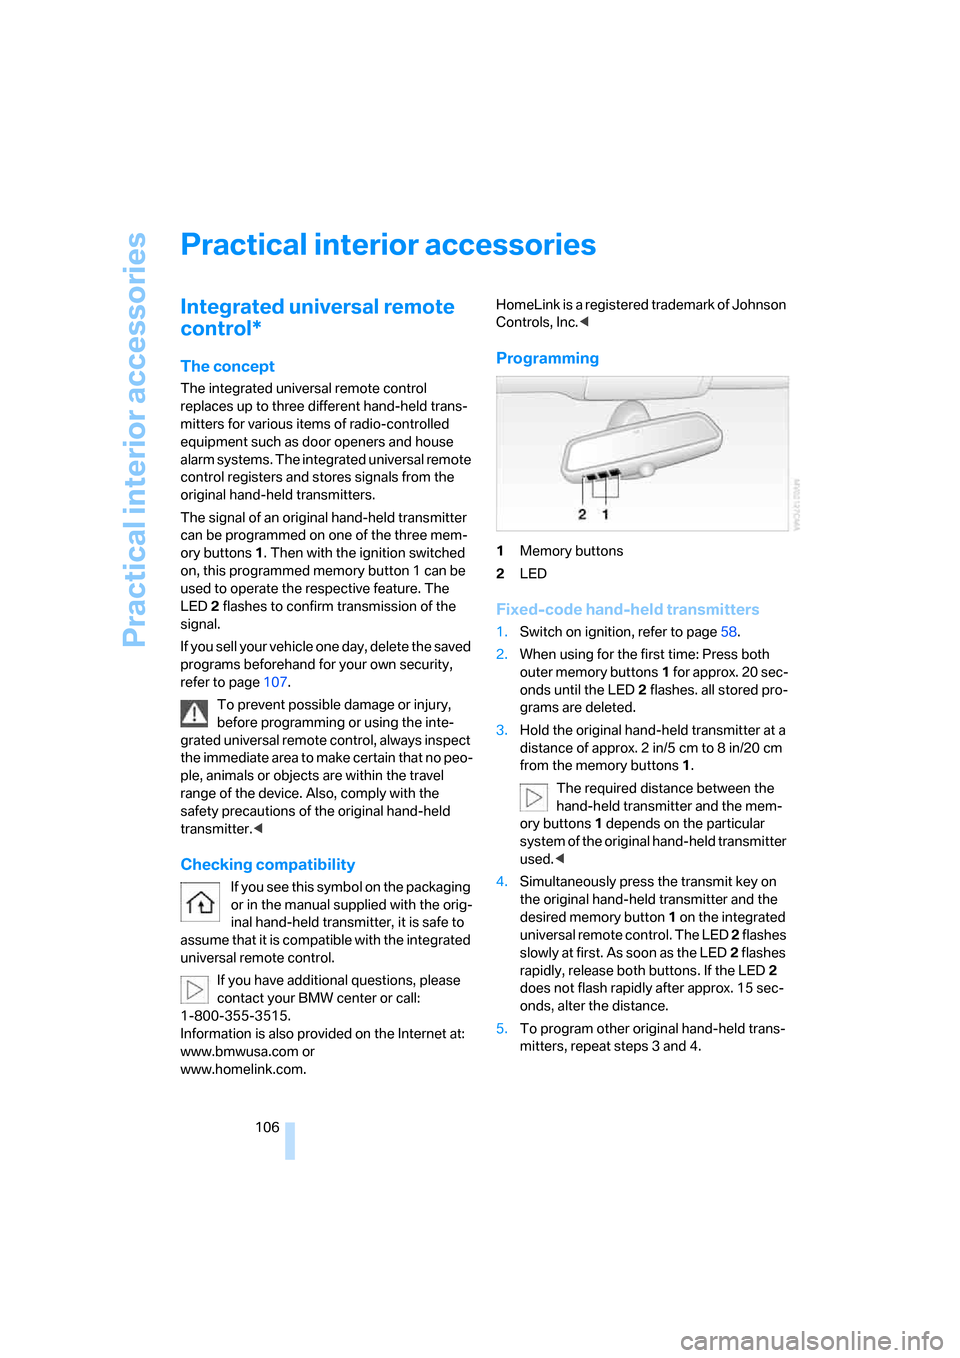
ory buttons1. Then with the ignition switched
on, this programmed memory button 1 can be
used to operate the respective feature. The
LED2 flashes to confirm transmission of the
signal.
If you sell your vehicle one day, delete the saved
programs beforehand for your own security,
refer to page107.
To prevent possible damage or injury,
before programming or using the inte-
grated universal remote control, always inspect
the immediate area to make certain that no peo-
ple, animals or objects are within the travel
range of the device. Also, comply with the
safety precautions of the original hand-held
transmitter.<
Checking compatibility
If you see this symbol on the packaging
or in the manual supplied with the orig-
inal hand-held transmitter, it is safe to
assume that it is compatible with the integrated
universal remote control.
If you have additional questions, please
contact your BMW center or call:
1-800-355-3515.
Information is also provided on the Internet at:
www.bmwusa.com or
www.homelink.com.HomeLink is a registered trademark of Johnson
Controls, Inc.<
Programming
1Memory buttons
2LED
Fixed-code hand-held transmitters
1.Switch on ignition, refer to page58.
2.When using for the first time: Press both
outer memory buttons1 for approx. 20 sec-
onds until the LED2 flashes. all stored pro-
grams are deleted.
3.Hold the original hand-held transmitter at a
distance of approx. 2 in/5 cm to 8 in/20 cm
from the memory buttons1.
The required distance between the
hand-held transmitter and the mem-
ory buttons1 depends on the particular
system of the original hand-held transmitter
used.<
4.Simultaneously press the transmit key on
the original hand-held transmitter and the
desired memory button 1 on the integrated
universal remote control. The LED 2 flashes
slowly at first. As soon as the LED2 flashes
rapidly, release both buttons. If the LED2
does not flash rapidly after approx. 15 sec-
onds, alter the distance.
5.To program other original hand-held trans-
mitters, repeat steps 3 and 4.
Page 111 of 236
Practical interior accessories
110
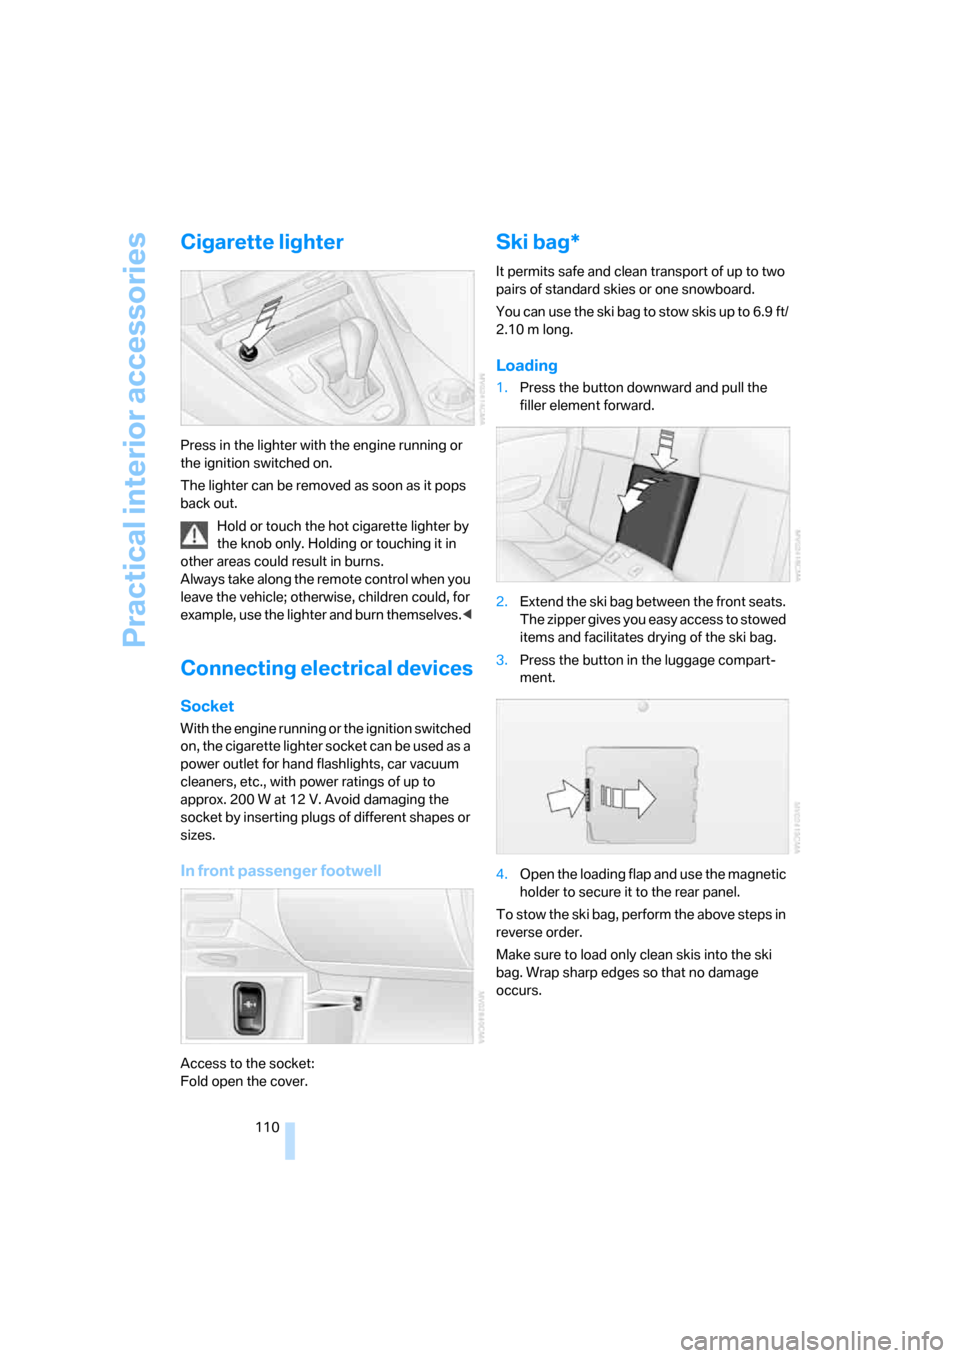
Cigarette lighter
Press in the lighter with the engine running or
the ignition switched on.
The lighter can be removed as soon as it pops
back out.
Hold or touch the hot cigarette lighter by
the knob only. Holding or touching it in
other areas could result in burns.
Always take along the remote control when you
leave the vehicle; otherwise, children could, for
example, use the lighter and burn themselves.<
Connecting electrical devices
Socket
With the engine running or the ignition switched
on, the cigarette lighter socket can be used as a
power outlet for hand flashlights, car vacuum
cleaners, etc., with power ratings of up to
approx. 200 W at 12 V. Avoid damaging the
socket by inserting plugs of different shapes or
sizes.
In front passenger footwell
Access to the socket:
Fold open the cover.
Ski bag*
It permits safe and clean transport of up to two
pairs of standard skies or one snowboard.
You can use the ski bag to stow skis up to 6.9 ft/
2.10 m long.
Loading
1.Press the button downward and pull the
filler element forward.
2.Extend the ski bag between the front seats.
The zipper gives you easy access to stowed
items and facilitates drying of the ski bag.
3.Press the button in the luggage compart-
ment.
4.Open the loading flap and use the magnetic
holder to secure it to the rear panel.
To stow the ski bag, perform the above steps in
reverse order.
Make sure to load only clean skis into the ski
bag. Wrap sharp edges so that no damage
occurs.
Page 112 of 236
Controls
111Reference
At a glance
Driving tips
Communications
Navigation
Entertainment
Mobility
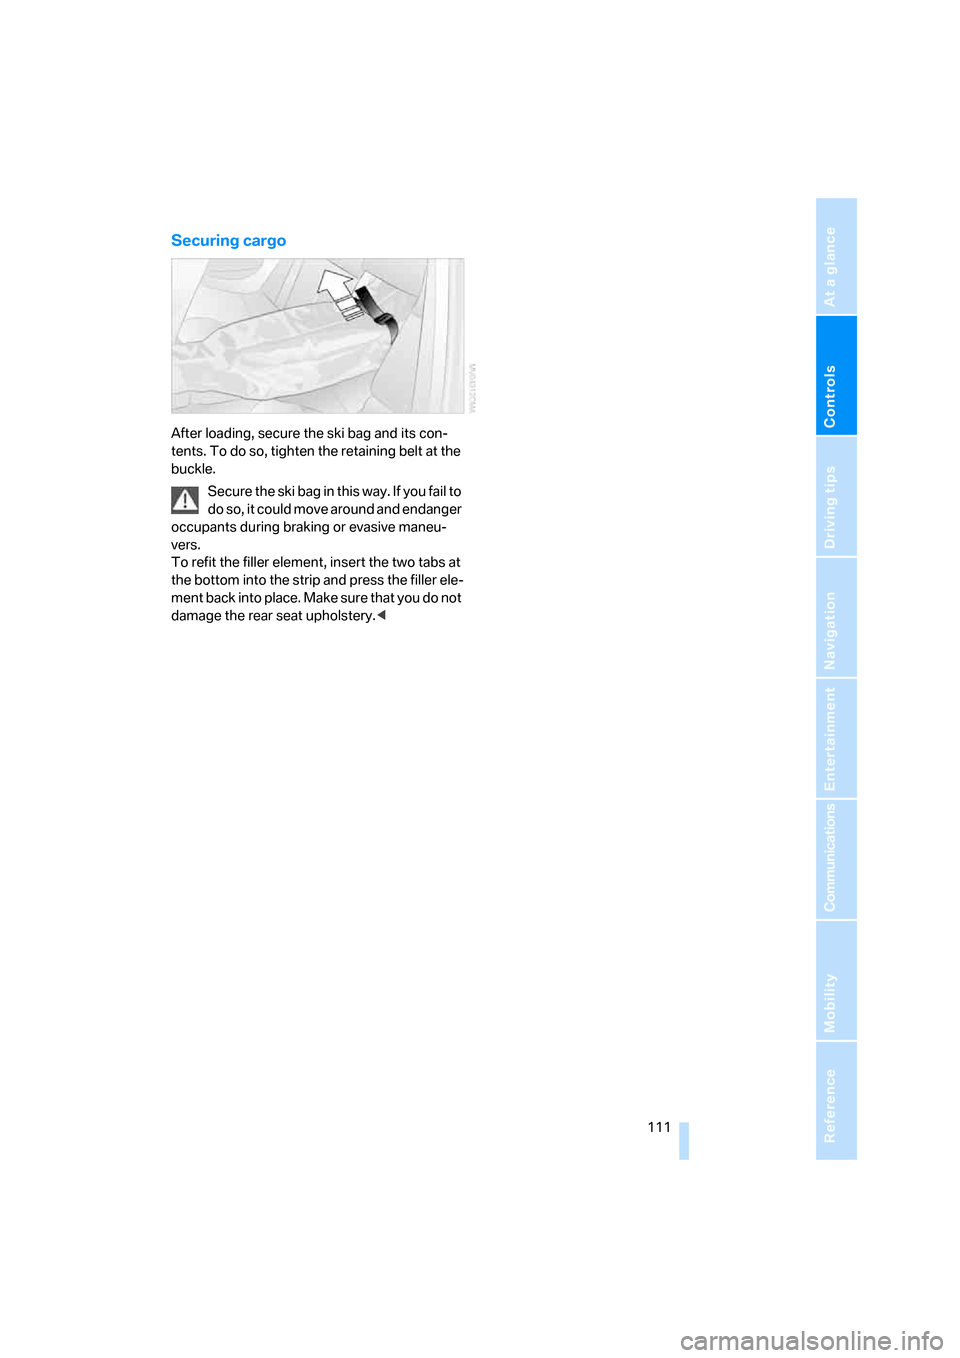
Securing cargo
After loading, secure the ski bag and its con-
tents. To do so, tighten the retaining belt at the
buckle.
Secure the ski bag in this way. If you fail to
do so, it could move around and endanger
occupants during braking or evasive maneu-
vers.
To refit the filler element, insert the two tabs at
the bottom into the strip and press the filler ele-
ment back into place. Make sure that you do not
damage the rear seat upholstery.<