2006 BMW 650I COUPE fuel consumption
[x] Cancel search: fuel consumptionPage 18 of 236
At a glance
17Reference
Controls
Driving tips
Communications
Navigation
Entertainment
Mobility
Menu overview
Communication
>Telephone*
>BMW Assist* or TeleService*
Navigation or onboard information
>Navigation system*
>Onboard info, e.g. for displaying of the
average fuel consumption
Entertainment
>Radio
>CD player and CD changer
*
Climate
>Air distribution
>Automatic program
>Parked car ventilation
menu
>Switching off the Control Display
>Tone and display settings
>Settings for your vehicle, e.g. for the central
locking system
>Display of the service requirements and
dates for statutory emission and vehicle
inspections
>Settings for the telephone
Basic operation
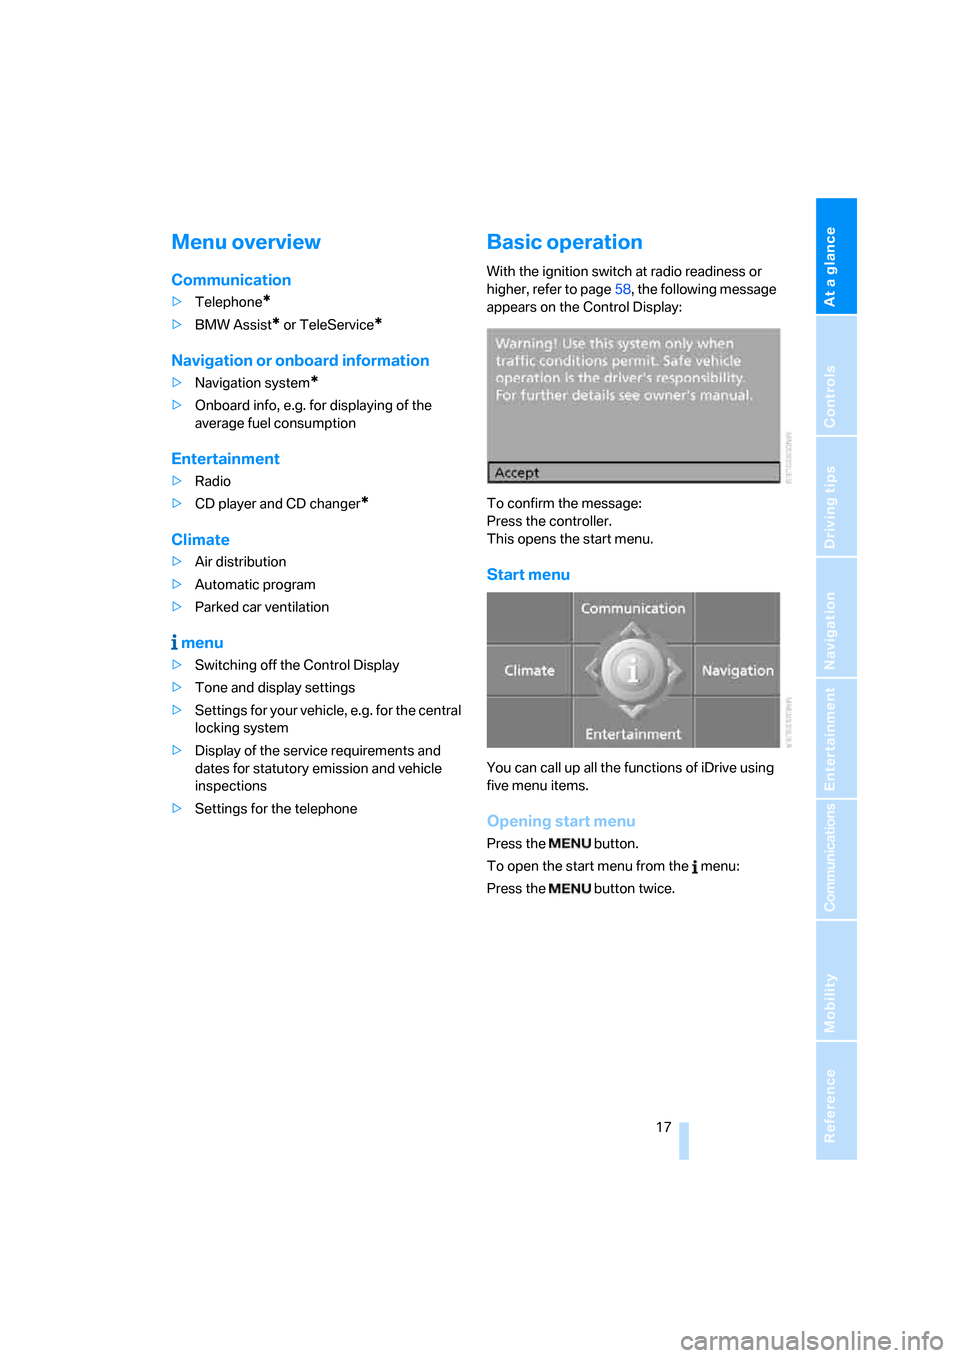
With the ignition switch at radio readiness or
higher, refer to page58, the following message
appears on the Control Display:
To confirm the message:
Press the controller.
This opens the start menu.
Start menu
You can call up all the functions of iDrive using
five menu items.
Opening start menu
Press the button.
To open the start menu from the menu:
Press the button twice.
Page 30 of 236

Controls
29Reference
At a glance
Driving tips
Communications
Navigation
Entertainment
Mobility
Remove the adapter from the holder in the
glove compartment and slide the spare key into
the adapter.
Personal Profile
The concept
You can set a number of functions of your BMW
individually according to your preferences.
Personal Profile ensures that most of these set-
tings are stored for the remote control currently
in use without you having to do anything. When
the vehicle is unlocked, the corresponding
remote control is detected and the settings
stored for it are called up and carried out.
This means that you will always find your BMW
set to your own personal settings even if
another person with his/her own remote control
and settings has used the vehicle since the last
time you drove it. The individual settings are
stored for a maximum of four remote controls.
Personal Profile settings
>When unlocking with the remote control,
either unlock only the driver's door or
unlock the entire vehicle, refer to page30
>Locking the vehicle after a short time or
after starting to drive, refer to page32
>Assigning the programmable buttons on
the steering wheel, refer to page54>Display settings for the Control Display:
>Brightness of the Control Display, refer
to page83
>Units of measure for consumption,
route/distances, temperature and pres-
sure, refer to page83
>Language on the Control Display, refer
to page84
>12h/24h clock mode, refer to page83
>Date format, refer to page83
>Displaying optical warning for the PDC Park
Distance Control
*, refer to page85
>Selection and brightness of the display for
the Head-Up Display
*, refer to page94
>Air distribution, temperature in the upper
body region, and intensity for the automatic
climate control, refer to page101
>Adjusting the voice instructions for the des-
tination guidance of the navigation sys-
tem
*, refer to page135
The most recent settings for the following are
also called up during unlocking:
>Driver's seat, exterior-mirror and steering-
wheel position, refer to page49
>The volume and tone settings for audio
sources, refer to page141
>The display of the stored stations for the
radio, refer to page144
>The volume setting for the telephone, refer
to page166
Central locking system
The concept
The central locking system is ready for opera-
tion whenever the driver's door is closed.
The system either locks or unlocks all of the fol-
lowing:
>Doors
>Compartment in the front center console
>Luggage compartment lid
>Fuel filler door
Page 64 of 236
Controls
63Reference
At a glance
Driving tips
Communications
Navigation
Entertainment
Mobility
To prevent the vehicle from creeping
after you select a driving position,
maintain pressure on the brake pedal until
you are ready to start.<
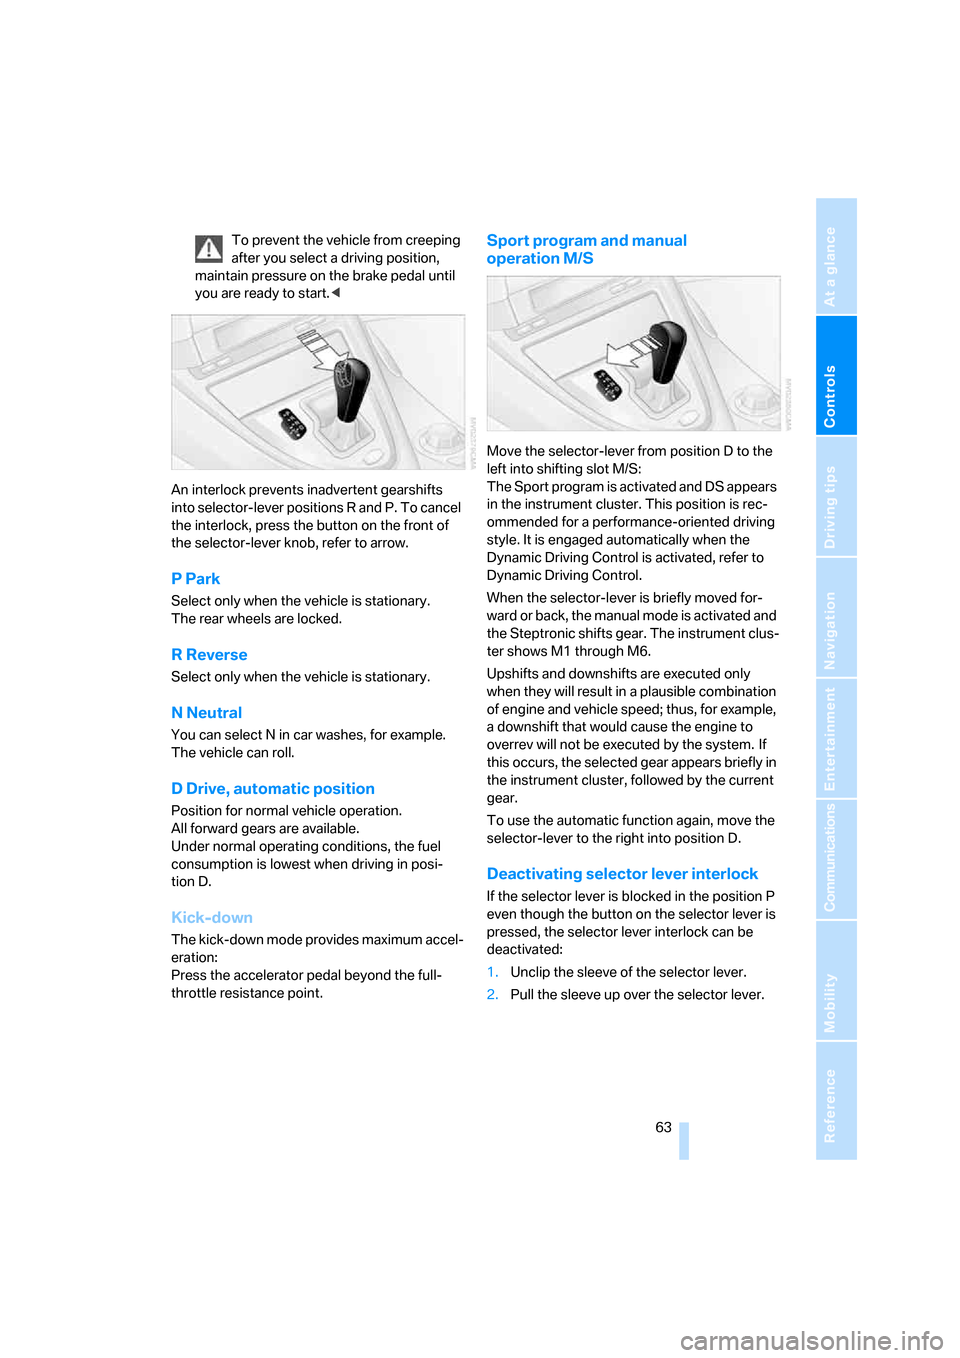
An interlock prevents inadvertent gearshifts
into selector-lever positions R and P. To cancel
the interlock, press the button on the front of
the selector-lever knob, refer to arrow.
P Park
Select only when the vehicle is stationary.
The rear wheels are locked.
R Reverse
Select only when the vehicle is stationary.
N Neutral
You can select N in car washes, for example.
The vehicle can roll.
D Drive, automatic position
Position for normal vehicle operation.
All forward gears are available.
Under normal operating conditions, the fuel
consumption is lowest when driving in posi-
tion D.
Kick-down
The kick-down mode provides maximum accel-
eration:
Press the accelerator pedal beyond the full-
throttle resistance point.
Sport program and manual
operation M/S
Move the selector-lever from position D to the
left into shifting slot M/S:
The Sport program is activated and DS appears
in the instrument cluster. This position is rec-
ommended for a performance-oriented driving
style. It is engaged automatically when the
Dynamic Driving Control is activated, refer to
Dynamic Driving Control.
When the selector-lever is briefly moved for-
ward or back, the manual mode is activated and
the Steptronic shifts gear. The instrument clus-
ter shows M1 through M6.
Upshifts and downshifts are executed only
when they will result in a plausible combination
of engine and vehicle speed; thus, for example,
a downshift that would cause the engine to
overrev will not be executed by the system. If
this occurs, the selected gear appears briefly in
the instrument cluster, followed by the current
gear.
To use the automatic function again, move the
selector-lever to the right into position D.
Deactivating selector lever interlock
If the selector lever is blocked in the position P
even though the button on the selector lever is
pressed, the selector lever interlock can be
deactivated:
1.Unclip the sleeve of the selector lever.
2.Pull the sleeve up over the selector lever.
Page 76 of 236
Controls
75Reference
At a glance
Driving tips
Communications
Navigation
Entertainment
Mobility
Engine oil temperature gauge
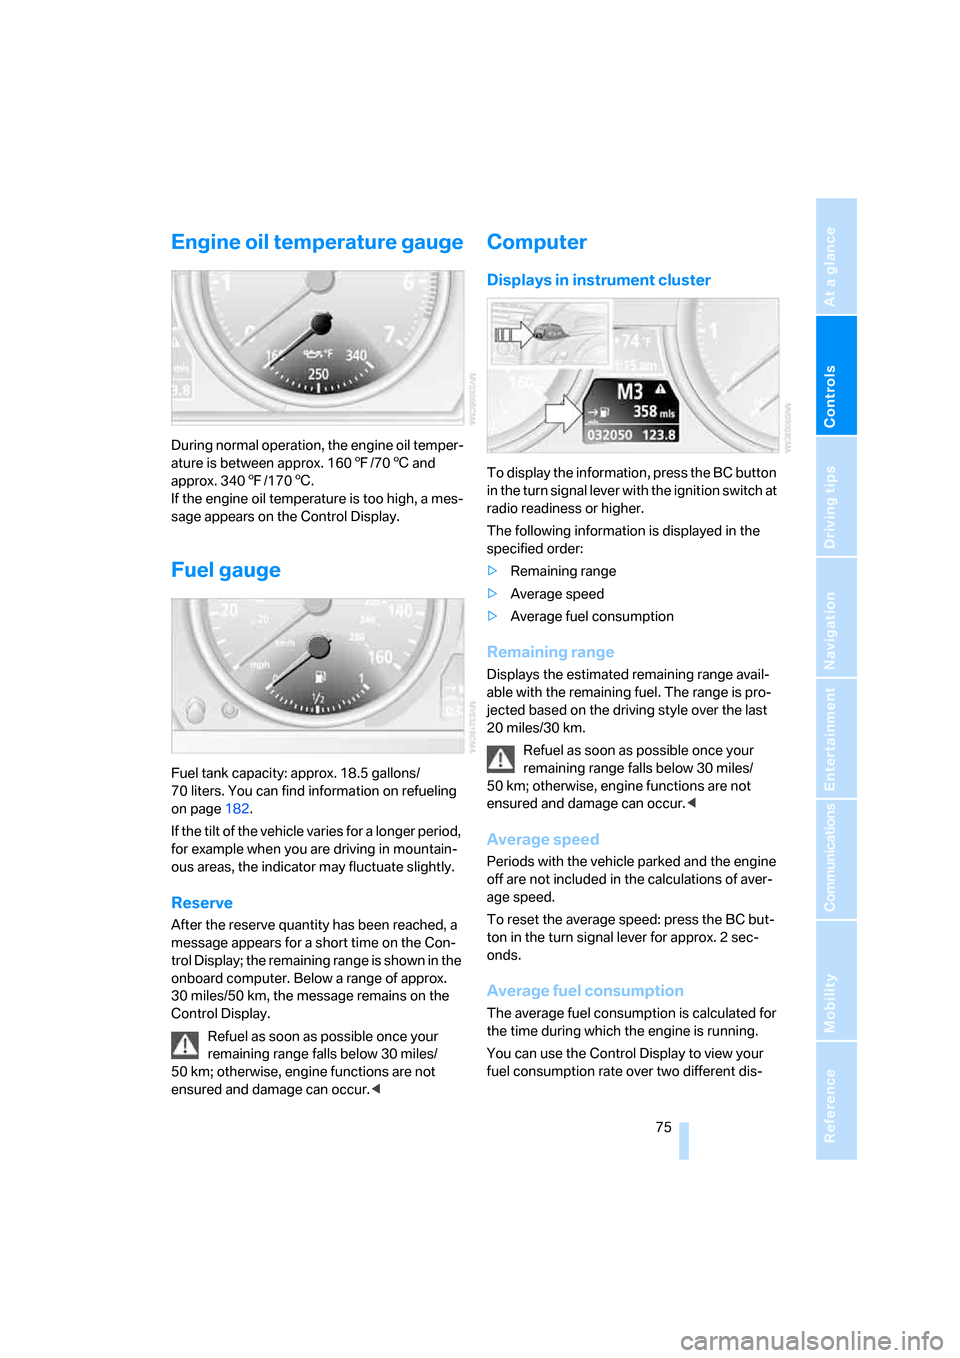
During normal operation, the engine oil temper-
ature is between approx. 1607/706 and
approx. 3407/1706.
If the engine oil temperature is too high, a mes-
sage appears on the Control Display.
Fuel gauge
Fuel tank capacity: approx. 18.5 gallons/
70 liters. You can find information on refueling
on page182.
If the tilt of the vehicle varies for a longer period,
for example when you are driving in mountain-
ous areas, the indicator may fluctuate slightly.
Reserve
After the reserve quantity has been reached, a
message appears for a short time on the Con-
trol Display; the remaining range is shown in the
onboard computer. Below a range of approx.
30 miles/50 km, the message remains on the
Control Display.
Refuel as soon as possible once your
remaining range falls below 30 miles/
50 km; otherwise, engine functions are not
ensured and damage can occur.<
Computer
Displays in instrument cluster
To display the information, press the BC button
in the turn signal lever with the ignition switch at
radio readiness or higher.
The following information is displayed in the
specified order:
>Remaining range
>Average speed
>Average fuel consumption
Remaining range
Displays the estimated remaining range avail-
able with the remaining fuel. The range is pro-
jected based on the driving style over the last
20 miles/30 km.
Refuel as soon as possible once your
remaining range falls below 30 miles/
50 km; otherwise, engine functions are not
ensured and damage can occur.<
Average speed
Periods with the vehicle parked and the engine
off are not included in the calculations of aver-
age speed.
To reset the average speed: press the BC but-
ton in the turn signal lever for approx. 2 sec-
onds.
Average fuel consumption
The average fuel consumption is calculated for
the time during which the engine is running.
You can use the Control Display to view your
fuel consumption rate over two different dis-
Page 77 of 236
Everything under control
76 tances, refer to Displays on Control Display or
Trip computer.
To reset the average fuel consumption: press
the BC button in the turn signal lever for approx.
2seconds.
Displays on Control Display
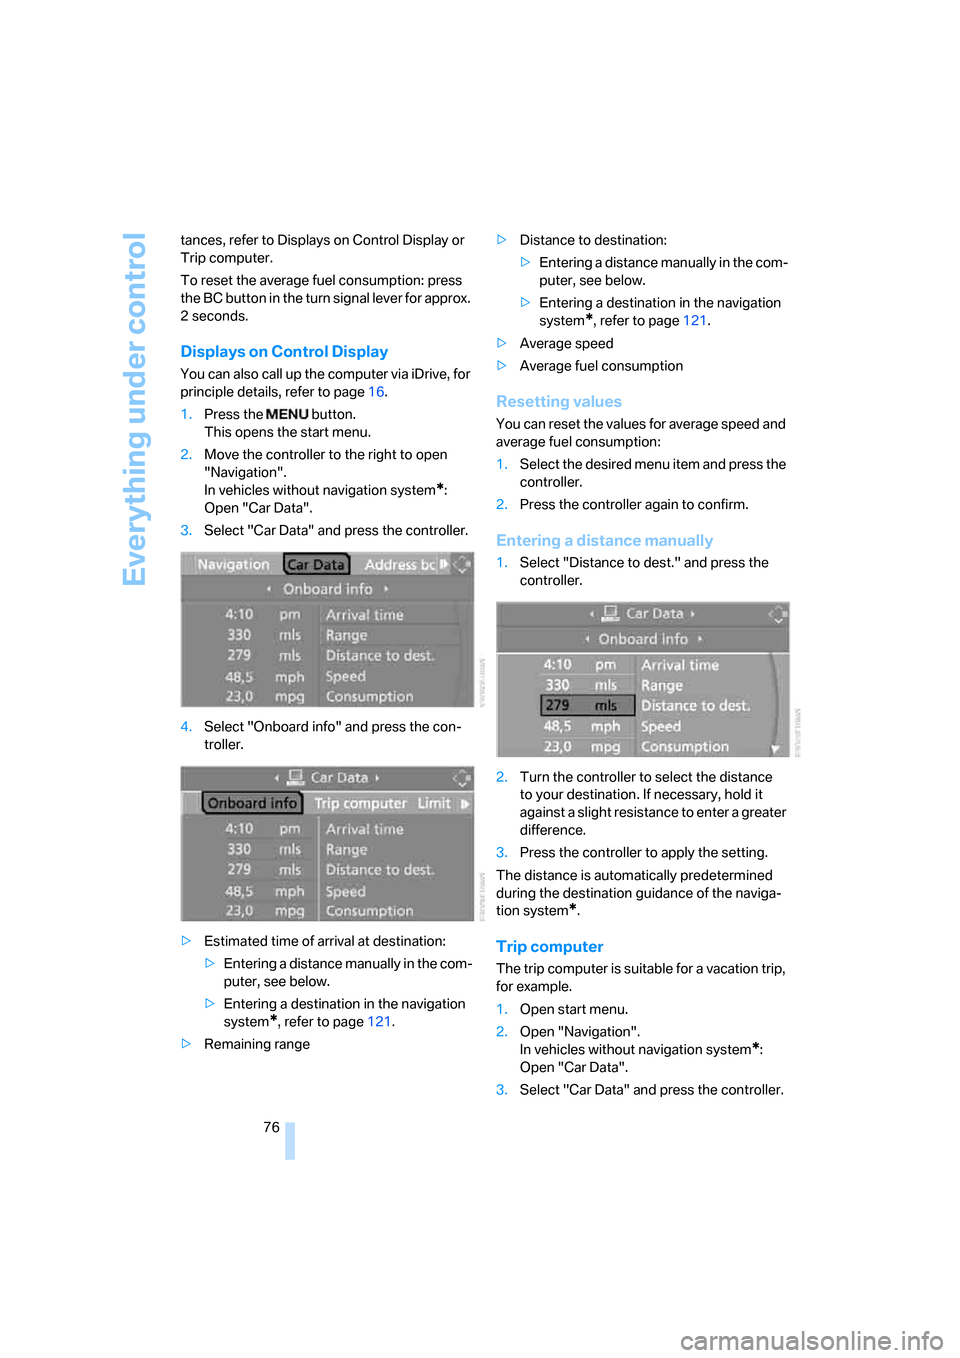
You can also call up the computer via iDrive, for
principle details, refer to page16.
1.Press the button.
This opens the start menu.
2.Move the controller to the right to open
"Navigation".
In vehicles without navigation system
*:
Open "Car Data".
3.Select "Car Data" and press the controller.
4.Select "Onboard info" and press the con-
troller.
>Estimated time of arrival at destination:
>Entering a distance manually in the com-
puter, see below.
>Entering a destination in the navigation
system
*, refer to page121.
>Remaining range>Distance to destination:
>Entering a distance manually in the com-
puter, see below.
>Entering a destination in the navigation
system
*, refer to page121.
>Average speed
>Average fuel consumption
Resetting values
You can reset the values for average speed and
average fuel consumption:
1.Select the desired menu item and press the
controller.
2.Press the controller again to confirm.
Entering a distance manually
1.Select "Distance to dest." and press the
controller.
2.Turn the controller to select the distance
to your destination. If necessary, hold it
against a slight resistance to enter a greater
difference.
3.Press the controller to apply the setting.
The distance is automatically predetermined
during the destination guidance of the naviga-
tion system
*.
Trip computer
The trip computer is suitable for a vacation trip,
for example.
1.Open start menu.
2.Open "Navigation".
In vehicles without navigation system
*:
Open "Car Data".
3.Select "Car Data" and press the controller.
Page 78 of 236

Controls
77Reference
At a glance
Driving tips
Communications
Navigation
Entertainment
Mobility
4.Select "Trip computer" and press the con-
troller.
>Departure time
>Driving time
>Distance traveled
>Average speed
>Average fuel consumption
Switching trip computer on/off and resetting
all values:
1.Select "Set" and press the controller.
2.Select the desired menu item and press the
controller.
Display options
You can display the computer or the trip com-
puter in the assistance window.
1.Move the controller to the right to switch to
the assistance window and press the con-
troller.
2.Select a menu item:
>"Onboard info"
>"Trip computer".3.Press the controller.
Service requirements
The remaining driving distance and the date for
the next maintenance are displayed briefly with
the ignition switched on.
Your BMW Service Advisor can deter-
mine your vehicle's current service
requirements by reading out the data stored in
the remote control.<
Additional information
You can view more detailed information by
using the Control Display, principle details, refer
to page16.
1.Open start menu.
2.Press the controller to open the menu.
3.Select "Service" and press the controller.
Page 84 of 236
Controls
83Reference
At a glance
Driving tips
Communications
Navigation
Entertainment
Mobility
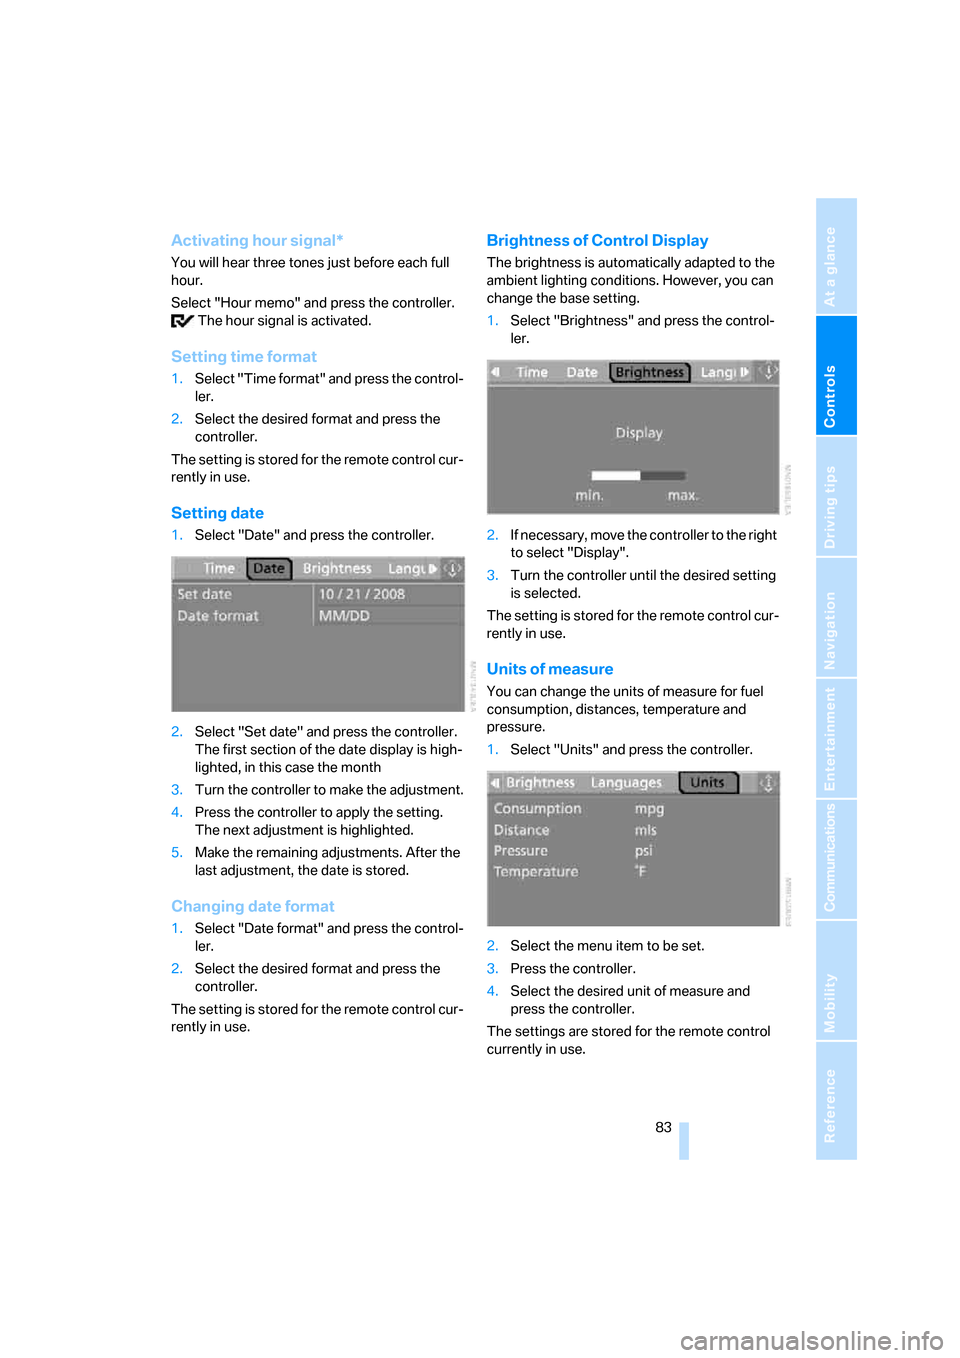
Activating hour signal*
You will hear three tones just before each full
hour.
Select "Hour memo" and press the controller.
The hour signal is activated.
Setting time format
1.Select "Time format" and press the control-
ler.
2.Select the desired format and press the
controller.
The setting is stored for the remote control cur-
rently in use.
Setting date
1.Select "Date" and press the controller.
2.Select "Set date" and press the controller.
The first section of the date display is high-
lighted, in this case the month
3.Turn the controller to make the adjustment.
4.Press the controller to apply the setting.
The next adjustment is highlighted.
5.Make the remaining adjustments. After the
last adjustment, the date is stored.
Changing date format
1.Select "Date format" and press the control-
ler.
2.Select the desired format and press the
controller.
The setting is stored for the remote control cur-
rently in use.
Brightness of Control Display
The brightness is automatically adapted to the
ambient lighting conditions. However, you can
change the base setting.
1.Select "Brightness" and press the control-
ler.
2.If necessary, move the controller to the right
to select "Display".
3.Turn the controller until the desired setting
is selected.
The setting is stored for the remote control cur-
rently in use.
Units of measure
You can change the units of measure for fuel
consumption, distances, temperature and
pressure.
1.Select "Units" and press the controller.
2.Select the menu item to be set.
3.Press the controller.
4.Select the desired unit of measure and
press the controller.
The settings are stored for the remote control
currently in use.
Page 219 of 236
Everything from A to Z
218 "Assist. window off"21
AUC Automatic recirculated-
air control103
Audio140
– controls140
– switching on/off140
– tone control141
– volume141
"Audio", refer to Tone
control141
Automatic
– air distribution101
– air volume101
– headlamp control96
– service notification175
– steering wheel adjustment,
refer to Easy entry/exit53
– storing stations145
Automatically switching
between high beams and
low beams, refer to High-
beam assistant97
Automatic car washes116
– also refer to Comfort
access37
– also refer to the Caring for
your vehicle brochure
Automatic climate control100
– automatic air
distribution101
– convertible program101
– switching off103
Automatic curb monitor53
Automatic lighting
– refer to Automatic headlamp
control96
– refer to Daytime driving
lamps96
– refer to High-beam
assistant97
– refer to Interior lamps99
– refer to Pathway lighting96
"Automatic programs"101
Automatic recirculated-air
control AUC103
Automatic station search145Automatic transmission with
Steptronic62
– deactivating selector lever
interlock63
– Dynamic Driving Control64
– interlock62
– kick-down63
– selector lever lock,
Interlock62
– shiftlock62
– towing205
– tow-starting206
– with comfort access37
"Automatic ventilation"104
AUTO program with
automatic climate
control101
"Autostore" on the
radio144,146
Average fuel consumption75
– setting units83
Average speed75
"Avoid ferries" for
navigation131
Avoid freeways for
navigation130
"Avoid highways" for
navigation131
Avoiding unintentional
alarms36
"Avoid tollroads" for
navigation131
Axle loads, refer to
Weights210
"A - Z"168
B
Backrest contour, refer to
Lumbar support48
Backrests, refer to Seats48
Backup lamps
– refer to Reverse gear61
– replacing bulbs, refer to Tail
lamps199
"Balance", refer to Tone
control142Balance, refer to Tone
control142
Balance adjustment in audio
mode, right/left142
Band-aids, refer to First-aid
kit203
Bass, refer to Tone
control141
"Bass", tone control142
Bass, tone control141
Battery
– disposal38
– jump starting203
– refer to Vehicle battery200
Battery change38
Being towed205
Belts, refer to Safety belts51
Beverage holder, refer to Cup
holders109
Blower, refer to Air
volume102
"BMW Assist"176
BMW Assist174
– enabling174
– services offered175
"BMW Contact"178
"BMW Contact
Numbers"178
BMW homepage4
BMW Maintenance
System195
"BMW Service"176
"BMW Service settings"175
BMW website4
Bottle holder, refer to Cup
holders109
Brake Assistant, refer to DBC
Dynamic Brake Control86
Brake fluid193
– level193
– warning lamp193
Brake force display90
Brake hydraulic system193
Brake lamps
– brake force display90
– replacing bulbs, refer to Tail
lamps199