2006 BMW 650I CONVERTIBLE engine s
[x] Cancel search: engine sPage 7 of 236
Notes
6
For your own safety
Maintenance and repairs
Advanced technology, e.g. the use of
modern materials and high-performance
electronics, requires specially adapted mainte-
nance and repair methods. Have corresponding
work on your BMW performed only by your
BMW center or a workshop that works accord-
ing to BMW repair procedures with appropri-
ately trained personnel. If this work is not
carried out properly, there is a danger of subse-
quent damage and related safety hazards.<
California Proposition 65 Warning
California law requires us to issue the following
warning:
Engine exhaust and a wide variety of
automobile components and parts,
including components found in the interior fur-
nishings in a vehicle, contain or emit chemicals
known to the State of California to cause cancer
and birth defects and reproductive harm. In
addition, certain fluids contained in vehicles and
certain products of component wear contain or
emit chemicals known to the State of California
to cause cancer and birth defects or other
reproductive harm.
Battery posts, terminals and related accesso-
ries contain lead and lead compounds. Wash
your hands after handling.
Used engine oil contains chemicals that have
caused cancer in laboratory animals. Always
protect your skin by washing thoroughly with
soap and water.<
Parts and accessories
For your own safety, use genuine parts
and accessories approved by BMW.
When you purchase accessories tested and
approved by BMW and Genuine BMW Parts,
you simultaneously acquire the assurance that
they have been thoroughly tested by BMW to
ensure optimum performance when installed
on your vehicle.
BMW warrants these parts to be free from
defects in material and workmanship.
BMW will not accept any liability for damage
resulting from installation of parts and accesso-
ries not approved by BMW.
BMW cannot test every product made by other
manufacturers to verify if it can be used on a
BMW safely and without risk to either the vehi-
cle, its operation, or its occupants.
Genuine BMW Parts, BMW Accessories and
other products approved by BMW, together
with professional advice on using these items,
are available from all BMW centers.
Installation and operation of non-BMW
approved accessories such as alarms, radios,
amplifiers, radar detectors, wheels, suspension
components, brake dust shields, telephones,
including operation of any mobile phone from
within the vehicle without using an externally
mounted antenna, or transceiver equipment, for
instance, CBs, walkie-talkies, ham radios or
similar accessories, may cause extensive dam-
age to the vehicle, compromise its safety, inter-
fere with the vehicle's electrical system or affect
the validity of the BMW Limited Warranty. See
your BMW center for additional information.<
Maintenance, replacement, or repair of
the emission control devices and sys-
tems may be performed by any automotive
repair establishment or individual using any cer-
tified automotive part.<
Page 12 of 236

At a glance
11Reference
Controls
Driving tips
Communications
Navigation
Entertainment
Mobility
7Buttons on steering wheel
8Instrument cluster12
11Ignition lock58
12Horn: the entire surface15Releasing the hood190
16Opening luggage compartment lid34 Mobile phone
*162
>Press: accepting and ending
call, starting dialing
* for
selected phone number and
redialing if no phone number is
selected
>Press longer: redialing
Volume
Activating/deactivating voice
command system
* 22
Changing radio station
Selecting music track
Scrolling in phone book and in lists
with stored phone numbers
Individually programmable
*54
Individually programmable54
9
Windshield wipers65
Rain sensor65
10Starting/stopping engine and
switching ignition on/off 58
13
Steering wheel heater
*54
Steering wheel adjustment53
14
Cruise control66
Active cruise control
*67
17
Head-Up Display
*93
18
Parking lamps96
Low beams96
Automatic headlamp control96
Adaptive Head Light
*97
19
Instrument lighting99
Front fog lamps98
Page 13 of 236
Cockpit
12
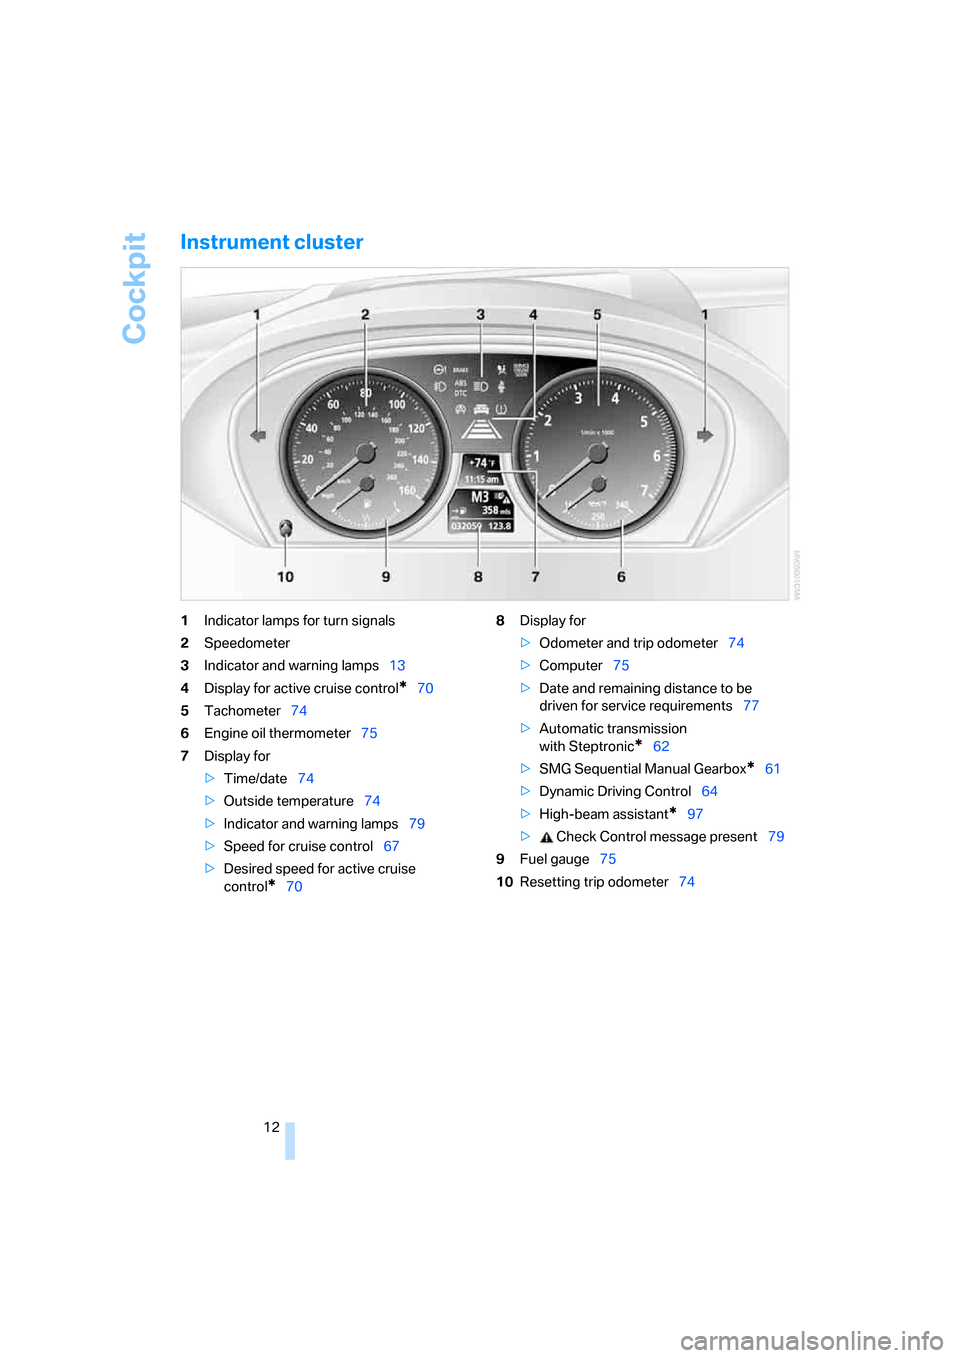
Instrument cluster
1Indicator lamps for turn signals
2Speedometer
3Indicator and warning lamps13
4Display for active cruise control
*70
5Tachometer74
6Engine oil thermometer75
7Display for
>Time/date74
>Outside temperature74
>Indicator and warning lamps79
>Speed for cruise control67
>Desired speed for active cruise
control
*708Display for
>Odometer and trip odometer74
>Computer75
>Date and remaining distance to be
driven for service requirements77
>Automatic transmission
with Steptronic
*62
>SMG Sequential Manual Gearbox
*61
>Dynamic Driving Control64
>High-beam assistant
*97
> Check Control message present79
9Fuel gauge75
10Resetting trip odometer74
Page 14 of 236

At a glance
13Reference
Controls
Driving tips
Communications
Navigation
Entertainment
Mobility
Indicator and warning lamps
The concept
Indicator and warning lamps can light up in dif-
ferent combinations and colors, both in the dis-
play area1 and in the display2
When the engine is started or the ignition is
switched on, some lamps are checked for
proper operation and light up briefly in the pro-
cess.
Explanatory text messages
Text messages at the bottom edge of the Con-
trol Display explain the meaning of the indicator
and warning lamps displayed.
You can consult Check Control for additional
information, e.g. regarding the cause of a mal-function or the appropriate actions to take, refer
to page79.
In cases of corresponding urgency, this infor-
mation is immediately displayed when the
associated lamps light up.
Indicator lamps without text messages
The following indicator lamps in the display
area1 indicate that certain functions are active:
Handbrake set60
Handbrake for Canadian models
Front fog lamps98
DTC Dynamic Traction Control87
High beams/headlamp flasher97
Lamp flashes:
DSC or DTC is controlling the drive
and braking forces to maintain vehicle
stability87
Page 37 of 236
Opening and closing
36
Indicator lamp displays
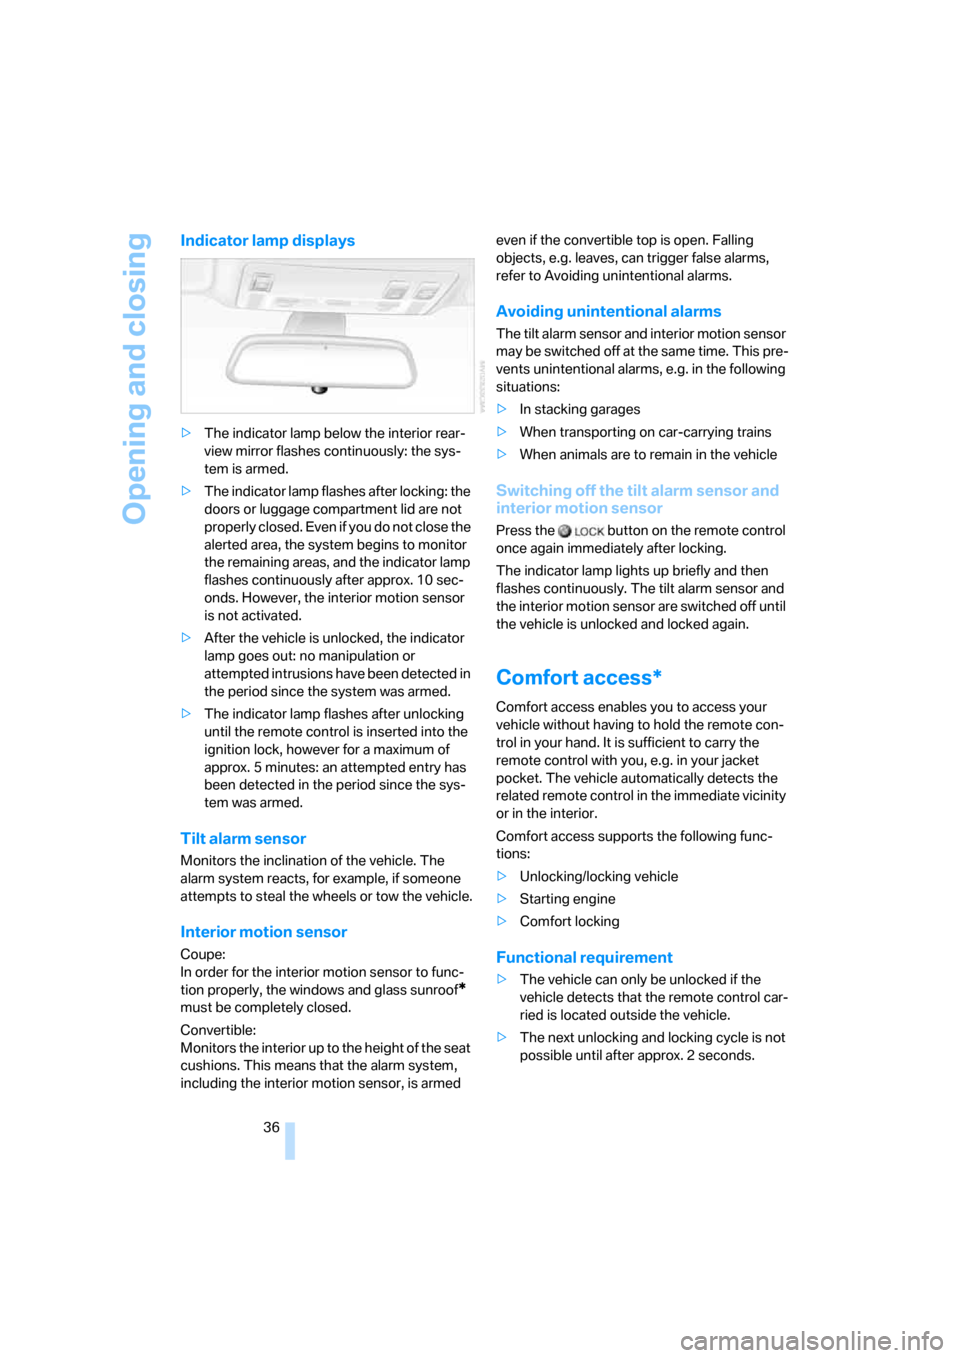
>The indicator lamp below the interior rear-
view mirror flashes continuously: the sys-
tem is armed.
>The indicator lamp flashes after locking: the
doors or luggage compartment lid are not
properly closed. Even if you do not close the
alerted area, the system begins to monitor
the remaining areas, and the indicator lamp
flashes continuously after approx. 10 sec-
onds. However, the interior motion sensor
is not activated.
>After the vehicle is unlocked, the indicator
lamp goes out: no manipulation or
attempted intrusions have been detected in
the period since the system was armed.
>The indicator lamp flashes after unlocking
until the remote control is inserted into the
ignition lock, however for a maximum of
approx. 5 minutes: an attempted entry has
been detected in the period since the sys-
tem was armed.
Tilt alarm sensor
Monitors the inclination of the vehicle. The
alarm system reacts, for example, if someone
attempts to steal the wheels or tow the vehicle.
Interior motion sensor
Coupe:
In order for the interior motion sensor to func-
tion properly, the windows and glass sunroof
*
must be completely closed.
Convertible:
Monitors the interior up to the height of the seat
cushions. This means that the alarm system,
including the interior motion sensor, is armed even if the convertible top is open. Falling
objects, e.g. leaves, can trigger false alarms,
refer to Avoiding unintentional alarms.
Avoiding unintentional alarms
The tilt alarm sensor and interior motion sensor
may be switched off at the same time. This pre-
vents unintentional alarms, e.g. in the following
situations:
>In stacking garages
>When transporting on car-carrying trains
>When animals are to remain in the vehicle
Switching off the tilt alarm sensor and
interior motion sensor
Press the button on the remote control
once again immediately after locking.
The indicator lamp lights up briefly and then
flashes continuously. The tilt alarm sensor and
the interior motion sensor are switched off until
the vehicle is unlocked and locked again.
Comfort access*
Comfort access enables you to access your
vehicle without having to hold the remote con-
trol in your hand. It is sufficient to carry the
remote control with you, e.g. in your jacket
pocket. The vehicle automatically detects the
related remote control in the immediate vicinity
or in the interior.
Comfort access supports the following func-
tions:
>Unlocking/locking vehicle
>Starting engine
>Comfort locking
Functional requirement
>The vehicle can only be unlocked if the
vehicle detects that the remote control car-
ried is located outside the vehicle.
>The next unlocking and locking cycle is not
possible until after approx. 2 seconds.
Page 38 of 236

Controls
37Reference
At a glance
Driving tips
Communications
Navigation
Entertainment
Mobility
>The engine can only be started if the vehicle
detects that the remote control carried is
located in the vehicle.
Special features in contrast to ordinary
remote control
It is basically irrelevant whether you operate the
above-mentioned functions with the comfort
access feature or by pressing the buttons on
the remote control. Before doing so, please
familiarize yourself with the information on
opening and closing, starting on page28.
The special features when using comfort
access are described below.
Unlocking
Completely grasp a door handle, arrow1.
This corresponds to pressing the button.
If a remote control is detected in the interior
after unlocking, the electric steering-wheel lock
disengages, refer to page58.
Locking doors
Touch the surface, arrow2 on the driver's door
or3 on the passenger door with a finger for
approx. 1 second. This corresponds to pressing
the button.
For comfort closing, hold a finger on the sur-
face, arrow2 or 3.
If a remote control accidentally left in the
luggage compartment is detected inside
the locked vehicle after the luggage compart-
ment lid has been closed, then the luggage
compartment lid opens again. The hazard warn-
ing flashers flash and an acoustic signal
*
sounds.<
Switching on radio readiness
By briefly pressing the Start/Stop button, you
switch on the radio readiness, refer to page58.
When doing so, do not depress the brake
pedal; otherwise, the engine will start
immediately.<
Starting engine
You can start the engine or switch on the igni-
tion if a remote control is located on the interior
of the vehicle. It need not be inserted in the igni-
tion lock, refer to page58.
If you take the remote control with you when
leaving the vehicle with the engine running, a
warning lamp lights up. In addition, a message
appears on the Control Display. As long as no
remote control is detected in the vehicle, it is
only possible to restart the engine within
approx. 10 seconds after it is switched off.
Switching off engine with automatic
transmission
The engine can only be switched off in the
selector lever position P, refer to page60.
To switch off the engine in the selector lever
position N, the remote control must be inserted
in the ignition lock.
Before driving into a car wash with
automatic transmission
1.Insert the remote control into the ignition
lock.
2.Depress brake pedal.
3.Place selector lever in position N.
4.Switch off the engine.
The vehicle can roll.
Malfunction
The comfort access function may malfunction
due to local radio waves. If this occurs, then
open or close the vehicle with the buttons on
the remote control or with a key. To start the
engine after this, insert the remote control in the
ignition lock.
Page 43 of 236
Opening and closing
42 In order to avoid damage, do not operate
the convertible top at temperatures
below + 147/–106.
Do not leave the convertible top in its storage
compartment for longer than one day when wet;
otherwise, damage from moisture can occur.
Do not place any objects on the convertible top;
otherwise, if the top were to be operated, these
objects could fall off and lead to damage or
injury.
Never move the convertible top when the roll-
over protection system is raised.
Driving without having completed the opening
or closing action can lead to damage or injury.
Do not place hands in the top mechanism dur-
ing the opening and closing action. Keep chil-
dren away from the travel path of the convert-
ible top.
For safety reasons, do not operate the convert-
ible top unless the vehicle is stationary.<
If you have initiated top operation with the
vehicle at a stop and then start to drive,
e.g. at a traffic light, you can continue the
initiated operation up to a speed of 20 mph/
30 km/h:
To do so, press and hold the corresponding
button.<
Partial vacuums that occur at higher
speeds in the passenger compartment
can make the convertible top flap. Use the auto-
matic climate control to increase the air supply
so that a partial vacuum in the vehicle does not
occur.<
Prior to opening and closing
>Read the safety precautions above carefully
and comply with them fully.
>Make sure that the convertible top com-
partment floor in the luggage compartment
is in the lowered position, refer to page35;
otherwise, the convertible top cannot be
opened.
>Make sure that the luggage compartment
lid is closed.
Opening and closing
Ignition key in radio ready position or higher,
refer to page58, with the vehicle stationary:
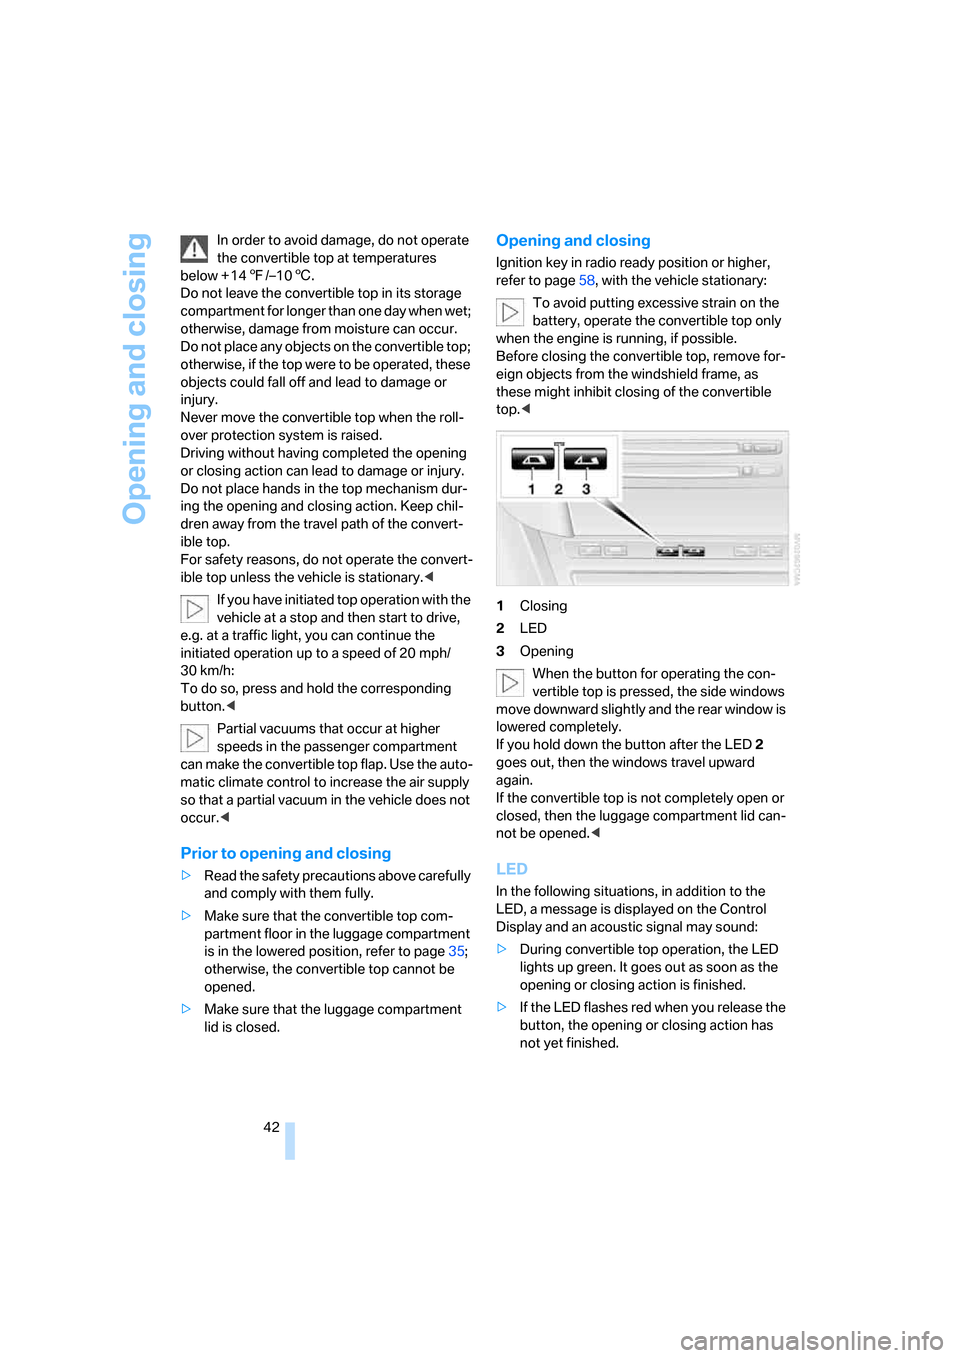
To avoid putting excessive strain on the
battery, operate the convertible top only
when the engine is running, if possible.
Before closing the convertible top, remove for-
eign objects from the windshield frame, as
these might inhibit closing of the convertible
top.<
1Closing
2LED
3Opening
When the button for operating the con-
vertible top is pressed, the side windows
move downward slightly and the rear window is
lowered completely.
If you hold down the button after the LED2
goes out, then the windows travel upward
again.
If the convertible top is not completely open or
closed, then the luggage compartment lid can-
not be opened.<
LED
In the following situations, in addition to the
LED, a message is displayed on the Control
Display and an acoustic signal may sound:
>During convertible top operation, the LED
lights up green. It goes out as soon as the
opening or closing action is finished.
>If the LED flashes red when you release the
button, the opening or closing action has
not yet finished.
Page 54 of 236
Controls
53Reference
At a glance
Driving tips
Communications
Navigation
Entertainment
Mobility
Automatic functions
>Both exterior mirrors are automatically
heated when the engine is running or the
ignition is switched on.
>When the vehicle is moving forward, the
interior and exterior mirrors dim as a func-
tion of the incoming light.
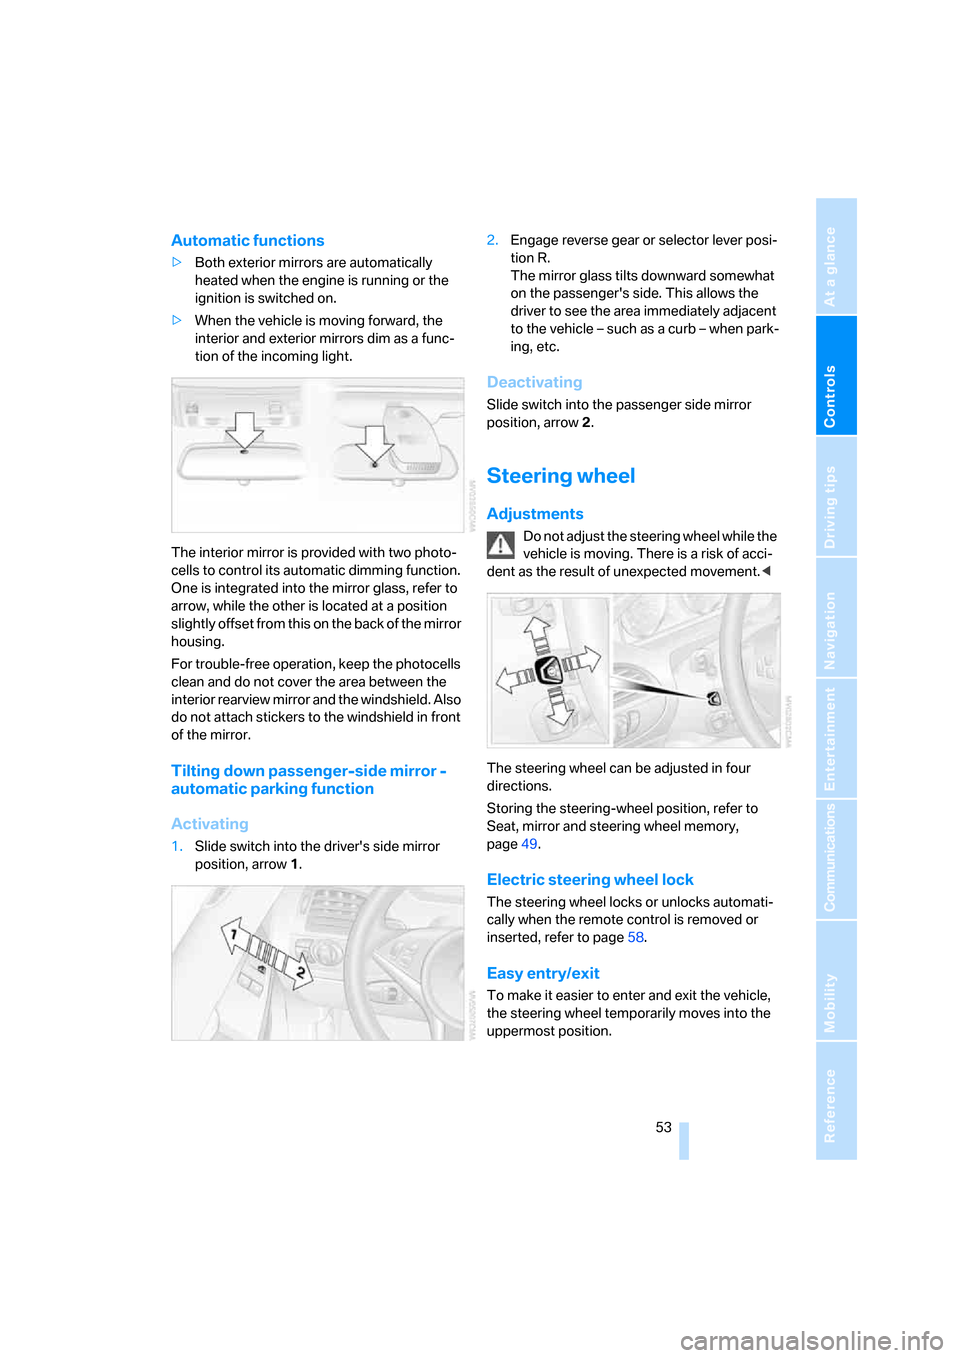
The interior mirror is provided with two photo-
cells to control its automatic dimming function.
One is integrated into the mirror glass, refer to
arrow, while the other is located at a position
slightly offset from this on the back of the mirror
housing.
For trouble-free operation, keep the photocells
clean and do not cover the area between the
interior rearview mirror and the windshield. Also
do not attach stickers to the windshield in front
of the mirror.
Tilting down passenger-side mirror -
automatic parking function
Activating
1.Slide switch into the driver's side mirror
position, arrow 1.2.Engage reverse gear or selector lever posi-
tion R.
The mirror glass tilts downward somewhat
on the passenger's side. This allows the
driver to see the area immediately adjacent
to the vehicle – such as a curb – when park-
ing, etc.
Deactivating
Slide switch into the passenger side mirror
position, arrow 2.
Steering wheel
Adjustments
Do not adjust the steering wheel while the
vehicle is moving. There is a risk of acci-
dent as the result of unexpected movement.<
The steering wheel can be adjusted in four
directions.
Storing the steering-wheel position, refer to
Seat, mirror and steering wheel memory,
page49.
Electric steering wheel lock
The steering wheel locks or unlocks automati-
cally when the remote control is removed or
inserted, refer to page58.
Easy entry/exit
To make it easier to enter and exit the vehicle,
the steering wheel temporarily moves into the
uppermost position.