2006 BMW 525XI TOURING change
[x] Cancel search: changePage 39 of 259

Controls
37Reference
At a glance
Driving tips
Communications
Navigation
Entertainment
Mobility
>Press the button in the driver's foot-
well.
>Press the button on the remote control
for approx. 1 second.
During opening, the tailgate pivots back
and up. Ensure that adequate clearance is
available before opening.<
To interrupt opening:
>Press the button on the outside of the tail-
gate.
>Press and hold the button on the remote
control.
>Press the button on the inside of the tail-
gate.
Automatic roll-up cover
When the tailgate or rear window is opened, the
roll-up cover is raised, and when the tailgate
and rear window is closed, it is lowered.
Make sure that the closing area of the roll-
up cover is clear of obstructions, as other-
wise the payload or the roll-up cover may be
damaged.<
Details on the roll-up cover are provided on
page117.
Closing tailgate
Make sure that the closing path of the tail-
gate is clear, otherwise injuries may
result.
To interrupt closing:
>Press the button on the inside of the tail-
gate.
>Press the button on the outside of the tail-
gate.
Closing is not canceled when you put the
vehicle into motion.<
Alarm system
The concept
The vehicle alarm system responds:
>When a door, the hood or the luggage com-
partment lid/tailgate or rear window is
opened
>To movements in the vehicle: Interior
motion sensor, refer to page38
>To changes in the vehicle's tilt if someone
attempts to steal the wheels or tow the
vehicle
>To interruptions in battery voltage
Unauthorized operations are briefly signaled by
the alarm system:
>with an acoustic alarm
>by switching on
the hazard warning flashers
>by flashing the high beams
Arming and disarming alarm system
When you lock or unlock the vehicle, either with
the remote control or at the door lock, the alarm
system is armed or disarmed at the same time.
Page 52 of 259

Adjustments
50
Releasing
1.Grasp the belt firmly.
2.Press the red button in the buckle.
3.Guide the belt into its reel.
The shoulder strap's anchorage point will be
correct for adult seat occupants of every build if
the seat is correctly adjusted, refer to page46.
The two rear safety belt buckles integrated into
the rear seat are for passengers sitting on the
left and right. The belt buckle embossed with
the word CENTER is intended exclusively for
use by passengers riding in the center position.
Damage to safety belts
In the event of loads caused by accidents
or other damage: replace the belt system
including the safety belt tensioner and any child
restraint systems, and have the belt anchor
points checked. Only have this work carried out
at a BMW center or at a workshop that works
according to BMW repair procedures with cor-
respondingly trained personnel. Otherwise cor-
rect operation of this safety equipment is not
guaranteed.<
Heated seats*
Front
The temperature setting progresses one step
through its control sequence each time you
press the button. The maximum temperature is
supplied when three LEDs are lit.
To switch off: press the button longer.
Temperature distribution
The heat output can be distributed variously in
the seat cushion and the backrest.
iDrive, for explanation of principle, refer to
page16.
1.Open the start menu.
2.Move the controller to the left to open "Cli-
mate".
3.Select "Seat heater distribution" and press
the controller.
4.Move the controller to the left or right to
select "Driver" or "Passenger".
5.Turn the controller. The adjustment is
applied; the field can be changed.
Rear
Operation as for front seat heating; two temper-
ature settings.
Page 55 of 259
Controls
53Reference
At a glance
Driving tips
Communications
Navigation
Entertainment
Mobility
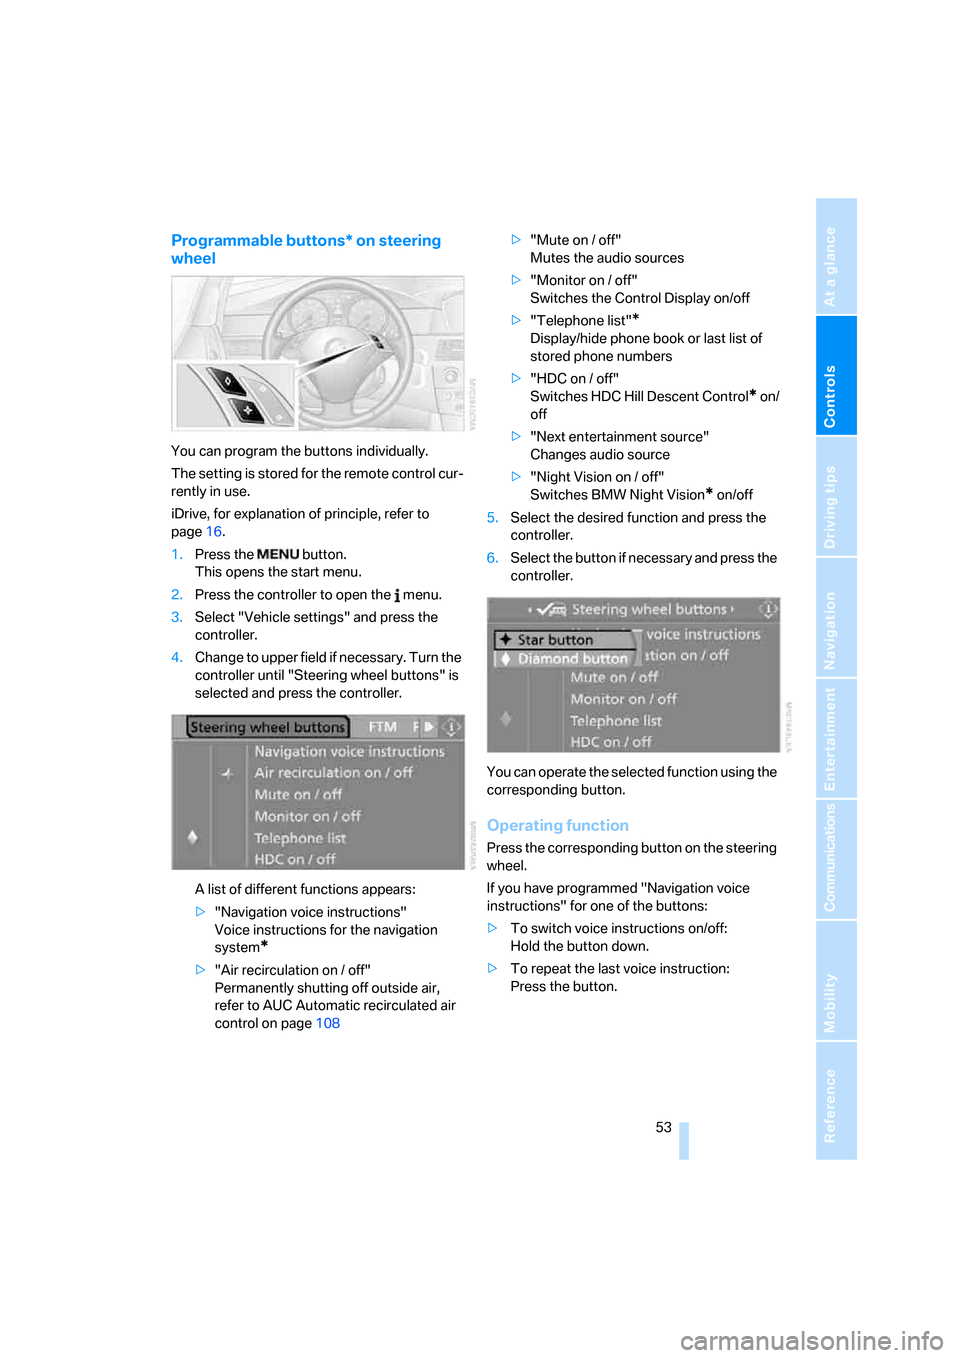
Programmable buttons* on steering
wheel
You can program the buttons individually.
The setting is stored for the remote control cur-
rently in use.
iDrive, for explanation of principle, refer to
page16.
1.Press the button.
This opens the start menu.
2.Press the controller to open the menu.
3.Select "Vehicle settings" and press the
controller.
4.Change to upper field if necessary. Turn the
controller until "Steering wheel buttons" is
selected and press the controller.
A list of different functions appears:
>"Navigation voice instructions"
Voice instructions for the navigation
system
*
>"Air recirculation on / off"
Permanently shutting off outside air,
refer to AUC Automatic recirculated air
control on page108>"Mute on / off"
Mutes the audio sources
>"Monitor on / off"
Switches the Control Display on/off
>"Telephone list"
*
Display/hide phone book or last list of
stored phone numbers
>"HDC on / off"
Switches HDC Hill Descent Control
* on/
off
>"Next entertainment source"
Changes audio source
>"Night Vision on / off"
Switches BMW Night Vision
* on/off
5.Select the desired function and press the
controller.
6.Select the button if necessary and press the
controller.
You can operate the selected function using the
corresponding button.
Operating function
Press the corresponding button on the steering
wheel.
If you have programmed "Navigation voice
instructions" for one of the buttons:
>To switch voice instructions on/off:
Hold the button down.
>To repeat the last voice instruction:
Press the button.
Page 63 of 259
Controls
61Reference
At a glance
Driving tips
Communications
Navigation
Entertainment
Mobility
Reverse gear
Select only when the vehicle is stationary.
When pressing the gearshift lever to the left,
overcome some resistance.
SMG Sequential Manual
Transmission*
The concept
The SMG Sequential Manual Transmission is
an automated manual transmission in which an
electrohydraulic system handles the clutching
and gear changes.
The SMG is operated with the selector lever
and two shift paddles on the steering wheel.
It offers you the following functions:
>Optional manual or automatic operation:
Sequential mode or Drive mode
>You have a choice of two driving programs:
Normal or Sport, refer to Dynamic Driving
Control page62
>Automatic downshifting and prevention of
incorrect shifting even in Sequential opera-
tion
>Acceleration assistant, refer to page63.
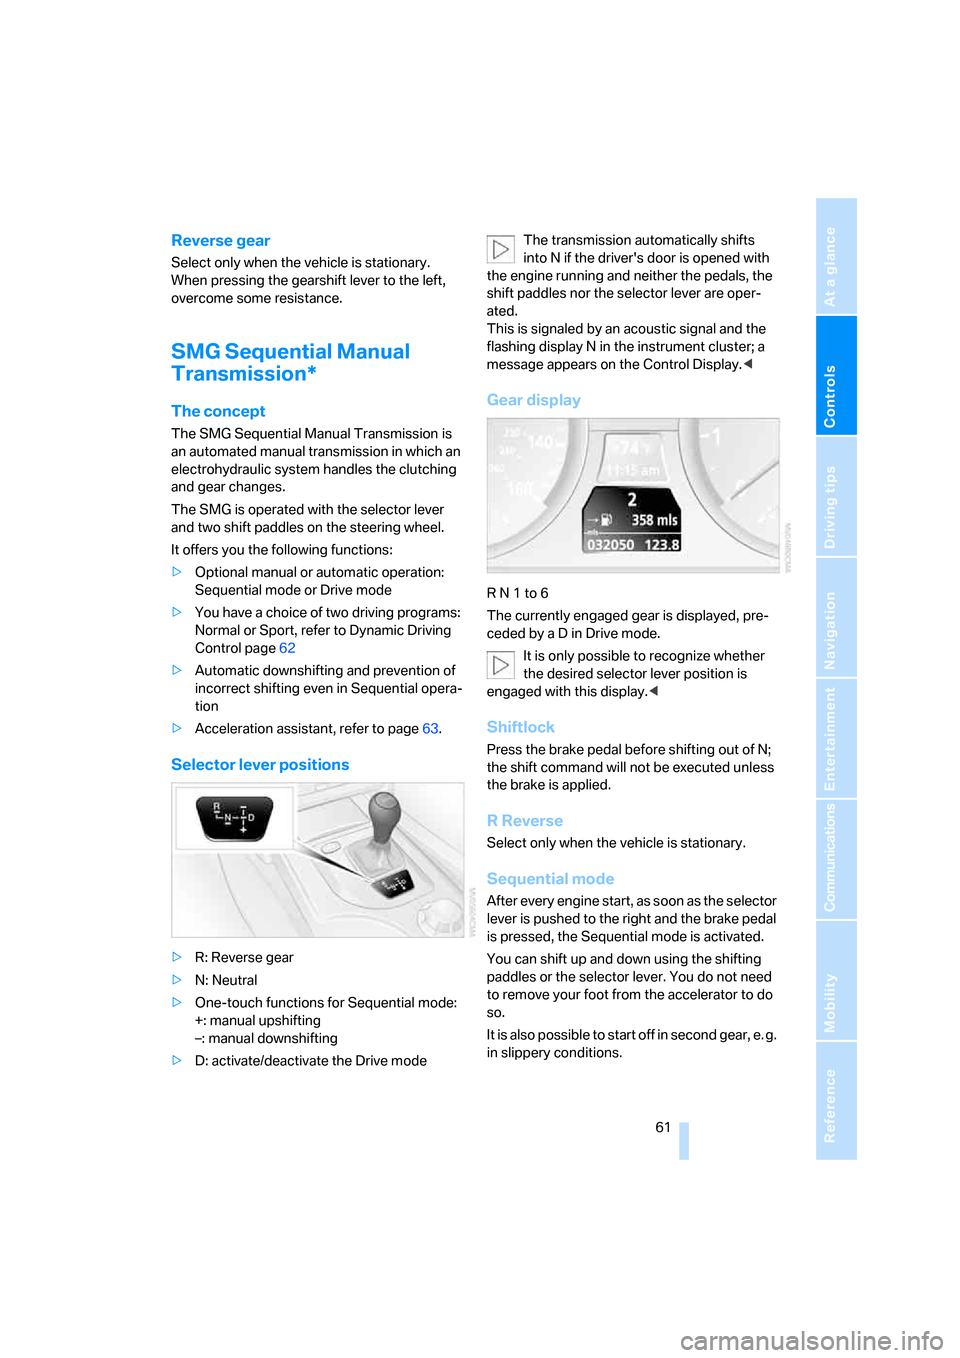
Selector lever positions
>R: Reverse gear
>N: Neutral
>One-touch functions for Sequential mode:
+: manual upshifting
–: manual downshifting
>D: activate/deactivate the Drive modeThe transmission automatically shifts
into N if the driver's door is opened with
the engine running and neither the pedals, the
shift paddles nor the selector lever are oper-
ated.
This is signaled by an acoustic signal and the
flashing display N in the instrument cluster; a
message appears on the Control Display.<
Gear display
R N 1 to 6
The currently engaged gear is displayed, pre-
ceded by a D in Drive mode.
It is only possible to recognize whether
the desired selector lever position is
engaged with this display.<
Shiftlock
Press the brake pedal before shifting out of N;
the shift command will not be executed unless
the brake is applied.
R Reverse
Select only when the vehicle is stationary.
Sequential mode
After every engine start, as soon as the selector
lever is pushed to the right and the brake pedal
is pressed, the Sequential mode is activated.
You can shift up and down using the shifting
paddles or the selector lever. You do not need
to remove your foot from the accelerator to do
so.
It is also possible to start off in second gear, e. g.
in slippery conditions.
Page 64 of 259

Driving
62 In the following situations, SMG thinks for you:
>Upshifts and downshifts are executed only
when they will result in a plausible combina-
tion of engine and vehicle speed; thus, for
example, a downshift that would cause the
engine to overrev will not be executed by
the system.
>When the vehicle is stationary, the trans-
mission automatically downshifts into first
gear.
>Shortly before dropping below a gear-
dependent minimum speed, the transmis-
sion downshifts automatically even without
your intervention.
D Drive mode
In the Drive mode, all forward gears are shifted
automatically.
Shifting from Sequential mode to Drive mode:
press selector lever to the right toward D.
Kick-down: for rapid acceleration, e. g. when
passing, press the accelerator pedal as far
down as it will go. You achieve maximum accel-
eration.
To switch back into the Sequential mode: press
selector lever to the right again toward D or shift
using the shifting paddles or the selector lever.
Start off quickly on slopes. Do not hold
the vehicle on a hill by pressing the accel-
erator, but apply the handbrake instead. Other-
wise overheating can occur in the transmission
region.<
Gear changes
Using selector lever
>To upshift, pull the selector lever back.
>To downshift, push the selector lever for-
ward.
Using shift paddles on steering wheel
>To upshift, pull one of the shift paddles.
>To downshift, press.
Dynamic Driving Control
The Dynamic Driving Control makes it possible
for your BMW to react in an even more perfor-
mance-oriented manner at the push of a button:
>The engine responds more spontaneously
to accelerator pedal movements.
>Gearshifts are faster.
>The engine speed range is used optimally in
the Drive mode.
>Cruise control
*:
The stored speed is reached more quickly
when it is requested.
Activating system
Press the SPORT button.
The LED in the button lights up and SPORT is
displayed in the instrument cluster.
Deactivating system
Press the SPORT button again.
The LED in the button and SPORT in the instru-
ment cluster go out.
Page 73 of 259

Controls
71Reference
At a glance
Driving tips
Communications
Navigation
Entertainment
Mobility
Warning lamps
The display2 flashes red and a sig-
nal sounds.
The system requests that you
intervene by braking or with an
evasive maneuver. The active
cruise control cannot automatically restore the
distance to the vehicle driving ahead.
However, this display cannot relieve the driver
of the responsibility for adjusting the desired
speed and driving style to the traffic conditions.
The display2 flashes yellow.
Automatic intervention by ABS or
DSC. The active cruise control
intervenes by braking until you
take over actively.
Radar sensor
Heavy rain, dirt, snow or ice can restrict the
detection of vehicles driving ahead. If neces-
sary, clean the front radar sensor under the
bumper. Exercise particular care when remov-
ing snow and ice.
If the sensor is not aligned properly, the active
cruise control cannot be activated.
Things to know about active cruise control
As with conventional cruise control sys-
tems, active cruise control in no way
diminishes or substitutes for the driver's own
personal responsibility, alertness and aware-
ness in adjusting speed, braking or otherwise
controlling the vehicle. The driver should
decide when to use the system on the basis of
road, traffic, visibility, and weather conditions.
Active cruise control is intended for use on
highway-type roadways where traffic is moving
relatively smoothly. Do not use this system in
city driving; heavy traffic such as during rush
hour; on curvy, winding roads, slippery roads or
roads with sharp curves such as highway off-
ramps; during inclement weather such as snow,
strong rain or fog; or when entering inter-
changes, service/parking areas or toll booths.
It is also important to regulate your vehicle's speed and distance setting within applicable
legal limits. Always be ready to take action or
apply the brakes if necessary, especially when
the system is actively following a vehicle in front
of you.<
Always remember that the range and abil-
ity of the system does have physical limi-
tations. It will not apply the brakes or decelerate
your vehicle when there is a slow-moving vehi-
cle, stopped vehicle or stationary object ahead
of you, as for example, at a traffic light or a
parked vehicle. Also, the system does not react
to oncoming traffic, pedestrians or other types
of potential traffic such as a rider on horseback.
It is also possible that the system may not
detect smaller moving objects such as motor-
cycles or bicycles. Be especially alert when
encountering any of these situations as the
Page 76 of 259

Everything under control
74
Everything under control
Odometer, outside
temperature display, clock
1Time, outside temperature and data
2Odometer and trip odometer
3Press button:
>with ignition switched on, trip odometer
is reset
>briefly display the time, outside temper-
ature and odometer with the ignition
switched off
From radio readiness the outside temperature
and the time are displayed.
Date retrieval:
Press CHECK button on turn signal lever, refer
to page80.
Time and date setting, refer to page82.
You can set the unit of measure 7 or 6 on the
Control Display, refer to Units of measure on
page84.
Outside temperature warning
If the display drops to +377/+36, a signal
sounds and a warning lamp lights up. A mes-
sage appears on the Control Display. There is
an increased danger of ice.
Even at temperatures above +377/
+36 ice can form. Therefore, drive care-
fully, e.g. on bridges and sections of road in the
shade, otherwise there is an increased accident
risk.<
Tachometer
The white-striped advance warning field,
arrow1, changes depending on the engine
temperature. With increasing engine tempera-
ture the advance warning field becomes corre-
spondingly smaller. Avoid allowing the engine
speed to rise as far as the orange warning sec-
tor whenever possible.
Be sure to avoid engine speeds in the red warn-
ing field, arrow2. In this range, the fuel supply is
interrupted to protect the engine.
Coolant temperature
Should the coolant, and with it the engine
become too hot, a warning lamp lights up. In
addition, a message appears on the Control
Display.
Checking coolant level, refer to page207.
Page 79 of 259

Controls
77Reference
At a glance
Driving tips
Communications
Navigation
Entertainment
Mobility
3.Select "Car Data" and press the controller.
4.Select "Trip computer" and press the con-
troller.
>Departure time
>Driving time
>Distance traveled
>Average speed
>Average fuel consumption
Starting or stopping the trip computer, or reset-
ting all values:
1.Select "Set" and press the controller.
2.Select the desired menu item.
3.Press the controller.
Display options
You can display the computer or the trip com-
puter in the assistance window.
1.Move the controller to the right to change to
the assistance window and press the con-
troller.
2.Select "Onboard info" or "Trip computer".3.Press the controller.
Service requirements
The remaining driving distance and the date for
the next maintenance are displayed briefly with
the ignition switched on.
Your BMW Service Advisor can deter-
mine your vehicle's current service
requirements by reading out the data stored in
the remote control.<
Additional information
You can select a display of more detailed infor-
mation on the maintenance scope on the Con-
trol Display. For explanation of principle, refer to
page16.
1.Open the start menu.
2.Press the controller to open the menu.
3.Select "Service" and press the controller.