2006 BMW 525XI light
[x] Cancel search: lightPage 96 of 248
Controls
95Reference
At a glance
Driving tips
Communications
Navigation
Entertainment
Mobility
The low beams remain switched on inde-
pendent of the ambient lighting condi-
tions when you switch on the fog lamps
*.
With the daytime driving lamps
* activated, the
low beams are always switched on when the
ignition is switched on.<
The automatic headlamp control cannot
serve as a substitute for your personal
judgment in determining when the lamps
should be switched on in response to ambient
lighting conditions. For example, the sensors
cannot detect fog of hazy weather. To avoid
safety risks, you should always switch on the
lamps manually under these conditions.<
Adaptive Head Light*
The concept
Adaptive Head Light is a variable headlamp
control system that enables better illumination
of the road surface. Depending on the steering
angle and other parameters, the light from the
headlamp follows the course of the road.
Activating Adaptive Head Light
In the switch position1, the Adaptive Head
Light is active and the automatic headlamp con-
trol
* is switched on.
To avoid dazzling oncoming traffic, the Adap-
tive Head Light is not active when driving in
reverse and points toward the passenger side
when the vehicle is stopped.
Malfunction
The LED next to the symbol for automatic head-
lamp control flashes. Adaptive Head Light is
malfunctioning or has failed. Have the system
checked as soon as possible.
High beams/
roadside parking lamps
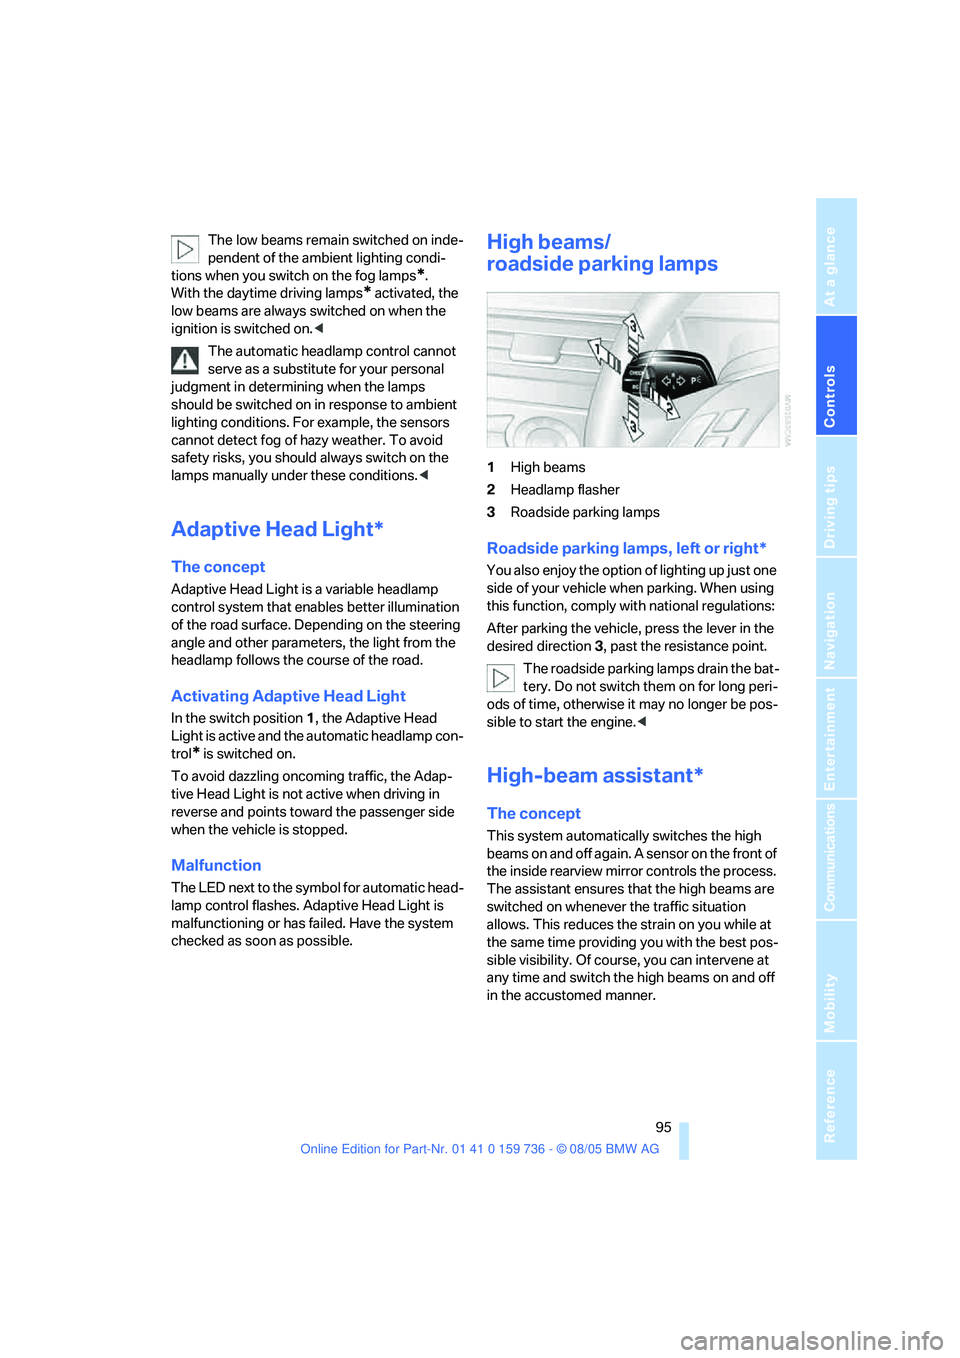
1High beams
2Headlamp flasher
3Roadside parking lamps
Roadside parking lamps, left or right*
You also enjoy the option of lighting up just one
side of your vehicle when parking. When using
this function, comply with national regulations:
After parking the vehicle, press the lever in the
desired direction3, past the resistance point.
The roadside parking lamps drain the bat-
tery. Do not switch them on for long peri-
ods of time, otherwise it may no longer be pos-
sible to start the engine.<
High-beam assistant*
The concept
This system automatically switches the high
beams on and off again. A sensor on the front of
the inside rearview mirror controls the process.
The assistant ensures that the high beams are
switched on whenever the traffic situation
allows. This reduces the strain on you while at
the same time providing you with the best pos-
sible visibility. Of course, you can intervene at
any time and switch the high beams on and off
in the accustomed manner.
Page 97 of 248
Lamps
96
Activating high-beam assistant
1.Turn the light switch to switch position1,
refer to page94.
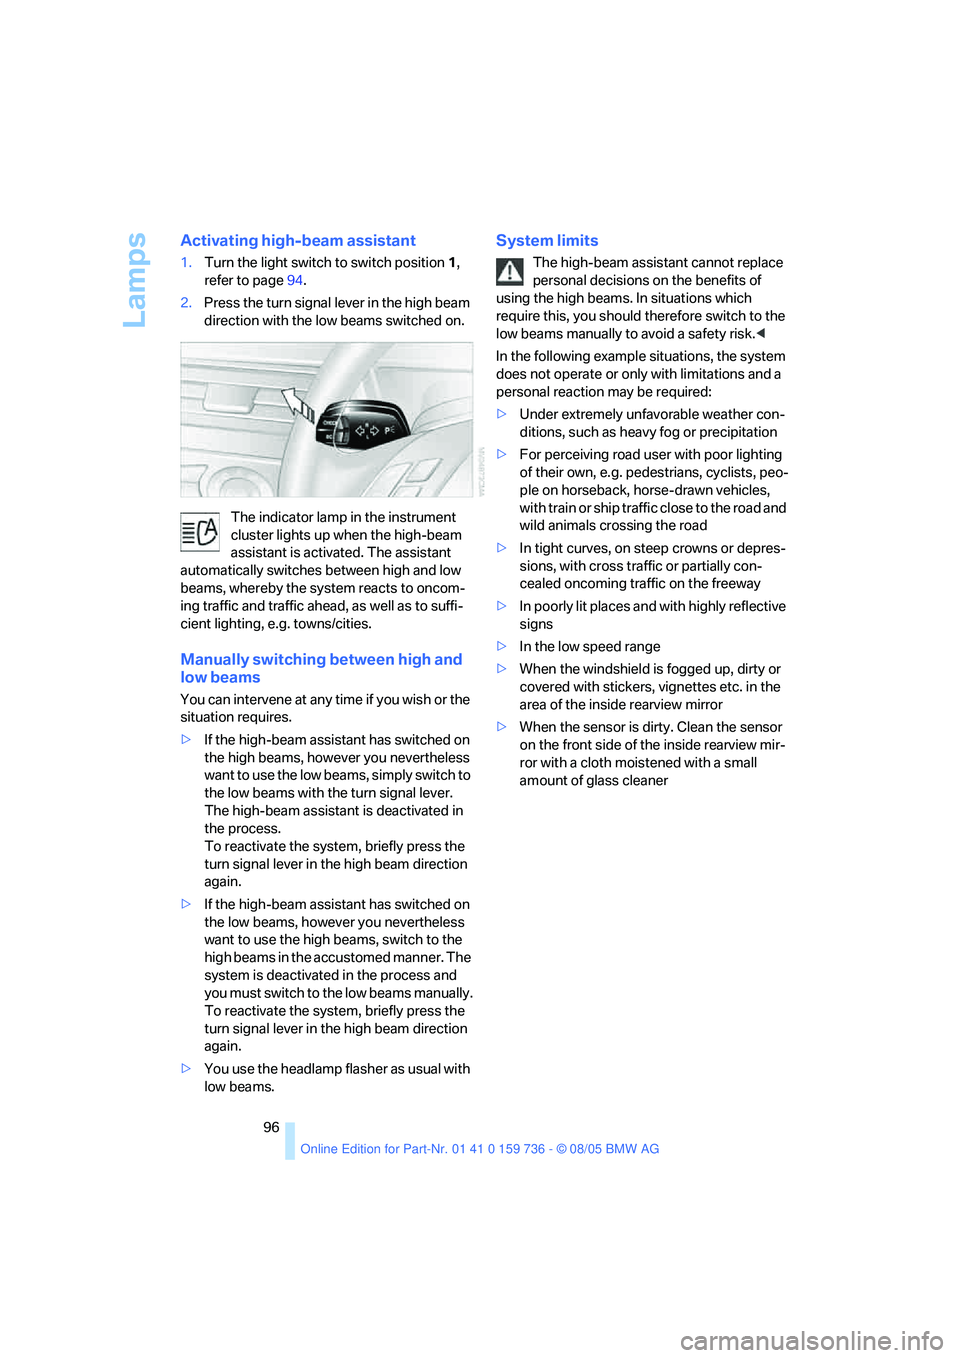
2.Press the turn signal lever in the high beam
direction with the low beams switched on.
The indicator lamp in the instrument
cluster lights up when the high-beam
assistant is activated. The assistant
automatically switches between high and low
beams, whereby the system reacts to oncom-
ing traffic and traffic ahead, as well as to suffi-
cient lighting, e.g. towns/cities.
Manually switching between high and
low beams
You can intervene at any time if you wish or the
situation requires.
>If the high-beam assistant has switched on
the high beams, however you nevertheless
want to use the low beams, simply switch to
the low beams with the turn signal lever.
The high-beam assistant is deactivated in
the process.
To reactivate the system, briefly press the
turn signal lever in the high beam direction
again.
>If the high-beam assistant has switched on
the low beams, however you nevertheless
want to use the high beams, switch to the
high beams in the accustomed manner. The
system is deactivated in the process and
you must switch to the low beams manually.
To reactivate the system, briefly press the
turn signal lever in the high beam direction
again.
>You use the headlamp flasher as usual with
low beams.
System limits
The high-beam assistant cannot replace
personal decisions on the benefits of
using the high beams. In situations which
require this, you should therefore switch to the
low beams manually to avoid a safety risk.<
In the following example situations, the system
does not operate or only with limitations and a
personal reaction may be required:
>Under extremely unfavorable weather con-
ditions, such as heavy fog or precipitation
>For perceiving road user with poor lighting
of their own, e.g. pedestrians, cyclists, peo-
ple on horseback, horse-drawn vehicles,
with train or ship traffic close to the road and
wild animals crossing the road
>In tight curves, on steep crowns or depres-
sions, with cross traffic or partially con-
cealed oncoming traffic on the freeway
>In poorly lit places and with highly reflective
signs
>In the low speed range
>When the windshield is fogged up, dirty or
covered with stickers, vignettes etc. in the
area of the inside rearview mirror
>When the sensor is dirty. Clean the sensor
on the front side of the inside rearview mir-
ror with a cloth moistened with a small
amount of glass cleaner
Page 98 of 248
Controls
97Reference
At a glance
Driving tips
Communications
Navigation
Entertainment
Mobility
Fog lamps*
The parking lamps or low beams must
be switched on for the fog lamps to
operate. The green indicator lamp in
the instrument cluster lights up whenever the
fog lamps are on.
The fog lamps are switched off whenever the
high beams are switched on.
If the automatic headlamp control is acti-
vated, the low beams will come on auto-
matically when you switch on the fog lamps.<
Instrument lighting
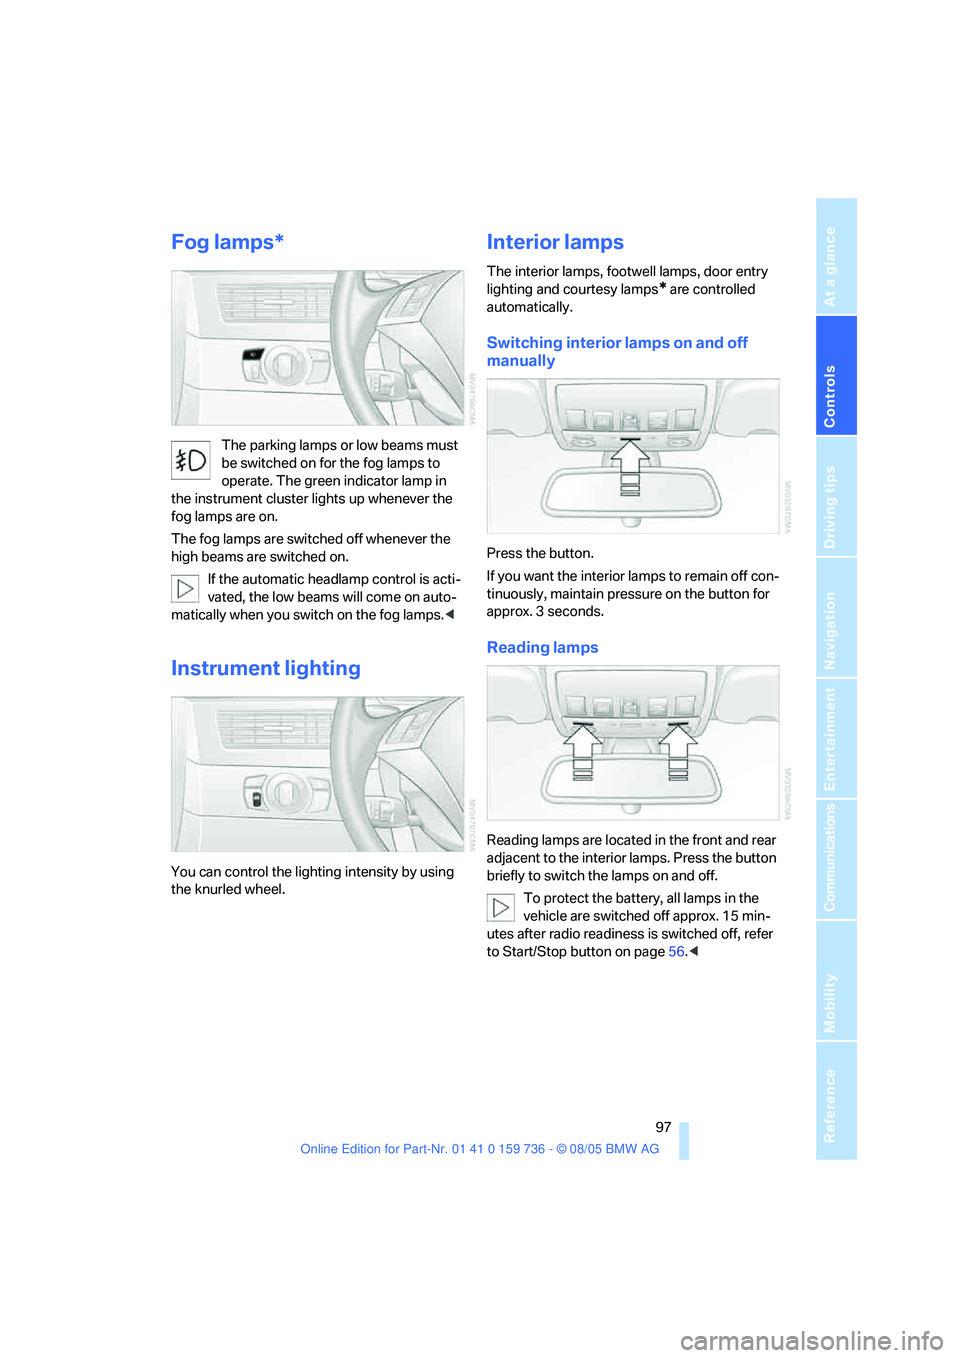
You can control the lighting intensity by using
the knurled wheel.
Interior lamps
The interior lamps, footwell lamps, door entry
lighting
and courtesy lamps* are controlled
automatically.
Switching interior lamps on and off
manually
Press the button.
If you want the interior lamps to remain off con-
tinuously, maintain pressure on the button for
approx. 3 seconds.
Reading lamps
Reading lamps are located in the front and rear
adjacent to the interior lamps. Press the button
briefly to switch the lamps on and off.
To protect the battery, all lamps in the
vehicle are switched off approx. 15 min-
utes after radio readiness is switched off, refer
to Start/Stop button on page56.<
Page 102 of 248

Controls
101Reference
At a glance
Driving tips
Communications
Navigation
Entertainment
Mobility
body. Therefore, open these vents for maxi-
mum cooling.
AUC Automatic recirculated-air
control/recirculated-air mode
You can respond to pollutants or
unpleasant odors in the immediate
environment by suspending the
supply of outside air. The system then recircu-
lates the air currently within the vehicle. During
AUC operation, a sensor detects pollutants in
the outside air and controls the shut-off auto-
matically.
By pressing the button repeatedly, you can
request three operating modes:
>LED off: outside air flows in continuously.
>Right LED on, AUC mode: the system
detects pollutants in the outside air and
shuts off the supply as needed.
>Left LED on, recirculated-air mode: the
supply of outside air is permanently shut off.
If condensation starts to form on the
inside window surfaces during operation
in the recirculated-air mode, you should switch
it off while also increasing the air volume as
required.
The recirculated-air mode should not be used
over an extended period of time, as the air qual-
ity inside the vehicle deteriorates continu-
ously.<
Residual heat
The heat stored in the engine is
used to heat the passenger com-
partment, e.g. while stopped at a
school to pick up a child.
The function can be switched on when the fol-
lowing conditions are met:
>up to 15 minutes after switching off the
engine
>with engine at operating temperature
>with sufficient battery voltage
>at an outside temperature below 777/
256The LED lights up when the function is
switched on.
From radio readiness the interior temperature,
the air volume and the air distribution can be
set.
Switching off automatic climate control
The air volume, the heater and the
cooling function are all switched
off.
You can restart the automatic
climate control by pressing any of its buttons
except the REST button.
Front ventilation
1Knurled wheels to smoothly open and close
air vents
2Levers to change the air vent direction
Do not drop any foreign objects into the
vent outlets, otherwise these could be
catapulted outwards and lead to injuries.<
Ventilation for cooling
Adjust the vent outlets to direct the flow of cool
air in your direction, for instance, if the interior
has become too warm, etc.
Draft-free ventilation
Set the vent outlets so that the air flows past
you and is not directed straight at you.
Page 104 of 248
Controls
103Reference
At a glance
Driving tips
Communications
Navigation
Entertainment
Mobility
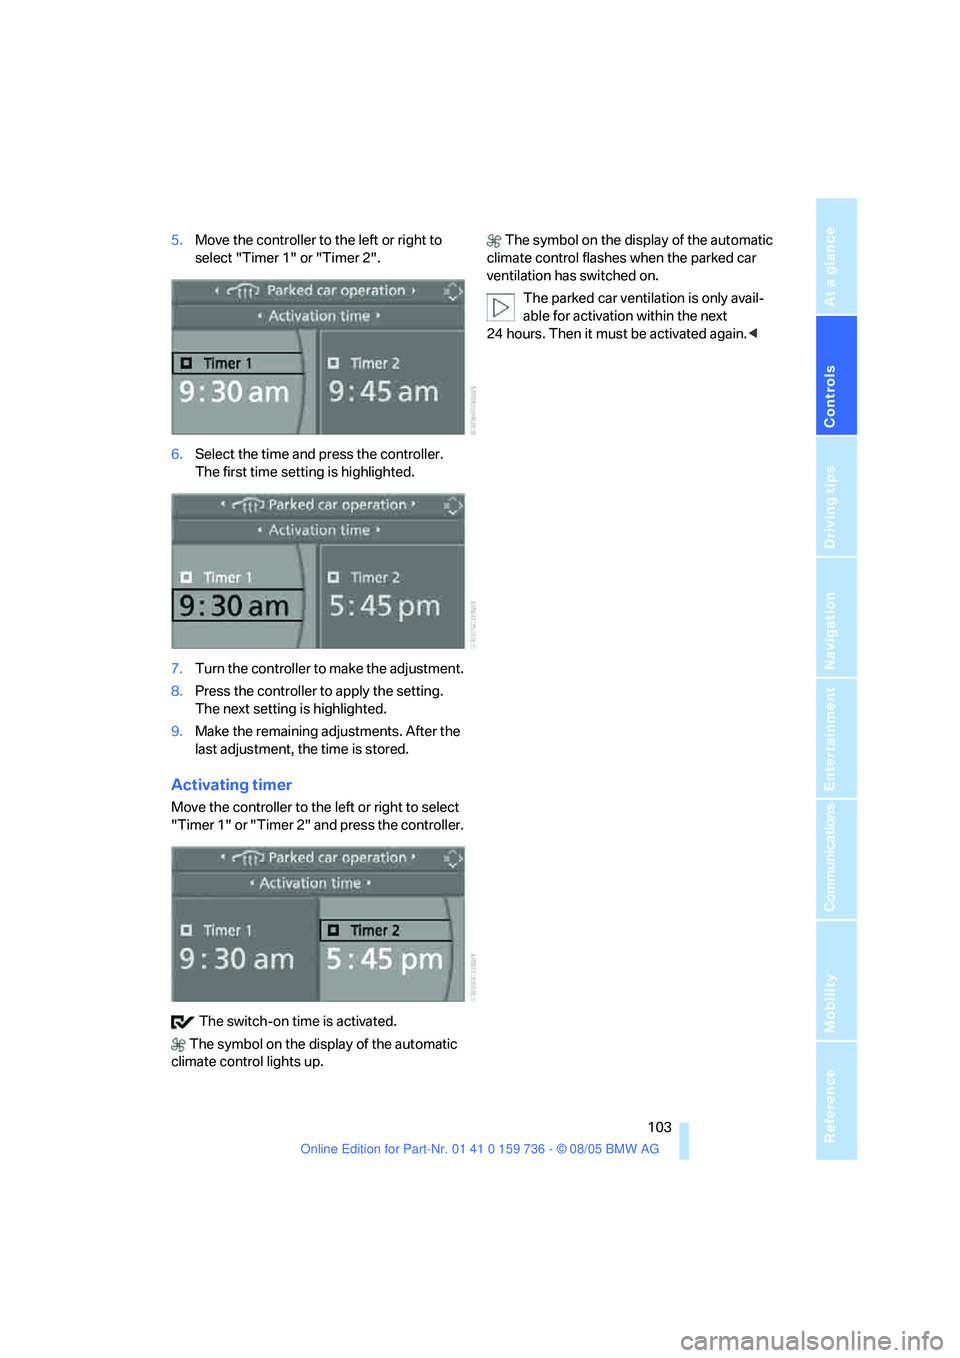
5.Move the controller to the left or right to
select "Timer 1" or "Timer 2".
6.Select the time and press the controller.
The first time setting is highlighted.
7.Turn the controller to make the adjustment.
8.Press the controller to apply the setting.
The next setting is highlighted.
9.Make the remaining adjustments. After the
last adjustment, the time is stored.
Activating timer
Move the controller to the left or right to select
"Timer 1" or "Timer 2" and press the controller.
The switch-on time is activated.
The symbol on the display of the automatic
climate control lights up. The symbol on the display of the automatic
climate control flashes when the parked car
ventilation has switched on.
The parked car ventilation is only avail-
able for activation within the next
24 hours. Then it must be activated again.<
Page 106 of 248
Controls
105Reference
At a glance
Driving tips
Communications
Navigation
Entertainment
Mobility
The corresponding memory button 1 is now
programmed with the signal of the original
hand-held transmitter.
You can operate the system when the engine is
running or when the ignition is switched on.
If the device can not be used after
repeated programming, check whether
the original hand-held transmitter uses an alter-
nating-code system. To do so, either read the
instructions for the original hand-held transmit-
ter or hold down the programmed memory
button1 of the integrated universal remote
control. If the LED 2 on the integrated universal
remote control flashes rapidly for a short time
and then remains lit for approx. 2 seconds, this
indicates that the original hand-held transmitter
uses an alternating-code system. In the case of
an alternating-code system, program the mem-
ory buttons1 as described at Alternating-code
transmitters.<
Alternating-code transmitters
To program the integrated universal remote
control, consult the operating instructions for
the equipment to be set. You will find informa-
tion there on the possibilities for synchroniza-
tion.
When programming hand-held transmitters
that employ an alternating code, please observe
the following supplementary instructions:
P r o g ra m m in g w i ll b e ea s i er w it h t h e a i d o f
a second person.<
1.Park your vehicle within the range of the
remote-controlled device.
2.Program the integrated universal remote
control as described above in the section
Fixed-code hand-held transmitters.
3.Locate the button on the receiver of the
device to be set, e. g. on the drive unit.
4.Press the button on the receiver of the
device to be set. After step 4, you have
approx. 30 seconds for step 5.
5.Press the programmed memory button1
of the integrated universal remote control
three times.The corresponding memory button 1 is now
programmed with the signal of the original
hand-held transmitter.
Deleting stored programs
Press both outer memory buttons1 for approx.
20 seconds until the LED2 flashes:
All stored programs are deleted.
Individual programs cannot be deleted.
Roller sun blinds*
Roller sun blind for rear window
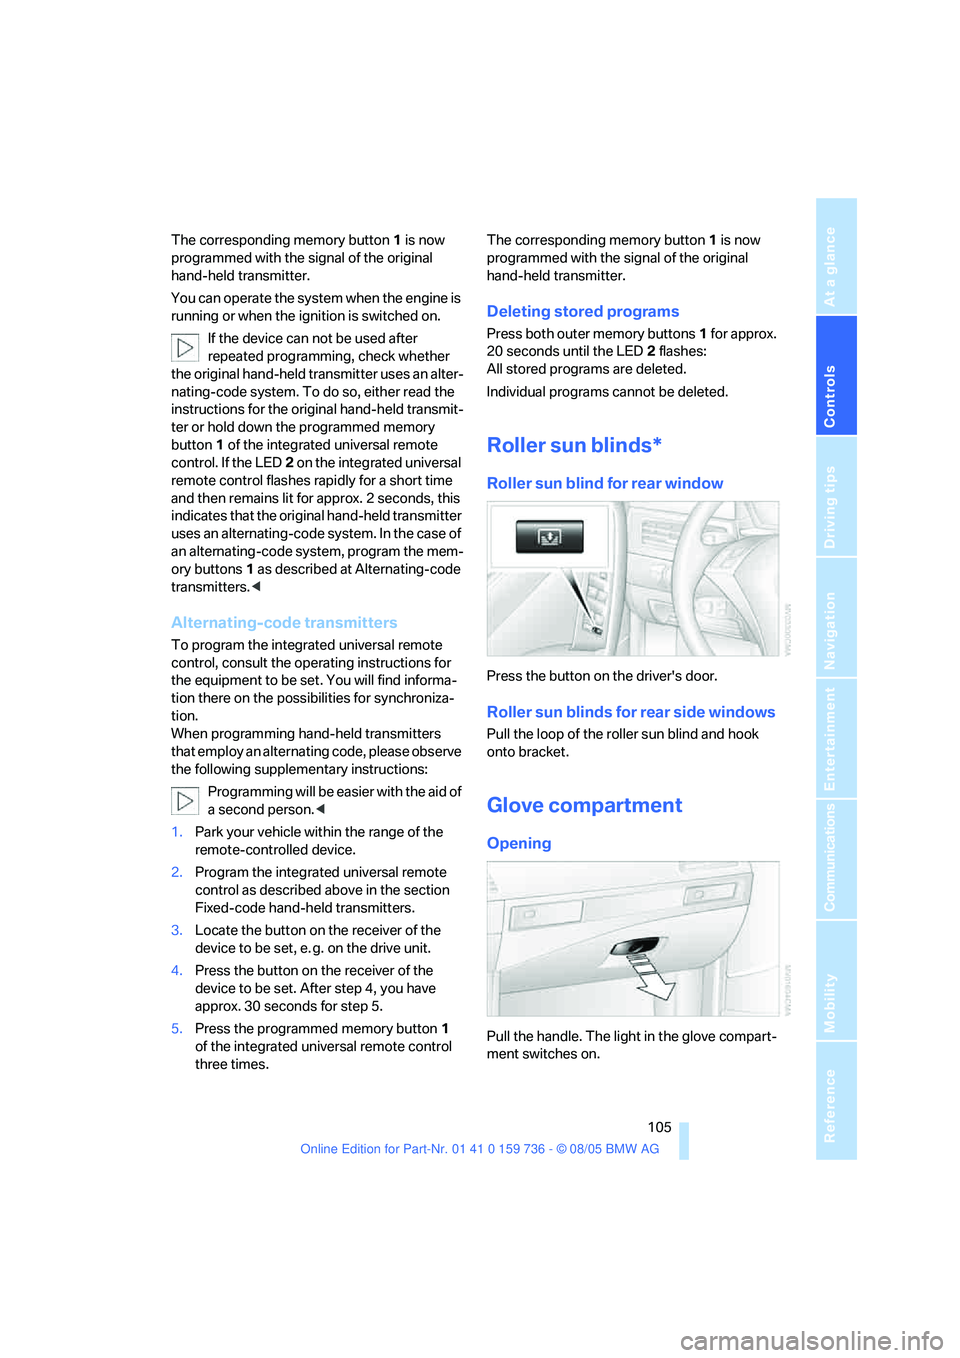
Press the button on the driver's door.
Roller sun blinds for rear side windows
Pull the loop of the roller sun blind and hook
onto bracket.
Glove compartment
Opening
Pull the handle. The light in the glove compart-
ment switches on.
Page 107 of 248
Practical interior accessories
106
Closing
Fold the cover up.
To prevent injury in the event of an acci-
dent while the vehicle is being driven,
close the glove compartment immediately after
use.<
Locking
Lock with a key.
If you only hand over the remote control
without the integrated key, e.g. for valet
parking, refer to page28, the glove compart-
ment cannot be unlocked.<
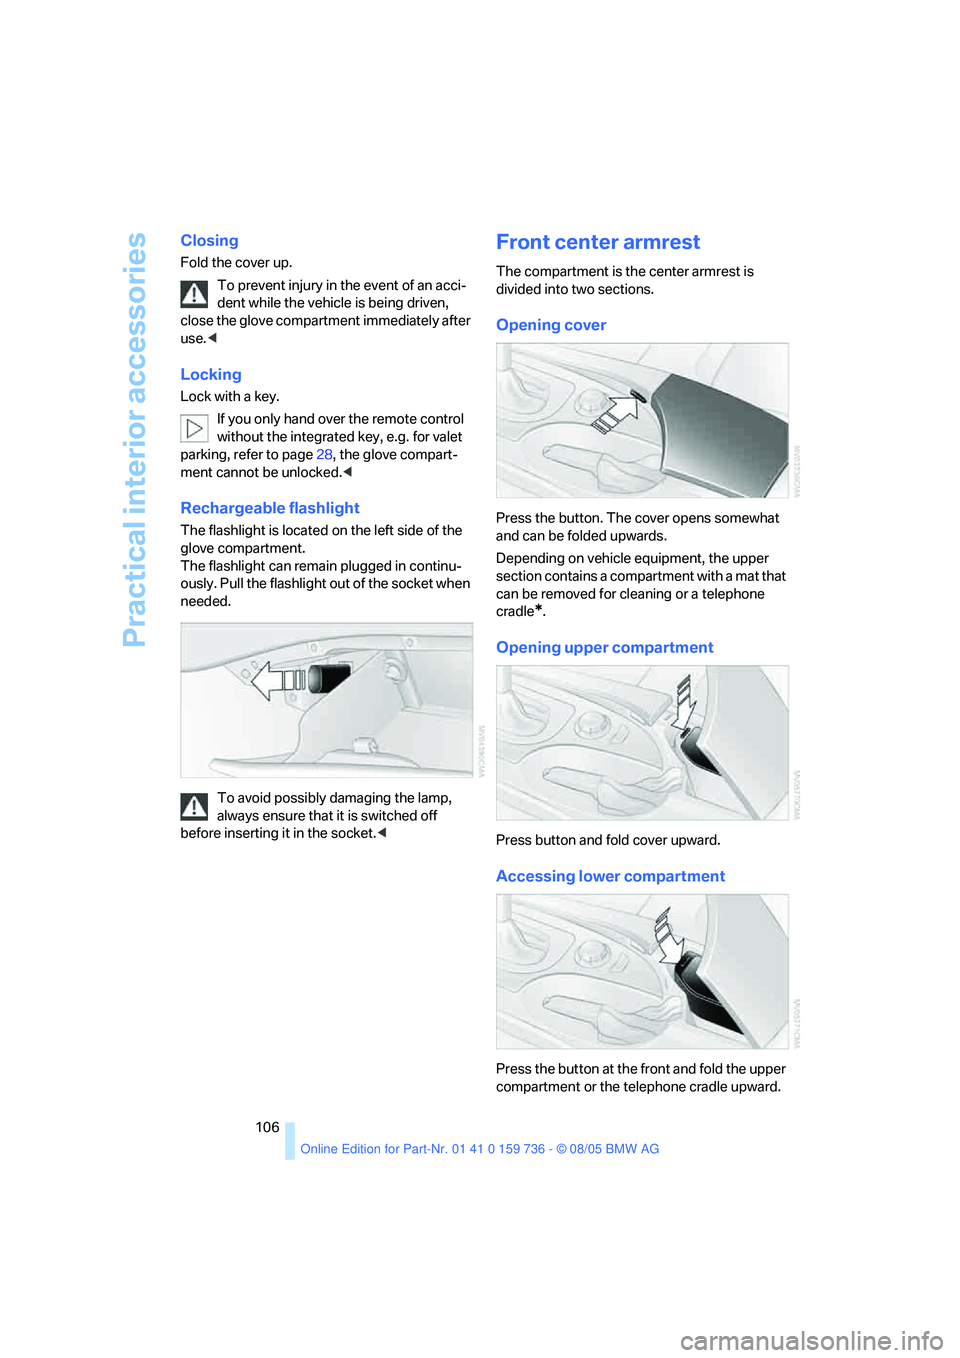
Rechargeable flashlight
The flashlight is located on the left side of the
glove compartment.
The flashlight can remain plugged in continu-
ously. Pull the flashlight out of the socket when
needed.
To avoid possibly damaging the lamp,
always ensure that it is switched off
before inserting it in the socket.<
Front center armrest
The compartment is the center armrest is
divided into two sections.
Opening cover
Press the button. The cover opens somewhat
and can be folded upwards.
Depending on vehicle equipment, the upper
section contains a compartment with a mat that
can be removed for cleaning or a telephone
cradle
*.
Opening upper compartment
Press button and fold cover upward.
Accessing lower compartment
Press the button at the front and fold the upper
compartment or the telephone cradle upward.
Page 109 of 248
Practical interior accessories
108
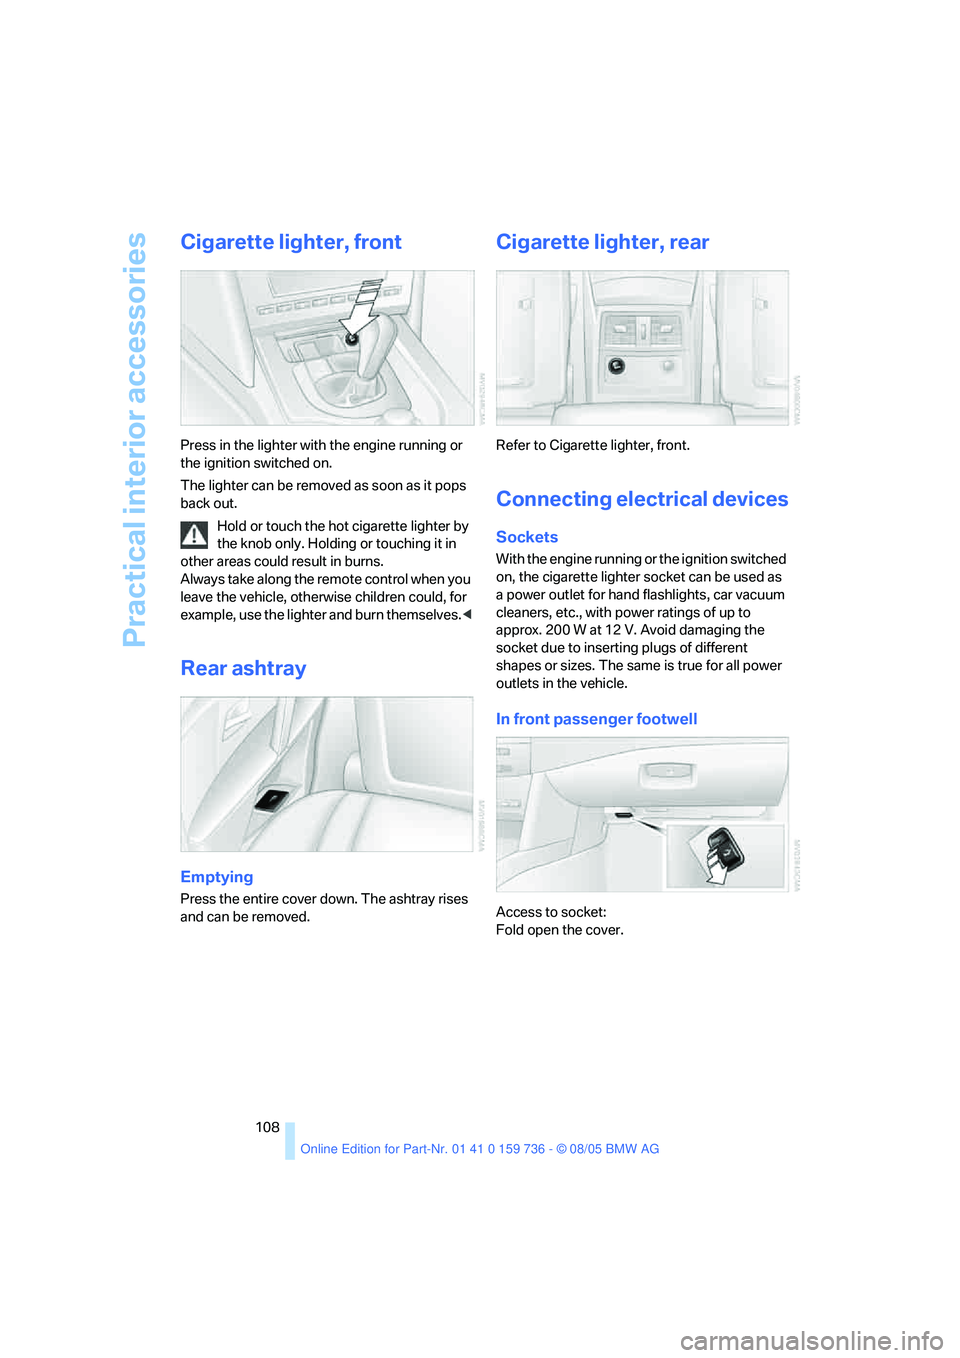
Cigarette lighter, front
Press in the lighter with the engine running or
the ignition switched on.
The lighter can be removed as soon as it pops
back out.
Hold or touch the hot cigarette lighter by
the knob only. Holding or touching it in
other areas could result in burns.
Always take along the remote control when you
leave the vehicle, otherwise children could, for
example, use the lighter and burn themselves.<
Rear ashtray
Emptying
Press the entire cover down. The ashtray rises
and can be removed.
Cigarette lighter, rear
Refer to Cigarette lighter, front.
Connecting electrical devices
Sockets
With the engine running or the ignition switched
on, the cigarette lighter socket can be used as
a power outlet for hand flashlights, car vacuum
cleaners, etc., with power ratings of up to
approx. 200 W at 12 V. Avoid damaging the
socket due to inserting plugs of different
shapes or sizes. The same is true for all power
outlets in the vehicle.
In front passenger footwell
Access to socket:
Fold open the cover.