Page 150 of 311
�µ�´
Trip Computer
Features
149
INSTANTANEOUS
FUEL MILEAGE
CLOCK
BUTTON
TRIP
BUTTON
RESET
BUTTON
DISPLAY BRIGHTNESS
CONTROL /CALIBRATE BUTTON
/ZONE BUTTONRESET, SET BUTTONCOMPASS
OUTSIDE
TEMPERATURE
CLOCK
Page 151 of 311

Clock
Direction of travel
Outside temperature
Instantaneous f uel mileageTheAvgdisplayshowsyouthe
average f uel economy since you
last reset the display.
The E/T is the elapsed time that
the ignition has been on. It
automatically resets to 0.0 when it
reaches twelve hours. This display
can be reset at any time.
The display also has manual
f unctions f or the Climate Control
System. Ref er to page .
All models of MDX have a trip
computer. To operate the trip
computer on models with the
navigation system, ref er to the
navigation manual.
The Trip Computer displays the
f ollowing inf ormation.
The temperature sensor is located
in the f ront bumper, and can be
affected by heat from the road
surf ace, engine heat, and the
exhaust f rom the surrounding
traf f ic. Because of these
conditions, it may take a while f or
the temperature to read correctly. The Range, or estimated distance
you can travel on the fuel
remaining in the tank estimated
f rom the f uel economy you have
gotten over the last several miles
(kilometers).
The Trip display shows you the
total distance you have driven
since it was last reset.
Press the TRIP button to show either
the range and Avg f uel economy, or
the E/T and Trip odometer.
To reset the Avg f uel economy, E/T,
and Trip odometer, press and hold
the RESET button until you hear a
beep.
The outside temperature, f uel
economy, range, and trip odometer
can be displayed in either English or
Metric units. To change between
units, press the TRIP button and
hold it f or f ive seconds.
106
(Without Navigation System)
Changing and Resetting the
Display
Changing Units of Measurement
Trip Computer
150
Page 152 of 311
To set the clock:Push the CLOCK button. The
hours digits will start blinking. If
you want to only set the minutes,
go to step 4. To change the hours to a lower
number, press and hold the
MODE button. To change the
hours to a higher number, press
andholdtheA/Cbutton.
When the hours reach the desired
number, release the button.
To set the minutes, press the
CLOCK button again. The
minutes digits will start blinking.
Use the MODE or A/C button to
set the minutes to the desired
number.
Press the CLOCK button again.
The clock will return to its normal
display.
For example:
1:06 will reset to 1:00
1:52 will reset to 2:00 You can quickly set the time to the
nearest hour. Press the CLOCK
button, then press the RESET button.
If the displayed time is before the
half hour, it will reset back to the
previous hour. If the displayed time
is af ter the half hour, it will reset
f orward to the next hour.
1. 2.
3.
4.
5.
6.
Setting the Clock
Trip Computer
Features
151
Page 153 of 311

�µ�µ�µ�µ
�µ�µ
The compass may need to be
manually calibrated af ter exposure to
a strong magnetic field. If the
compassseemstobecontinually
showing the wrong direction and is
not self -calibrating, do the f ollowing. Do this procedure in an open
area, away f rom buildings, power
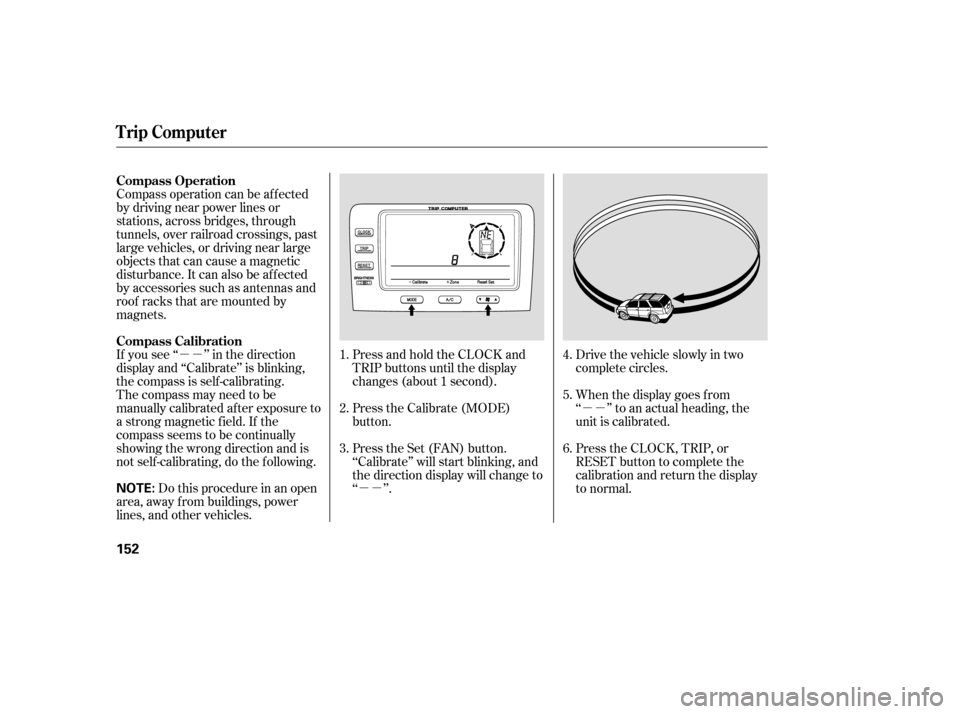
lines, and other vehicles. Press and hold the CLOCK and
TRIP buttons until the display
changes (about 1 second).
Press the Calibrate (MODE)
button.
Press the Set (FAN) button.
‘‘Calibrate’’ will start blinking, and
the direction display will change to
‘‘ ’’.
Drive the vehicle slowly in two
complete circles.
When the display goes f rom
‘‘ ’’ to an actual heading, the
unit is calibrated.
Press the CLOCK, TRIP, or
RESET button to complete the
calibration and return the display
to normal.
Compass operation can be af f ected
by driving near power lines or
stations, across bridges, through
tunnels, over railroad crossings, past
large vehicles, or driving near large
objects that can cause a magnetic
disturbance. It can also be af f ected
by accessories such as antennas and
roof racks that are mounted by
magnets.
If you see ‘‘ ’’ in the direction
display and ‘‘Calibrate’’ is blinking,
the compass is self -calibrating.
1.
2.
3.4.
5.
6.
Compass Operation
Compass Calibration
Trip Computer
152
NOTE:
Page 154 of 311
In most areas, there is a variation
between magnetic north and true
north. Zone selection is required so
the compass can compensate f or this
variation. To check and select the
zone, do this:Press the Zone (A/C) button. The
zone the compass is currently set
to is displayed.
Find the zone f or your area on the
map.If the zone is incorrect, press and
hold the MODE button to get the
number to count down, or the A/C
button to get the number to count
up. If the zone is correct, continue
to step 5.
Press the Set (FAN) button to set
the zone selection.
Press the CLOCK, TRIP or
RESET button to exit the zone
selection and return display to
normal.
Press and hold the CLOCK and
TRIP buttons until the display
changes (about 1 second).
1. 2.
3.4.
5.
6.
CONT INUED
Compass Zone Select ion
Trip Computer
Features
153
Page 156 of 311

The Brightness control has seven
positions. In the middle f ive positions
the display will dim when you turn
on the parking lights or headlights.
Moving the control to the far left
position turns of f the display. It will
come back on f or several seconds if
you press any of the buttons.
In the f ar right (maximum
brightness) position, the display will
notdimwhenyouturnonthe
parking lights.
Always use a sof t cloth and mild
glass/plastic cleaner (such as
cleaners f or computer monitor
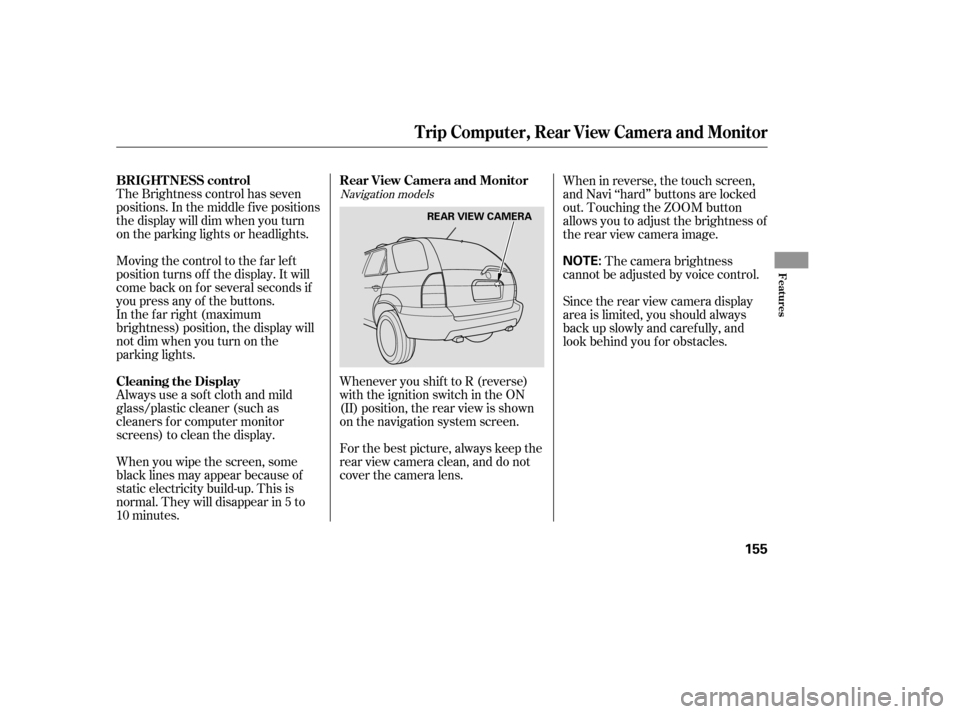
screens) to clean the display.Whenever you shif t to R (reverse)
with the ignition switch in the ON
(II) position, the rear view is shown
on the navigation system screen.
For the best picture, always keep the
rear view camera clean, and do not
cover the camera lens.
When you wipe the screen, some
black lines may appear because of
static electricity build-up. This is
normal. They will disappear in 5 to
10 minutes. When in reverse, the touch screen,
and Navi ‘‘hard’’ buttons are locked
out. Touching the ZOOM button
allows you to adjust the brightness of
the rear view camera image.
The camera brightness
cannot be adjusted by voice control.
Since the rear view camera display
area is limited, you should always
back up slowly and caref ully, and
look behind you f or obstacles.Navigation models
BRIGHT NESS control
Cleaning the Display Rear View Camera and Monitor
Trip Computer, Rear View Camera and Monitor
Features
155
NOTE:
REAR VIEW CAMERA
Page 158 of 311

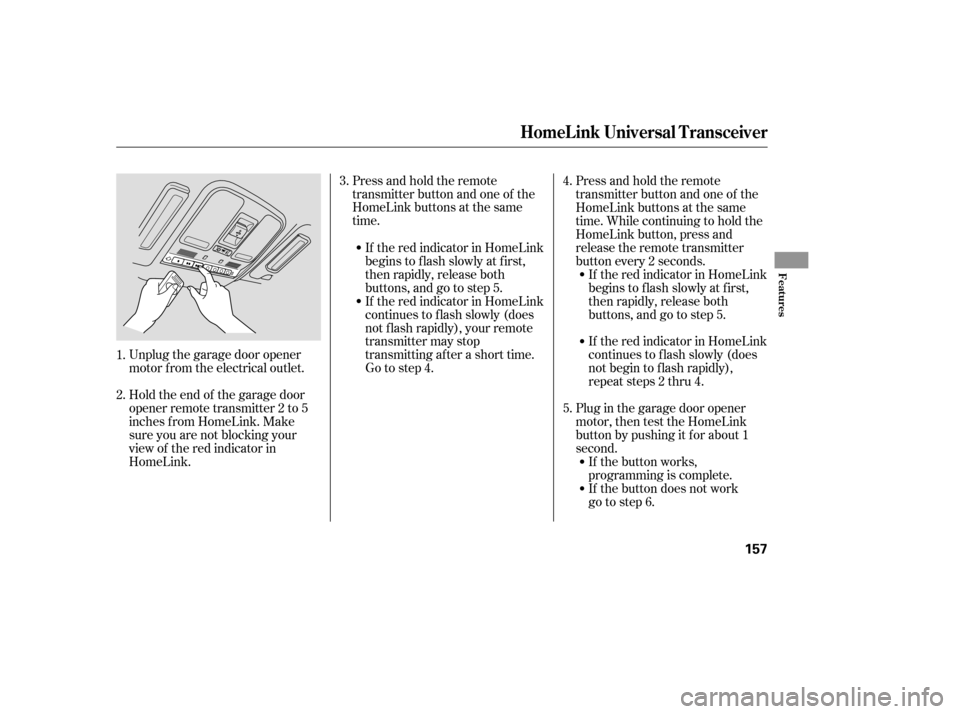
Unplug the garage door opener
motor f rom the electrical outlet.
Holdtheendof thegaragedoor
opener remote transmitter 2 to 5
inches f rom HomeLink. Make
sure you are not blocking your
view of the red indicator in
HomeLink.Press and hold the remote
transmitter button and one of the
HomeLink buttons at the same
time.
Plug in the garage door opener
motor, then test the HomeLink
button by pushing it f or about 1
second. Press and hold the remote
transmitter button and one of the
HomeLink buttons at the same
time. While continuing to hold the
HomeLink button, press and
release the remote transmitter
button every 2 seconds.If the red indicator in HomeLink
continues to f lash slowly (does
not begin to f lash rapidly),
repeat steps 2 thru 4.
If the button does not work
go to step 6. If the button works,
programming is complete.
If the red indicator in HomeLink
continues to f lash slowly (does
not f lash rapidly), your remote
transmitter may stop
transmitting after a short time.
Go to step 4. If the red indicator in HomeLink
begins to f lash slowly at f irst,
then rapidly, release both
buttons, and go to step 5.
If the red indicator in HomeLink
begins to f lash slowly at f irst,
then rapidly, release both
buttons, and go to step 5.
2. 3.
1. 5. 4.
HomeL ink Universal Transceiver
Features
157
Page 164 of 311

�Î
�Î�µ �µ
�ΠHere are some guidelines f or using
voice control:
To enter a command, press the top
of the TALK/BACK button. Then,
af ter the beep, say your command
in a clear, natural tone.
For best system operation, set the
climate control f an speed to low,
and direct the center vents away
f rom the microphone in the ceiling.
If the HFL does not recognize a
command, its response is, ‘‘Pardon.’’
If it doesn’t recognize the
command a second time, its
response is, ‘‘Please repeat.’’ If it
doesn’t recognize the command a
third time, it plays the Help
prompt. To hear a list of available options
at any time, press the top of the
TALK/BACK button, wait f or the
beep, and say, ‘‘Hands f ree link
help.’’
Many commands can be spoken
together. For example, you can
say, ‘‘Dial 123-456-7891.’’
To enter a string of numbers in a
Call or Dial command, you can say
them all at once, or you can
separate them in blocks of 3, 4, 7,
10, and 11.
To skip a voice prompt, press the
Talk button while the HFL is
speaking. The HFL will then begin
listening f or your next command.
Signal Strength Indicates the
network signal strength.
ROAM Status (models without
navigation system) Indicates
your phone is roaming.
Some phones will not send this
inf ormation to the HFL.
TheHFLisoperatedbytheHFL
TALK/BACKbuttonontheleftside
of the steering wheel. The next f ew
pages provide easy-to-use
instructions f or all basic f eatures of
the HFL. All phones may not
operate identically, and some may
cause inconsistent operation of the
HFL. :
CONT INUED
HandsFreeL ink
Using Voice Control
How to Use the HFL
Features
163
NOTE:
TM