Page 65 of 106

3-32
E
EJU01894
Post-operation checks
Always perform the following post-opera-
tion checks after operating the watercraft.
1. Remove the watercraft from the water.
2. Wash down the hull, steering pole, han-
dlebars, and jet unit with fresh water.
3. Remove the hood and check the engine
compartment for water. To drain excess
water, turn the watercraft on its port (left)
side. If necessary, turn the watercraft
upside down to drain water completely.
CAUTION:@ �Place a suitable clean cloth or carpet-
ing underneath the watercraft to pro-
tect it from abrasions and scratches.
�Always turn the watercraft over onto
its port (left) side.
�When turning the watercraft onto its
side or inverting it, support the bow
and secure the steering pole, other-
wise the steering pole and handlebars
could be bent or damaged.
@
NOTE:@ This watercraft is equipped with an auto-
matic bilge-draining system that removes
water from the engine compartment while
you are underway. However, some residual
water will remain.
@
4. Put the watercraft in a horizontal posi-
tion.
5. Flush the cooling system to prevent it
from clogging with salt, sand, or dirt.
(See page 4-1 for flushing the cooling
system procedures.)
6. Drain residual water from the exhaust
system by alternately squeezing and
releasing the throttle lever for 10 to
15 seconds while the engine is running.
UF1N73.book Page 32 Monday, May 10, 2004 10:37 AM
Page 66 of 106
3-33
E
CAUTION:@ Do not run the engine at full throttle or
for more than 15 seconds on land, other-
wise the engine may overheat and seize.
@
7. If the watercraft will be stored for a week
or more, lubricate internal engine com-
ponents to help prevent corrosion. (See
page 4-3 for lubrication procedures.)
8. Rinse the engine and engine compart-
ment with a small amount of water.
CAUTION:@ Do not use high pressure when rinsing
the engine or engine compartment as
severe damage could result.
@
9. Wipe the engine and engine compart-
ment dry with a clean cloth (repeat
step 3, if necessary).
10. Wipe the hull, steering pole, handlebars,
and jet unit dry with a clean cloth.
11. Spray a rust inhibitor on metallic parts to
minimize corrosion.
12. Allow the engine compartment to air dry
completely before reinstalling the hood.
UF1N73.book Page 33 Monday, May 10, 2004 10:37 AM
Page 67 of 106
3-34
E
EJU01956
Transporting
WARNING@ Always place the fuel cock knob in the
“OFF” position when transporting the
watercraft, otherwise fuel could leak out
into the engine or engine compartment,
which would create a fire hazard.
@
Transport this watercraft using the special
trailer that incorporates a hole into which the
pin 1 can be inserted and locked after
passing it through the rope hole 2.
After securing the bow with the pin,
secure the stern with ropes or tie downs 4
over the gunwale. Use a rubber shock
cord3 to hold the steering pole.
CAUTION:@ �Do not route ropes or tie downs over
the steering pole, as they may damage
it. Also, wrap the ropes or tie downs
with towels or rags where they touch
the body of the watercraft to avoid
scratching or damage.
�Do not transport the watercraft with
steering pole up, or the steering pole
may be damaged during transporta-
tion.
@
UF1N73.book Page 34 Monday, May 10, 2004 10:37 AM
Page 68 of 106
E
–MEMO–
UF1N73.book Page 35 Monday, May 10, 2004 10:37 AM
Page 69 of 106

E
4
EJU01086
MAINTENANCE AND
CARE
Storage ...................................................... 4-1
Flushing the cooling system .................. 4-1
Lubrication .............................................. 4-3
Fuel system ............................................ 4-4
Battery .................................................... 4-5
Cleaning the watercraft .......................... 4-6
Maintenance and adjustments .............. 4-7
Owner’s/Operator’s Manual and
tool kit ..................................................... 4-8
Periodic maintenance chart ................... 4-9
Inspecting the fuel system ................... 4-10
Inspecting the jet thrust nozzle
angle ..................................................... 4-12
Inspecting and adjusting the throttle
cable ..................................................... 4-12
Cleaning and adjusting the spark
plugs ..................................................... 4-13
Lubrication points ................................. 4-14
Adjusting the choke cable .................... 4-16
Inspecting the battery .......................... 4-17
Adjusting the carburetor ...................... 4-19
Replacing the fuse ............................... 4-20
Adjusting the steering friction .............. 4-20
Adjusting the jet thrust nozzle angle ... 4-21
Specifications ........................................ 4-23
UF1N73.book Page 1 Monday, May 10, 2004 10:37 AM
Page 70 of 106

4-1
E
EJU01087
Storage
WARNING@ Always place the fuel cock knob in the
“OFF” position when storing the water-
craft, otherwise fuel could leak out into
the engine or engine compartment,
which would create a fire hazard.
@
Storage for prolonged periods of time,
such as winter storage, requires preventa-
tive maintenance to ensure against deterio-
ration. It is advisable to have the watercraft
serviced by a Yamaha dealer prior to stor-
age. However, the following procedures can
be performed by the owner.
EJU10881
Flushing the cooling system
Flushing the cooling system is essential
to prevent the cooling system from being
clogged with salt, sand, or dirt.
CAUTION:@ �Do not supply water to the cooling
water passages when the engine is not
running. The water could flow back
through the muffler into the crankcase
causing severe engine damage.
�Do not run the engine of the watercraft
for more than 15 seconds without sup-
plying water, otherwise the engine may
overheat.
@
UF1N73.book Page 1 Monday, May 10, 2004 10:37 AM
Page 71 of 106
4-2
E
1. Put the watercraft on land in a horizontal
position.
2. Open the flushing hose connector
cap1, and then insert the garden hose
adapter 2 into the flushing hose con-
nector 3 and turn it until it is securely
connected.
3. Connect the garden hose adapter to a
water tap using a hose.
4. Start the engine, and then immediately
turn the water supply on until water flows
out continually from the cooling water
pilot outlet.
5. Run the engine at idling speed for about
3 minutes watching the engine condition.
If the engine stops while flushing, turn
the water supply off immediately and
repeat the above steps.
6. Turn the water supply off, and then force
the remaining water out from the cooling
passages by alternately squeezing, and
releasing the throttle lever for 10 to
15 seconds.
7. Stop the engine.
8. Remove the garden hose adapter and
secure the cap.
UF1N73.book Page 2 Monday, May 10, 2004 10:37 AM
Page 72 of 106

4-3
E
EJU01299
Lubrication
WARNING@ To reduce the risk of fire or explosion:
Never pour or spray gasoline, or any sub-
stance other than a rust inhibitor through
the hole in the carburetor silencer cover.
@
CAUTION:@ �Make sure to replace the cap securely
after fogging the engine, otherwise
water could enter the engine and
cause damage.
�Do not attempt to run the engine at full
throttle or for more than 15 seconds
while the watercraft is out of the water,
otherwise the engine may overheat
and/or seize.
@
1. Open the silencer cap 1 on the silencer.
2. Start the engine with the watercraft in a
well-ventilated area.
3. With the engine running at a fast idle,
quickly spray as much rust inhibitor as
possible through the hole in the silencer
cover. Keep spraying until the engine
stalls (or a maximum of 15 seconds).
4. Install the cap securely.
5. Lubricate all cables such as the throttle,
choke, and steering cables.
NOTE:@ Use a suitable marine grease applicator to
pressure lubricate the cables and purge out
any moisture between the inner and outer
cables.
@
6. Lubricate the areas of the watercraft
specified under Lubrication points on
page 4-14.
UF1N73.book Page 3 Monday, May 10, 2004 10:37 AM
 1
1 2
2 3
3 4
4 5
5 6
6 7
7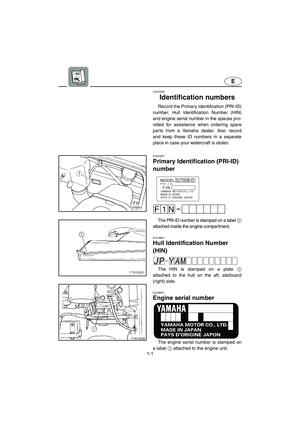 8
8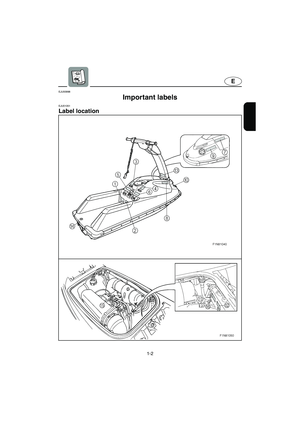 9
9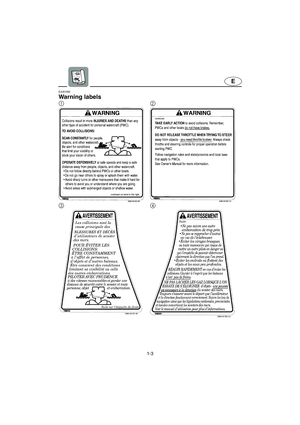 10
10 11
11 12
12 13
13 14
14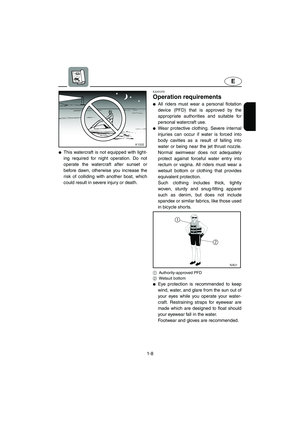 15
15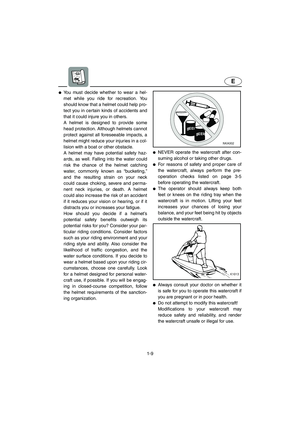 16
16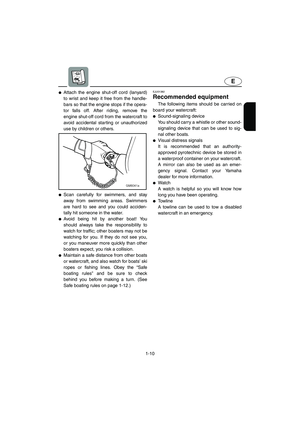 17
17 18
18 19
19 20
20 21
21 22
22 23
23 24
24 25
25 26
26 27
27 28
28 29
29 30
30 31
31 32
32 33
33 34
34 35
35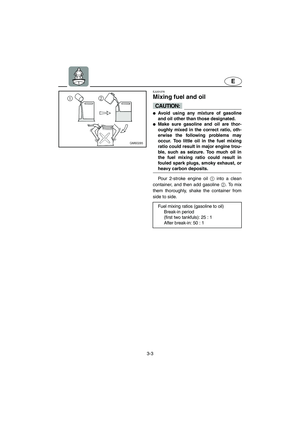 36
36 37
37 38
38 39
39 40
40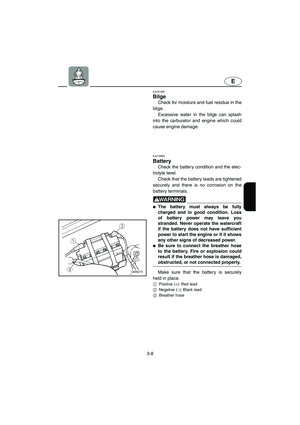 41
41 42
42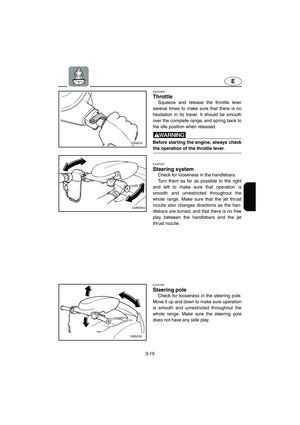 43
43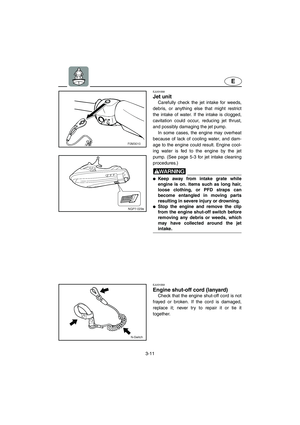 44
44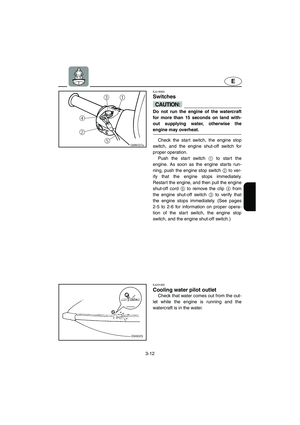 45
45 46
46 47
47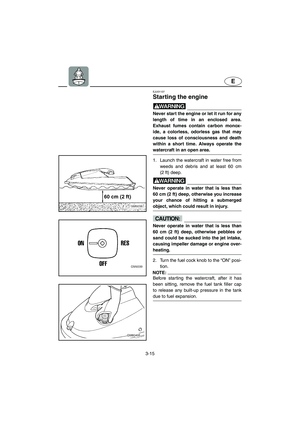 48
48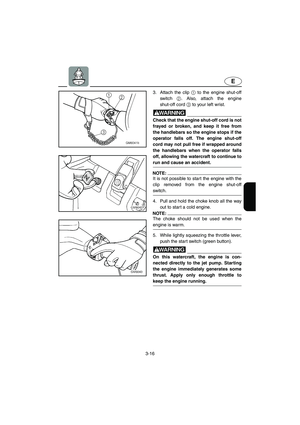 49
49 50
50 51
51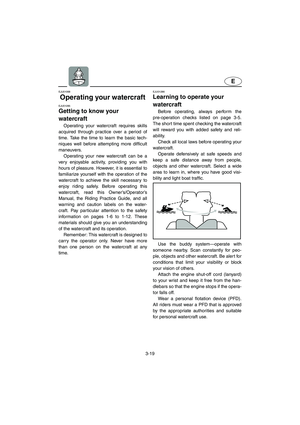 52
52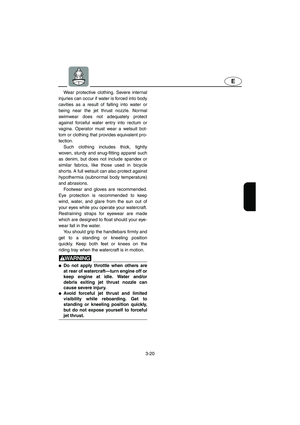 53
53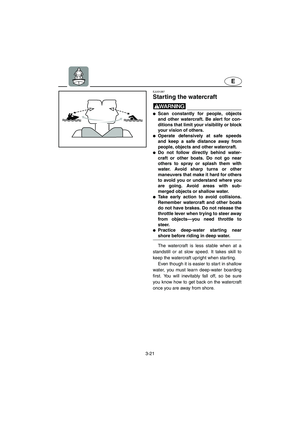 54
54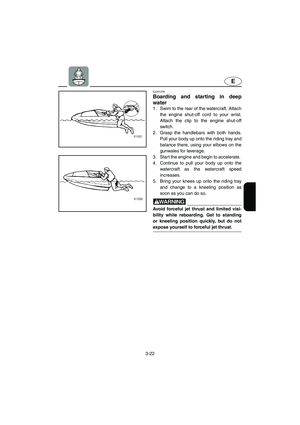 55
55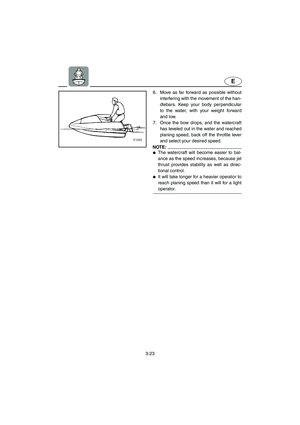 56
56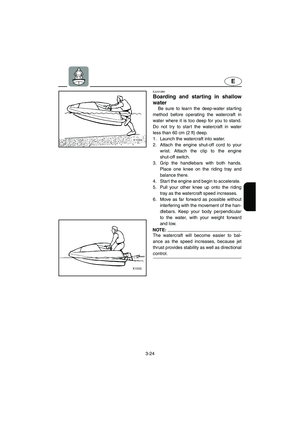 57
57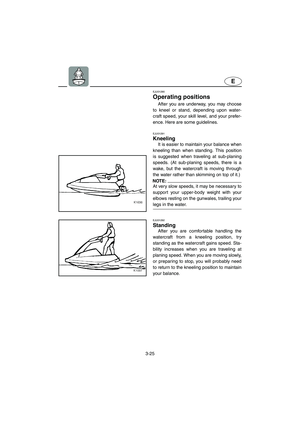 58
58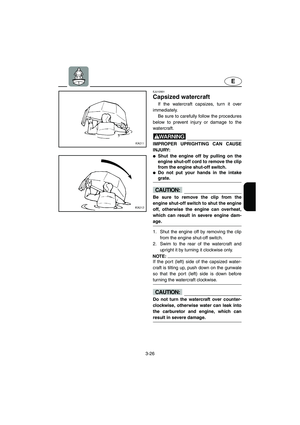 59
59 60
60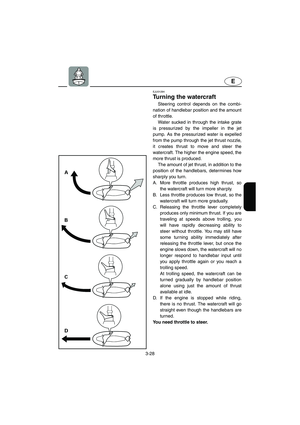 61
61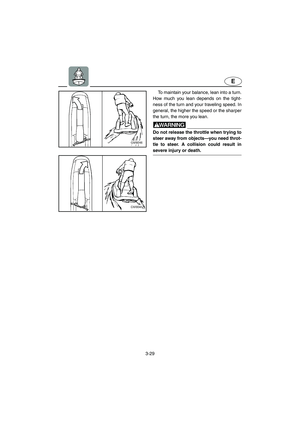 62
62 63
63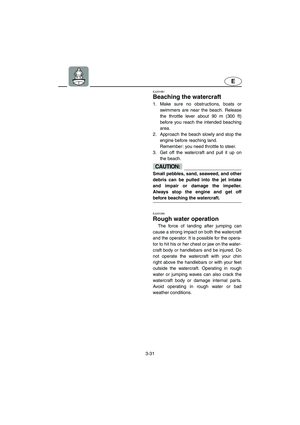 64
64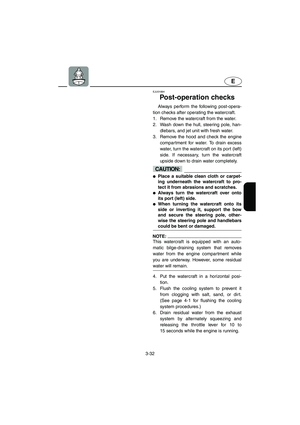 65
65 66
66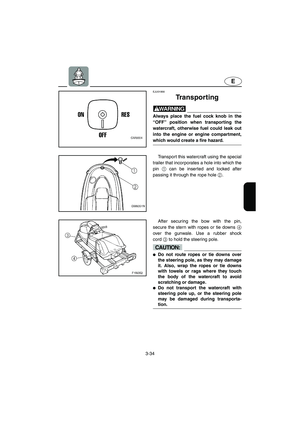 67
67 68
68 69
69 70
70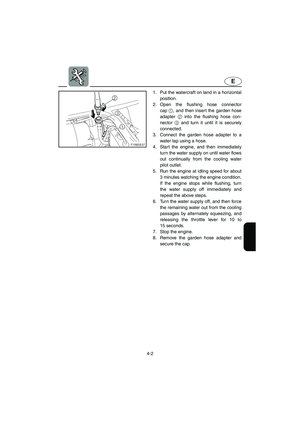 71
71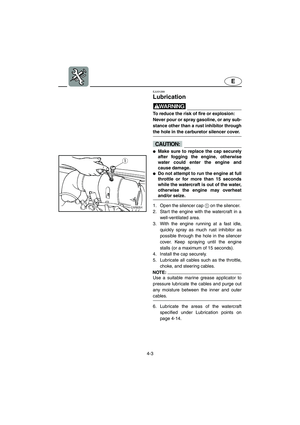 72
72 73
73 74
74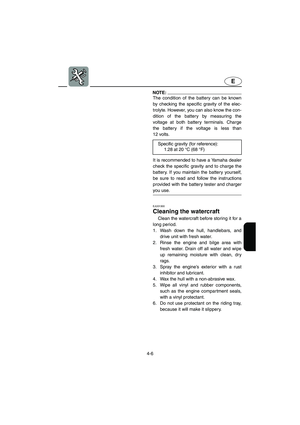 75
75 76
76 77
77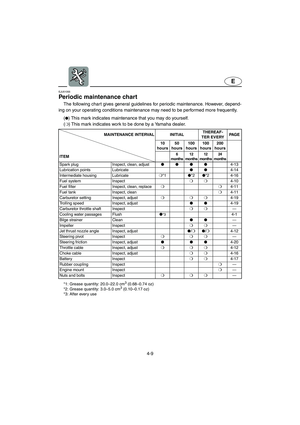 78
78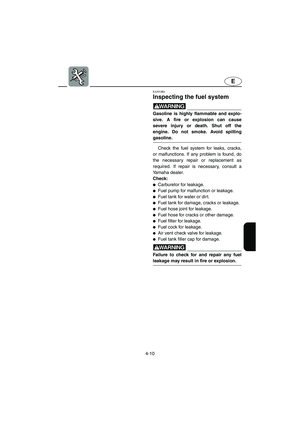 79
79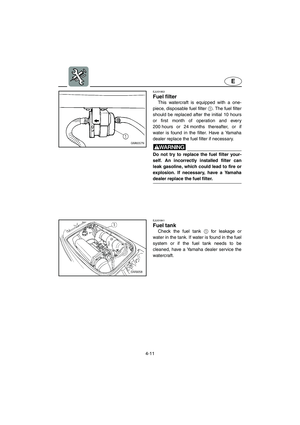 80
80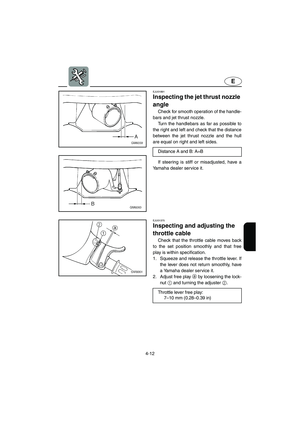 81
81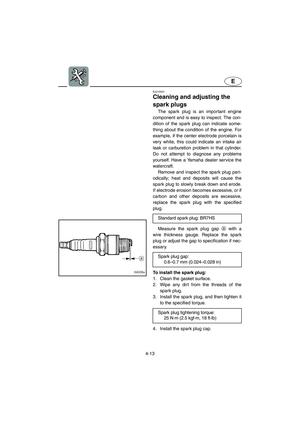 82
82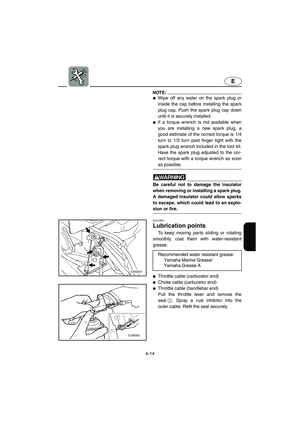 83
83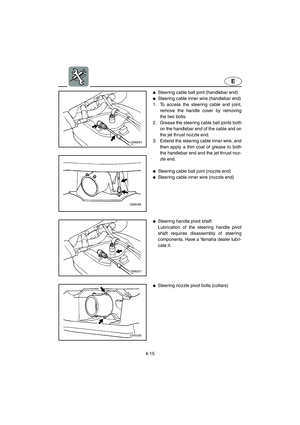 84
84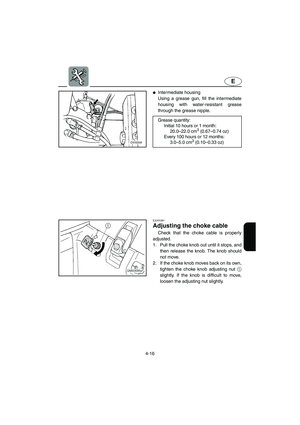 85
85 86
86 87
87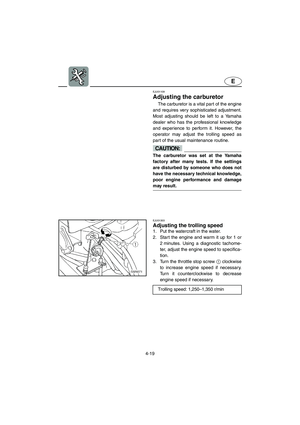 88
88 89
89 90
90 91
91 92
92 93
93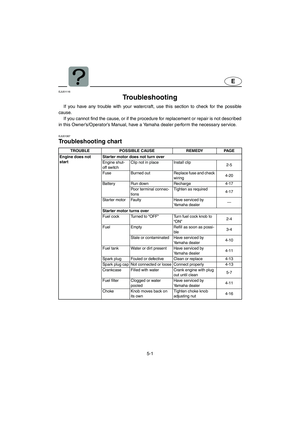 94
94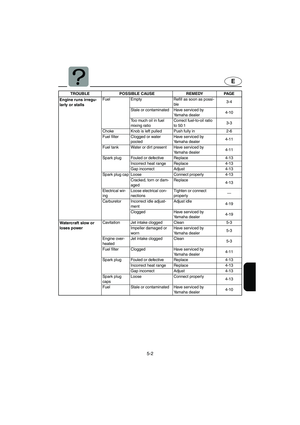 95
95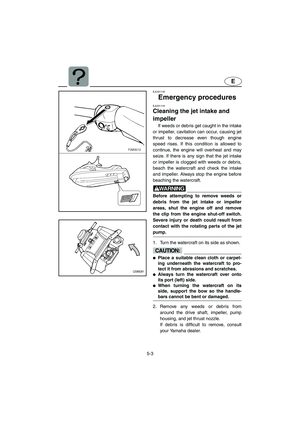 96
96 97
97 98
98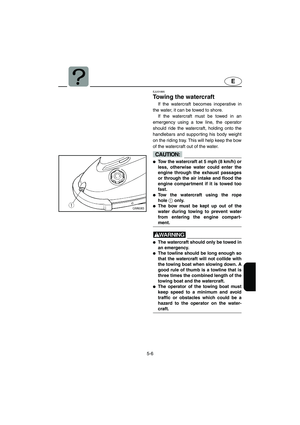 99
99 100
100 101
101 102
102 103
103 104
104 105
105


