2005 VOLVO S40 reset
[x] Cancel search: resetPage 19 of 127

1. Speedometer
2. Turn signal, left
3. Warning symbol
See the next page for additional information.
4. Information display
The display presents information and warning messages, the ambient temperature, and the clock, etc. When the
ambient temperature is between 23° and 36°F (-5° and +2°C), a snowflake symbol is shown in the display. This
symbol serves as a warning for possible slippery road surfaces. Please note that this symbol does not indicate a fault
with your car. At low speeds, or when the car is not moving, the temperature readings may be slightly higher than the
actual ambient temperature.
5. Information symbol
See the next page for additional information.
6. Turn signal, right
7. Tachometer
The tachometer shows engine speed in thousands of revolutions per minute (rpm). Do not drive continuously with the
needle in the red area of the dial, which indicates maximum allowable engine rpm range. Instead, shift to a higher gear
or slow the vehicle down. The engine management system will automatically prevent excessively high engines speeds.
This will be noticeable as a pronounced unevenness in engine speed.
8. Indicator and warning symbols
9. Fuel gauge
The fuel tank holds approximately 15.9 US gallons (60 liters)
1. When a warning light in the gauge comes on, there are
approximately 2.1 US gallons (8 liters) of fuel remaining in the tank.
10. Trip odometer reset button
The trip odometers are used to measure short distances. Press the button briefly to switch between the odometer for the
car's total mileage and the two trip odometers, T1 and T2. A long press (more than 2 seconds) resets the currently
selected trip odometer.
11. Function display
This window displays information on functions such as the odometer, trip odometers, optional rain sensor, and cruise
control.
12. High beam indicator
13. Clock setting button
Turn the button to set the time.
ProCarManuals.com
Page 24 of 127

Messages
When an indicator or warning light in the instrument panel comes on, a message is also shown in the information
display. To read a message:
Press the READ button (A).
Pressing READ repeatedly enables you to scroll to any other messages that may be stored.
NOTE: If a message is displayed when e.g. you are using the trip computer, this message must be read before you can
access the trip computer.Message Meaning
STOP
SAFELY Stop and switch off the engine to help prevent the risk of serious damage.
STOP
ENGINE Stop and switch off the engine to help prevent the risk of serious damage.
SERVICE
URGENT Take your car to an authorized Volvo retailer for inspection as soon as possible.
SEE
MANUAL Refer to your owner's manual. For additional information, please contact your Volvo retailer.
SERVICE
REQUIRED Take your car to an authorized Volvo retailer for inspection at your convenience (but preferably
before the next scheduled maintenance service).
TIME FOR
REGULAR
SERVICE This message is affect by the number of miles/km driven, by the number of months, or by the
number of hours the engine has been run since the service function was reset at the most recent
regularly scheduled service.
pg. 44 Center console controls
ProCarManuals.com
Page 28 of 127

Move the lever toward the steering wheel and release it to switch between high and low beams.
With the headlights off: headlight flasher (3)
With the headlights switched off (the switch on the lighting panel in position 0), move the lever toward the steering
wheel. The high beams will remain on until the lever is released.
Home safe lighting (3)
When you leave your car at night, you can make use of the home safe lighting function to illuminate the area in front
of the car:
1. Remove the key from the ignition switch.
2. Pull the direction indicator lever towards the steering wheel (as when using the headlight flasher function).
3. Exit the car and lock the doors.
The headlights, parking lights, license plate lights will now come on and remain on for 30, 60 or 90 seconds. The time
interval can be changed according to your preferences by using the Personal Settings function, described at the end of
this chapter.
Trip computer (option)
The trip computer stores information gathered from several systems in your car and has four menus (five on Canadian
models) that can be shown in the information display.
Driving distance on current fuel reserve
Average fuel consumption
Current fuel consumption
Average speed
Current speed in m.p.h. (Canadian models only)
pg. 48 Left-side steering wheel lever
NOTE: Warning messages from the car's monitoring systems will override the trip computer function. If a warning
message is shown in the information display while you are using the trip computer, you must acknowledge the
message by pressing the READ button (A). Press button A again to return to the trip computer function.
Controls
The four trip computer functions (five on Canadian models) can be accessed by twisting INFO (B) one step at a time
in either direction. Twisting a fifth time (sixth time on Canadian models) returns you to the original function.
The trip computer can be reset (average fuel consumption and average speed will be erased from system memory) by
pressing RESET (C) for at least five seconds.
Driving distance on current fuel reserve
This function shows the approximate distance that can be driven on the fuel remaining in the tank. This calculation is
ProCarManuals.com
Page 29 of 127
based on average fuel consumption during the last 20 miles (30 km) of driving and the amount of fuel remaining in the
tank when the reading was taken. When the driving distance on current fuel reserve is less than 12 miles (20 km), "---"
will be displayed in the information display.
Average fuel consumption
This value indicates fuel consumption since the last time the trip computer was reset (by pressing RESET, button C).
When the engine is switched off, information on fuel consumption is stored and remains in system memory until the
RESET (button C) is pressed again.
Current fuel consumption
This value indicates the current fuel consumption, based on readings taken once per second. When the car is not
moving, "---- " will be displayed.
Average speed
This value indicates average speed since the last time the trip computer was reset (by pressing RESET, button C).
When the engine is switched off, information on average speed is stored and remains in system memory until the
RESET (button C) is pressed again.
Current speed in m.p.h. (Canadian models only)
This function provides the driver with an instantaneous conversion of the car's current speed from km/h to m.p.h.
NOTE: Trip computer readings may vary slightly depending on the circumference of the tires on the car or on tire
inflation.
pg. 49 Cruise control (option)
Cruise control
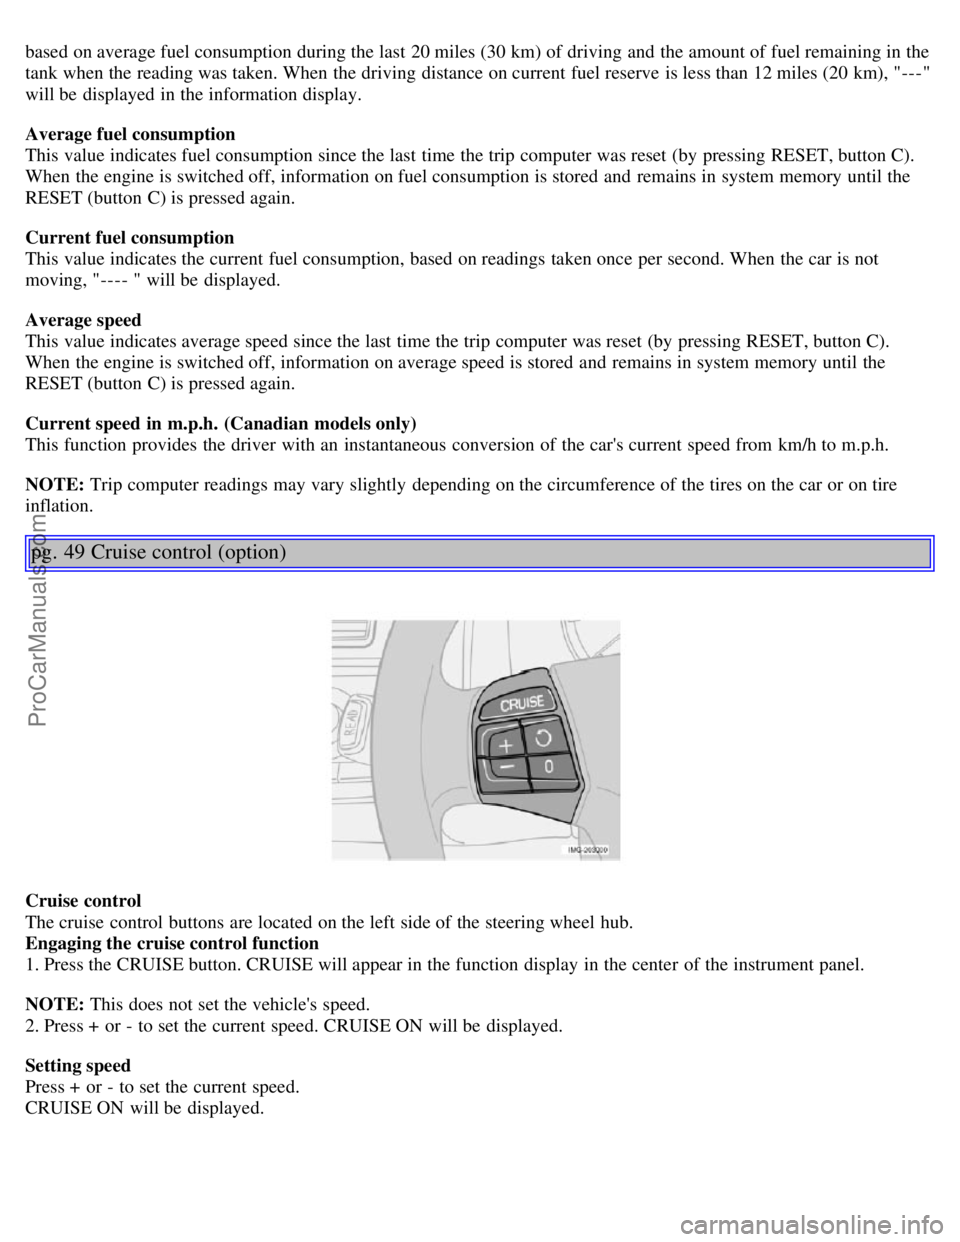
The cruise control buttons are located on the left side of the steering wheel hub.
Engaging the cruise control function
1. Press the CRUISE button. CRUISE will appear in the function display in the center of the instrument panel.
NOTE: This does not set the vehicle's speed.
2. Press + or - to set the current speed. CRUISE ON will be displayed.
Setting speed
Press + or - to set the current speed.
CRUISE ON will be displayed.
ProCarManuals.com
Page 44 of 127
If the ignition key is in position I or II.
During a 10 minute period after the doors have been unlocked if the door remains open.
If the door is closed and the ignition key is not yet in the ignition, or if the key is in position 0, the seat can be
adjusted or during a period of 40 seconds. The power passenger's seat can only be adjusted if the ignition key is in
position I or II, or if the engine is running.
Adjusting the seat
Controls 5, 6, and 7 on the side of the seat can be used to make adjustments.
5. Backrest tilt
6. Move this section of the control up or down to raise/lower the rear section of the seat. Move the control forward to
move the seat forward.
7. Move this section of the control up or down to raise/lower the front section of the seat. Move the control rearward
to move the seat rearward.
NOTE: The power seats have an overload protector that activates if a seat is blocked by any object. If this occurs,
switch off the ignition (key in position 0) and wait for approximately 20 seconds before operating the seat again.
Emergency stop
If the seat inadvertently begins to move, press any of the buttons to stop the seat.
Programming the seat memory, driver's seat only (option)
Three different seating positions can be stored in the seat's memory.
The following example explains how button 1 can be programmed. Buttons 2 and 3 can be programmed in the same
way.
To program (store) a seat position in button 1:
1. Use controls 5, 6, and 7 to adjust the seat to the desired position.
2. Press and hold down the M (memory) button.
3. With the M button depressed, press button 1 to store the seat's current position.
To move the seat to the position that it was in when button 1 was programmed, press and hold down button 1 until the
seat stops moving.
As a safety precaution, the seat will stop automatically if the button is released before the seat has reached the preset
position.
Central locking system remote control and driver's seat memory
The remote control transmitter can also be equipped with an optional function that controls the electrically operated
driver's seat in the following way:
1. Adjust the seat to the desired position.
2. When you leave the car, lock it using the remote control.
3. The next time the driver's door is unlocked with the same remote control and the driver's door is opened, the
pg. 80 Front seats
driver's seat will automatically move to the position that it was in when the door was most recently locked with that
remote control.
WARNING!
Because the driver's seat can be adjusted with the ignition off, children should never be left unattended in the car.
Movement of the seat can be STOPPED at any time by pressing any button on the power seat control panel.
Do not adjust the seat while driving. The seat should be adjusted so that the brake pedal can be depressed fully. In
addition, position the seat as far rearward as comfort and control allow.
The seat rails on the floor must not be obstructed in any way when the seat is in motion.
ProCarManuals.com
Page 99 of 127
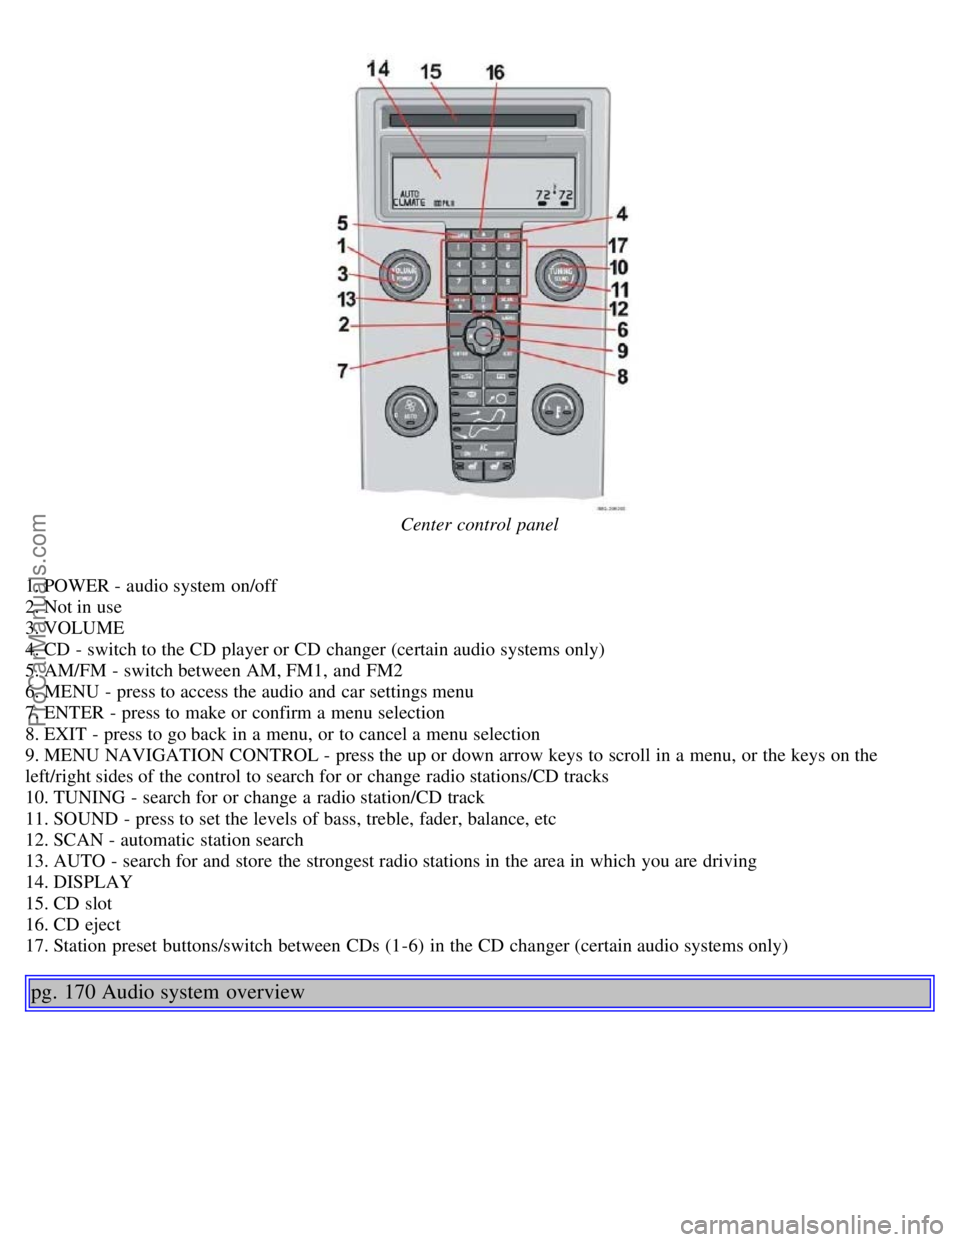
Center control panel
1. POWER - audio system on/off
2. Not in use
3. VOLUME
4. CD - switch to the CD player or CD changer (certain audio systems only)
5. AM/FM - switch between AM, FM1, and FM2
6. MENU - press to access the audio and car settings menu
7. ENTER - press to make or confirm a menu selection
8. EXIT - press to go back in a menu, or to cancel a menu selection
9. MENU NAVIGATION CONTROL - press the up or down arrow keys to scroll in a menu, or the keys on the
left/right sides of the control to search for or change radio stations/CD tracks
10. TUNING - search for or change a radio station/CD track
11. SOUND - press to set the levels of bass, treble, fader, balance, etc
12. SCAN - automatic station search
13. AUTO - search for and store the strongest radio stations in the area in which you are driving
14. DISPLAY
15. CD slot
16. CD eject
17. Station preset buttons/switch between CDs (1-6) in the CD changer (certain audio systems only)
pg. 170 Audio system overview
ProCarManuals.com
Page 100 of 127
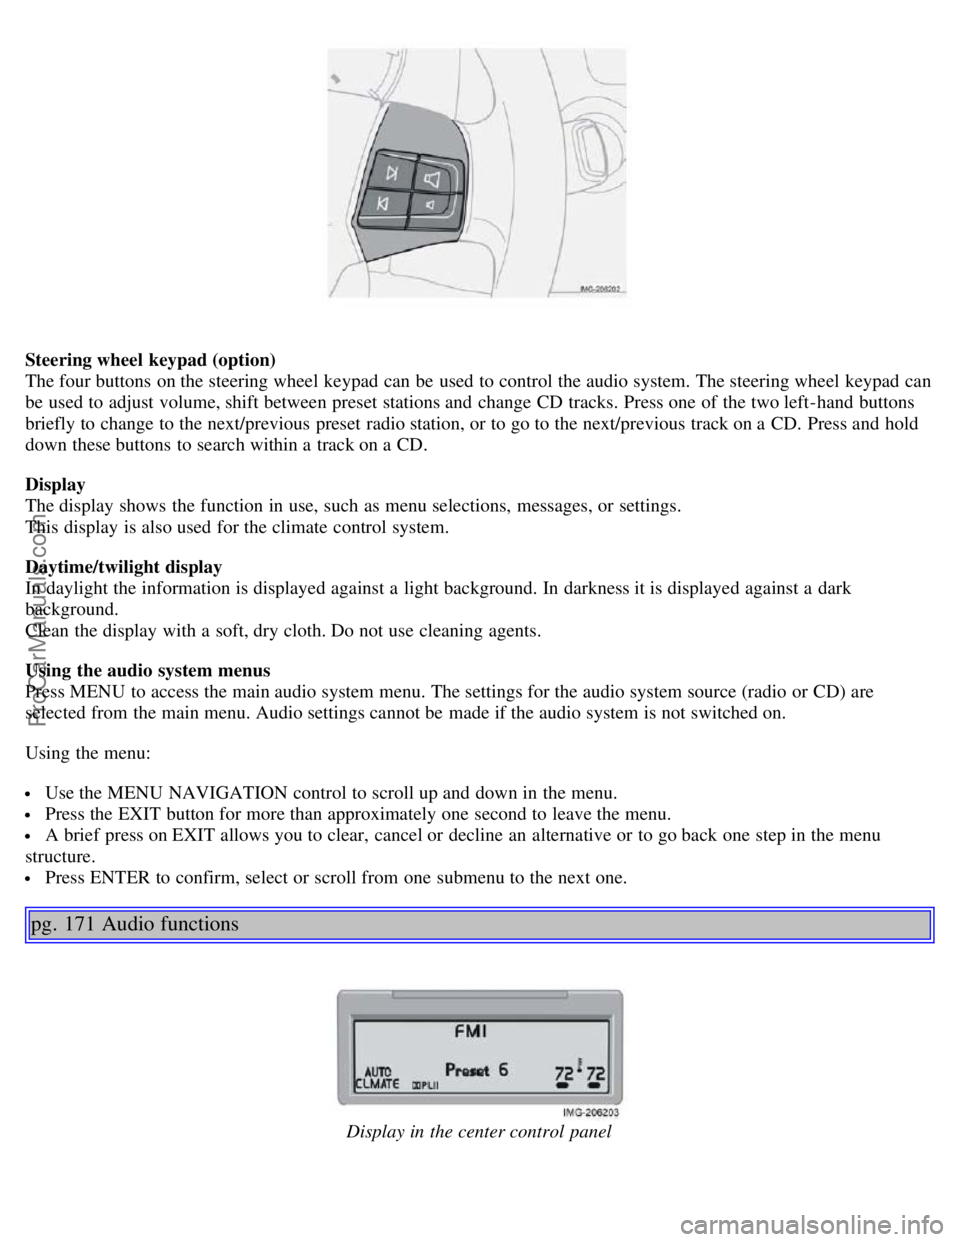
Steering wheel keypad (option)
The four buttons on the steering wheel keypad can be used to control the audio system. The steering wheel keypad can
be used to adjust volume, shift between preset stations and change CD tracks. Press one of the two left-hand buttons
briefly to change to the next/previous preset radio station, or to go to the next/previous track on a CD. Press and hold
down these buttons to search within a track on a CD.
Display
The display shows the function in use, such as menu selections, messages, or settings.
This display is also used for the climate control system.
Daytime/twilight display
In daylight the information is displayed against a light background. In darkness it is displayed against a dark
background.
Clean the display with a soft, dry cloth. Do not use cleaning agents.
Using the audio system menus
Press MENU to access the main audio system menu. The settings for the audio system source (radio or CD) are
selected from the main menu. Audio settings cannot be made if the audio system is not switched on.
Using the menu:
Use the MENU NAVIGATION control to scroll up and down in the menu.
Press the EXIT button for more than approximately one second to leave the menu.
A brief press on EXIT allows you to clear, cancel or decline an alternative or to go back one step in the menu
structure.
Press ENTER to confirm, select or scroll from one submenu to the next one.
pg. 171 Audio functions
Display in the center control panel
ProCarManuals.com
Page 104 of 127
The stored stations can be found using the buttons 0-9.
When the radio is in auto-store mode, AUTO is shown in the display. AUTO disappears when you return to the
normal radio mode. Return to the normal radio mode by pressing the AM/FM button, EXIT, or by briefly pressing the
AUTO button (for less than approx. 0.5 seconds).
To return to the Auto-store mode, press the AUTO button briefly and select a stored station by pressing one of the
number keys (0-9)
Scanning - SCAN
This function automatically searches for the next strong AM or FM station signal. When the radio finds a station,
scanning is interrupted for approximately 8 seconds, after which it will continue scanning.
pg. 175 Radio functions
1. Select radio mode using the AM/FM button.
2. Press SCAN (SCAN is shown in the display).
3. Press the SCAN or EXIT button to stop the scan function and listen to the selected station.
To start a new station scanning, repeat steps 1-3.
Radio Broadcast Data System - RBDS
This feature, which may not be available in your area, functions only with FM broadcasts. The radio in your car is
equipped with an advanced system allowing information from broadcasters to be transmitted visually, as text, together
with the audio signal. This information is then decoded by the radio and made available for several new and unique
features.
The RBDS or Radio Broadcast Data System operates in the FM band only, and the information transmitted is
supplied exclusively by participating broadcasters. Volvo has no control over the accuracy of the data or
information.
Coverage by local broadcasters may be limited at this time, but as the technology and benefits grow, you will find the
radio in your car is equipped to take advantage of this system.
PI (Program Information) seek
When an FM station has been stored as a preset, the radio also stores RBDS program information if it is available.
When the preset is selected at a later time, the radio tries to access updated program information. In weak signal areas,
there may be a delay before the station becomes audible. During this delay, there will be no sound.
PI seek can be interrupted by pressing EXIT.
Radio text
Certain RBDS stations broadcast program information, which can be shown in the display.
To start this function:
1. Select FM1 or FM2 and press the MENU button.
2. Press ENTER.
3. Select RADIOTEXT in the menu and press ENTER.
To deactivate this function, select RADIOTEXT again and press ENTER.
Alarm
Alarms bulletins are transmitted automatically by certain RBDS stations. The function cannot be deactivated.
"Alarm!" is shown in the radio display when an alarm message is sent. The function is used to warn motorists of
serious accidents, etc.
Program type/station format - PTY
The PTY function allows you to find stations whose programs suit your taste. Use the PTY function to select among
the different station formats shown in the list.
To show the format of the current station:
1. Select FM1 or FM2 and press the MENU button.
ProCarManuals.com