2005 VOLVO S40 lock
[x] Cancel search: lockPage 2 of 127

Your Volvo is designed to meet all applicable safety and emission standards, as indicated by the certification labels
attached to the driver's door opening, and on the underside of the hood.
For further information please contact your retailer, or:
In the USA: Volvo Cars of North America
Customer Care Center
P.O. Box 914 Rockleigh, New Jersey 07647-0914
1-800-458-1552
http://www.volvocars.us
In Canada:Volvo Cars of Canada Ltd.
Customer Care Center
175 Gordon Baker Road
North York, Ontario M2H 2N7
1-800-663-8255
http://www.volvocanada.com
2005 © Volvo Cars of North America, LLC
Introduction
General information
Shiftlock
When your car is parked, the gear selector is locked in the (P)ark position. To release the selector from this position,
turn the ignition key to position II (or start the engine), depress the brake pedal, press the button on the front side of the
gear selector and move the selector from (P)ark.
Keylock
When the ignition is switched off, the gear selector must be in the (P)ark position before the key can be removed from
the ignition switch.
Anti-lock Brake System (ABS)
The ABS system in your car performs a self -diagnostic test when the vehicle first reaches the speed of approximately
12 mph (20 km/h). The brake pedal will pulsate several times and a sound may be audible from the ABS control
module. This is normal.
Fuel filler door
Press the button on the light switch panel when the car is at a standstill to unlock the fuel filler door.
Fuel filler cap
After refueling, close the fuel filler cap by turning it clockwise until it clicks into place. If this cap is not closed tightly
or if the engine is running when the car is refueled, the Malfunction Indicator Lamp ("Check Engine" light) may
indicate a fault.
Points to keep in mind
Before you operate your vehicle for the first time, please familiarize yourself with the new-engine oil consumption
information on page 187
. You should also be familiar with the information found in the chapters "Instruments and
controls", and "Starting and driving".
Information contained in the balance of the manual is extremely useful and should be read after operating the vehicle
for the first time.
The manual is structured so that it can be used for reference. For this reason, it should be kept in the vehicle for
ProCarManuals.com
Page 4 of 127

Drive at a constant speed whenever possible.
See an authorized Volvo retailer as soon as possible for inspection if the check engine (malfunction indicator) lamp
illuminates, or stays on after the vehicle has started.
Properly dispose of any vehicle-related waste such as used motor oil, used batteries, brake pads, etc.
When cleaning your car, use Volvo's own car care products, all of which have systematically been adapted to the
environment.
Introduction
PremAir®
The surface of the radiator in the engine compartment is treated with a special coating called Premair*. This coating
works as a catalytic converter, converting most of the ground level ozone passing through the radiator into oxygen,
thereby reducing harmful ground-level ozone.
* PremAir is a registered trademark of Engelhard Corporation.
Contents
Contents
Chapter 1 - Instrument overview
Chapter 2 - Safety
Chapter 3 - Instruments and controls
Chapter 4 - Climate
Chapter 5 - Interior
Chapter 6 - Locks and alarm
Chapter 7 - Starting and driving
Chapter 8 - Wheels and tires
Chapter 9 - Vehicle care
Chapter 10 - Maintenance and servicing
Chapter 11 - Audio
Chapter 12 - Specifications
Index
Supplement - VALET OR SERVICE LOCKING
Supplement - ACCESSORY 18-INCH TIRE PRESSURES
Supplement - SAFETY - AIRBAG LABELS
ProCarManuals.com
Page 6 of 127

2 0 0 5
VOLVO S40
Chapter 1 - Instrument overview
pg. 8 Instrument overview
pg. 9 Instrument overview
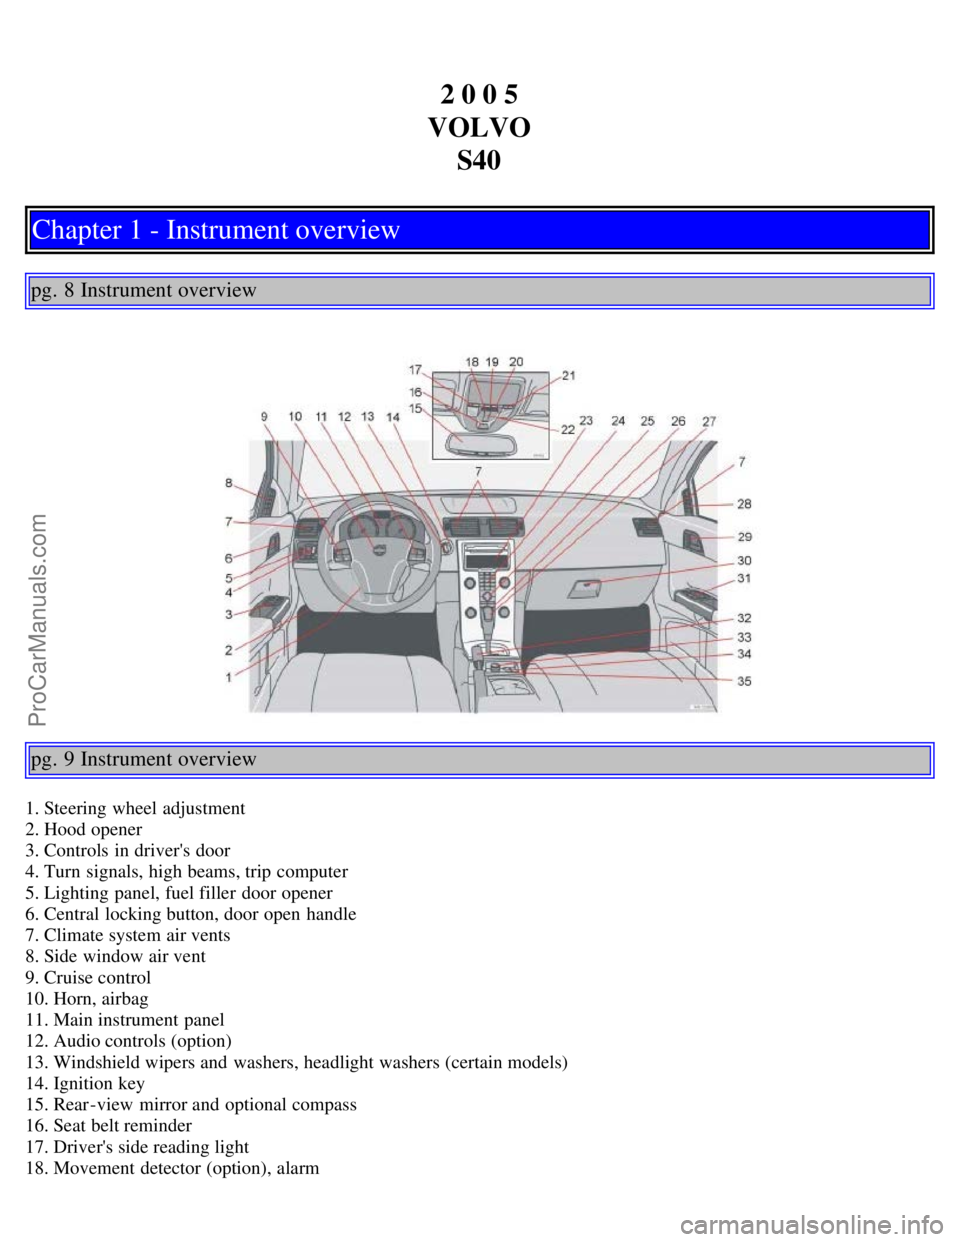
1. Steering wheel adjustment
2. Hood opener
3. Controls in driver's door
4. Turn signals, high beams, trip computer
5. Lighting panel, fuel filler door opener
6. Central locking button, door open handle
7. Climate system air vents
8. Side window air vent
9. Cruise control
10. Horn, airbag
11. Main instrument panel
12. Audio controls (option)
13. Windshield wipers and washers, headlight washers (certain models)
14. Ignition key
15. Rear-view mirror and optional compass
16. Seat belt reminder
17. Driver's side reading light
18. Movement detector (option), alarm
ProCarManuals.com
Page 7 of 127

19. Courtesy lighting switch
20. Position for accessory switch
21. Passenger's side reading light
22. Moonroof control (option)
23. Display for climate control and audio systems
24. Audio system
25. Controls for audio system
26. Climate control system
27. Gear selector
28. Side window air vent
29. Central locking button, door open handle
30. Glove compartment
31. Controls in passenger's door
32. Parking brake
33. 12-volt socket
34. Stability system STC/DSTC switch
35. Switch for optional equipment
1. Power window lockout button
2. Power windows
3. Door mirror button, driver's side
4. Door mirror adjustment control
5. Door mirror button, passenger's side
Contents | Top of Page
ProCarManuals.com
Page 10 of 127

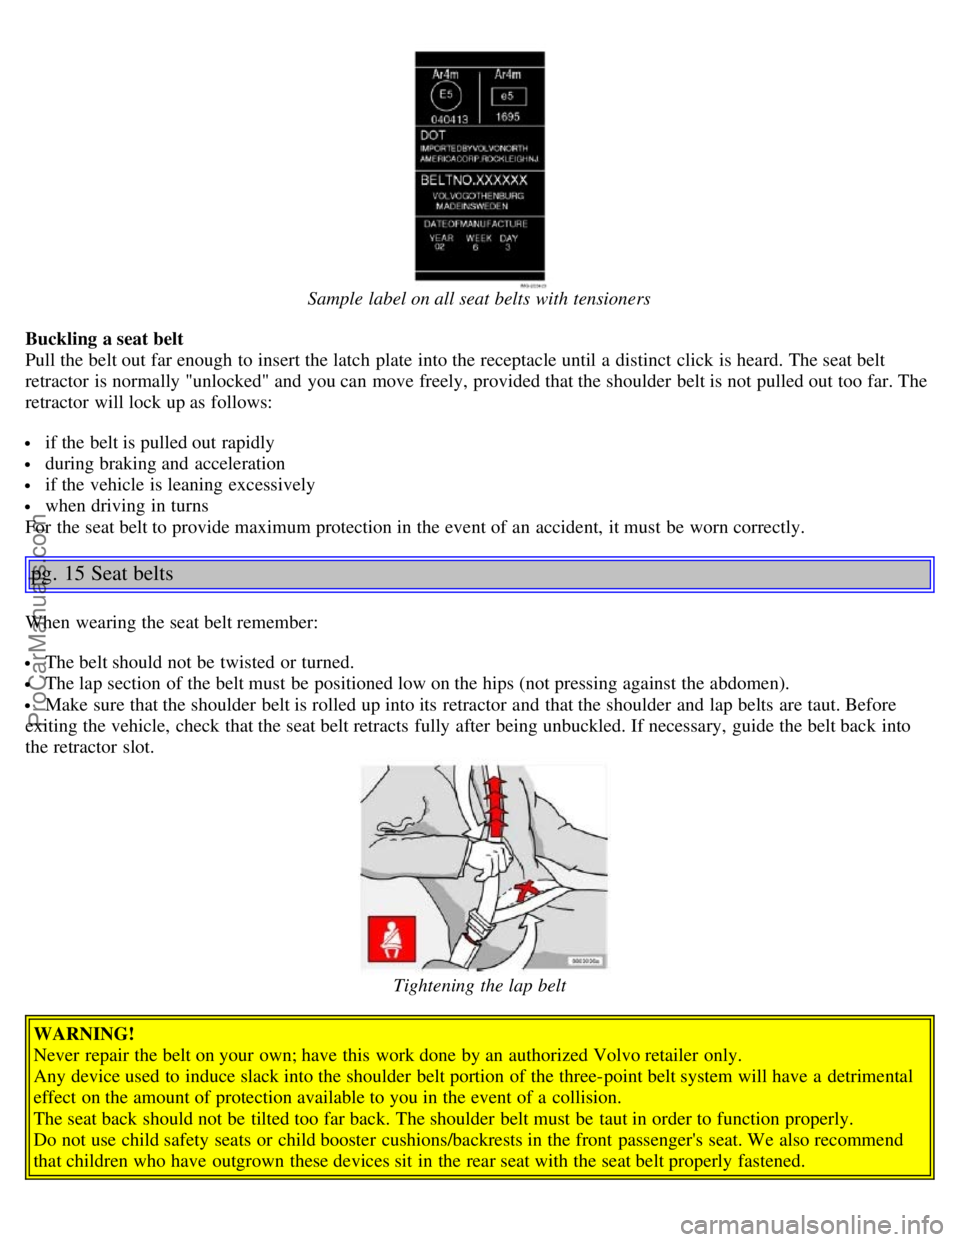
Sample label on all seat belts with tensioners
Buckling a seat belt
Pull the belt out far enough to insert the latch plate into the receptacle until a distinct click is heard. The seat belt
retractor is normally "unlocked" and you can move freely, provided that the shoulder belt is not pulled out too far. The
retractor will lock up as follows:
if the belt is pulled out rapidly
during braking and acceleration
if the vehicle is leaning excessively
when driving in turns
For the seat belt to provide maximum protection in the event of an accident, it must be worn correctly.
pg. 15 Seat belts
When wearing the seat belt remember:
The belt should not be twisted or turned.
The lap section of the belt must be positioned low on the hips (not pressing against the abdomen).
Make sure that the shoulder belt is rolled up into its retractor and that the shoulder and lap belts are taut. Before
exiting the vehicle, check that the seat belt retracts fully after being unbuckled. If necessary, guide the belt back into
the retractor slot.
Tightening the lap belt
WARNING!
Never repair the belt on your own; have this work done by an authorized Volvo retailer only.
Any device used to induce slack into the shoulder belt portion of the three-point belt system will have a detrimental
effect on the amount of protection available to you in the event of a collision.
The seat back should not be tilted too far back. The shoulder belt must be taut in order to function properly.
Do not use child safety seats or child booster cushions/backrests in the front passenger's seat. We also recommend
that children who have outgrown these devices sit in the rear seat with the seat belt properly fastened.
ProCarManuals.com
Page 15 of 127

Have the vehicle towed to an authorized Volvo retailer. Never drive with the airbags deployed.
Have an authorized Volvo retailer replace the SRS system components.
Use only new, Genuine Volvo Parts when replacing SRS components (airbags, seat belts, tensioners, etc.).
NOTE:
Deployment of SRS components occurs only one time during an accident. In a collision where deployment occurs,
the airbags and seat belt tensioners activate. Some noise occurs and a small amount of powder is released. The release
of the powder may appear as smoke-like matter. This is a normal characteristic and does not indicate fire.
Volvo's dual-threshold, dual-stage front airbags use special sensors that are integrated with the front seat buckles.
The point at which the airbag deploys is determined by whether or not the seat belt is being used, as well as the
severity of the collision. Collisions can occur where only one of the airbags deploys. If the impact is less severe, but
severe enough to present a clear injury risk, the dual-stage airbags are triggered at 70% of their total capacity. If the
impact is more severe, the dual-stage airbags are triggered at full capacity.
WARNING!
Do not use child safety seats or child booster cushions/backrests in the front passenger's seat. We also recommend
that occupants under 4 feet 7 inches (140 cm) in height who have outgrown these devices sit in the rear seat with the
seat belt fastened.
Never drive with the airbags deployed. The fact that they hang out can impair the steering of your vehicle. Other
safety systems can also be damaged.
The smoke and dust formed when the airbags are deployed can cause skin and eye irritation in the event of
prolonged exposure.
When do the front airbags not deploy?
Not all frontal collisions activate the SRS system. If the collision involves a nonrigid object (e.g., a snow drift or
bush), or a rigid, fixed object at a low speed, the SRS system will not necessarily deploy. Front airbags do not
normally deploy in a side impact collision, in a collision from the rear or in a rollover situation. The amount of
damage to the bodywork does not reliably indicate if the airbags should have deployed or not.
pg. 22 Front airbags (Supplemental Restraint System - SRS)
Safety system warning light in the instrument panel
A self -diagnostic system incorporated in the sensor monitors certain safety system components. A check is performed
on components such as seat belt locks, SRS, SIPS, OWS, and/or the VIC system. If a fault is detected, the warning
light will illuminate. The light is included in the warning/indicator light cluster in the instrument panel. Normally, the
safety system warning lamp should light up when the ignition key is turned to positions I, II or III and should go out
after approximately 7 seconds or when the engine is started. Check that this light is functioning properly every time the
ProCarManuals.com
Page 16 of 127

vehicle is started.
WARNING!
If the safety system warning light stays on after the engine has started or if it comes on while you are driving, drive
the vehicle to the nearest authorized Volvo retailer for inspection as soon as possible.
There is no maintenance to perform on the SRS yourself. The month and year shown on the decal on the door pillar
indicate when you should contact your Volvo retailer for specific servicing or replacement of airbags and seat belt
tensioners. This service must be performed by an authorized Volvo retailer. WARNING!
If your vehicle has been subjected to flood conditions (e.g. soaked carpeting/ standing water on the floor of the
vehicle) or if your vehicle has become flood-damaged in any way, do not attempt to start the vehicle or put the key
in the ignition before disconnecting the battery (see below). This may cause airbag deployment which could result in
personal injury. Have the vehicle towed to an authorized Volvo retailer for repairs.
Automatic transmission:
Before attempting to tow the vehicle, use the following procedure to override the shiftlock system to move the gear
selector to the neutral position.
Switch off the ignition for at least 10 minutes and disconnect the battery
Wait at least one minute.
Insert the key in the ignition and turn it to position II.
Press firmly on the brake pedal.
Move the gear selector from (P)ark to the (N)eutral position. See page 111 for information on manually overriding
the shiftlock system.
pg. 23 Front airbags (Supplemental Restraint System - SRS)
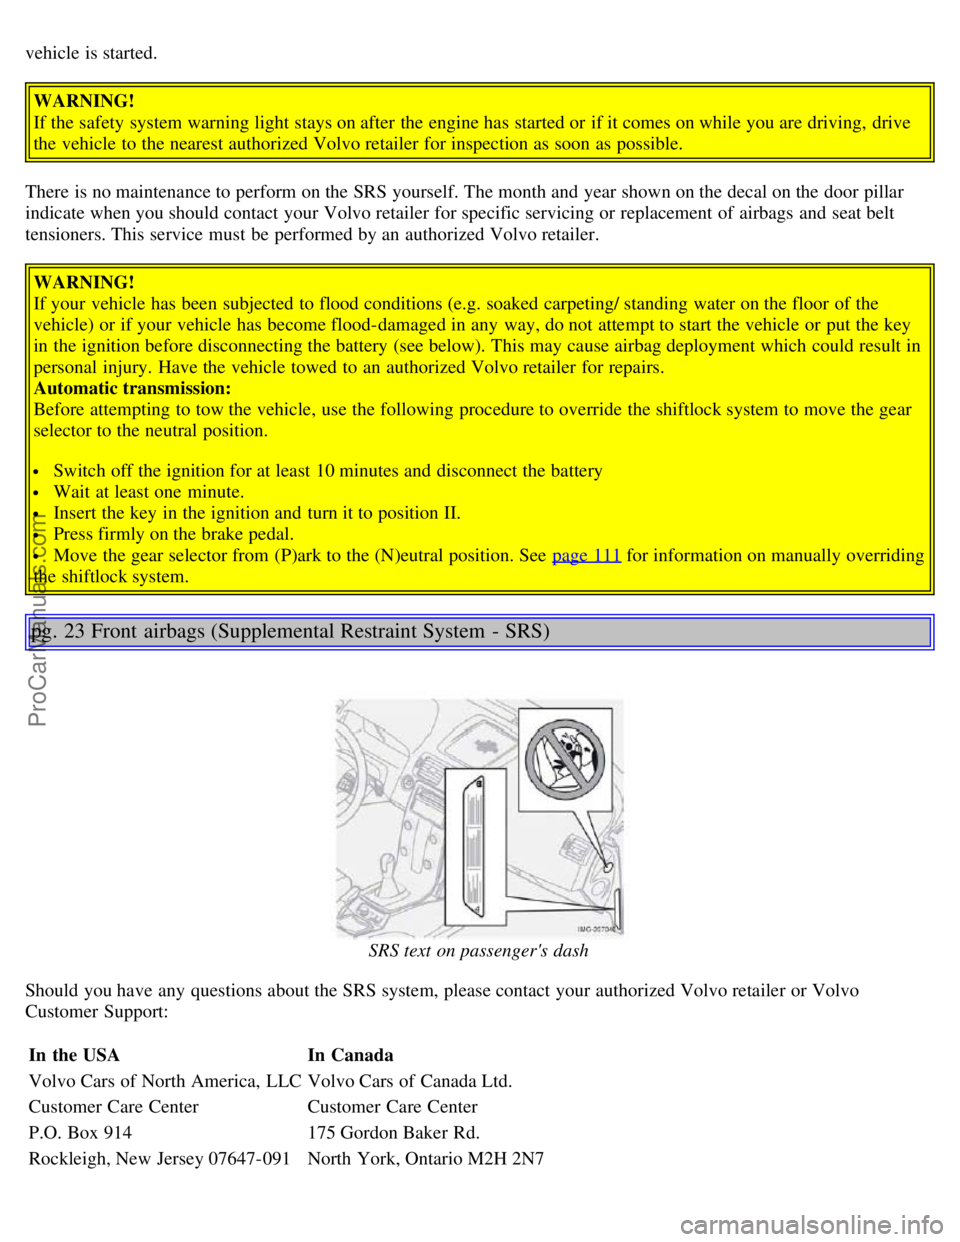
SRS text on passenger's dash
Should you have any questions about the SRS system, please contact your authorized Volvo retailer or Volvo
Customer Support:
In the USA In Canada
Volvo Cars of North America, LLC Volvo Cars of Canada Ltd.
Customer Care Center Customer Care Center
P.O. Box 914 175 Gordon Baker Rd.
Rockleigh, New Jersey 07647-091 North York, Ontario M2H 2N7
ProCarManuals.com
Page 19 of 127

1. Speedometer
2. Turn signal, left
3. Warning symbol
See the next page for additional information.
4. Information display
The display presents information and warning messages, the ambient temperature, and the clock, etc. When the
ambient temperature is between 23° and 36°F (-5° and +2°C), a snowflake symbol is shown in the display. This
symbol serves as a warning for possible slippery road surfaces. Please note that this symbol does not indicate a fault
with your car. At low speeds, or when the car is not moving, the temperature readings may be slightly higher than the
actual ambient temperature.
5. Information symbol
See the next page for additional information.
6. Turn signal, right
7. Tachometer
The tachometer shows engine speed in thousands of revolutions per minute (rpm). Do not drive continuously with the
needle in the red area of the dial, which indicates maximum allowable engine rpm range. Instead, shift to a higher gear
or slow the vehicle down. The engine management system will automatically prevent excessively high engines speeds.
This will be noticeable as a pronounced unevenness in engine speed.
8. Indicator and warning symbols
9. Fuel gauge
The fuel tank holds approximately 15.9 US gallons (60 liters)
1. When a warning light in the gauge comes on, there are
approximately 2.1 US gallons (8 liters) of fuel remaining in the tank.
10. Trip odometer reset button
The trip odometers are used to measure short distances. Press the button briefly to switch between the odometer for the
car's total mileage and the two trip odometers, T1 and T2. A long press (more than 2 seconds) resets the currently
selected trip odometer.
11. Function display
This window displays information on functions such as the odometer, trip odometers, optional rain sensor, and cruise
control.
12. High beam indicator
13. Clock setting button
Turn the button to set the time.
ProCarManuals.com