Page 9 of 136

Downloaded from www.Manualslib.com manuals search engine 983K6. Any consequential repairs or replacement of parts which may be found necessary to establish compliance of Emission Warranty,
will not be considered under warranty, unless the same is under product warranty. The consumable will be charged as per actual
under such repair or replacement.
7. Maruti Suzuki will not be responsible for the cost of transportation of the vehicle to the nearest Maruti Suzuki dealer workshop
or any loss due to non-availability of the vehicle during the period of lodging of a warranty claim and examination and/or repair
by Maruti Suzuki dealer.
8. Maruti Suzuki will not be responsible for any penalty that may be charged by statutory authorities on account of failure to comply
with the EMISSION STANDARDS.
9. Emission Warranty will not be affected on the change of owner, provided all the documents are available.
10. All maintenance actions (as specified in the Owner's Manual and Service Booklet) need to be followed and recorded in the manual
for emission warranty.
11. The customer needs to produce the PUC (Pollution Under Control) certificate valid for the period preceding the test during which
the failure is discovered. The receipts (for the maintenance of the vehicle as per specification in Owner's Manual and Service
Booklet from the date of original purchase of the vehicle) will also be required.Condition Under which the Emission Warranty is not APPLICABLE
1. In the absence of valid PUC certificate.
2. Vehicle not serviced from Maruti Suzuki authorised workshop as per the schedule specified in the Owner's Manual.
3. Vehicle subjected to abnormal use (accident, motor race, rallies or for the purpose of establishing the records etc.)
4. Use of non MGP (Maruti Genuine Part).
5. Vehicle tempered in an unauthorised manner.
6. Tampering with odometer so that the actual kilometer reading can not be read.
7. Use of adulterated fuel and/or unspecified oils (Engine oil, Transmission oil and Brake oil etc.)
EMISSION WARRANTY
2-4
Page 10 of 136
Downloaded from www.Manualslib.com manuals search engine 1083K
Annexure-A
List of parts covered under Emission Warranty
1. Fuel injection Assembly, Pressure Regulator, Throttle Body Assembly.
2. Electronic Control Module (ECM).
3. Intake Manifold.
4. EGR valve.
5. Distributor and internal parts.
6. Ignitions coil.
7. Canister Assembly.
8. Vapour Liquid Separator.
9. Fuel Tank and Filler Cap.
10. PCV (Positive Crankcase Ventilation) Valve.
11. Oil Filler Cap.
12. Catalytic Convertor.
13. Exhaust manifold.
14. All fuel injection System related SENSORS.
15. High Pressure Fuel Pump.
16. Glow Plug.
17. Glow Plug Controller.
18. ManiverterEMISSION WARRANTY
2-5
Page 11 of 136
 of 91 or higher.
Diesel Eng")
Downloaded from www.Manualslib.com manuals search engine 1183KFUEL RECOMMENDATION
FUEL RECOMMENDATION
Petrol Engine
You must use unleaded petrol with an
octane number (RON) of 91 or higher.
Diesel Engine
The diesel fuel should be with cetane num-
ber (CN) higher than 51 and sulphur con-
tent less than 350 ppm (parts per million).
Do not use marine diesel fuel, heating oils
and so forth.
Petrol/Ethanol blends
Blends of unleaded petrol and ethanol (grain
alcohol), also known as gasohol, are
commercially available in some areas.
Blends of this type may be used in your
vehicle if they are no more than 10% etha-
nol. Make sure this petrol-ethanol blend has
octane ratings no lower than those
recommended for petrol.
Petrol/Methanol blends
Blends of unleaded petrol and methanol
(wood alcohol) are also commercially avail-
able in some areas. DO NOT USE fuels
containing more than 5% methanol under any
circumstances. Fuel system damage or
vehicle performance problems resulting from
the use of such fuels are not the
responsibility of MARUTI SUZUKI and may
not be covered under the New Vehicle
Warranty.Fuels containing 5% or less methanol may
be suitable for use in your vehicle if they
contain cosolvents and corrosion inhibitors.
NOTE:
If you are not satisfied with the driveability
or fuel economy of your vehicle when you
are using a petrol/alcohol blend, you should
switch back to unleaded petrol containing no
alcohol.The fuel tank has an air space to
allow for fuel expansion in hot
weather. If you continue to add fuel
after the filler nozzle has automatically
shut off or an initial blowback occurs,
the air chamber will become full.
Exposure to heat when fully fuelled in
this manner will result in leakage due
to fuel expansion. To prevent such
fuel leakage, stop filling after the filler
nozzle has automatically shut off, or
when using an alternative non
automatic system, initial vent
blowback occurs.
CAUTION
CAUTION
Be careful not to spill fuel containing
alcohol while refueling. If fuel is
spilled on the vehicle body, wipe it up
immediately. Fuels containing alcohol
can cause paint damage, which is not
covered under the New Vehicle
Limited Warranty.
3-1
Page 12 of 136

Downloaded from www.Manualslib.com manuals search engine 1283K
BEFORE DRIVING
Keys ...................................................................................................................................... 4-1
Door Locks.......................................................................................................................... 4-2
Keyless Entry System Transmitter (if equipped)......................................................... 4-4
Mirrors................................................................................................................................ 4-13
Heated Rear Window Switch (if equipped).................................................................4-14
Front Seats........................................................................................................................ 4-14
Rear Seats......................................................................................................................... 4-16
Seat Belts and Child Restraint Systems.....................................................................4-18
Supplemental Restraint System (air bags) (if equipped).........................................4-24
Instrument Cluster (For Petrol & Diesel)....................................................................4-28
Warning and Indicator Lights........................................................................................4-29
Speedometer/Odometer/Trip meter/Meter Illumination Control................................4-34
Tachometer (if equipped)................................................................................................4-35
Fuel Gauge........................................................................................................................ 4-35
Lighting Control Lever....................................................................................................4-38
Front Fog Light Switch (if equipped)..........................................................................4-39
Rear Fog Light Switch (if equipped)............................................................................4-39
Headlight Leveling Switch.............................................................................................. 4-39
Turn Signal Control Lever.............................................................................................. 4-40
Hazard Warning Switch...................................................................................................4-40
Windshield Wiper and Washer Lever...........................................................................4-40
Rear Window Wiper/Washer Switch (if equipped).....................................................4-41
Tilt Steering Lock Lever (if equipped) ......................................................................... 4-42
Horn ..................................................................................................................................... 4-42
BEFORE DRIVING
Page 13 of 136

Downloaded from www.Manualslib.com manuals search engine 1383K
In case of attaching any metal objects
to the immobilizer key, it may not
start the engine.
The immobilizer key is a sensitive
electronic instrument. To avoid dam-
aging the immobilizer key:
Do not expose it to impacts, mois-
ture or high temperature such as by
leaving it on the dashboard under
direct sunlight.
Keep the immobilizer key away from
magnetic objects.
Keys
which has an electronic identification code
programmed into it. The key communicates
the identification code to the vehicle when
the key is turned to the “ON” position. If you
need to make spare keys, visit (contact)
your MARUTI SUZUKI authorized dealer.
The vehicle must be programmed with the
correct identification code for the spare
keys. A key made by an ordinary locksmith
will not work.
Your vehicle comes with a pair of identical
keys. Keep the spare key in a safe place.
One key can open all of the locks on the
vehicle.
The key identification number is stamped on
a metal tag provided with the keys or on
the keys. Keep the tag (if equipped) in a
safe place. If you lose your keys, you will
need this number to have new keys made.
Write the number below for your future ref-
erence.
KEY NUMBER
If the immobilizer system light (1) for petrol
engine or service vehicle soon (SVS) light
(2) for diesel engine blinks when the igni-
tion switch is in the “ON” position, there
may be something wrong with your key or
with the immobilizer system. Contact your
MARUTI SUZUKI authorized dealer to
inspect the system.NOTE:
If you lose your immobilizer ignition key,
contact your MARUTI SUZUKI dealer as
soon as possible to have the lost one
deactivated, then have the new key
made by them. If you own other vehicles with immobi-
lizer keys, keep those keys away from
the ignition switch when using your vehi-
cle, or the engine may not be started
because they may interfere with your
vehicle’s immobilizer system.
CAUTION
EXAMPLEBEFORE DRIVING
4-1
83K-02-001
Immobilizer System
This system is designed to help prevent
vehicle theft by electronically disabling the
engine starting system.
The engine can be started only with your
vehicle’s original immobilizer ignition key
83K-02-002
Ignition Key Reminder (if equipped)A buzzer sounds intermittently to remind
you to remove the ignition key if it is in the
ignition switch when the driver’s door is
opened.
Page 14 of 136

Downloaded from www.Manualslib.com manuals search engine 1483K
Door LocksSide Door Locks
To lock a door from inside the vehicle, turn
the lock knob forward. Turn the lock knob
backward to unlock the door.
NOTE:
Be sure to hold the door handle up when
you close a locked front door, as the door
will not remain locked.
EXAMPLE BEFORE DRIVING
4-2
83K-02-003
To lock a front door from outside the vehi-
cle:
Insert the key and turn the top of the
key anti clockwise or
Turn the lock knob forward and hold the
door handle as you close the door.
To unlock a front door from outside the
vehicle, insert the key and turn the top of
the key clockwise.
To lock a door from outside the vehicle, turn
the lock knob forward and close the door.
83K-02-004
Central Door Locking SystemDriver’s door (if equipped)
You can lock and unlock all doors (includ-
ing the tailgate) simultaneously by using the
key in the driver’s door lock.
To lock all doors simultaneously, insert the
key in the driver’s door lock and turn the
top of the key anti-clockwiseTo unlock all doors simultaneously, insert
the key in a driver’s door lock and turn the
top of the key toward the front of the vehi-
cle twice.
To unlock the driver’s door only, insert the
key in that door lock and turn the top of
the key toward the front of the vehicle once.
You can also lock or unlock (4 or 5) all
doors by depressing the front or rear of the
switch (1), respectively.
NOTE:
If your vehicle is equipped with keyless
entry system, you can also lock or unlock
all doors by operating the transmitter. Refer
to “Keyless Entry System Transmitter”.
83K-02-006
EXAMPLE
Page 15 of 136

Downloaded from www.Manualslib.com manuals search engine 1583KNOTE:
Individual doors can also be UNLOCKED
anytime by using their respective "Door
Lock Knob" inside the vehicle.
If child proof locks are in locked position,
rear doors cannot be opened from inside.
w ww w
w WARNING
Be sure to place the child-proof lock
in the locked position whenever chil-
dren are seated in the rear.
BEFORE DRIVING
4-3
Child-Proof Locks (rear side door)
83K-02-007
EXAMPLEAs illustrated, a child-proof lock is provided
for both rear doors. When the lock lever is
in position (1), the child-proof lock is locked,
and when in position (2), the child-proof lock
is unlocked. When the child-proof lock is in
the locked position, the rear door cannot be
opened from the inside even if the inside
door lock is unlocked but can be opened
from the outside.
Manual tailgate unlatchType1 (if equipped)
83K-02-008
EXAMPLETo open the tailgate, insert the key and turn
it clockwise to unlatch and lift the tailgate.You can also unlatch the tailgate-trunk lid by
pulling the release lever (if equipped) located
on the outboard side of the driver’s seat.
Type2 (if equipped)
83K-02-00983K-02-010
EXAMPLE
EXAMPLE(1) Tailgate handle
Page 16 of 136

Downloaded from www.Manualslib.com manuals search engine 1683K
You can lock and unlock the tailgate by
using the key in the driver’s door lock.
To open the tailgate, pull up and hold the
tailgate unlatch handle (1) and lift the tailgate.
w ww w
w WARNING
Always make sure that the tailgate is
closed and latched securely. Com-
pletely closing the tailgate helps pre-
vent occupants from being thrown
from the vehicle in the event of an
accident. Completely closing it also
helps keep away exhaust gases from
entering the car.BEFORE DRIVING
4-4
83K-02-011
2) Push open the tailgate from inside by
pushing up on the emergency lever (2)
using a flat blade screw driver or the
jack handle. The tailgate will be latched
again by closing the tailgate simply.
If the tailgate can not be unlatched by pull-
ing up the tailgate unlatch switch (1), have
the vehicle inspected by your MARUTI
SUZUKI authorized dealer. If you can not unlatch the tailgate by pulling
up the unlatch handle (1) due to a malfunc-
tion, follow the procedures below to unlatch
the tailgate from inside the vehicle.
1) Fold the rear seat forward for easier
access. Refer to “Folding Rear Seats”
section for details on how to fold the
rear seat forward.
w ww w
w WARNING
To avoid injury, do not use your fin-
ger to push the emergency lever.
Make sure there is no one near the
tailgate when pushing open the tail-
gate from inside the vehicle.
Keyless Entry System Trans-
mitter (if equipped)
83K-02-012
(1) “LOCK” button
(2) “UNLOCK” button
There are two ways to lock or unlock all
doors (including the tailgate) simultaneously
by operating the transmitter near the vehicle.
Central door locking system
To lock all doors, push the “LOCK” but-
ton (1) once.
To unlock all other doors, push the
“UNLOCK” button (2) once.
The turn signal lights will flash once when
the doors are locked.
When the doors are unlocked:
The turn signal lights will flash twice.
If the interior light switch is in the middle
position, the interior light will turn on for
about 15 seconds and then fade out. If
you insert the key into the ignition switch
during this time, the light will start to
fade out immediately.
 1
1 2
2 3
3 4
4 5
5 6
6 7
7 8
8 9
9 10
10 11
11 12
12 13
13 14
14 15
15 16
16 17
17 18
18 19
19 20
20 21
21 22
22 23
23 24
24 25
25 26
26 27
27 28
28 29
29 30
30 31
31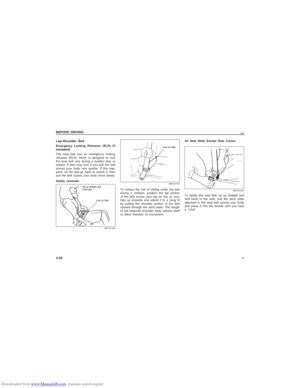 32
32 33
33 34
34 35
35 36
36 37
37 38
38 39
39 40
40 41
41 42
42 43
43 44
44 45
45 46
46 47
47 48
48 49
49 50
50 51
51 52
52 53
53 54
54 55
55 56
56 57
57 58
58 59
59 60
60 61
61 62
62 63
63 64
64 65
65 66
66 67
67 68
68 69
69 70
70 71
71 72
72 73
73 74
74 75
75 76
76 77
77 78
78 79
79 80
80 81
81 82
82 83
83 84
84 85
85 86
86 87
87 88
88 89
89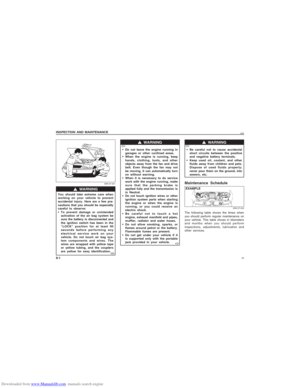 90
90 91
91 92
92 93
93 94
94 95
95 96
96 97
97 98
98 99
99 100
100 101
101 102
102 103
103 104
104 105
105 106
106 107
107 108
108 109
109 110
110 111
111 112
112 113
113 114
114 115
115 116
116 117
117 118
118 119
119 120
120 121
121 122
122 123
123 124
124 125
125 126
126 127
127 128
128 129
129 130
130 131
131 132
132 133
133 134
134 135
135