2005 SUBARU FORESTER lights
[x] Cancel search: lightsPage 226 of 477

5-23
Audio
– CONTINUED –
NOTE �yMake sure to always insert a disc with the label
side up. If a disc is inserted with the label side
down, it might be ejected or the player might shut off. �y Single CDs (i.e., 8 cm/3 inch CDs) are not sup-
ported, and if inserted, they will be immediately
ejected. �y If a disc is inserted during a radio broadcast, the
disc will interrupt the broadcast. �T How to insert a CD(s)
�V Inserting a CD
1. Press “LOAD” button (16). If the magazine in the
player has an idle position where you can insert a disc,
the “DISC” indicator (13) associated with the idle posi-
tion will blink.
If no indicator blinks, it means that there is no idle po-
sition in the magazine.
2. As soon as the “DISC” indicator (13) begins to
blink, the “LOAD” will appear on display for a period of
15 seconds. Insert a disc during the period. The disc
will be then automatically drawn in, and the player will
begin to play back the first track of the disc. �y To insert more discs in succession, repeat Steps 1
and 2. The magazine will be loaded with discs in the ascending order of position number.
If you do not insert any disc in 15 seconds after you
have pressed the “LOAD” button, the player will begin
to play back the first track of the last disc you have in- serted.�y
The disc indicator steadily lights up if a disc is al-
ready inserted in the corresponding position of the
magazine.�y While the player is in the loading mode, if you press
the “FM/AM” selection button (2), the player will enter
the standby mode. Press the “CD” button (11) to start
playback. �V Inserting a disc in a desired position
1. Press the “LOAD” button (16). If the magazine in
the player has an idle position where you can insert a
disc, the “DISC” indicator (13) associated with the idle
position will blink.
The positions in the magazine the indicator of which
steadily lights up are already loaded with discs.
2. Press the disc select button (17) at the position
where you want to insert a disc. The associated
“DISC” indicator will blink, and the “LOAD” will be dis-
played.
3. If you insert a disc during the 15-second period
while the “LOAD” is on display, the disc will be auto-
matically drawn in, and the player will start playback of
the disc, beginning with the first track.
Page 227 of 477

5-24
Audio
�y
To insert more discs in succession, repeat Steps 1
and 2. �y While the player is in the loading mode, if you press
the “FM/AM” selection button (2), the player will enter
standby mode. Press the “CD” button (11) to start
playback. �V Loading all the magazine (Full disc loading mode)
1. If you continue to press the “LOAD” button (16) for
more than 1.5 seconds, the player will produce beep
sound and will enter the full disc loading mode.
2. A “DISC” indicator (13) will blink, and the “ALL
LOAD” will be on display for a period of 15 seconds. If
a disc is successfully loaded during this period, the
“DISC” indicator will stop blinking and will steadily
light.
3. When the loading of a disc is complete, the next
“DISC” indicator will blink. Then repeat Step 2.
4. When the magazine is filled with discs by repeating
Steps 2 and 3, the player will start playback of the
discs, beginning with the one inserted first.
If you fail to insert any disc during each 15 seconds in-
terval, the full disc loading mode will be canceled, and
the player will start playback of the disc inserted first. �T
How to play back a CD or make a pause
�V When there is no CD inserted:
Insert a CD by referring to “How to insert a CD(s)”.
When a CD is loaded, the player will start playback of
the CD, beginning with the first track. �V When there are CDs loaded:
Press a desired one of the disc select buttons (17) the
“DISC” indicator (13) of which steadily lights up. The
player will then start playback of the selected CD, be-
ginning with the first track. �T To select a song from its beginning
�V Forward direction
Briefly press the “ ” side of the button (18) to skip to
the beginning of the next track. Each time the button is
pressed, the indicated track number will increase. �V Backward direction
Briefly press the “ ” side of the button (18) to skip to
the beginning of the current track. Each time the but-
ton is pressed, the indicated track number will de- crease.
Page 231 of 477

5-28
Audio
�y
Do not attempt to insert two or more discs
into the slot at a time. Doing so can cause me-
chanical damage to the CD changer. �y Use only music CDs identified by
am ark .
�y Do not use CDs listed below which could
cause damage to the CD player. �y3 inch (8 cm) compact disc.
�y Any disc with a peel-off or seal on it.
�y Any disc with scratches and/or dust.
�y Bent disc.
�y Cleaning disc.
�y CD accessory. (E.g., 3 inch (8 cm) disc
adapter)
�y Do not insert or remove any disc when the
automatic transmission selector lever is in the
park position; the selector lever in that position
can interfere with disc insertion or removal,
causing scratches on the disc surface (for AT
vehicles).
�T To insert a disc
1. Press one of the disc select buttons (3) (numbered
from 1 to 6) for which the disc indicator light (2) is “OFF”.
The disc indicator lights are located directly above the
corresponding disc select buttons.
2. The indicator will begin blinking. The blinking will last for 15 seconds.
During this period, insert a desired disc, and the disc
will begin to play. (If any disc is not inserted during this
period, the “Disc slot” (1) door will close. Repeat Step
1.)
Be sure to hold a disc with the label side (the side
where titles are printed) up.
3. To insert another disc, repeat Steps 1 and 2 choos-
ing a different disc select button. �T
To insert six discs at a time
1. Press and hold the disc select button number 1 un-
til all disc indicators begin blinking (about 1.5 sec-
onds).
2. The indicators will blink for 15 seconds. During this
period, insert desired six discs.
3. When all discs are loaded, the first disc will begin to
play. (If no disc is inserted within this 15 seconds, the
entire disc load sequence will be canceled.) �T To remove a disc
1. Press the desired one of the disc select buttons (3)
(numbered from 1 to 6) for which the disc indicator
light is on.
Page 236 of 477

6-1
6
Interior equipment
Interior lights ................................................ 6-2 Dome light ......................................................... 6-2
Cargo area light ................................................ 6-2
Map lights ...................................................... 6-3
Sun visors ..................................................... 6-3 Vanity mirror ...................................................... 6-4
Storage compartments ................................ 6-4 Glove box ........................................................... 6-5
Center console .................................................. 6-5
Overhead console ............................................. 6-6
Dashboard storage compartment ................... 6-6
Convenience net ............................................... 6-7
Coin tray ............................................................ 6-7
Cup holders .................................................. 6-8 Front passenger’s cup holder ......................... 6-8
Rear passenger’s cup holder ........................... 6-8
Accessory power outlets ............................. 6-9
Cigarette lighter socket ................................ 6-11 Use with a cigarette lighter .............................. 6-12
Using as an accessory power outlet ............... 6-13
Ashtray .......................................................... 6-14
Floor mat ....................................................... 6-15
Coat hook ...................................................... 6-16
Cargo area cover (if equipped) .................... 6-16 Using the cover ................................................. 6-16
To remove the cover ......................................... 6-17
To install the cover housing ............................ 6-17
Shopping bag hook ...................................... 6-18
Cargo tie-down hooks .................................. 6-18 Under-floor storage compartment ............... 6-19
Page 237 of 477

6-2
Interior equipment
Interior equipmentInterior lights
When leaving your vehicle, make sure the light goes
out to avoid battery discharge. �„
Dome light
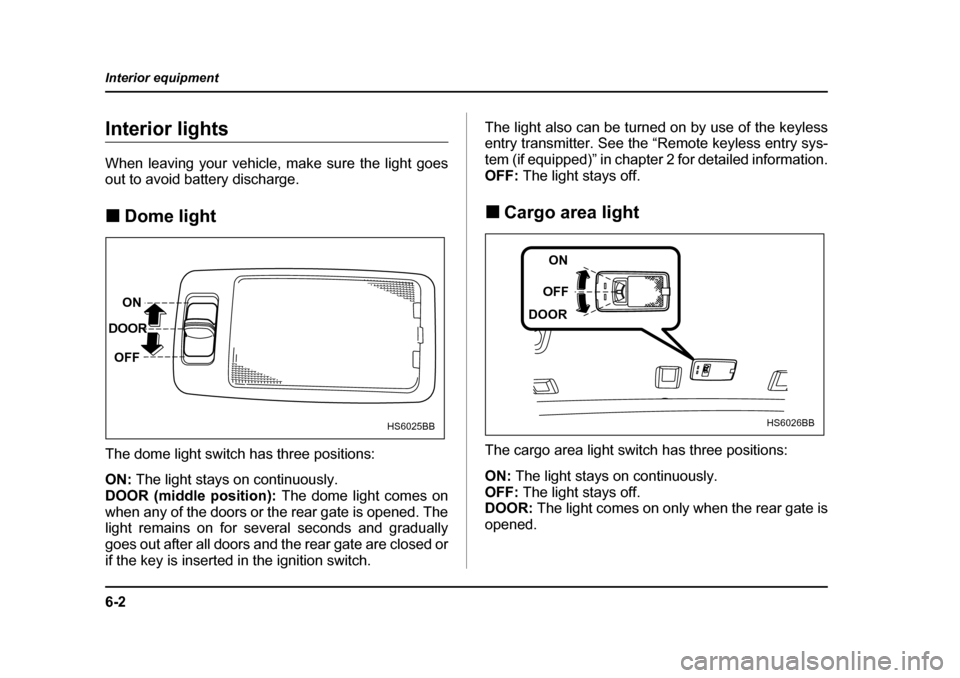
The dome light switch has three positions: ON: The light stays on continuously.
DOOR (middle position): The dome light comes on
when any of the doors or the rear gate is opened. The
light remains on for several seconds and gradually
goes out after all doors and the rear gate are closed or
if the key is inserted in the ignition switch. The light also can be turned on by use of the keyless
entry transmitter. See the “Remote keyless entry sys-
tem (if equipped)” in chapter 2 for detailed information.
OFF:
The light stays off.
�„ Cargo area light
The cargo area light switch has three positions: ON: The light stays on continuously.
OFF: The light stays off.
DOOR: The light comes on only when the rear gate is
opened.
ON
DOOR
OFF
HS6025BB
ON
OFF
DOOR
HS6026BB
Page 238 of 477

6-3
Interior equipment
– CONTINUED –
Map lights
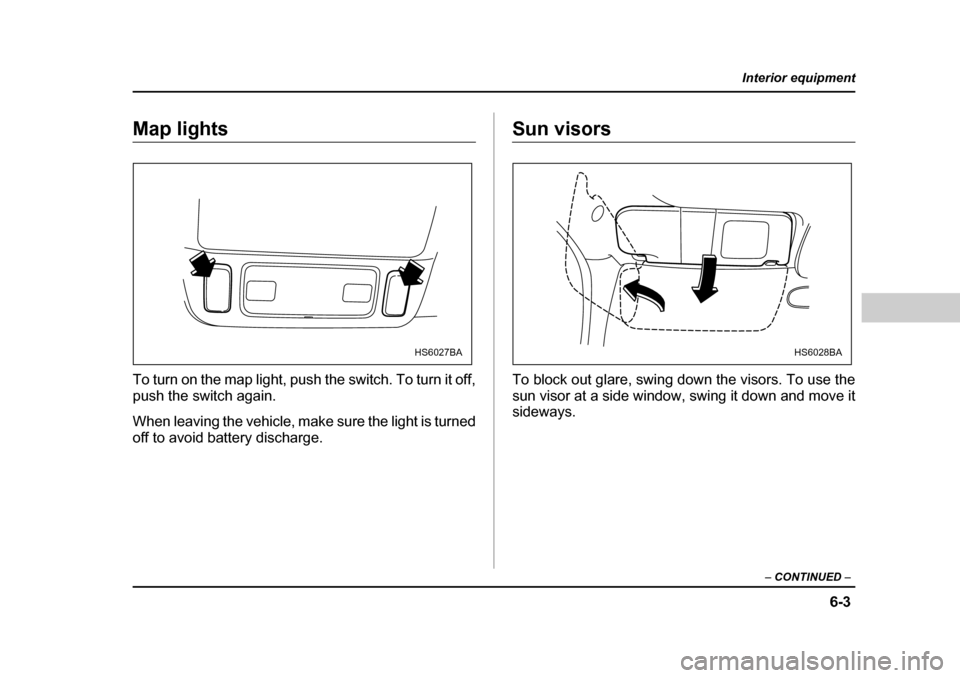
To turn on the map light, push the switch. To turn it off,
push the switch again.
When leaving the vehicle, make sure the light is turned
off to avoid battery discharge.Sun visors
To block out glare, swing down the visors. To use the
sun visor at a side window, swing it down and move it sideways.
HS6027BAHS6028BA
Page 263 of 477

7-6
Starting and operating
weather, which may cause injury.
3. Stop filling the tank after the fuel filler pump auto-
matically stops. Do not add any more fuel.
4. Put the cap back on, turn it clockwise until you hear
a clicking noise. Be certain not to catch the tether un-
der the cap while tightening.
5. Close the fuel filler lid completely.
If you spill any fuel on the painted surface, rinse it off
immediately. Otherwise, the painted surface could be
damaged.
NOTE
If the fuel filler cap is not tightened until it clicks or
if the tether is caught under the cap, the CHECK
ENGINE warning light may come on. Refer to the
“Warning and indicator lights” section located in
chapter 3.
�y Never add any cleaning agents to the fuel
tank. The addition of a cleaning agent may
cause damage to the fuel system. �y Make sure that the cap is tightened until it
clicks to prevent fuel spillage in the event of an
accident. �y
Do not let fuel spill on the exterior surfaces of
the vehicle. Fuels may cause paint damage,
which is not covered under the SUBARU Limit-
ed Warranty. �y Always use a genuine SUBARU fuel filler cap.
If you use the wrong cap, it may not fit or have
proper venting, and your fuel tank and emis-
sion control system might be damaged.
Page 266 of 477

7-9
Starting and operating
– CONTINUED –
Preparing to drive
You should perform the following checks and adjust-
ments every day before you start driving.
1. Check that all windows, mirrors, and lights are
clean and unobstructed.
2. Check the appearance and condition of the tires.
Also check tires for proper inflation.
3. Look under the vehicle for any sign of leaks.
4. Check that the hood and rear gate are fully closed.
5. Check the adjustment of the seat.
6. Check the adjustment of the inside and outside mir-
rors.
7. Fasten your seatbelt. Check that your passengers
have fastened their seatbelts.
8. Check the operation of the warning and indicator
lights when the ignition switch is turned to the “ON” po-sition.
9. Check the gauges, indicator and warning lights af-
ter starting the engine.
NOTE
Engine oil, engine coolant, brake fluid, washer flu-
id and other fluid levels should be checked daily,
weekly or at fuel stops.
Starting the engine
Do not operate the starter motor continuously
for more than ten seconds. If the engine fails to
start after operating the starter for five to ten
seconds, wait for ten seconds or more before
trying again.
�„ Manual transmission vehicle
1. Apply the parking brake.
2. Turn off unnecessary lights and accessories.
3. Press the clutch pedal to the floor and shift the shift
lever into neutral. Hold the clutch pedal to the floor
while starting the engine.
The starter motor will only operate when the clutch
pedal is pressed fully to the floor.
4. Turn the ignition switch to the “ON” position and
check the operation of the warning and indicator lights.
Refer to the “Warning and indicator lights” section(chapter 3).
5. Turn the ignition switch to the “START” position
without depressing the accelerator pedal. Release
the key immediately after the engine has started.