Page 9 of 26
 SymphonyTape Car Radio Manual With the push of a button you may store
up to 30 stations in the IS memory (IS =
intelligent search). The stored stations
then can be called one after the other.
The IS memory is useful if you wish to")
With the push of a button you may store
up to 30 stations in the IS memory (IS =
intelligent search). The stored stations
then can be called one after the other.
The IS memory is useful if you wish to re-
assign the station buttons, or when you
are in an unknown reception area and do
not wish to delete already stored stations.
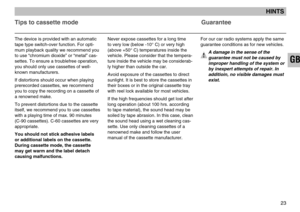
Programming RDS stations
(IS function)
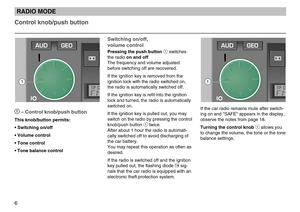
Starting the IS search
• Press on ��or ��of the rocker ß`
repeatedly for more than 2 seconds
until "IS ON" appears in the display.
• Press the AS button
ßZfor about 2
seconds. "STORE" appears in the
display.
This operation takes several seconds.
• If no reception is possible, for example in an underground car park or if the aerial
is defective, the search function may be
endless. In this case you may switch off
the search function by pressing one of
the station buttons
1… 6.
As soon as the IS search is completed,
up to 30 stations are stored. You then will
hear the station giving best reception.
The intelligent search function first stores
the RDS stations (sorted by station name)
and then the remaining stations in the
order of their volume level.
Calling up the IS memory contents
Selecting the IS mode
• Press on
��or ��of the rocker ß`
repeatedly for more than 2 seconds until
"IS ON" appears in the display.
• Briefly press on
��or ��of the rocker
ß`.
Switching the IS mode off
• Press on ��or ��of the rocker ß`
repeatedly for more than 2 seconds until
"IS OFF" appears in the display.
RADIO MODE
8
12
18
Page 10 of 26
 SymphonyTape Car Radio Manual 9
GB
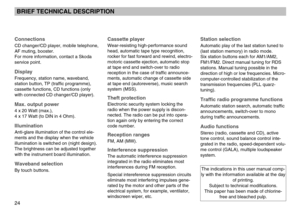
Treble control (TRE)
• \"TRE\" and the current setting +6 to –6appear in the display.
• Turn the control knob/push button
1to
the left or the right to adjust the desired
setting.
• If you")
9
GB
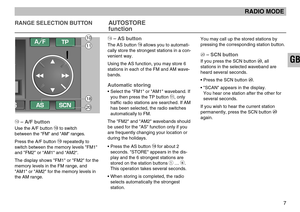
Treble control (TRE)
• "TRE" and the current setting +6 to –6appear in the display.
• Turn the control knob/push button
1to
the left or the right to adjust the desired
setting.
• If you wish to adjust the treble control immediately to its normal setting, press
the AUD button
2until "TRE 00"
appears in the display.
• When this is done, press the AUD button
2again to store the setting.
• To go directly to the treble control mode, press the AUD button
2briefly twice.
RADIO MODE
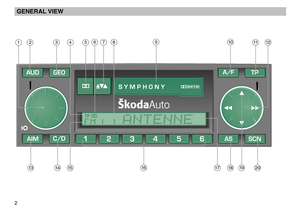
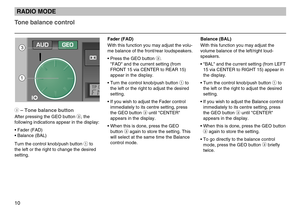
2– Tone control button
After pressing the AUD button 2, the fol-
lowing indications appear in the display:
• 1 pressure: bass control "BASS",
• 2 pressures: treble control "TRE".
You may change the tone control setting
by turning the control knob/push button
1.
TP
Tone control
Bass control (BASS)
• Press the AUD button
2. "BASS" and
the current setting +6 to –6 appear in the
display.
• Turn the control knob/push button
1to
the left or the right to adjust the desired
setting.
• If you wish to adjust the bass control immediately to its normal setting, press
the AUD button
2until "BASS 00"
appears in the display.
• When this is done, press the AUD button
2again to store the setting.
This will select at the same time the
treble control mode.
2
1
Page 11 of 26
 SymphonyTape Car Radio Manual Balance (BAL)
With this function you may adjust the
volume balance of the left/right loud-
speakers.
• \"BAL\" and the current setting (from LEFT15 via CENTER to RIGHT 15) appear in
the display.
•")
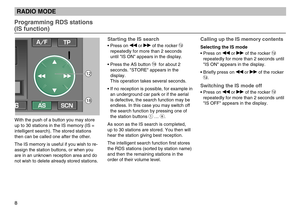
Balance (BAL)
With this function you may adjust the
volume balance of the left/right loud-
speakers.
• "BAL" and the current setting (from LEFT15 via CENTER to RIGHT 15) appear in
the display.
• Turn the control knob/push button
1to
the left or the right to adjust the desired
setting.
• If you wish to adjust the Balance control immediately to its centre setting, press
the GEO button
3until "CENTER"
appears in the display.
• When this is done, press the GEO button
3again to store the setting.
• To go directly to the balance control mode, press the GEO button
3briefly
twice.
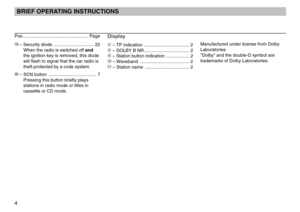
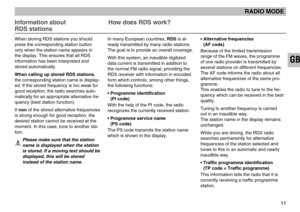
3– Tone balance button
After pressing the GEO button 3, the
following indications appear in the display:
• Fader (FAD)
• Balance (BAL)
Turn the control knob/push button
1to
the left or the right to change the desired
setting.
TP
Fader (FAD)
With this function you may adjust the volu-
me balance of the front/rear loudspeakers.
• Press the GEO button
3.
"FAD" and the current setting (from
FRONT 15 via CENTER to REAR 15)
appear in the display.
• Turn the control knob/push button
1to
the left or the right to adjust the desired
setting.
• If you wish to adjust the Fader control immediately to its centre setting, press
the GEO button
3until "CENTER"
appears in the display.
• When this is done, press the GEO button
3again to store the setting. This
will select at the same time the Balance
control mode.
10
Tone balance control
RADIO MODE
1
3
Page 12 of 26
 SymphonyTape Car Radio Manual 11
GB
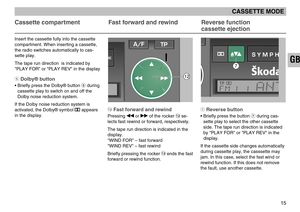
When storing RDS stations you should
press the corresponding station button
only when the station name appears in
the display. This ensures that all RDS
information has been interpreted and
st")
11
GB
When storing RDS stations you should
press the corresponding station button
only when the station name appears in
the display. This ensures that all RDS
information has been interpreted and
stored automatically.
When calling up stored RDS stations,
the corresponding station name is display-
ed. If the stored frequency is too weak for
good reception, the radio searches auto-
matically for an appropriate alternative fre-
quency (best station function).
If non of the stored alternative frequencies
is strong enough for good reception, the
desired station cannot be received at the
moment. In this case, tune to another sta-
tion.
�!Please make sure that the station
name is displayed when the station
is stored. If a moving text should be
displayed, this will be stored
instead of the station name.
Information about How does RDS work?
RDS stations
In many European countries, RDSis al-
ready transmitted by many radio stations.
The goal is to provide an overall coverage.
With this system, an inaudible digitized
data current is transmitted in addition to
the normal FM radio signal, providing the
RDS receiver with information in encoded
form which controls, among other things,
the following functions:
• Programme identification (PI code)
With the help of the PI code, the radio
recognizes the currently received station.
• Programme service name (PS code)
The PS code transmits the station name
which is shown in the display.• Alternative frequencies (AF code)
Because of the limited transmission
range of the FM waves, the programme
of one radio provider is transmitted by
several stations on different frequencies.
The AF code informs the radio about all
alternative frequencies of the same pro-
gramme.
This enables the radio to tune to the fre-
quency which can be received in the best
quality.
Tuning to another frequency is carried
out in an inaudible way.
The station name in the display remains
unchanged.
While you are driving, the RDS radio
searches permanently for alternative
frequencies of the station selected and
tunes to this in an automatic and nearly
inaudible way.
• Traffic programme identification (TP code = Traffic programme)
This information tells the radio that it is
currently receiving a traffic programme
station.
RADIO MODE
Page 13 of 26
 SymphonyTape Car Radio Manual ßQ– AIM button
Using the AIM function (Automatic Infor-
mation Memory), you may store automati-
cally up to 9 traffic announcements with a
total length of 4 minutes with the help of
the integrated")
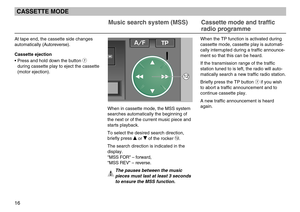
ßQ– AIM button
Using the AIM function (Automatic Infor-
mation Memory), you may store automati-
cally up to 9 traffic announcements with a
total length of 4 minutes with the help of
the integrated digital voice memory.
Storing traffic announcements
There are 3 different possibilities of storing
traffic announcements:
• When the radio is switched on, every traffic announcement of the station tuned
to is stored as soon as the “TP” function
has been selected ("TP" in the display).
TP
12
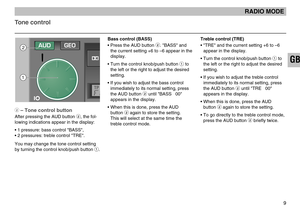
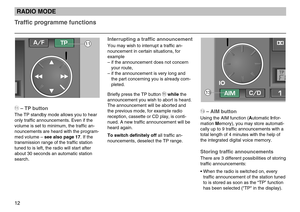
ß?– TP button
The TP standby mode allows you to hear
only traffic announcements. Even if the
volume is set to minimum, the traffic an-
nouncements are heard with the program-
med volume – see also page 17. If the
transmission range of the traffic station
tuned to is left, the radio will start after
about 30 seconds an automatic station
search.
Interrupting a traffic announcement
You may wish to interrupt a traffic an-
nouncement in certain situations, for
example
– if the announcement does not concern your route,
– if the announcement is very long and the part concerning you is already com-
pleted.
Briefly press the TP button
ß?while the
announcement you wish to abort is heard.
The announcement will be aborted and
the previous mode, for example radio
reception, cassette or CD play, is conti-
nued. A new traffic announcement will be
heard again.
To switch definitely off all traffic an-
nouncements, deselect the TP range.
RADIO MODE
Traffic programme functions
11
13
Page 14 of 26
 SymphonyTape Car Radio Manual Playback of traffic announcements
in chronological order
Press the AIM buttonßQ. Playback is started
with the last stored traffic announcement
and is continued till the oldest announce-
ment. The dis")
Playback of traffic announcements
in chronological order
Press the AIM buttonßQ. Playback is started
with the last stored traffic announcement
and is continued till the oldest announce-
ment. The display indicates, for example,
"AIM 4 15:35".
– "AIM" AIM playback
– "4" 4th announcement
– "15:35" Time of storage
If no traffic announcement has been stored,
"AIM NO MSG" appears in the display.
Playback of traffic announcements
in random order
• With the AIM function activated, press quickly twice on the manual tuning
rocker
ß`during playback.
• You may then use the rocker
ß`to skip
forward and reverse between the stored
traffic announcements.
Repeating traffic announcements
Press on the left side of the manual tuning
rocker
ß`during playback. The current
traffic announcement is repeated.
13
GB
• Storage standby: 2 hours.
1 – Activate the TP function using the TP button
ß?.
2 – Switch the radio off.
"AIM 2 h" appears in the display. This
means that 2 hours of traffic announce-
ments will be stored.
• Storage standby: 24 hours.
Proceed as described above.
3 – Press the AIM button
ßQfor about
1 second.
The station last tuned to and then
"AIM 24 h" appears in the display. Now
24 hours of traffic announcements will be
stored.
�!If the voice memory is full, the
oldest announcement will be
overwritten (deleted).
�!In the case of a message having a
length of more than 4 minutes the
beginning is overwritten.
A signal sounds to indicate you that
the entire message could not be
recorded.
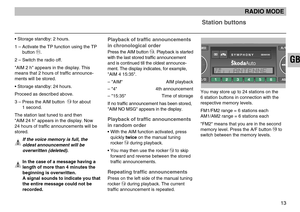
Station buttons
You may store up to 24 stations on the
6 station buttons in connection with the
respective memory levels.
FM1/FM2 range = 6 stations each
AM1/AM2 range = 6 stations each
"FM2" means that you are in the second
memory level. Press the A/F button
ßIto
switch between the memory levels.
ANTENNETP
RADIO MODE
Page 15 of 26
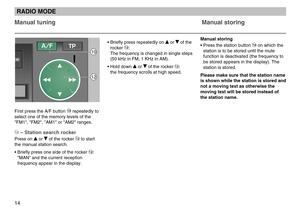
Manual tuningManual storing
14
First press the A/F button ßIrepeatedly to
select one of the memory levels of the
"FM1", "FM2", "AM1" or "AM2" ranges.
ß`– Station search rocker
Press on �or �of the rocker ß`to start
the manual station search.
• Briefly press one side of the rocker
ß`:
"MAN" and the current reception
frequency appear in the display.
• Briefly press repeatedly on �or �of the
rocker
ß`:
The frequency is changed in single steps
(50 kHz in FM, 1 KHz in AM).
• Hold down
�or �of the rocker ß`:
the frequency scrolls at high speed.
Manual storing
• Press the station button
ßRon which the
station is to be stored until the mute
function is deactivated (the frequency to
be stored appears in the display). The
station is stored.
Please make sure that the station name
is shown while the station is stored and
not a moving text as otherwise the
moving text will be stored instead of
the station name.
RADIO MODE
12
10
Page 16 of 26
 SymphonyTape Car Radio Manual 7Reverse button
• Briefly press the button 7during cas-
sette play to select the other cassette
side. The tape run direction is indicated
by \"PLAY FOR\" or \"PLAY REV\" in the
display.
If the cassette")
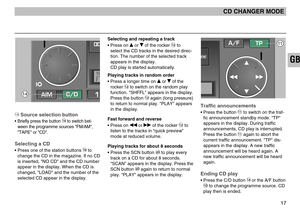
7Reverse button
• Briefly press the button 7during cas-
sette play to select the other cassette
side. The tape run direction is indicated
by "PLAY FOR" or "PLAY REV" in the
display.
If the cassette side changes automatically
during cassette play, the casssette may
jam. In this case, select the fast wind or
rewind function. If this does not remove
the fault, use another cassette.
ANT
TP
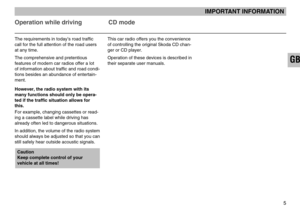
Insert the cassette fully into the cassette
compartment. When inserting a cassette,
the radio switches automatically to cas-
sette play.
The tape run direction is indicated by
"PLAY FOR" or "PLAY REV" in the display
5Dolby® button
• Briefly press the Dolby® button 5during
cassette play to switch on and off the
Dolby noise reduction system.
If the Dolby noise reduction system is
activated, the Dolby® symbol
�appears
in the display.ß`Fast forward and rewind
Pressing ��or ��of the rocker ß`se-
lects fast rewind or forward, respectively.
The tape run direction is indicated in the
display.
"WIND FOR" – fast forward
"WIND REV" – fast rewind
Briefly pressing the rocker
ß`ends the fast
forward or rewind function.
15
GB
CASSETTE MODE
Cassette compartment Fast forward and rewind Reverse function
cassette ejection
12
7