2005 Seat Ibiza 5D window
[x] Cancel search: windowPage 98 of 252

Lights and visibility
96
Note•
Do not put stickers on the windscreen in front of the sensor. This may
cause sensor disruption or faults.
Rear window wiper
The windscreen wiper lever operates the windscreen wiper
and the wash and wipe system for the rear window.Switching on the interval wipe
– Press the lever forwards to position ⇒fig. 66 . The wiper will
wipe the window approximately every 6 seconds. Switching off the interval wipe function
– Pull the lever back from position towards the steering wheel.
The wiper will continue to function for a short period if you switch
off whilst the wipers are in motion.
Switching on the windscreen wiper and washer system
– Press the lever fully forwards to position ⇒fig. 66 . The rear
wiper and washer operate at the same time. The windscreen
wash system will function as long as you hold the lever in this
position.
– Then release the lever. The washer system stops and the wipers continue until the end of the cycle.
– Move the lever towards the steering wheel to switch off.
WARNING
•
A worn or dirty wiper blade will obstruct visibility and reduce safety.
•
Always note the corresponding warnings on ⇒page 180.Caution
In icy conditions, always check that the wiper blade is not frozen to the glass
before using the wiper for the first time. If you switch on the wiper when the
wiper blade is frozen to the glass, this could damage both the wiper blade
and the wiper motor.
Note
•
The rear window wiper will only work when the ignition is switched on.
F i g . 6 6 W i n d o w w a s h a n d
wipe lever: Rear window
wiper
A6
A6
A7
ibiza_ingles Seite 96 Mittwoch, 5. Oktober 2005 5:17 17
Page 99 of 252

Lights and visibility97
Safety First
Operating instructions
Tips and Maintenance
Te c h n i c a l D a t a
Headlight washer system
The headlight washers clean the headlight lenses.The headlight washers are activated automatically when the windscreen
washer is used and the windscreen wiper lever is pulled towards the steering
wheel for at least 1.5 seconds – provided the dipped headlights or main
beams are switched on. Clean off stubborn dirt (insects, etc.) from the head-
lights at regular intervals, for instance when filling the fuel tank.
Note
•
To ensure that the headlight washers work properly in winter, keep the
nozzle holders in the bumper free of sn ow and remove any ice with a de-icer
spray.
•
To remove water, the windscreen wipers will be activated from time to
time, the headlight wipers will be activated every three cycles.
MirrorsInterior mirror
It is dangerous to drive if you cannot see clearly through the
rear window.Manual anti-dazzle function for interior mirror
In the basic mirror position, the lever at the bottom edge of the mirror should
be at the front. Pull the lever to the back to select the anti-dazzle function.
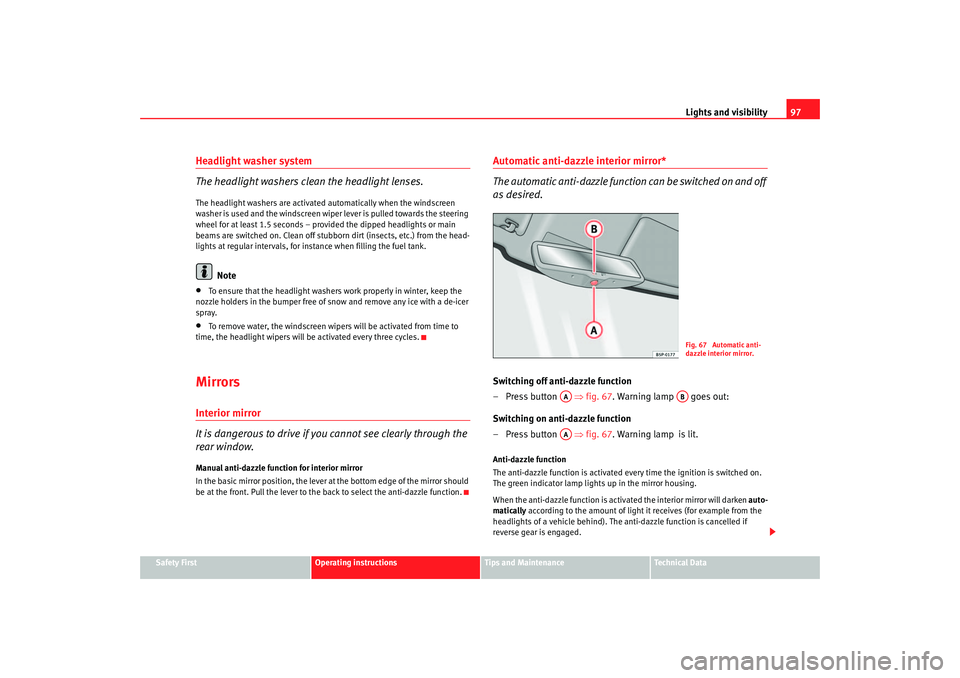
Automatic anti-dazzle interior mirror*
The automatic anti-da zzle function can be switched on and off
as desired.Switching off anti-dazzle function
– Press button ⇒ fig. 67. Warning lamp goes out:
Switching on anti-dazzle function
– Press button ⇒ fig. 67. Warning lamp is lit.Anti-dazzle function
The anti-dazzle function is activated every time the ignition is switched on.
The green indicator lamp ligh ts up in the mirror housing.
When the anti-dazzle function is activa ted the interior mirror will darken auto-
matically according to the amount of light it receives (for example from the
headlights of a vehicle behind). The anti-dazzle function is cancelled if
reverse gear is engaged.
Fig. 67 Automatic anti-
dazzle interior mirror.
AA
AB
AA
ibiza_ingles Seite 97 Mittwoch, 5. Oktober 2005 5:17 17
Page 100 of 252

Lights and visibility
98
Note•
The automatic anti-dazzle function will only work properly if the sun
blind* for the rear window is retracted and there are no other objects
preventing light from reac hing the interior mirror.
•
If you have to stick any type of sticker on the windscreen, do not do so in
front of the sensors. Doing so could pr event the anti-dazzle function from
working well or even from working at all.
Exterior mirrors
The exterior mirrors can be adjusted using the rotary knob in
the centre console.Basic setting of exterior mirrors
1. Turn knob ⇒fig. 68 to position L ( left exterior mirror). 2. Turn the rotary knob to position the mirror so that you have a
good view to the rear of the vehicle.
3. Turn knob to position R (right exterior mirror ).
4. Swivel the rotary knob to position the mirror so that you have a good view to the rear of the car ⇒.
Heating the exterior mirrors*
– Turn the knob to dem isting position
⇒ fig. 68.
– Pl
ace the control in position L or R once the mirrors have
demisted to prevent unnecessary use of the battery.
Folding in exterior mirrors*
– Turn the control ⇒fig. 68 to position
to fold in the exterior
mirrors. You should always fold in the exterior mirrors if you are
driving through an automatic car wash. This will help prevent
damage.
Folding exterior mirrors back out to the extended position*
– Turn the knob to position L or R to fold the exterior mirrors back out ⇒ .
Sy nc
hronised wing mirror adjustment*
1. Turn the control to the position L ( left exterior mirror ).
2. Turn the rotary knob to position the mirror so that you have a good view to the rear of the vehicle. The right exterior mirror will
be adjusted at the same time (synchronised).
Fig. 68 Exterior mirror
control
ibiza_ingles Seite 98 Mittwoch, 5. Oktober 2005 5:17 17
Page 102 of 252

Seats and stowage
100Seats and stowageThe importance of correct seat adjustmentProper seat adjustment optimi ses the level of protection
offered by seat belts and airbags.Your vehicle has five passenger places, two individual front seats and three
places on the rear seat. Each seat is equipped with a three-point seat belt.
The driver seat and front passenger seat can be adjusted in many ways to suit
the physical requirements of the vehicl e occupants. The correct seat position
is very important for:•
fast and easy operation of all controls on the instrument panel,
•
relaxed posture that does not cause drowsiness,
•
safe driving ⇒page 7,
•
and to ensure that the seat belts and airbag system provide maximum
protection ⇒page 17.
WARNING
•
If the driver and passengers assume improper sitting positions, they
may sustain critical injuries.
•
Never transport more people than there are seats available in the
vehicle.
•
Every occupant in the vehicle must properly fasten and wear the seat
belt belonging to his or her seat. Children must be protected with an appro-
priate child restraint system ⇒page 43, “Child safety”.
•
The front seats and all head restraints must always be adjusted to body
size and the seat belt must always be properly adjusted to provide you and
your passengers with optimum protection.
•
Always keep your feet in the foot well when the vehicle is moving; never
rest them on the dash panel, out of the window or on the seat. This also
applies to passengers. An incorrect sitting position exposes you to an
increased risk of injury in the event of a braking manoeuvre or an accident.
If the airbag is triggered, you could sustain severe injuries due to an incor-
rect sitting position.
•
It is important for the driver and front passenger to maintain a distance
of at least 25 cm from the steering wh eel or dash panel. Failure to respect
the minimum distance means that the airbag will not protect you. Risk of
fatal injury. The distance between the driver and the steering wheel or
between the front passenger and the dash panel should always be as great
as possible.
•
Adjust the driver or front passenger seat only when the vehicle is
stationary. Otherwise your seat could move unexpectedly while the vehicle
is moving. This could increase the risk of an accident and therefore injury.
In addition, while adjusting your seat, you will assume an incorrect sitting
position. Risk of fatal accidents.
•
Special guidelines apply to installing a child seat on the front
passenger seat. When installing a chil d seat, observe the warning note in
the ⇒page 43, “Child safety”.WARNING (continued)
ibiza_ingles Seite 100 Mittwoch, 5. Oktober 2005 5:17 17
Page 113 of 252

Seats and stowage111
Safety First
Operating instructions
Tips and Maintenance
Te c h n i c a l D a t a
Luggage compartmentStowing luggage
All luggage must be securely stowed.Please observe the following points to ensure the vehicle handles
well at all times:
– Distribute the load as evenly as possible.
– Place heavy objects as far forward in the luggage compartment
as possible.
– Secure luggage in the luggage compartment with suitable straps on the fastening rings.
WARNING
•
Loose luggage and other loose items in the vehicle can cause serious
injuries.
•
Loose objects in the luggage compartment can suddenly move and
change the way the vehicle handles.
•
During sudden manoeuvres or accidents, loose objects in the
passenger compartment can be flung forward, injuring vehicle occupants.
•
Always store objects in the luggage compartment and secure with suit-
able straps. This is especially important for heavy objects.
•
When you transport heavy objects, always keep in mind that a change
in the centre of gravity can also cause changes in vehicle handling.
•
Please observe information on safe driving ⇒page 7, “Safe driving”.
Caution
Hard objects on the shelf could chafe against the wires of the heating
element in the rear window and cause damage.
Note
The ventilation slots in front of the r ear side windows must not be covered as
this would prevent stale air being extracted from the vehicle.Fastening rings*Four rings are fitted in the boot ⇒fig. 83 (see arrows) for securing objects.
Two of the rings are located on the right and left, respectively, of the rear
section of the boot. The other two are next to the loading edge of the boot.
The fastening rings are in accordance with standard DIN 75410
Fig. 83 Fastening rings
ibiza_ingles Seite 111 Mittwoch, 5. Oktober 2005 5:17 17
Page 115 of 252

Air conditioning113
Safety First
Operating instructions
Tips and Maintenance
Te c h n i c a l D a t a
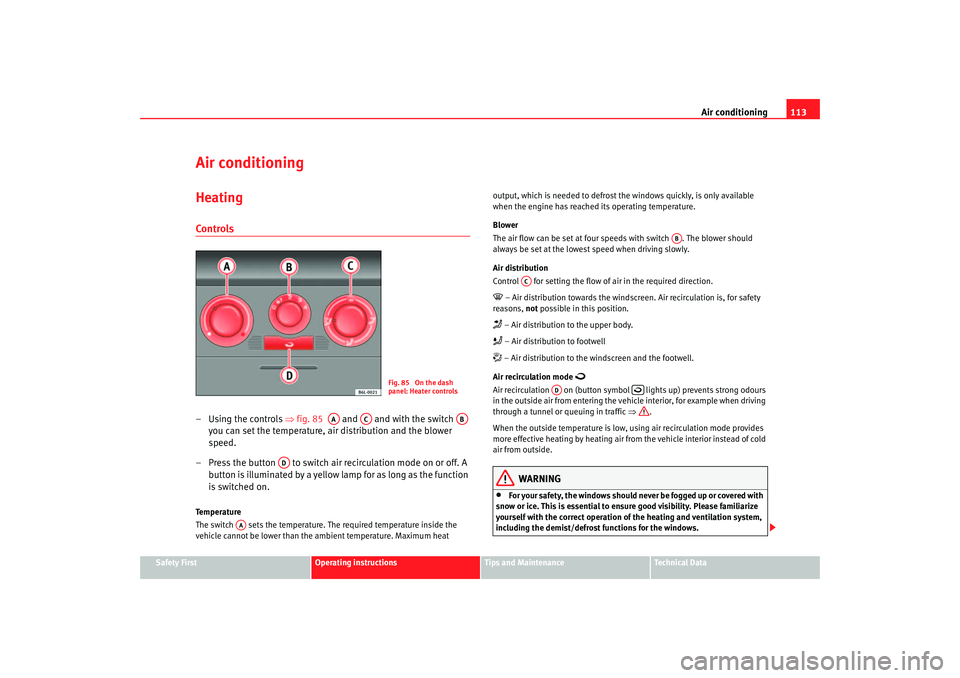
Air conditioningHeatingControls– Using the controls ⇒ fig. 85 and and with the switch
you can set the temperature, air distribution and the blower
speed.
– Press the button to switch air recirculation mode on or off. A button is illuminated by a yellow lamp for as long as the function
is switched on.Temperature
The switch sets the temperature. The required temperature inside the
vehicle cannot be lower than the ambient temperature. Maximum heat output, which is needed to defrost the windows quickly, is only available
when the engine has reached its operating temperature.
Blower
The air flow can be set at four s
peeds with switch . The blower should
always be set at the lowest speed when driving slowly.
Air distribution
Control for setting the flow of air in the required direction.
– Air distribution towards the windsc reen. Air recirculation is, for safety
reasons, not possible in this position. – Air distribution to the upper body. – Air distribution to footwell – Air distribution to the windscreen and the footwell.
Air recirculation mode
Air recirculation on (button symbol lights up) prevents strong odours
in the outside air from entering the vehicle interior, for example when driving
through a tunnel or queuing in traffic ⇒.
When the outside temperature is low, using air recirculation mode provides
more effective heating by heating air from the vehicle interior instead of cold
air from outside.
WARNING
•
For your safety, the windows should never be fogged up or covered with
snow or ice. This is essential to ensure good visibility. Please familiarize
yourself with the correct operation of the heating and ventilation system,
including the demist/defrost functions for the windows.
Fig. 85 On the dash
panel: Heater controls
AA
AC
AB
AD
AA
AB
AC
AD
ibiza_ingles Seite 113 Mittwoch, 5. Oktober 2005 5:17 17
Page 116 of 252

Air conditioning
114•
In air recirculation mode, no ambient air enters the vehicle interior. The
windows can quickly fog over if the heating is switched off. Therefore, you
should never leave the air recirculation mode switched on for longer
periods, as this increases the risk of an accident.Note
•
Please observe the general notes ⇒page 121.
Vehicle ventilation or heatingVentilating the passenger compartment
– Turn the temperature selector ⇒fig. 86 anti-clockwise.
– Turn b lower swit ch to spe ed
settings 1-4. – Set the air
flow to the desired direction using air distribution
con trol .
–
Ope
n the relevant air outlets.
Heating the interior
– Turn the temperature selector ⇒fig. 86 clockwise to select
the required temperature.
– Turn b lower switch to speed settings 1-4.
– S et th
e airf
low to the desired direction using air distribution
con trol .
– O
pen the relevant air outlets.
Defrosting the windscreen
– Turn the temperature selector ⇒fig. 86 clockwise to the
maximum temperature.
– Turn the blower switch to setting 4.
– Set air distribution to
.
–Close outlet .
– Open and turn outlet towards side windows
Demisting the windscreen and the side windows
– Turn the temperature selector ⇒fig. 86 to the heating zone.
– Turn b lower switch to speed settings 2-3.
– S e
t a
ir distribution to
.
WARNING (continued)
Fig. 86 On the dash
panel: Heater controls
A1
A7
AC
AA
A7
AC
AA
AB
A3
A4
AA
A7
ibiza_ingles Seite 114 Mittwoch, 5. Oktober 2005 5:17 17
Page 117 of 252

Air conditioning115
Safety First
Operating instructions
Tips and Maintenance
Te c h n i c a l D a t a
– Close outlets .
– Open a
nd turn outlets towards s ide windows
.
When the windows are demisted and as a preventive measure, the switch
can be set in position
, thus obtaining geater comfo rt while prevent ing the
windows from misting again. Heating system
Maximum heat output, which is needed to defrost the windows quickly, is
only available when the engine has reached its operating temperature.
Note
Remember that the temperature of the engine coolant should be optimum to
ensure that the heating system functions correctly ( except in vehicles fitted
with additional heating*)
Air outlets
A3
A4
AC
Fig. 87 Air vent
ibiza_ingles Seite 115 Mittwoch, 5. Oktober 2005 5:17 17