Page 130 of 250
Downloaded from www.Manualslib.com manuals search engine
2
5
NU761_2_G2-FRA.qxd 4/11/05 10:48 Page 2.30
2.30
CRUISE CONTROL/SPEED LIMITER: cruise control function (continued)
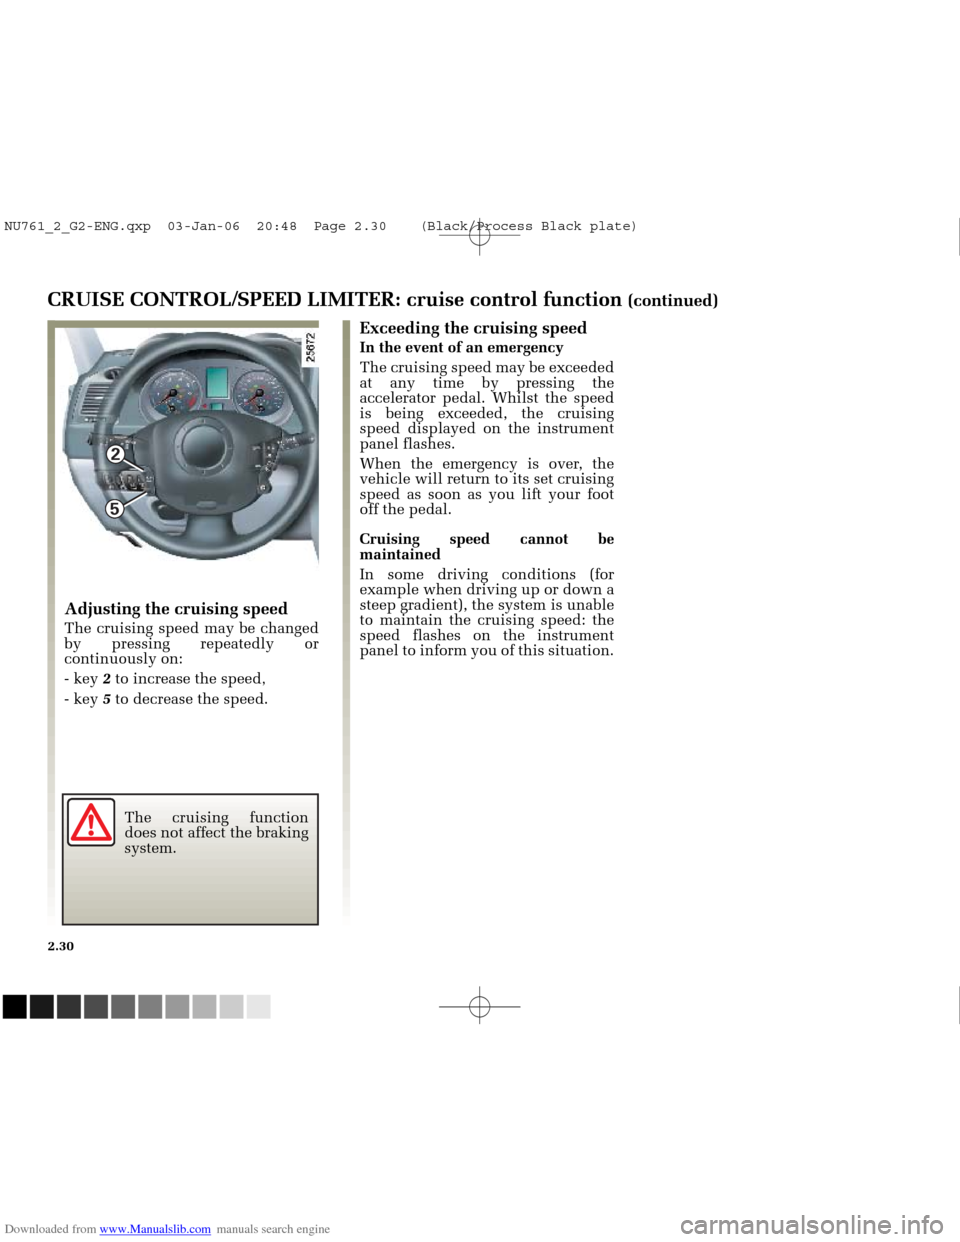
Adjusting the cruising speed
The cruising speed may be changed
by pressing repeatedly or
continuously on:
- key 2to increase the speed,
- key 5to decrease the speed.
Exceeding the cruising speed
In the event of an emergency
The cruising speed may be exceeded
at any time by pressing the
accelerator pedal. Whilst the speed
is being exceeded, the cruising
speed displayed on the instrument
panel flashes.
When the emergency is over, the
vehicle will return to its set cruising
speed as soon as you lift your foot
off the pedal.
Cruising speed cannot be
maintained
In some driving conditions (for
example when driving up or down a
steep gradient), the system is unable
to maintain the cruising speed: the
speed flashes on the instrument
panel to inform you of this situation.
The cruising function
does not affect the braking
system.
NU761_2_G2-ENG.qxp 03-Jan-06 20:48 Page 2.30 (Black/Process Black\
plate)
Page 131 of 250
Downloaded from www.Manualslib.com manuals search engine
2
5
3
4
1
NU761_2_G2-FRA.qxd 4/11/05 10:48 Page 2.31
CRUISE CONTROL/SPEED LIMITER: cruise control function (continued)
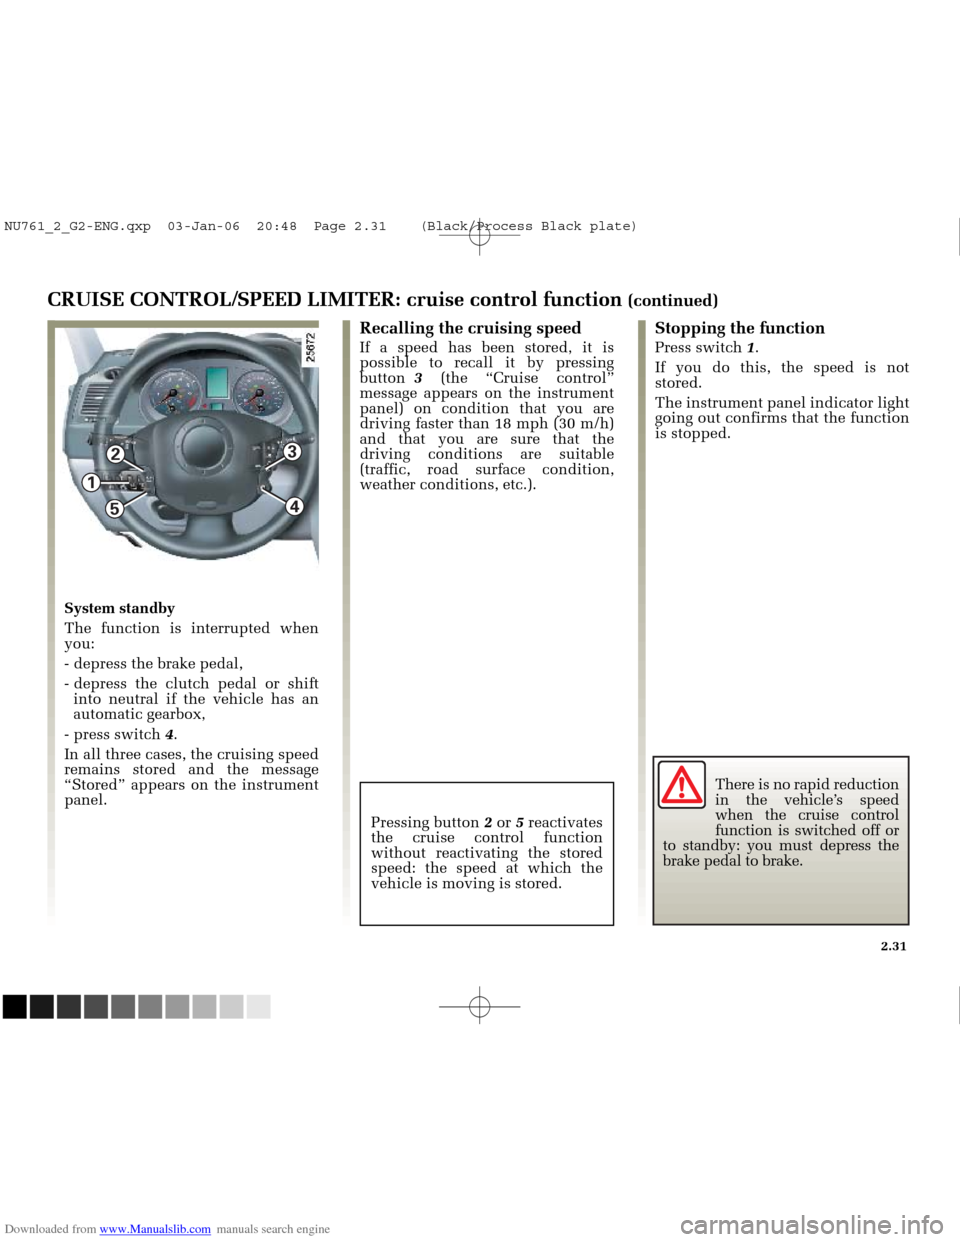
Recalling the cruising speed
If a speed has been stored, it is
possible to recall it by pressing
button 3 (the “Cruise control”
message appears on the instrument
panel) on condition that you are
driving faster than 18 mph (30 m/h)
and that you are sure that the
driving conditions are suitable
(traffic, road surface condition,
weather conditions, etc.).
Stopping the function
Press switch 1.
If you do this, the speed is not
stored.
The instrument panel indicator light
going out confirms that the function
is stopped.
Pressing button 2or 5reactivates
the cruise control function
without reactivating the stored
speed: the speed at which the
vehicle is moving is stored.
System standby
The function is interrupted when
you:
- depress the brake pedal,
- depress the clutch pedal or shift into neutral if the vehicle has an
automatic gearbox,
- press switch 4.
In all three cases, the cruising speed
remains stored and the message
“Stored” appears on the instrument
panel.
2.31
There is no rapid reduction
in the vehicle’s speed
when the cruise control
function is switched off or
to standby: you must depress the
brake pedal to brake.
NU761_2_G2-ENG.qxp 03-Jan-06 20:48 Page 2.31 (Black/Process Black\
plate)
Page 134 of 250
Downloaded from www.Manualslib.com manuals search engine
1
1
NU761_2_G2-FRA.qxd 4/11/05 10:48 Page 2.34
2.34
AUTOMATIC GEARBOX
Operation
With the lever in position Por N,
switch on the ignition.
Foot on the brake pedal (the warning
light goes out), move the lever out of
position P.
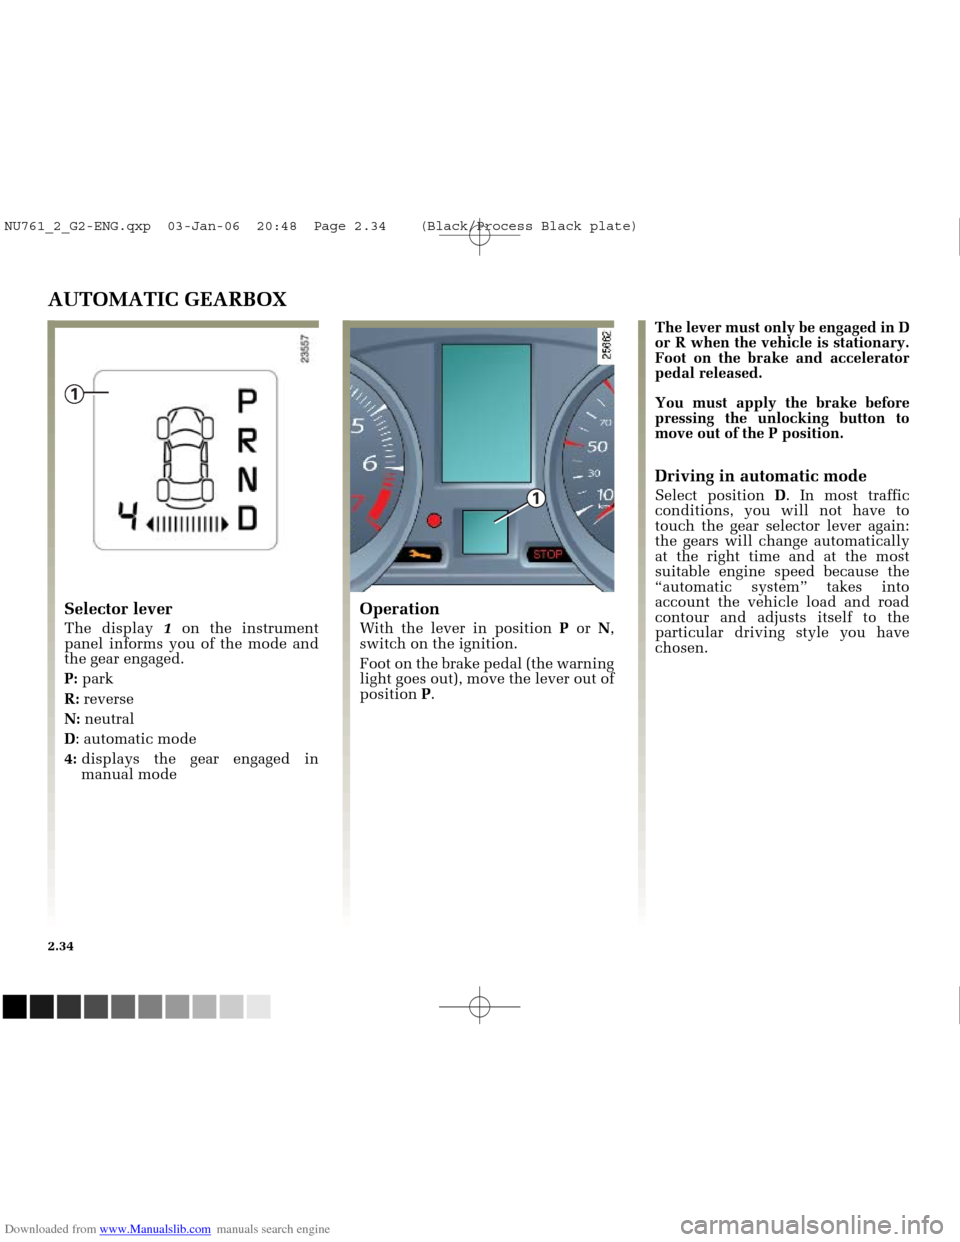
Selector lever
The display 1on the instrument
panel informs you of the mode and
the gear engaged.
P: park
R: reverse
N: neutral
D : automatic mode
4: displays the gear engaged in
manual mode The lever must only be engaged in D
or R when the vehicle is stationary.
Foot on the brake and accelerator
pedal released.
You must apply the brake before
pressing the unlocking button to
move out of the P position.
Driving in automatic mode
Select position
D. In most traffic
conditions, you will not have to
touch the gear selector lever again:
the gears will change automatically
at the right time and at the most
suitable engine speed because the
“automatic system” takes into
account the vehicle load and road
contour and adjusts itself to the
particular driving style you have
chosen.
NU761_2_G2-ENG.qxp 03-Jan-06 20:48 Page 2.34 (Black/Process Black\
plate)
Page 135 of 250

Downloaded from www.Manualslib.com manuals search engine
NU761_2_G2-FRA.qxd 4/11/05 10:48 Page 2.35
AUTOMATIC TRANSMISSION (continued)Driving in manual mode
With the selector lever in position D,
move the lever to the left.
Pushing the lever repeatedly allows
you to change gears manually.
- to move down through the gears, push the lever backwards.
- to move up through the gears, push the lever forwards.
The gear selected is displayed on the
instrument panel. Special cases
Under certain driving conditions
(e.g.: engine protection, with
electronic stability program (ESP)
operational: etc.) the “automatic
system” may change gear
automatically.
Likewise, to prevent “incorrect
manoeuvres”, a gear change may be
refused by the “automatic system”:
in this case the gear display flashes
for a few seconds as a warning.
How to drive as economically as
possible
Leave the selector in position
Don
the open road, depress the
accelerator pedal slightly to ensure
automatic gear changes at
comparatively low engine speeds.
Accelerating and overtaking
Depress the accelerator pedal
briskly and fully (so that it goes
beyond the kickdown point).
This will enable you to change
down to the optimal gear within the
engine range.
2.35
NU761_2_G2-ENG.qxp 03-Jan-06 20:48 Page 2.35 (Black/Process Black\
plate)
Page 137 of 250
Downloaded from www.Manualslib.com manuals search engine
NU761_2_G2-FRA.qxd 4/11/05 10:49 Page 2.37
AUTOMATIC TRANSMISSION (continued)
Operating faults
- when driving , if the message
“Check gearbox” along with the
warning light appears on the
instrument panel, this indicates a
fault.
Consult your RENAULT Dealer as
soon as possible.
- when driving , if the message
“Gearbox overheating” along with
the warning light appears on
the instrument panel, avoid leaving
the lever in position D(or R), traffic
permitting: systematically return to
position Nwhile stopping.
Consult your RENAULT Dealer as
soon as possible.
- Recovering a vehicle with an
automatic transmission : refer to
the information on Towing in
Section 5.
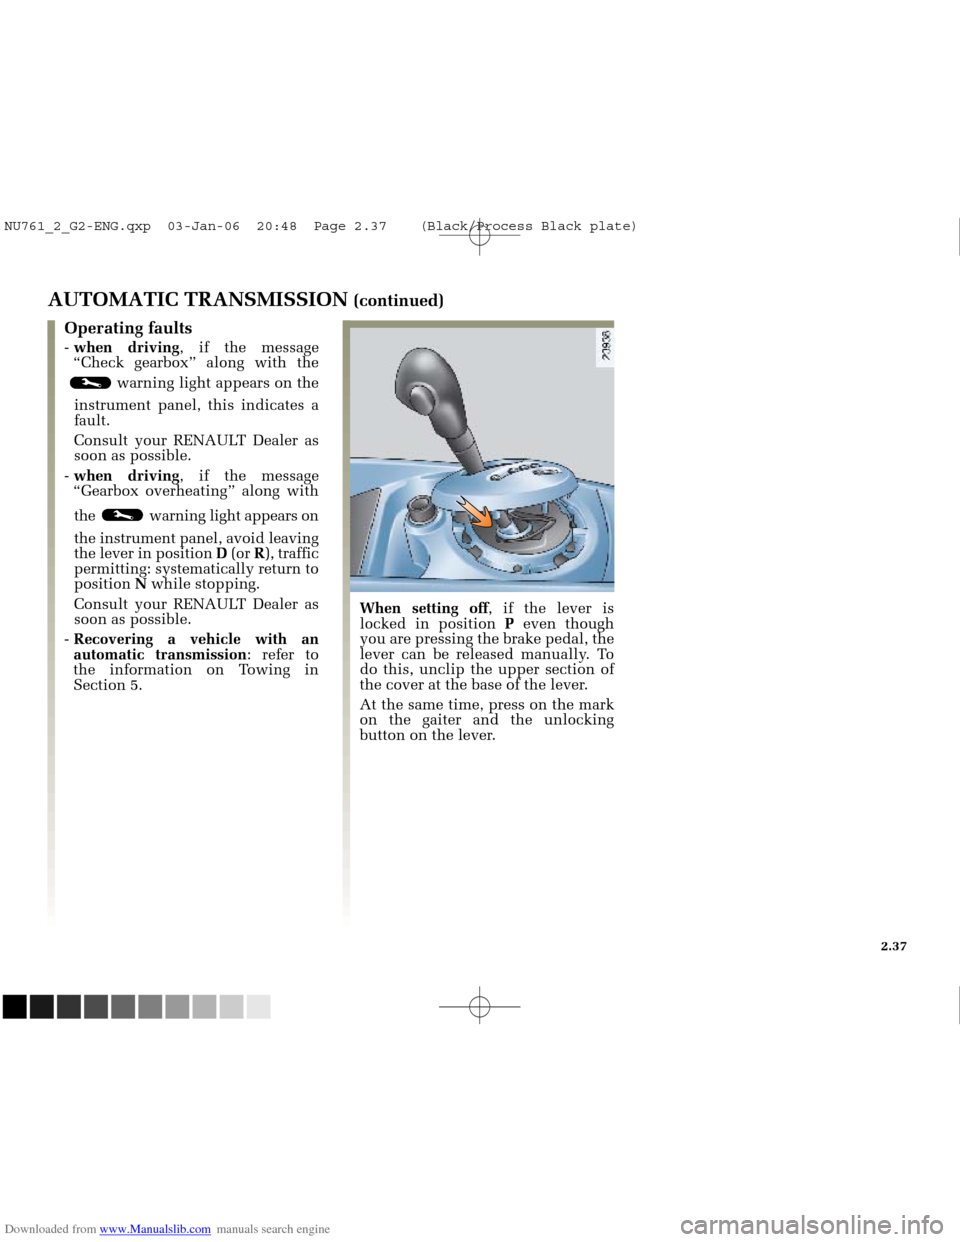
When setting off , if the lever is
locked in position Peven though
you are pressing the brake pedal, the
lever can be released manually. To
do this, unclip the upper section of
the cover at the base of the lever.
At the same time, press on the mark
on the gaiter and the unlocking
button on the lever.
2.37
NU761_2_G2-ENG.qxp 03-Jan-06 20:48 Page 2.37 (Black/Process Black\
plate)
Page 178 of 250
Downloaded from www.Manualslib.com manuals search engine
23532
23507
NU761_2_G4-FRA.qxd 14/11/05 10:10 Page 4.04
4.04
ENGINE OIL LEVEL
It is normal for an engine to use oil
for lubrication and cooling of
moving parts and it is normal to top
up the level between oil changes.
However, contact your RENAULT
Dealer if more than 0.5 litres is being
consumed every 600 miles (1,000
km) after the running in period.
Oil change frequency: check the oil
level from time to time and
certainly before any long journey to
avoid the risk of damaging your
engine.
Reading the oil level
The vehicle must be parked on level
ground and the engine should have
been switched off for some time
beforehand to obtain an accurate
reading.
To be able to read the exact oil level
and make sure that the maximum
level has not been exceeded (risk of
engine damage), the dipstick must
be used.
In the following pages, see Engine
oil level: topping up/filling.
The instrument panel display only
shows a warning when the
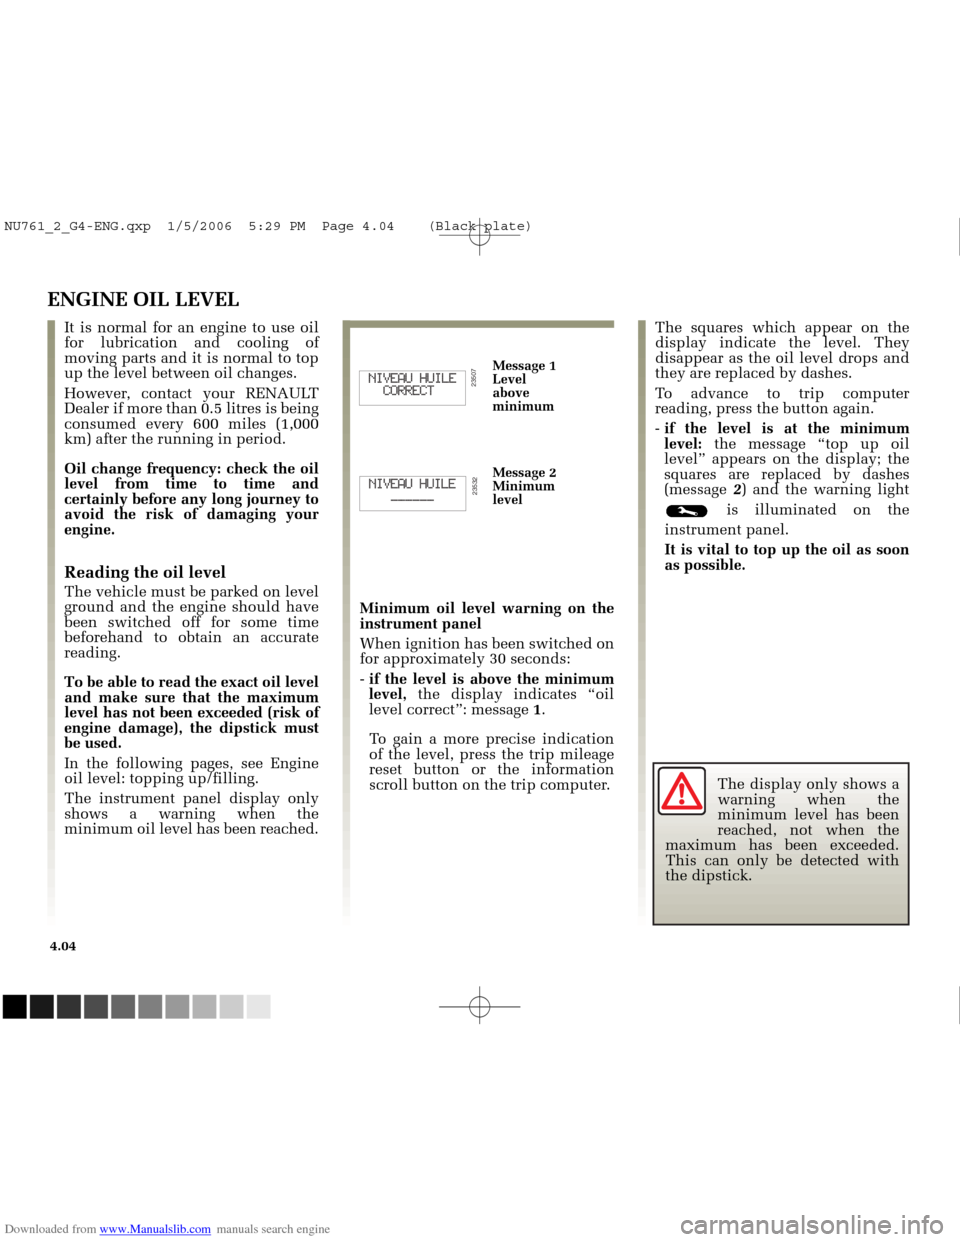
minimum oil level has been reached.Minimum oil level warning on the
instrument panel
When ignition has been switched on
for approximately 30 seconds:
-
if the level is above the minimum
level, the display indicates “oil
level correct”: message 1.
To gain a more precise indication
of the level, press the trip mileage
reset button or the information
scroll button on the trip computer. The squares which appear on the
display indicate the level. They
disappear as the oil level drops and
they are replaced by dashes.
To advance to trip computer
reading, press the button again.
-
if the level is at the minimum
level: the message “top up oil
level” appears on the display; the
squares are replaced by dashes
(message 2) and the warning light
is illuminated on the
instrument panel.
It is vital to top up the oil as soon
as possible.
Message 1
Level
above
minimum
Message 2
Minimum
level
The display only shows a
warning when the
minimum level has been
reached, not when the
maximum has been exceeded.
This can only be detected with
the dipstick.
NU761_2_G4-ENG.qxp 1/5/2006 5:29 PM Page 4.04 (Black plate)
Page 188 of 250
Downloaded from www.Manualslib.com manuals search engine
NU761_2_G4-FRA.qxd 14/11/05 10:11 Page 4.14
4.14
INTERIOR TRIM MAINTENANCE
Whatever type of stain is on the
trim, use soapy water (if possible,
warm water) containing:
natural soap,
washing up liquid (with one partwashing up liquid to 200 parts
water).
Rinse off with a soft, damp cloth.
Special instructions
Instrumentation glass panels (e.g.:
instrument panel, clock, external
temperature display, radio
display, etc.)
Use a soft cloth (or cotton wool).
If this does not clean it properly,
use a soft cloth (or cotton wool)
slightly moistened with soapy
water and then wipe clean with a
soft damp cloth/cotton.
Finally, carefully dry off with a
soft dry cloth.
Cleaning products containing
alcohol must not be used under
any circumstances. Seat belts
These must be kept clean.
Use products selected by
RENAULT’s Technical Department
(RENAULT accessory outlets) or
warm soapy water and a sponge
and dry off with a dry cloth.
Detergents or dyes must not be
used under any circumstances.What you should not do
You are strongly recommended not
to use high-pressure or atomising
cleaning equipment inside the
passenger compartment: unless
carefully used, such equipment
could interfere with correct
functioning of the electrical or
electronic components in the
vehicle, amongst other effects.
You are strongly recommended not
to place objects such as air
fresheners, perfumes, etc. near the
air vents, as they could damage the
dashboard.
NU761_2_G4-ENG.qxp 1/5/2006 5:29 PM Page 4.14 (Black plate)
Page 190 of 250
Downloaded from www.Manualslib.com manuals search engine
1
4
3
2
NU761_2_G5-FRA.qxd 4/11/05 11:09 Page 5.02
5.02
EMERGENCY SPARE WHEEL
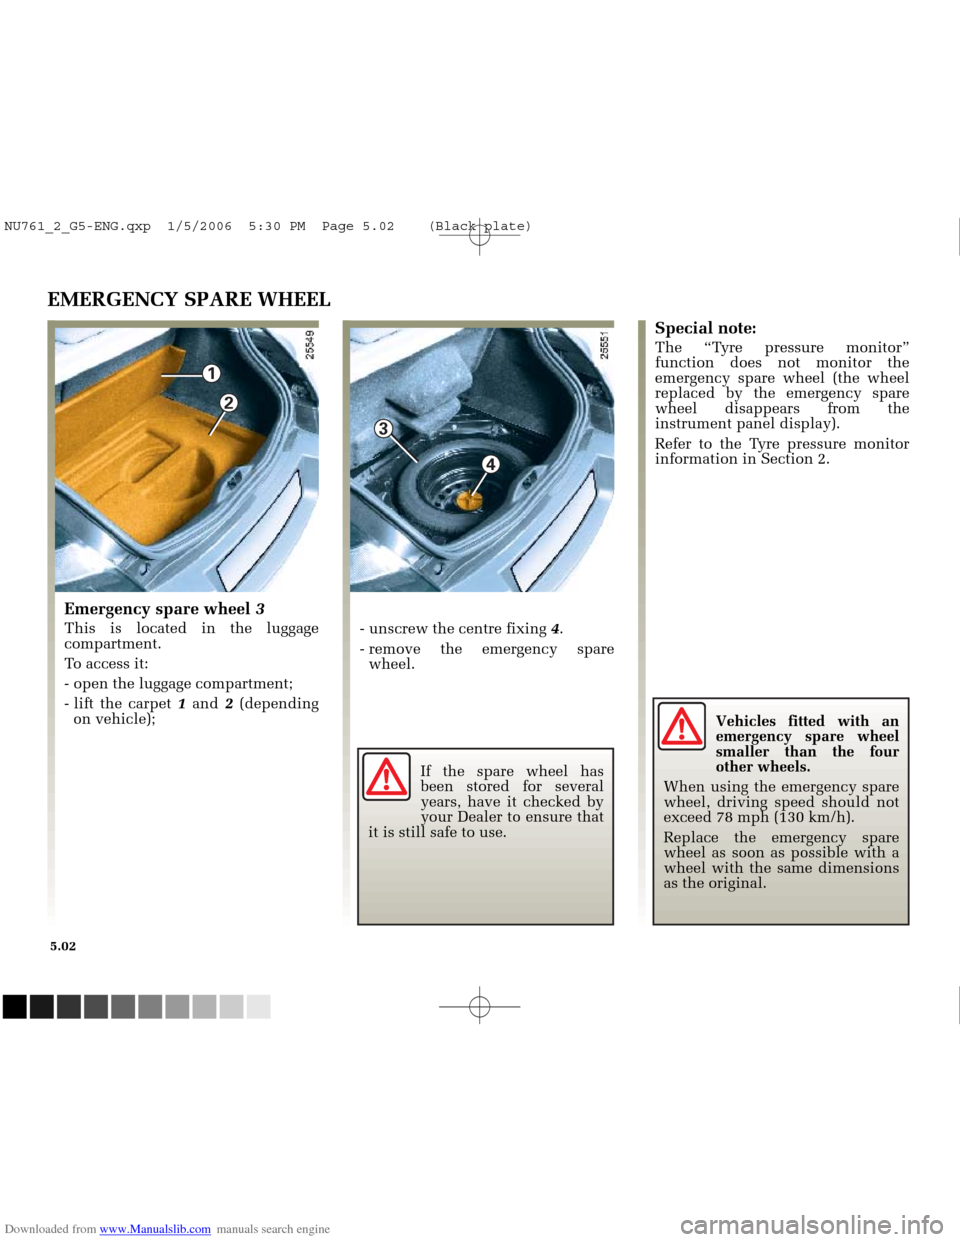
Emergency spare wheel 3
This is located in the luggage
compartment.
To access it:
- open the luggage compartment;
- lift the carpet 1and 2(depending
on vehicle);
Special note:
The “Tyre pressure monitor”
function does not monitor the
emergency spare wheel (the wheel
replaced by the emergency spare
wheel disappears from the
instrument panel display).
Refer to the Tyre pressure monitor
information in Section 2.
- unscrew the centre fixing 4.
- remove the emergency spare wheel.
If the spare wheel has
been stored for several
years, have it checked by
your Dealer to ensure that
it is still safe to use. Vehicles fitted with an
emergency spare wheel
smaller than the four
other wheels.
When using the emergency spare
wheel, driving speed should not
exceed 78 mph (130 km/h).
Replace the emergency spare
wheel as soon as possible with a
wheel with the same dimensions
as the original.
NU761_2_G5-ENG.qxp 1/5/2006 5:30 PM Page 5.02 (Black plate)