2005 RENAULT MEGANE ignition
[x] Cancel search: ignitionPage 155 of 250
Downloaded from www.Manualslib.com manuals search engine
1
5
2
3
4
6
7
NU761_2_G3-FRA.qxd 4/11/05 10:51 Page 3.17
3.17
ELECTRIC WINDOWS
With the ignition on:
- press the button to open thewindow to the desired height
(note: the rear windows do not
open fully),
- lift the switch of the concerned window to raise it to the desired
height.
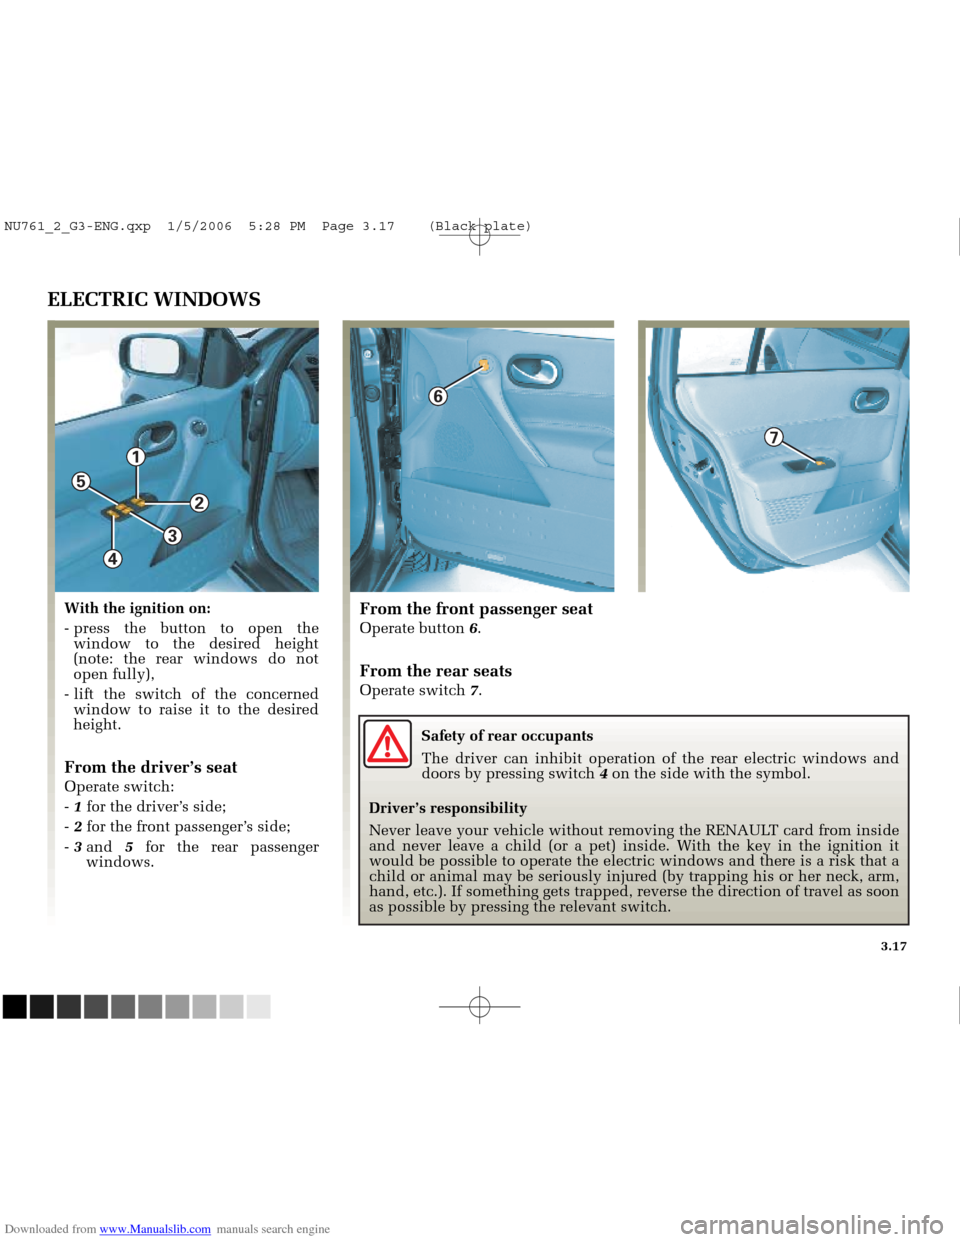
From the driver’s seat
Operate switch:
- 1 for the driver’s side;
- 2 for the front passenger’s side;
- 3 and 5for the rear passenger
windows.
From the front passenger seat
Operate button 6.
From the rear seats
Operate switch 7.
Safety of rear occupants
The driver can inhibit operation of the rear electric windows and
doors by pressing switch 4on the side with the symbol.
Driver’s responsibility
Never leave your vehicle without removing the RENAULT card from inside
and never leave a child (or a pet) inside. With the key in the ignition it
would be possible to operate the electric windows and there is a risk th\
at a
child or animal may be seriously injured (by trapping his or her neck, \
arm,
hand, etc.). If something gets trapped, reverse the direction of travel\
as soon
as possible by pressing the relevant switch.
NU761_2_G3-ENG.qxp 1/5/2006 5:28 PM Page 3.17 (Black plate)
Page 156 of 250
Downloaded from www.Manualslib.com manuals search engine
1
5
2
3
4
6
7
NU761_2_G3-FRA.qxd 4/11/05 10:51 Page 3.18
3.18
“ONE-TOUCH” ELECTRIC WINDOWS
The “one-touch” mode is an added
feature to the operation of the
previously described electric
windows.
If it is fitted to the vehicle, it may be
fitted only to the driver’s window or
to all of the windows.
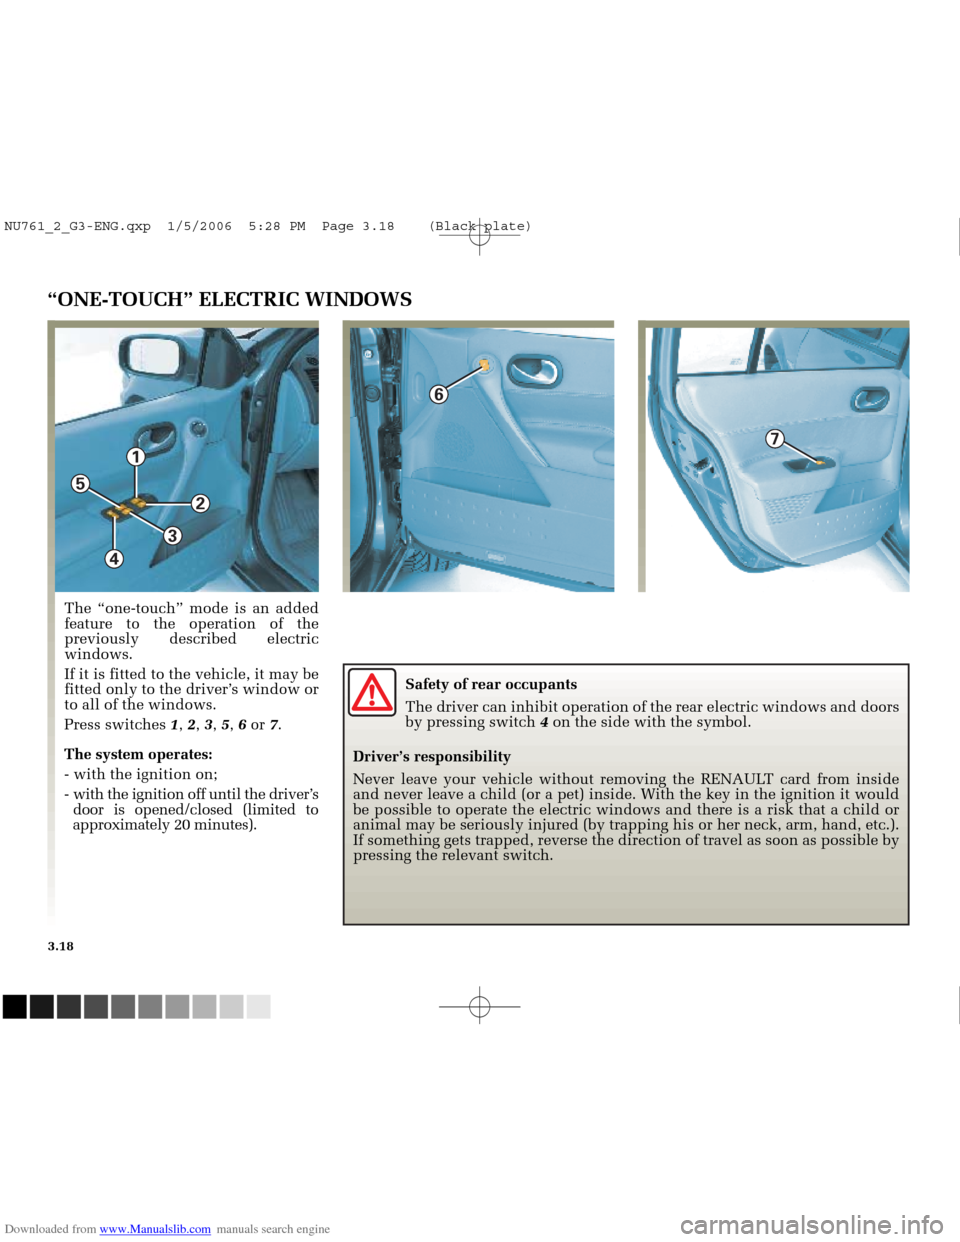
Press switches 1, 2 , 3 , 5 , 6 or 7.
The system operates:
- with the ignition on;
- with the ignition off until the driver’s door is opened/closed (limited to
approximately 20 minutes). Safety of rear occupants
The driver can inhibit operation of the rear electric windows and doors
by pressing switch
4on the side with the symbol.
Driver’s responsibility
Never leave your vehicle without removing the RENAULT card from inside
and never leave a child (or a pet) inside. With the key in the ignition it would
be possible to operate the electric windows and there is a risk that a c\
hild or
animal may be seriously injured (by trapping his or her neck, arm, hand\
, etc.).
If something gets trapped, reverse the direction of travel as soon as po\
ssible by
pressing the relevant switch.
NU761_2_G3-ENG.qxp 1/5/2006 5:28 PM Page 3.18 (Black plate)
Page 160 of 250
Downloaded from www.Manualslib.com manuals search engine
1
2
B
D
C
A
0
3
NU761_2_G3-FRA.qxd 4/11/05 10:51 Page 3.22
3.22
ELECTRIC SUNROOF
The system operates:
- with the ignition on,
- with the ignition off until thedriver’s door is opened/closed
(limited to approximately
20 minutes).
Sunblind
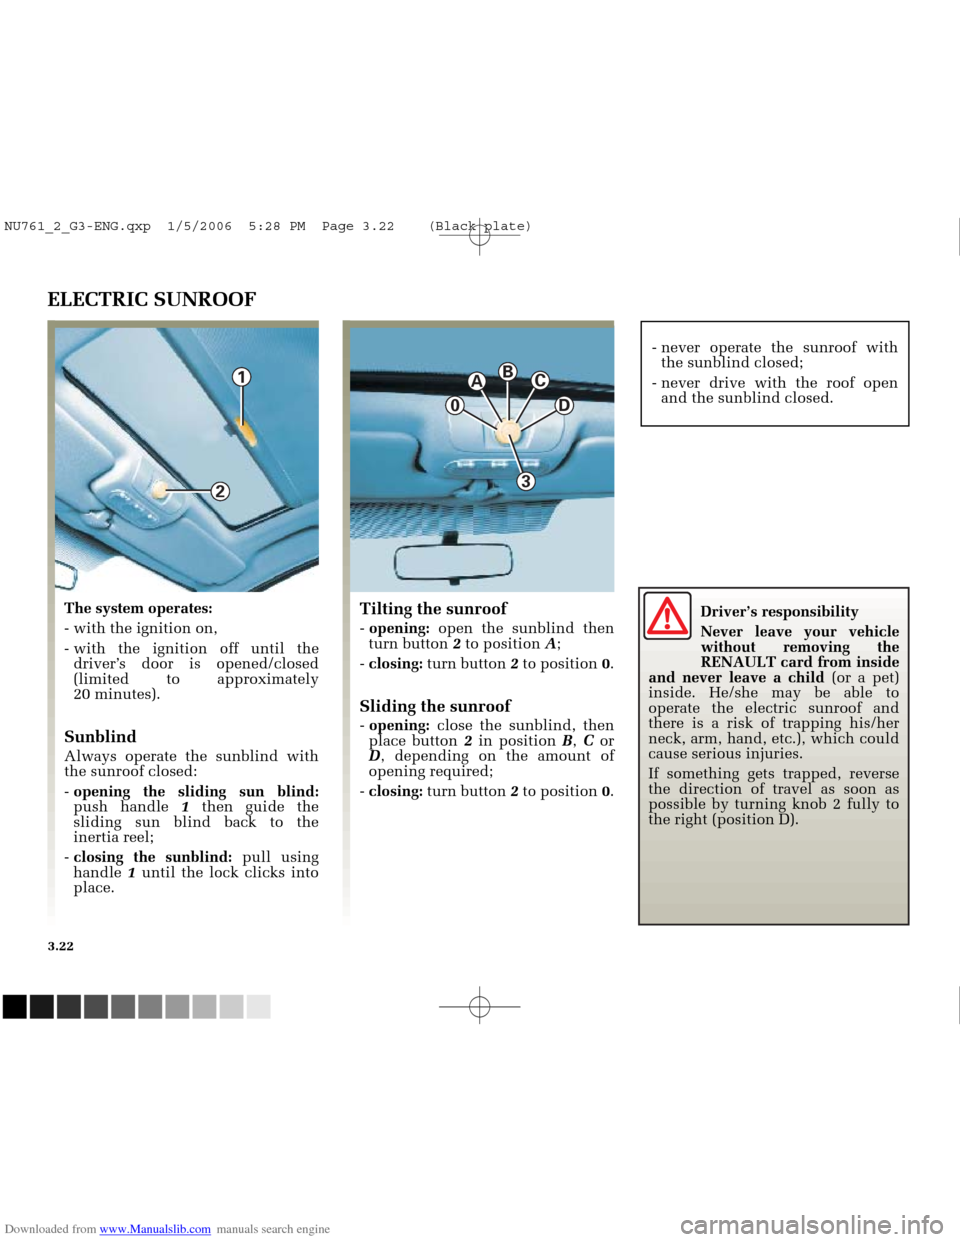
Always operate the sunblind with
the sunroof closed:
- opening the sliding sun blind:
push handle 1then guide the
sliding sun blind back to the
inertia reel;
- closing the sunblind: pull using
handle 1until the lock clicks into
place.
Tilting the sunroof
- opening: open the sunblind then
turn button 2to position A;
- closing: turn button 2to position 0.
Sliding the sunroof
- opening: close the sunblind, then
place button 2in position B, C or
D , depending on the amount of
opening required;
- closing: turn button 2to position 0. - never operate the sunroof with
the sunblind closed;
- never drive with the roof open and the sunblind closed.
Driver’s responsibility
Never leave your vehicle
without removing the
RENAULT card from inside
and never leave a child (or a pet)
inside. He/she may be able to
operate the electric sunroof and
there is a risk of trapping his/her
neck, arm, hand, etc.), which could
cause serious injuries.
If something gets trapped, reverse
the direction of travel as soon as
possible by turning knob 2 fully to
the right (position D).
NU761_2_G3-ENG.qxp 1/5/2006 5:28 PM Page 3.22 (Black plate)
Page 167 of 250
Downloaded from www.Manualslib.com manuals search engine
1
2
NU761_2_G3-FRA.qxd 4/11/05 10:52 Page 3.29
3.29
ASHTRAY/CIGARETTE LIGHTER
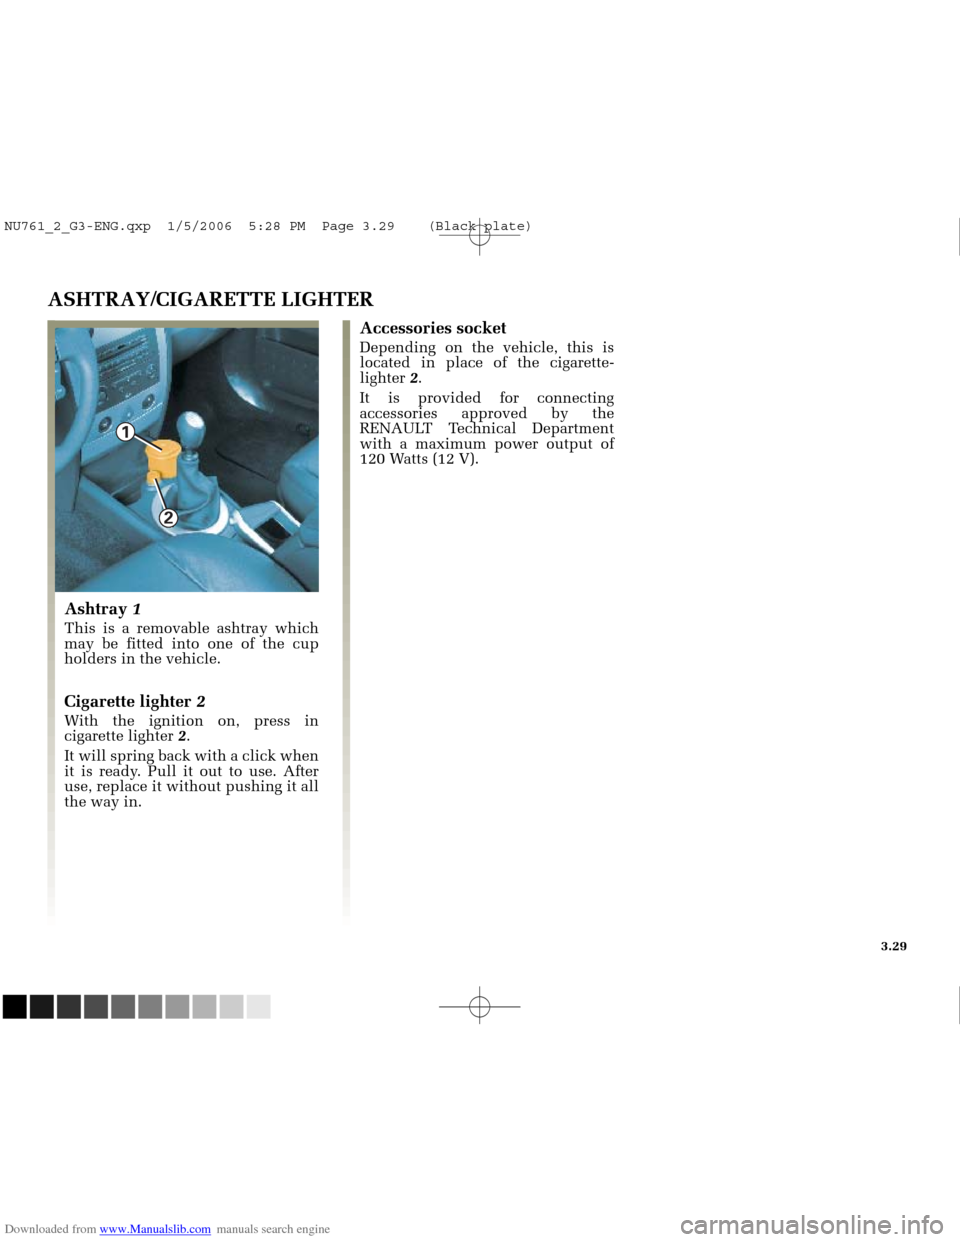
Ashtray 1
This is a removable ashtray which
may be fitted into one of the cup
holders in the vehicle.
Cigarette lighter 2
With the ignition on, press in
cigarette lighter 2.
It will spring back with a click when
it is ready. Pull it out to use. After
use, replace it without pushing it all
the way in.
Accessories socket
Depending on the vehicle, this is
located in place of the cigarette-
lighter 2.
It is provided for connecting
accessories approved by the
RENAULT Technical Department
with a maximum power output of
120 Watts (12 V).
NU761_2_G3-ENG.qxp 1/5/2006 5:28 PM Page 3.29 (Black plate)
Page 178 of 250
Downloaded from www.Manualslib.com manuals search engine
23532
23507
NU761_2_G4-FRA.qxd 14/11/05 10:10 Page 4.04
4.04
ENGINE OIL LEVEL
It is normal for an engine to use oil
for lubrication and cooling of
moving parts and it is normal to top
up the level between oil changes.
However, contact your RENAULT
Dealer if more than 0.5 litres is being
consumed every 600 miles (1,000
km) after the running in period.
Oil change frequency: check the oil
level from time to time and
certainly before any long journey to
avoid the risk of damaging your
engine.
Reading the oil level
The vehicle must be parked on level
ground and the engine should have
been switched off for some time
beforehand to obtain an accurate
reading.
To be able to read the exact oil level
and make sure that the maximum
level has not been exceeded (risk of
engine damage), the dipstick must
be used.
In the following pages, see Engine
oil level: topping up/filling.
The instrument panel display only
shows a warning when the
minimum oil level has been reached.Minimum oil level warning on the
instrument panel
When ignition has been switched on
for approximately 30 seconds:
-
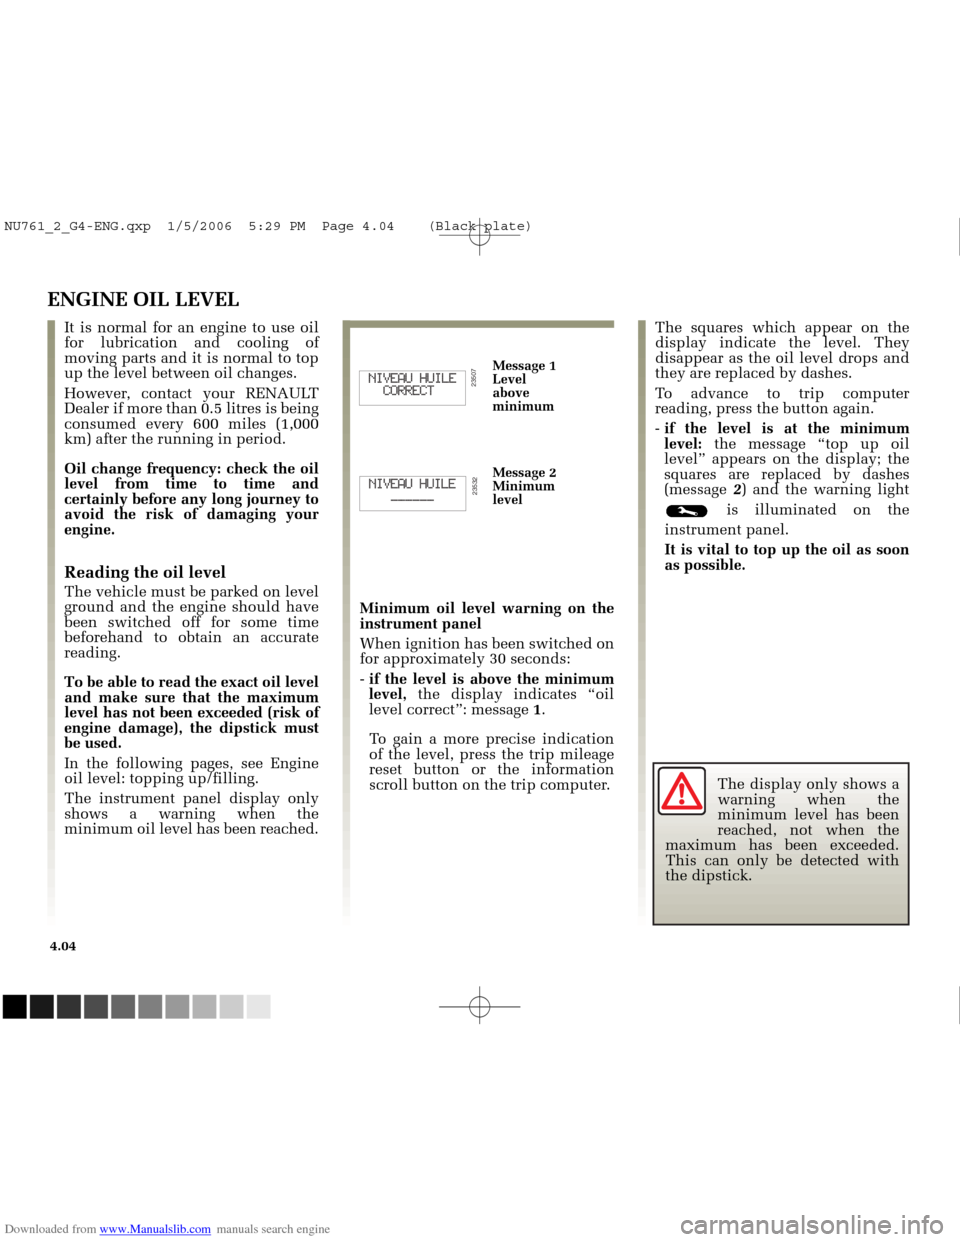
if the level is above the minimum
level, the display indicates “oil
level correct”: message 1.
To gain a more precise indication
of the level, press the trip mileage
reset button or the information
scroll button on the trip computer. The squares which appear on the
display indicate the level. They
disappear as the oil level drops and
they are replaced by dashes.
To advance to trip computer
reading, press the button again.
-
if the level is at the minimum
level: the message “top up oil
level” appears on the display; the
squares are replaced by dashes
(message 2) and the warning light
is illuminated on the
instrument panel.
It is vital to top up the oil as soon
as possible.
Message 1
Level
above
minimum
Message 2
Minimum
level
The display only shows a
warning when the
minimum level has been
reached, not when the
maximum has been exceeded.
This can only be detected with
the dipstick.
NU761_2_G4-ENG.qxp 1/5/2006 5:29 PM Page 4.04 (Black plate)
Page 209 of 250

Downloaded from www.Manualslib.com manuals search engine
NU761_2_G5-FRA.qxd 4/11/05 11:09 Page 5.21
5.21
BATTERY: troubleshooting (continued)
Connecting a battery charger
The battery charger should be
compatible with a battery with a
nominal voltage of 12 Volts.
With the engine switched off, it is
essential to disconnect the cables
connected to both battery terminals,
starting with the negative terminal .
Do not disconnect the battery when
the engine is running. Follow the
manufacturer’s instructions for the
battery charger you are using.
Only a well-charged and well-
maintained battery will have a long
and useful life and enable you to
start the vehicle’s engine normally.
The battery must be kept clean and
dry.
Have the battery’s charge status
checked regularly:
Especially if you use your vehicle for short journeys or for frequent
driving in town. When the external temperature
drops (in winter), the charge
decreases . In winter, only use
electrical equipment which is
really necessary.
Finally, you should understand that the charge decreases naturally
as a result of certain “permanent
electrical consumers” such as the
clock, After-Sales accessories, etc.
When many accessories are fitted to
the vehicle, have them connected
to + after ignition feed . In this case,
it is advisable to have your vehicle
fitted with a battery which has an
increased capacity. Contact your
RENAULT Dealer. If your vehicle is to be left stationary
for a relatively long time, disconnect
the battery or have it recharged
regularly, in particular during cold
weather. The equipment with a
memory, radio etc. will then have to
be reprogrammed. The battery must
be stored in a cool dry place,
protected from frost.
Special procedures may
be required to charge
some batteries. Contact
your RENAULT Dealer.
Avoid all risk of sparks which
may cause an immediate
explosion and charge the battery
in a well-ventilated area. Risk of
serious injury.
NU761_2_G5-ENG.qxp 1/5/2006 5:30 PM Page 5.21 (Black plate)
Page 210 of 250
Downloaded from www.Manualslib.com manuals search engine
4
1
A
2
3
B
NU761_2_G5-FRA.qxd 4/11/05 11:09 Page 5.22
5.22
BATTERY: troubleshooting (continued)
Starting the vehicle using the
battery from another vehicle
Proceed as follows when starting
your vehicle from another vehicle’s
battery:
Obtain suitable jump leads (with a
large cross section) from a
RENAULT Dealer or, if you already
have jump leads, ensure that they
are in perfect condition.
The two batteries must have an
identical voltage: 12 volts. The
battery supplying the current should
have a capacity (amp-hours, Ah)
which is at least the same as that of
the discharged battery.
Ensure that there is no risk of
contact between the two vehicles
(risk of short circuiting when the
positive terminals are connected)
and that the discharged battery is
properly connected. Switch off your
vehicle ignition.
Start the engine of the vehicle
supplying the current and run it at
an intermediate engine speed. Check that there is no contact
between cables
Aand Band that
cable A(+) is not touching any metal
parts on the vehicle supplying the
current.
Start the engine as you would
normally. As soon as it is running,
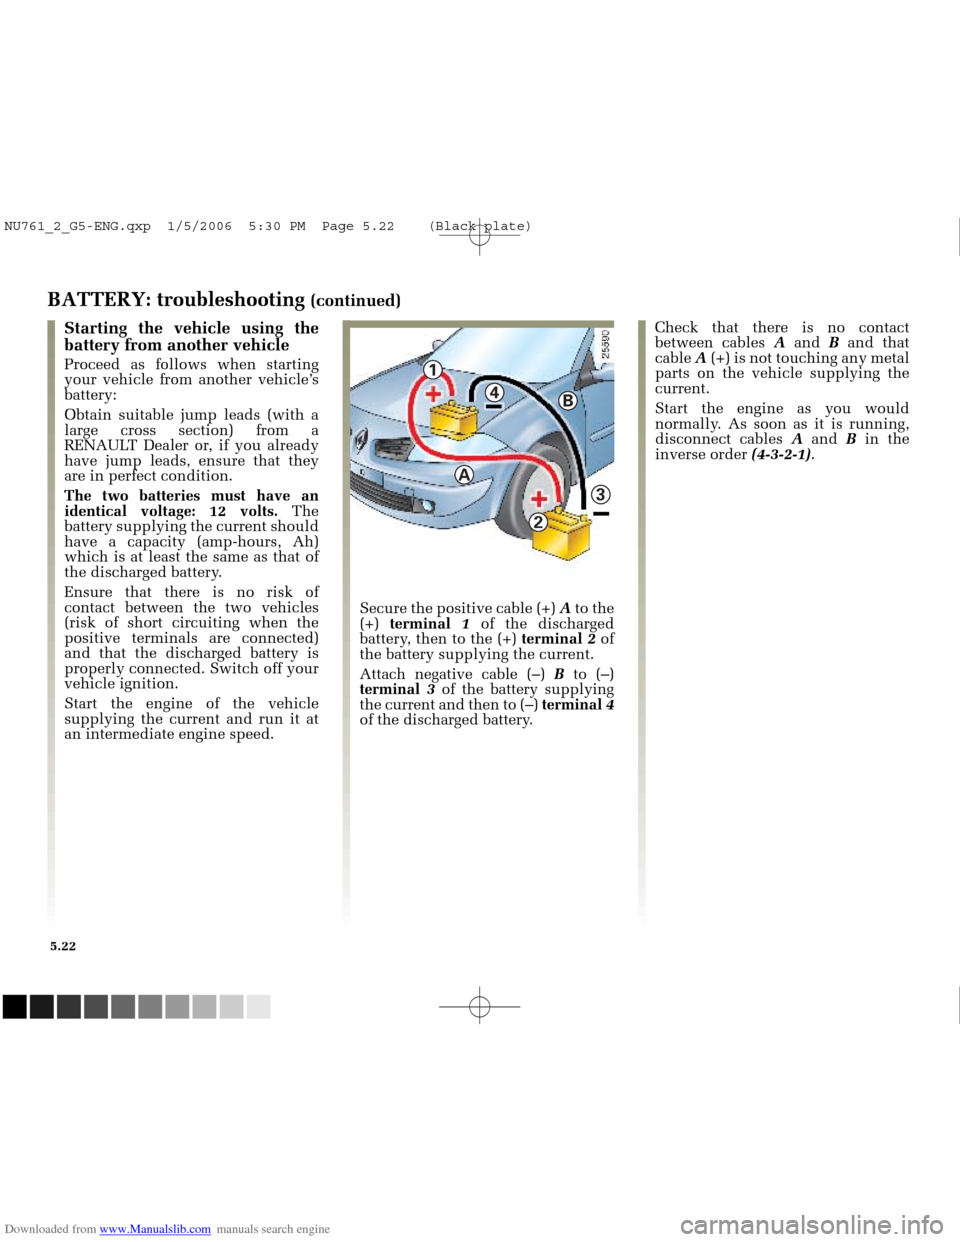
disconnect cables A and B in the
inverse order (4-3-2-1).
Secure the positive cable (+) Ato the
(+) terminal 1 of the discharged
battery, then to the (+) terminal2 of
the battery supplying the current.
Attach negative cable (–) B to (–)
terminal 3 of the battery supplying
the current and then to (–) terminal4
of the discharged battery.
NU761_2_G5-ENG.qxp 1/5/2006 5:30 PM Page 5.22 (Black plate)
Page 214 of 250
Downloaded from www.Manualslib.com manuals search engine
1
2
3
NU761_2_G5-FRA.qxd 4/11/05 11:10 Page 5.26
5.26
WINDSCREEN WIPER BLADES
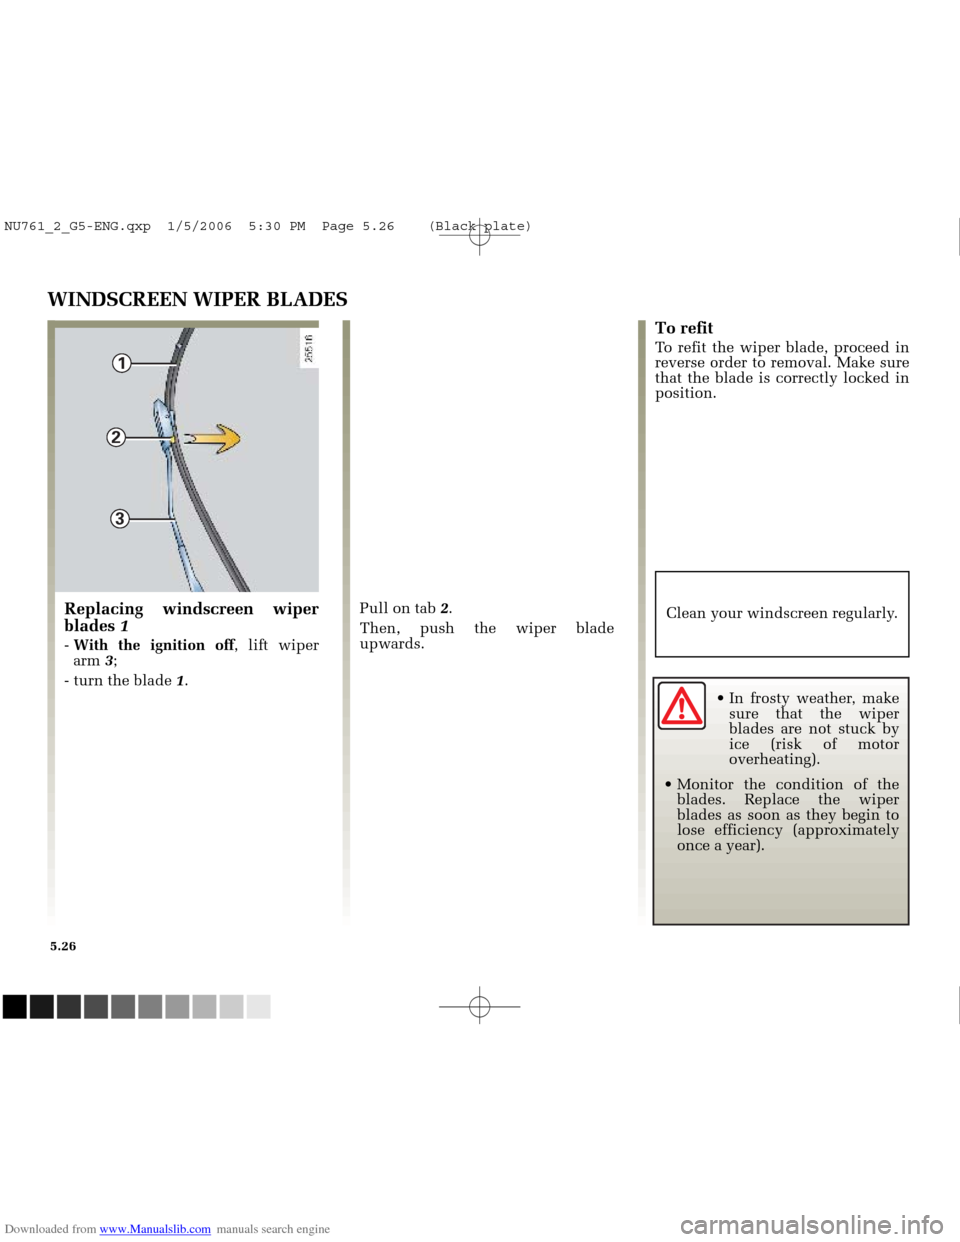
Pull on tab 2.
Then, push the wiper blade
upwards.
To refit
To refit the wiper blade, proceed in
reverse order to removal. Make sure
that the blade is correctly locked in
position.
Clean your windscreen regularly.
Replacing windscreen wiper
blades 1
- With the ignition off , lift wiper
arm 3;
- turn the blade 1.
In frosty weather, makesure that the wiper
blades are not stuck by
ice (risk of motor
overheating).
Monitor the condition of the blades. Replace the wiper
blades as soon as they begin to
lose efficiency (approximately
once a year).
NU761_2_G5-ENG.qxp 1/5/2006 5:30 PM Page 5.26 (Black plate)