2005 RENAULT MEGANE height adjustment
[x] Cancel search: height adjustmentPage 29 of 250
Downloaded from www.Manualslib.com manuals search engine
1
3
4
2
NU761_2_G1-FRA.qxd 10/11/05 15:53 Page 1.19
1.19
To avoid hindering the
efficient operation of the
seat belts, you are advised
to keep the seat belt on your
shoulder.
Make sure that the seatback is
locked in place correctly.
No objects should be placed on the
floor (area in front of driver) as
these objects could slide under the
pedal during braking manoeuvres,
thus obstructing its use.
For safety reasons, make
these adjustments only
when the vehicle is
stationary.
FRONT SEATS
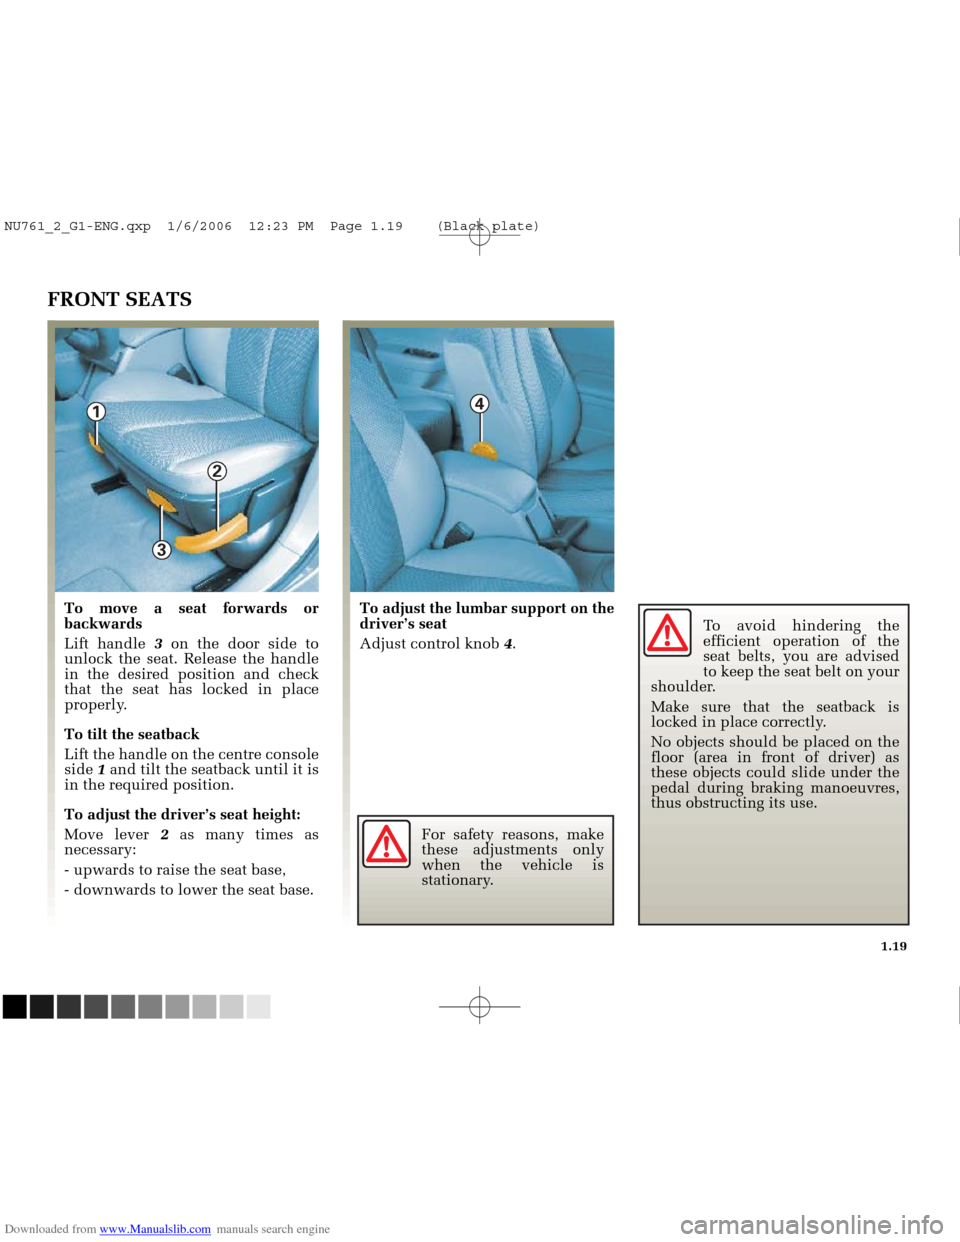
To move a seat forwards or
backwards
Lift handle 3on the door side to
unlock the seat. Release the handle
in the desired position and check
that the seat has locked in place
properly.
To tilt the seatback
Lift the handle on the centre console
side 1and tilt the seatback until it is
in the required position.
To adjust the driver’s seat height:
Move lever 2as many times as
necessary:
- upwards to raise the seat base,
- downwards to lower the seat base. To adjust the lumbar support on the
driver’s seat
Adjust control knob
4.
NU761_2_G1-ENG.qxp 1/6/2006 12:23 PM Page 1.19 (Black plate)
Page 31 of 250
Downloaded from www.Manualslib.com manuals search engine
1
2
NU761_2_G1-FRA.qxd 10/11/05 15:53 Page 1.21
1.21
Incorrectly adjusted seat
belts may cause injuries in
the event of an accident.
Even pregnant women
should wear a seat belt. In this
case, ensure that the lap belt is
not exerting too much pressure
on the abdomen without allowing
any slack.
SEAT BELTS
Always wear your seat belt when
travelling in your vehicle. You must
also comply with the legislation of
the particular country you are in.
Before driving off:
- firstly ensure that your driving
position is correctly adjusted,
- then adjust your seat belt to
provide maximum protection.Adjusting your driving position
Sit well back in your seat (having
removed your coat or jacket). This
is essential to ensure your back is
positioned correctly.
Adjust the distance between the seat and the pedals. Your seat
should be as far back as possible
while still allowing you to fully
depress the clutch pedal. The
seatback should be adjusted so
that your arms are slightly bent
when you hold the steering wheel.
Adjust the position of your head restraint. For safety reasons, the
top of your head should be in line
with the top of the head restraint.
Adjust the height of the seat. This
adjustment allows you to select
the seat position which offers you
the best possible view.
Adjust the position of the steering wheel.
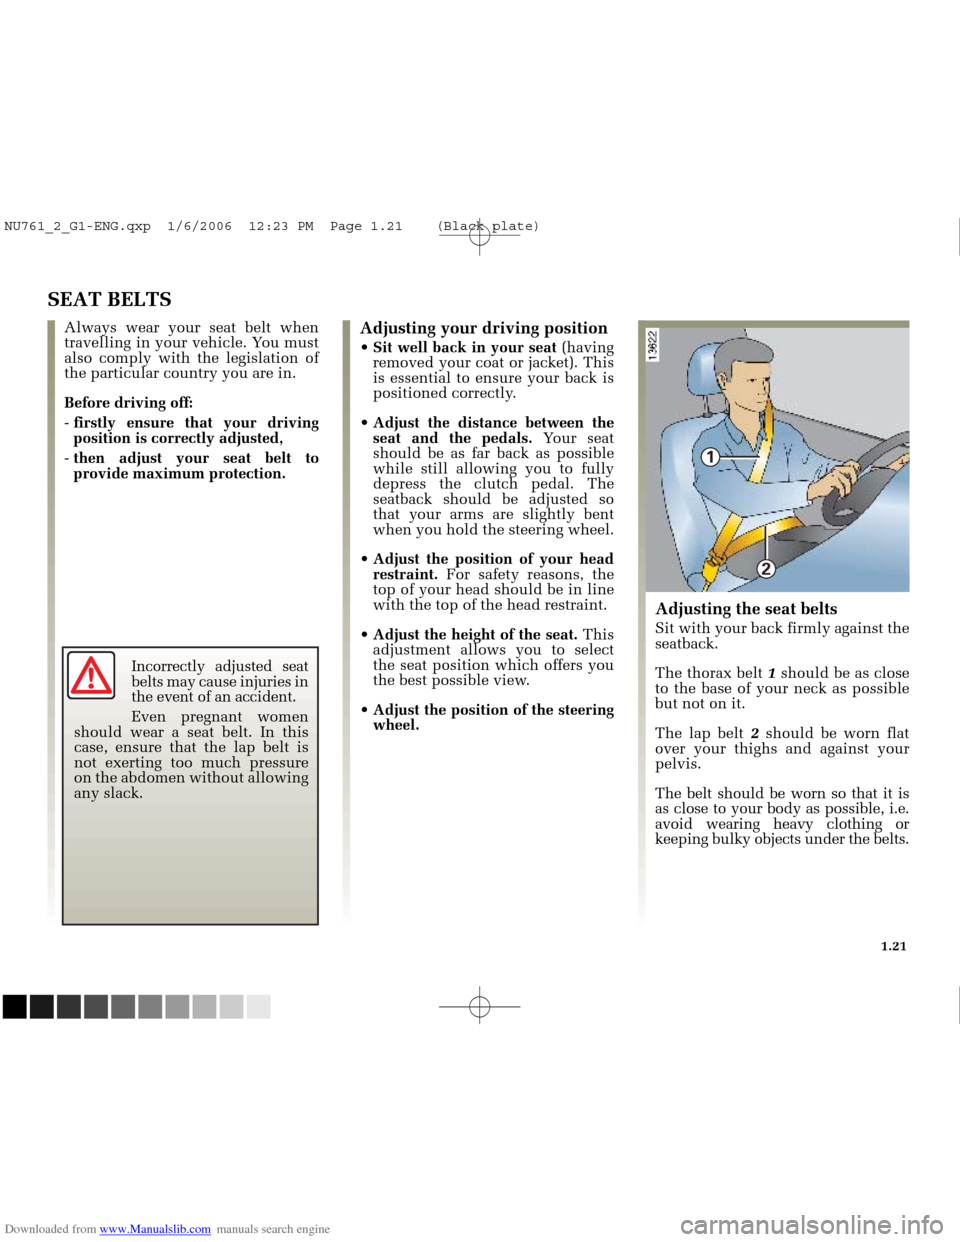
Adjusting the seat belts
Sit with your back firmly against the
seatback.
The thorax belt 1should be as close
to the base of your neck as possible
but not on it.
The lap belt 2should be worn flat
over your thighs and against your
pelvis.
The belt should be worn so that it is
as close to your body as possible, i.e.
avoid wearing heavy clothing or
keeping bulky objects under the belts.
NU761_2_G1-ENG.qxp 1/6/2006 12:23 PM Page 1.21 (Black plate)
Page 32 of 250
Downloaded from www.Manualslib.com manuals search engine
6
4
6
1
3
5
NU761_2_G1-FRA.qxd 10/11/05 15:53 Page 1.22
1.22
SEAT BELTS (continued)
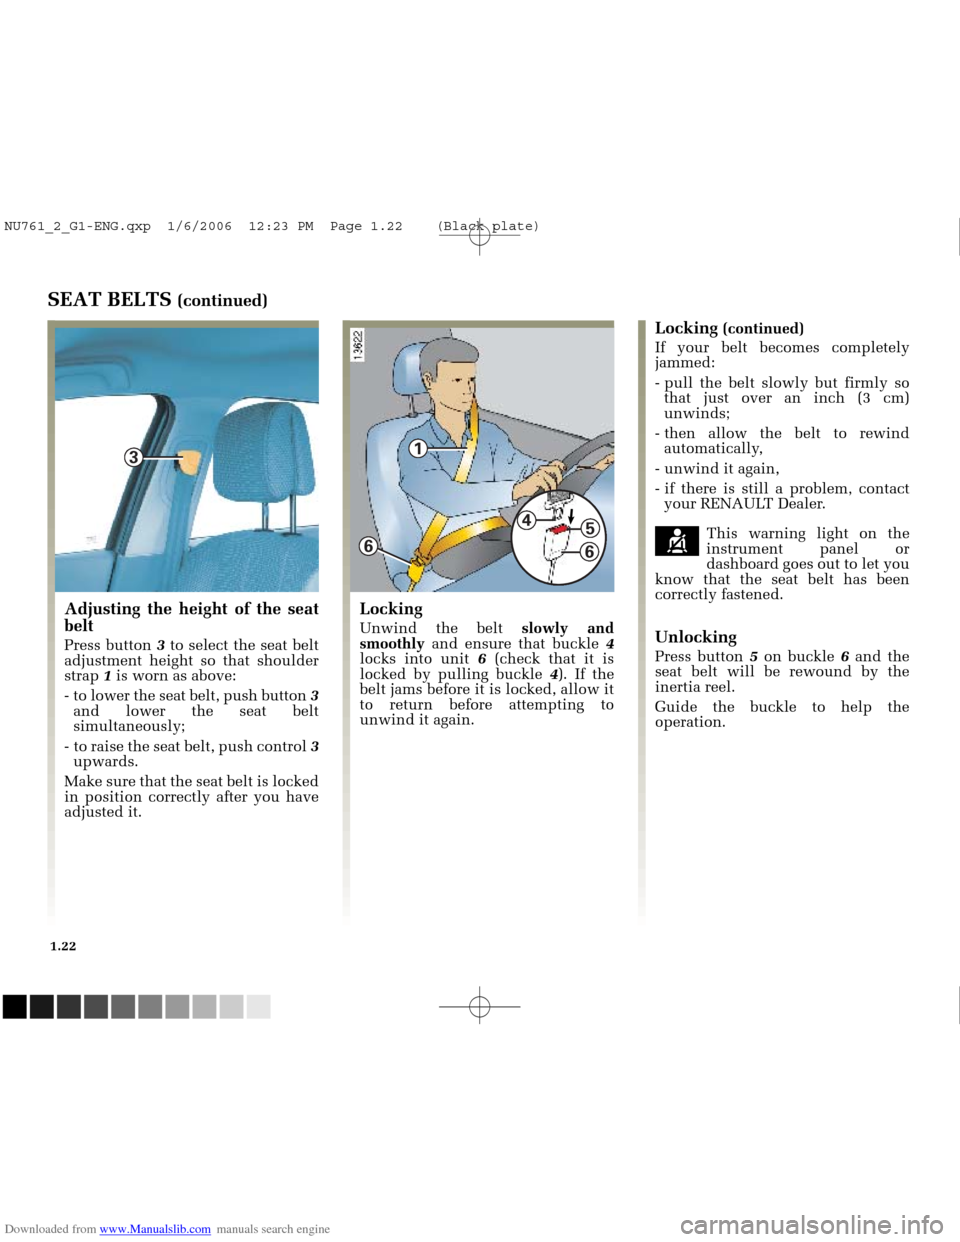
Adjusting the height of the seat
belt
Press button 3to select the seat belt
adjustment height so that shoulder
strap 1is worn as above:
- to lower the seat belt, push button 3
and lower the seat belt
simultaneously;
- to raise the seat belt, push control 3
upwards.
Make sure that the seat belt is locked
in position correctly after you have
adjusted it.
Locking
Unwind the belt slowly and
smoothly and ensure that buckle 4
locks into unit 6(check that it is
locked by pulling buckle 4). If the
belt jams before it is locked, allow it
to return before attempting to
unwind it again.
Locking (continued)
If your belt becomes completely
jammed:
- pull the belt slowly but firmly so that just over an inch (3 cm)
unwinds;
- then allow the belt to rewind automatically,
- unwind it again,
- if there is still a problem, contact your RENAULT Dealer.
çThis warning light on the
instrument panel or
dashboard goes out to let you
know that the seat belt has been
correctly fastened.
Unlocking
Press button 5on buckle 6and the
seat belt will be rewound by the
inertia reel.
Guide the buckle to help the
operation.
NU761_2_G1-ENG.qxp 1/6/2006 12:23 PM Page 1.22 (Black plate)
Page 42 of 250
Downloaded from www.Manualslib.com manuals search engine
NU761_2_G1-FRA.qxd 10/11/05 15:53 Page 1.32
1.32
Under no circumstances
should babies or children
be allowed to travel sitting
on the knees of another
passenger in the vehicle.
If a frontal impact occurs at 30 mph
(50 km/h) a child weighing 30 kg
will be transformed into a missile
equivalent to one ton: you will find
it impossible to hold the child, even
if you yourself are wearing a belt.
It is particularly dangerous to put
the belt round your child when he
or she is sitting on your lap. Never
use the belt for more than one
person at the same time.
CHILD SAFETY
Remember that a collision at 30 mph
(50 km/h) is the same as falling a
distance of 10 metres. Expressed in
other terms, transporting a child
without a restraint is the equivalent
of allowing him or her to play on a
fourth-floor balcony without
railings.In all countries there are regulations
governing the use of restraints for
children and babies.
In Europe, children under 10 years
of age
(1)must be seated in an
approved safety device which is
suitable for the weight and size of
the child.
The driver is responsible for
ensuring that this equipment is used
correctly.
Child restraints for which type
approval was obtained after January
1992 offer a level of safety much
greater than for restraints with type
approval before that date.
It is therefore advisable to select a
child restraint that complies with
European regulation ECE 44.
Restraints that comply with this
legislation must be marked with an
orange label bearing the letter E
followed by a number (which
represents the country where it is
type approved) and the year in
which the type approval was
granted.
Refer to the Child safety equipment
booklet available from the Renault
Network to choose the seat suited to
your child and recommended for
your vehicle. There are some passenger seats on
which the installation of child seats
is forbidden.
To find the authorised seats and
types of child seats that can be
installed in each of the authorised
seats, refer to the table in the
following pages.
Before installing a child seat in the
front seat
(if installation is permitted)
If fitted to the passenger seat, carry
out the following adjustments:
- move the passenger seat as far back as possible,
- set the seatback to its fully upright position,
- raise the seat base as far as possible,
- raise the headrest to its highest setting,
- move the seat belt height control to the low position.
(1) You must always comply with the
laws of the country in which you are
travelling. They may be different to
the guidelines in this handbook.
NU761_2_G1-ENG.qxp 1/6/2006 12:23 PM Page 1.32 (Black plate)
Page 53 of 250
Downloaded from www.Manualslib.com manuals search engine
1
NU761_2_G1-FRA.qxd 10/11/05 15:53 Page 1.43
1.43
For safety reasons, only
adjust the steering wheel
when the vehicle is
stationary.
STEERING WHEEL
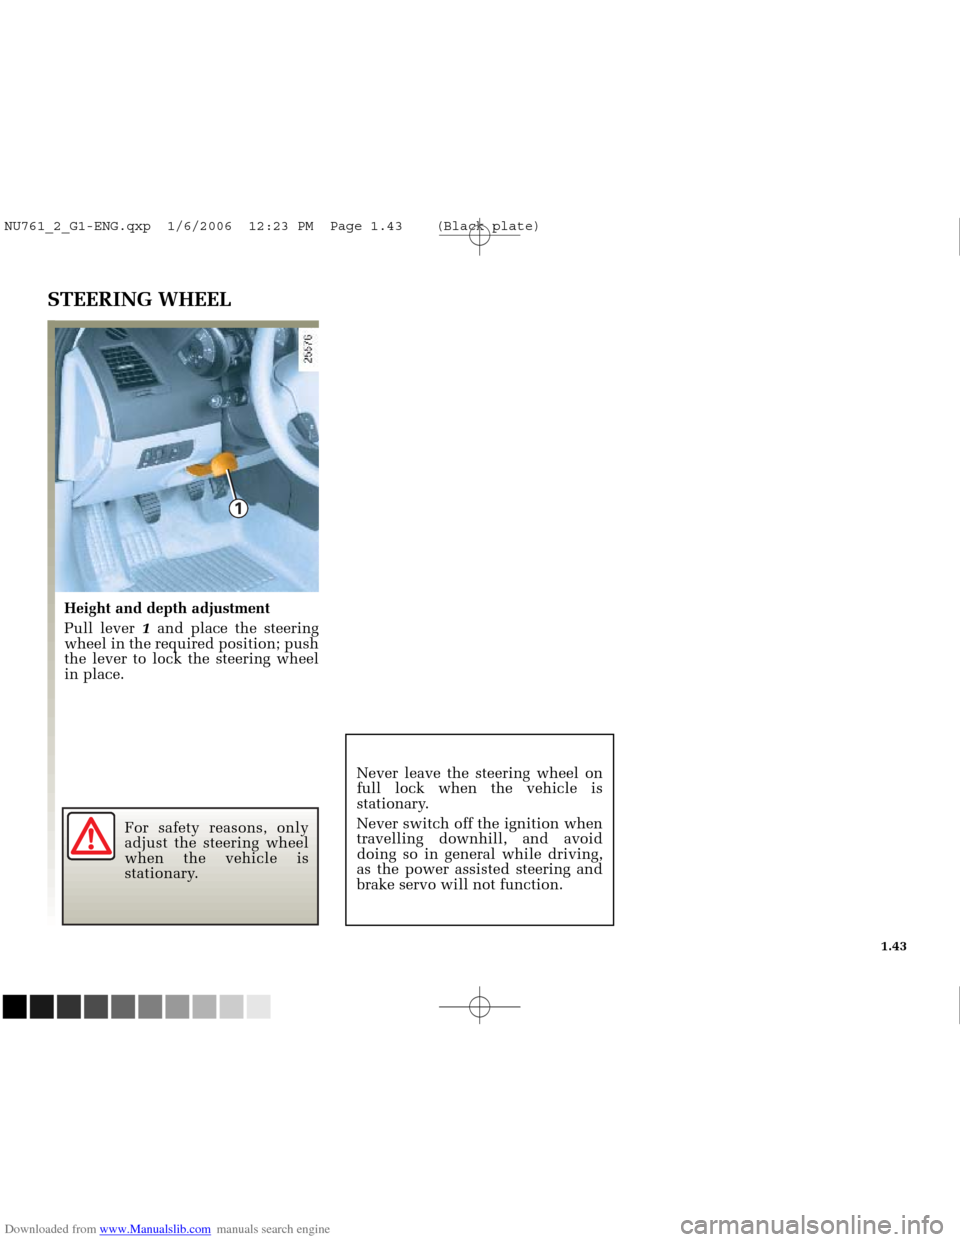
Height and depth adjustment
Pull lever 1and place the steering
wheel in the required position; push
the lever to lock the steering wheel
in place.
Never leave the steering wheel on
full lock when the vehicle is
stationary.
Never switch off the ignition when
travelling downhill, and avoid
doing so in general while driving,
as the power assisted steering and
brake servo will not function.
NU761_2_G1-ENG.qxp 1/6/2006 12:23 PM Page 1.43 (Black plate)
Page 55 of 250
Downloaded from www.Manualslib.com manuals search engine
NU761_2_G1-FRA.qxd 10/11/05 15:54 Page 1.45
1.45
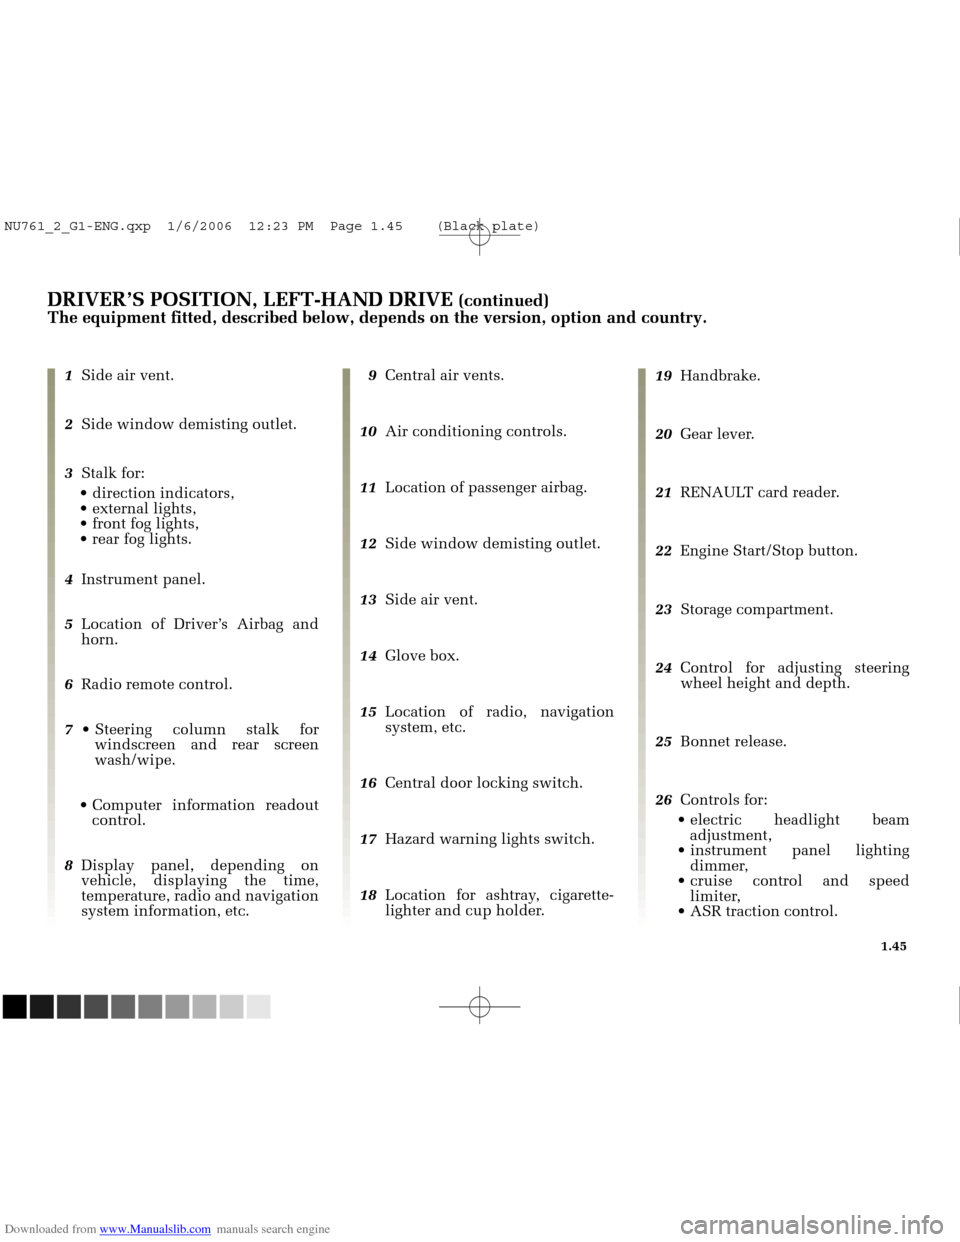
DRIVER’S POSITION, LEFT-HAND DRIVE (continued)
The equipment fitted, described below, depends on the version, option an\
d country.
1 Side air vent.
2 Side window demisting outlet.
3 Stalk for:
direction indicators,
external lights,
front fog lights,
rear fog lights.
4 Instrument panel.
5 Location of Driver’s Airbag and
horn.
6 Radio remote control.
7 Steering column stalk for
windscreen and rear screen
wash/wipe.
Computer information readout control.
8 Display panel, depending on
vehicle, displaying the time,
temperature, radio and navigation
system information, etc. 9
Central air vents.
10 Air conditioning controls.
11 Location of passenger airbag.
12 Side window demisting outlet.
13 Side air vent.
14 Glove box.
15 Location of radio, navigation
system, etc.
16 Central door locking switch.
17 Hazard warning lights switch.
18 Location for ashtray, cigarette-
lighter and cup holder. 19
Handbrake.
20 Gear lever.
21 RENAULT card reader.
22 Engine Start/Stop button.
23 Storage compartment.
24 Control for adjusting steering
wheel height and depth.
25 Bonnet release.
26 Controls for:
electric headlight beam adjustment,
instrument panel lighting dimmer,
cruise control and speed limiter,
ASR traction control.
NU761_2_G1-ENG.qxp 1/6/2006 12:23 PM Page 1.45 (Black plate)
Page 57 of 250
Downloaded from www.Manualslib.com manuals search engine
NU761_2_G1-FRA.qxd 10/11/05 15:54 Page 1.47
1.47
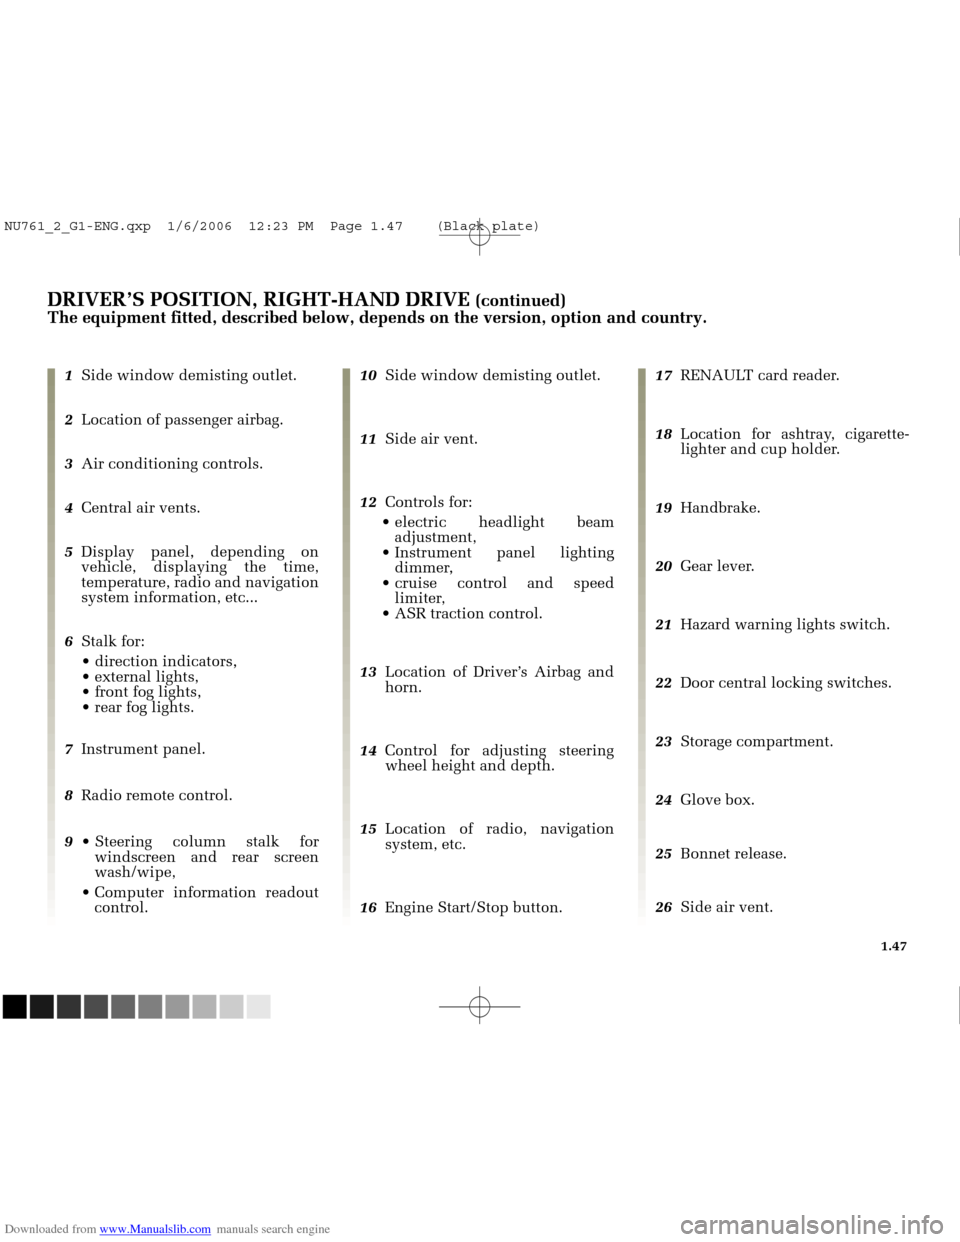
DRIVER’S POSITION, RIGHT-HAND DRIVE (continued)
The equipment fitted, described below, depends on the version, option an\
d country.
1 Side window demisting outlet.
2 Location of passenger airbag.
3 Air conditioning controls.
4 Central air vents.
5 Display panel, depending on
vehicle, displaying the time,
temperature, radio and navigation
system information, etc...
6 Stalk for:
direction indicators,
external lights,
front fog lights,
rear fog lights.
7 Instrument panel.
8 Radio remote control.
9 Steering column stalk for
windscreen and rear screen
wash/wipe,
Computer information readout control. 10
Side window demisting outlet.
11 Side air vent.
12 Controls for:
electric headlight beam adjustment,
Instrument panel lighting dimmer,
cruise control and speed limiter,
ASR traction control.
13 Location of Driver’s Airbag and
horn.
14 Control for adjusting steering
wheel height and depth.
15 Location of radio, navigation
system, etc.
16 Engine Start/Stop button. 17
RENAULT card reader.
18 Location for ashtray, cigarette-
lighter and cup holder.
19 Handbrake.
20 Gear lever.
21 Hazard warning lights switch.
22 Door central locking switches.
23 Storage compartment.
24 Glove box.
25 Bonnet release.
26 Side air vent.
NU761_2_G1-ENG.qxp 1/6/2006 12:23 PM Page 1.47 (Black plate)
Page 95 of 250
Downloaded from www.Manualslib.com manuals search engine
A
NU761_2_G1-FRA.qxd 10/11/05 15:55 Page 1.85
1.85
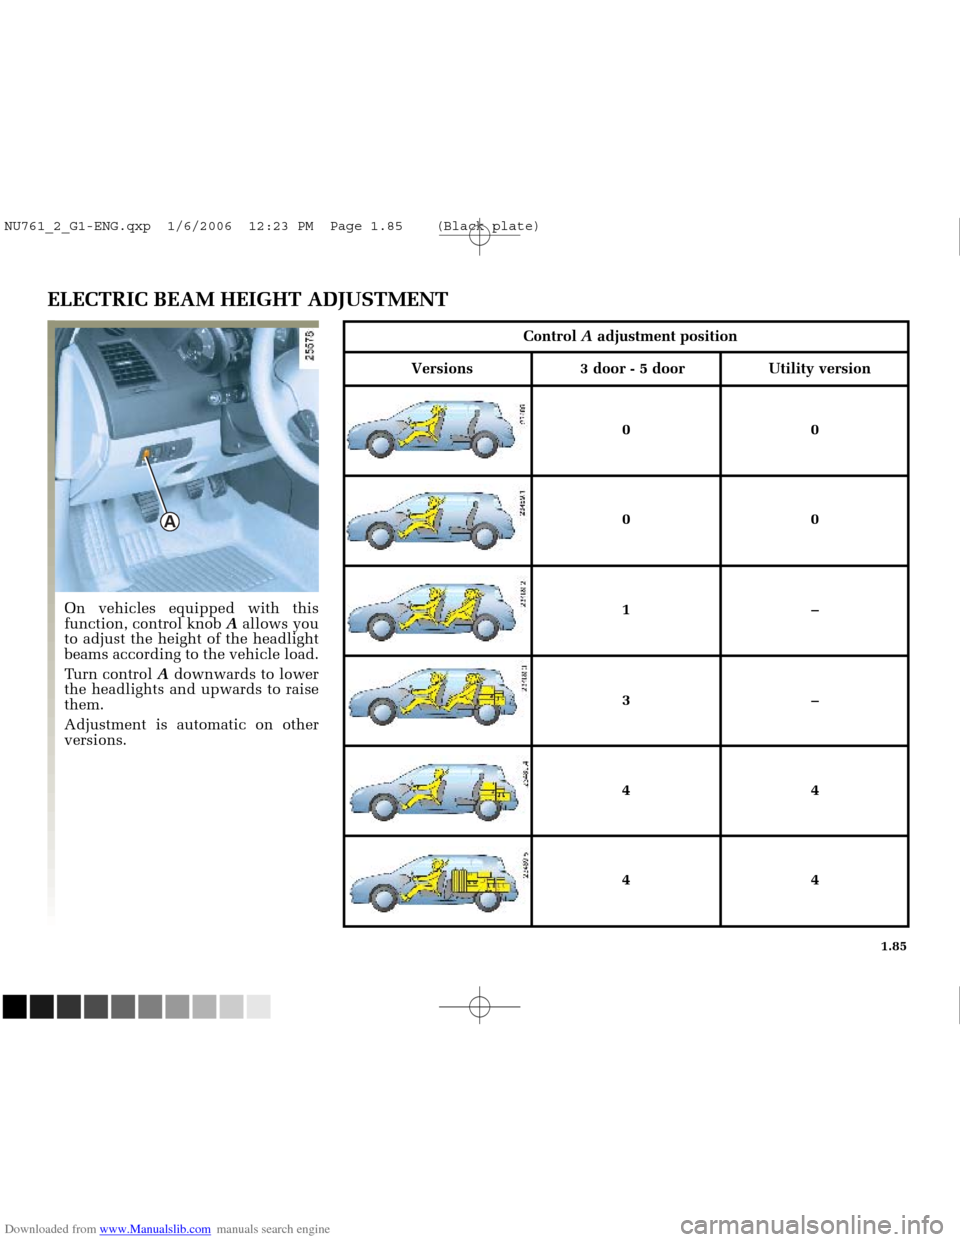
ELECTRIC BEAM HEIGHT ADJUSTMENT
On vehicles equipped with this
function, control knob Aallows you
to adjust the height of the headlight
beams according to the vehicle load.
Turn control Adownwards to lower
the headlights and upwards to raise
them.
Adjustment is automatic on other
versions.
Control Aadjustment position
Versions 3 door - 5 door Utility version
00
00
1–
3–
44
44
NU761_2_G1-ENG.qxp 1/6/2006 12:23 PM Page 1.85 (Black plate)