Page 110 of 250
Downloaded from www.Manualslib.com manuals search engine
1
2
NU761_2_G2-FRA.qxd 4/11/05 10:48 Page 2.10
2.10
HANDBRAKE POWER STEERING
Never drive with an inadequately-
charged battery.
Variable power assisted steering
The variable assistance power
steering has an electronic
management system that adapts the
level of assistance to the vehicle
speed.
Steering is made easier during
parking manoeuvres (for added
comfort) whilst the force needed to
steer rises progressively as speed
increases (for enhanced safety at
high speeds).
To apply:
Pull upwards, make sure that the
vehicle cannot move
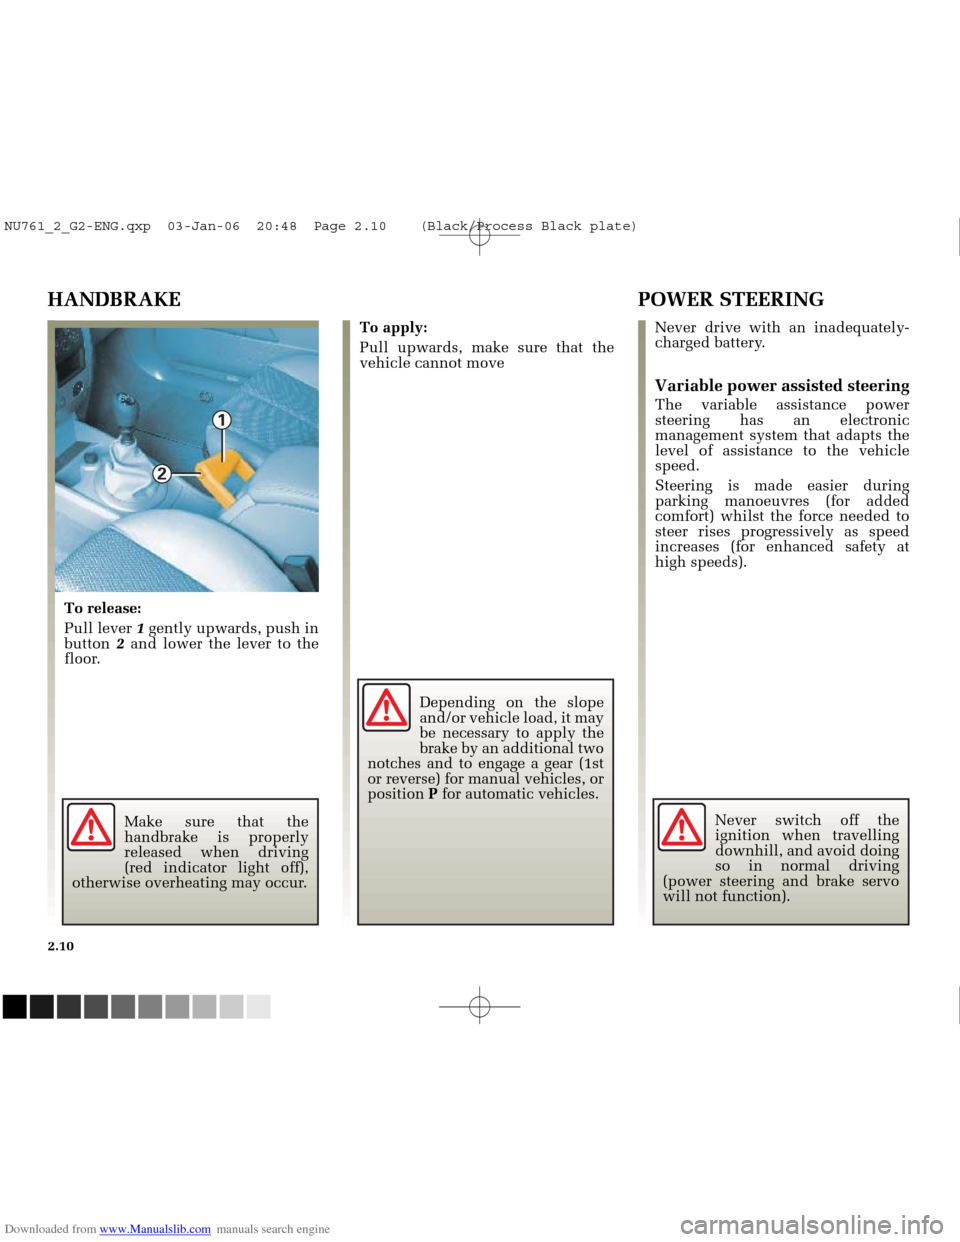
To release:
Pull lever 1gently upwards, push in
button 2and lower the lever to the
floor.
Make sure that the
handbrake is properly
released when driving
(red indicator light off),
otherwise overheating may occur. Depending on the slope
and/or vehicle load, it may
be necessary to apply the
brake by an additional two
notches and to engage a gear (1st
or reverse) for manual vehicles, or
position Pfor automatic vehicles.
Never switch off the
ignition when travelling
downhill, and avoid doing
so in normal driving
(power steering and brake servo
will not function).
NU761_2_G2-ENG.qxp 03-Jan-06 20:48 Page 2.10 (Black/Process Black\
plate)
Page 137 of 250
Downloaded from www.Manualslib.com manuals search engine
NU761_2_G2-FRA.qxd 4/11/05 10:49 Page 2.37
AUTOMATIC TRANSMISSION (continued)
Operating faults
- when driving , if the message
“Check gearbox” along with the
warning light appears on the
instrument panel, this indicates a
fault.
Consult your RENAULT Dealer as
soon as possible.
- when driving , if the message
“Gearbox overheating” along with
the warning light appears on
the instrument panel, avoid leaving
the lever in position D(or R), traffic
permitting: systematically return to
position Nwhile stopping.
Consult your RENAULT Dealer as
soon as possible.
- Recovering a vehicle with an
automatic transmission : refer to
the information on Towing in
Section 5.
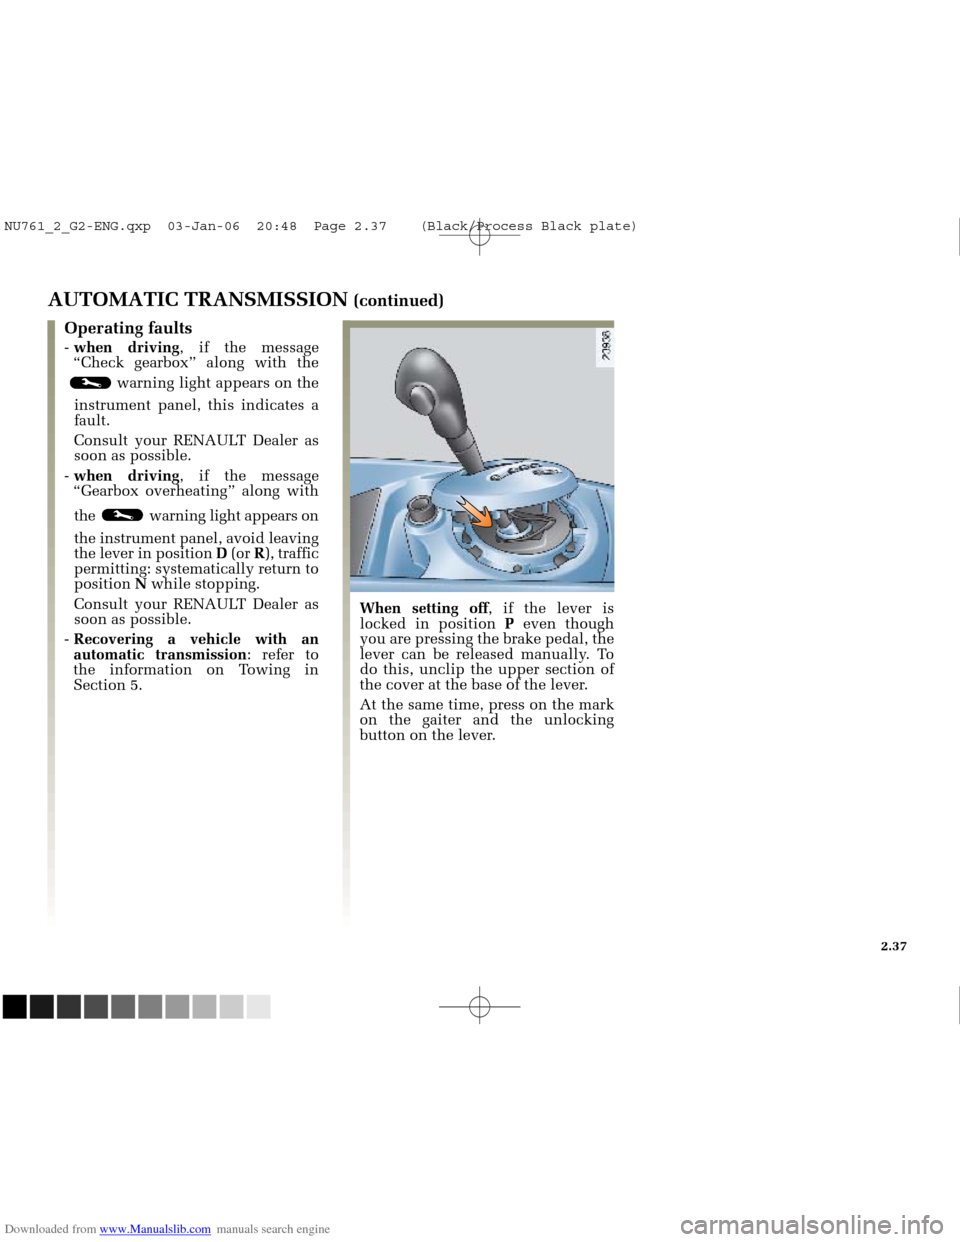
When setting off , if the lever is
locked in position Peven though
you are pressing the brake pedal, the
lever can be released manually. To
do this, unclip the upper section of
the cover at the base of the lever.
At the same time, press on the mark
on the gaiter and the unlocking
button on the lever.
2.37
NU761_2_G2-ENG.qxp 03-Jan-06 20:48 Page 2.37 (Black/Process Black\
plate)
Page 139 of 250
Downloaded from www.Manualslib.com manuals search engine
NU761_2_G3-FRA.qxd 4/11/05 10:50 Page 3.01
Section 3: Your comfort
Air vents ........................................................................\
..........................................................................................3.02 - 3.03
Heating and air conditioning
........................................................................\
....................................................3.04 ➟3.16
Electric windows
........................................................................\
....................................................... ..................3.17 ➟3.20
Windscreen
........................................................................\
....................................................... .........................................3.20
Sun visor
........................................................................\
....................................................... ..............................................3.21
Electric sunroof
........................................................................\
....................................................... .......................3.22 - 3.23
Interior lighting
........................................................................\
....................................................... ..................................3.24
Storage compartments/passenger compartment fittings
........................................................................\
.....3.25 ➟3.28
Ashtrays/Cigarette lighter
........................................................................\
....................................................... ................3.29
Rear bench seat
........................................................................\
....................................................... ..................................3.30
Luggage compartment
........................................................................\
....................................................... .......................3.31
Rear parcel shelf
........................................................................\
....................................................... ..................................3.32
Storage compartments/luggage compartment fittings
........................................................................\
......................3.33
Transporting items in the luggage compartment
........................................................................\
...............................3.34
Roof rack
........................................................................\
....................................................... ..............................................3.35
3.01
NU761_2_G3-ENG.qxp 1/5/2006 5:28 PM Page 3.01 (Black plate)
Page 142 of 250
Downloaded from www.Manualslib.com manuals search engine
ABC D
FE
NU761_2_G3-FRA.qxd 4/11/05 10:51 Page 3.04
3.04
HEATING/AIR CONDITIONING
The controls
A - Air recirculation control.
B - Air temperature adjustment.
C - Ventilation speed adjustment.
D - Adjusting the passenger
compartment air distribution. E
- Heated rear screen and heated
door mirror control and
indicator light (depending on
vehicle).
F - Air conditioning control and
warning light (depending on
vehicle).
Adjusting the air temperature
Turn control Bto obtain the desired
temperature. The further the slide is
in the red, the more the temperature
will be increased.
When the air conditioning system is
used for long periods, it may begin
to feel cold. This can be corrected by
increasing the quantity of hot air
(turn control Bto the right).
NU761_2_G3-ENG.qxp 1/5/2006 5:28 PM Page 3.04 (Black plate)
Page 143 of 250
Downloaded from www.Manualslib.com manuals search engine
D
NU761_2_G3-FRA.qxd 4/11/05 10:51 Page 3.05
3.05
HEATING/AIR CONDITIONING (continued)
Distribution of air in the
passenger compartment
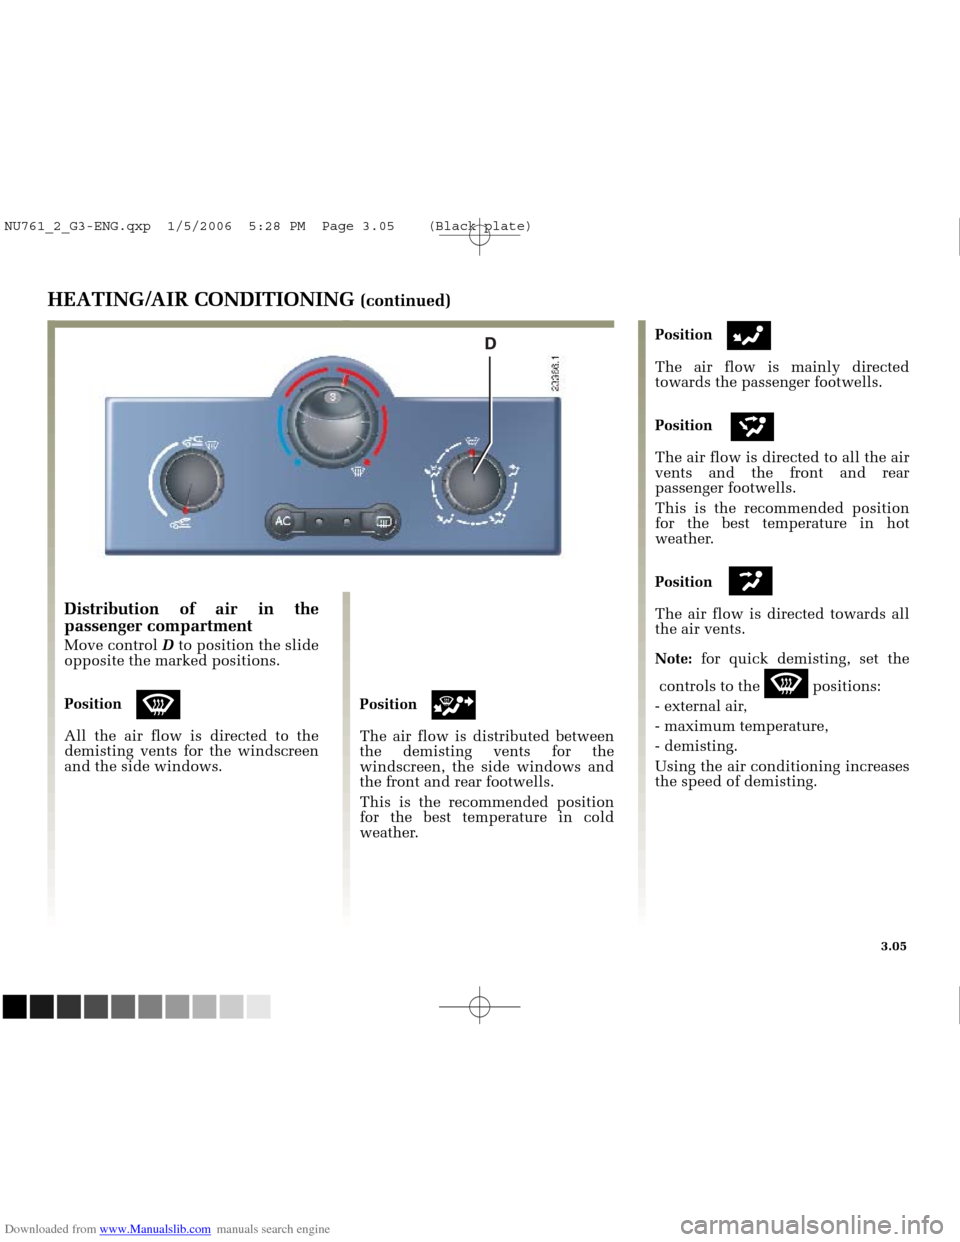
Move control Dto position the slide
opposite the marked positions.
Position
d
All the air flow is directed to the
demisting vents for the windscreen
and the side windows. Position
j
The air flow is distributed between
the demisting vents for the
windscreen, the side windows and
the front and rear footwells.
This is the recommended position
for the best temperature in cold
weather.Position
h
The air flow is mainly directed
towards the passenger footwells.
Position
The air flow is directed to all the air
vents and the front and rear
passenger footwells.
This is the recommended position
for the best temperature in hot
weather.
Position
The air flow is directed towards all
the air vents.
Note:
for quick demisting, set the
controls to the
dpositions:
- external air,
- maximum temperature,
- demisting.
Using the air conditioning increases
the speed of demisting.
NU761_2_G3-ENG.qxp 1/5/2006 5:28 PM Page 3.05 (Black plate)
Page 144 of 250
Downloaded from www.Manualslib.com manuals search engine
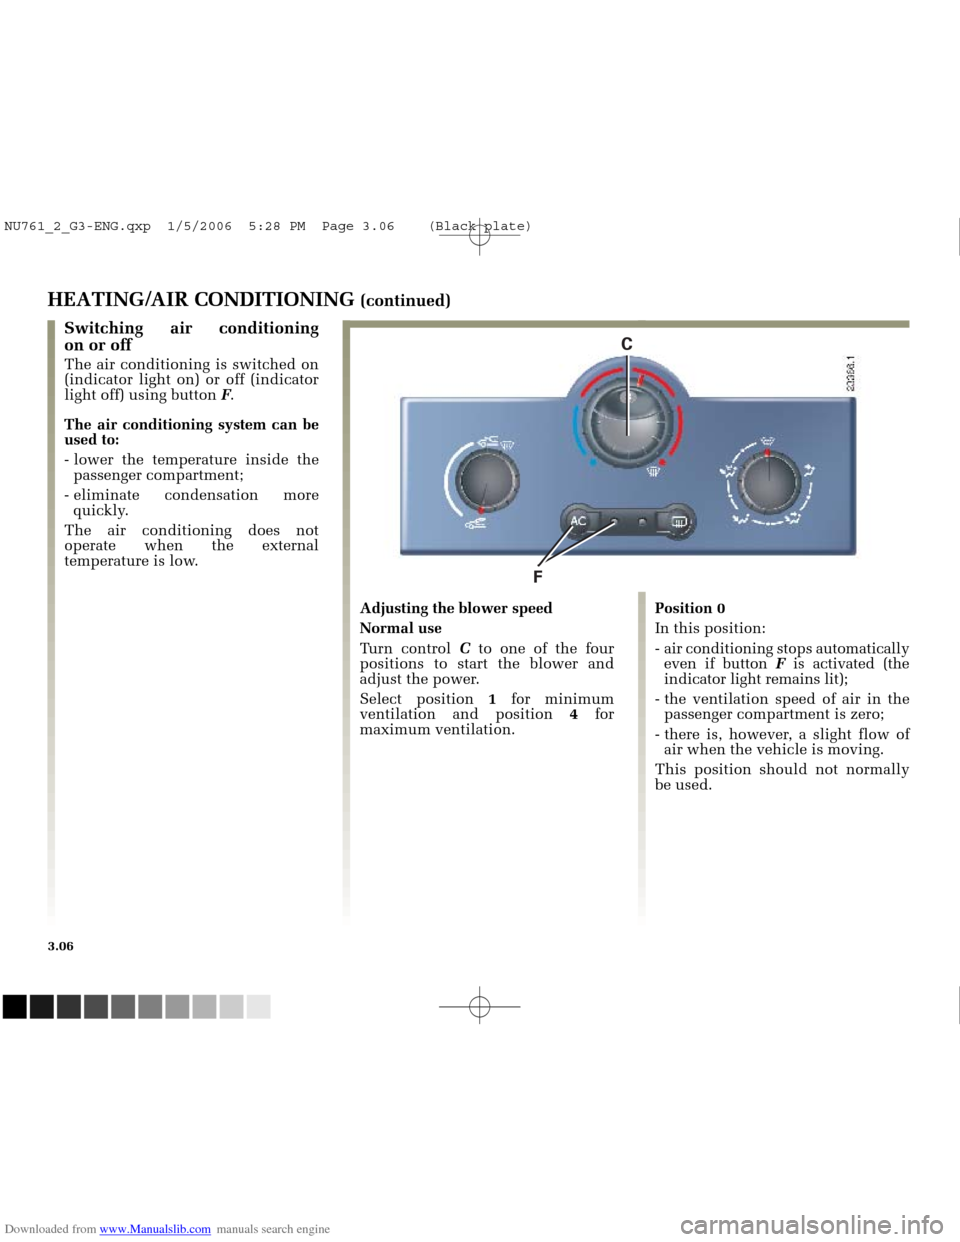
F
C
NU761_2_G3-FRA.qxd 4/11/05 10:51 Page 3.06
3.06
HEATING/AIR CONDITIONING (continued)
Position 0
In this position:
- air conditioning stops automaticallyeven if button Fis activated (the
indicator light remains lit);
- the ventilation speed of air in the passenger compartment is zero;
- there is, however, a slight flow of air when the vehicle is moving.
This position should not normally
be used.
Switching air conditioning
on or off
The air conditioning is switched on
(indicator light on) or off (indicator
light off) using button F.
The air conditioning system can be
used to:
- lower the temperature inside the passenger compartment;
- eliminate condensation more quickly.
The air conditioning does not
operate when the external
temperature is low.
Adjusting the blower speed
Normal use
Turn control Cto one of the four
positions to start the blower and
adjust the power.
Select position 1for minimum
ventilation and position 4for
maximum ventilation.
NU761_2_G3-ENG.qxp 1/5/2006 5:28 PM Page 3.06 (Black plate)
Page 145 of 250
Downloaded from www.Manualslib.com manuals search engine
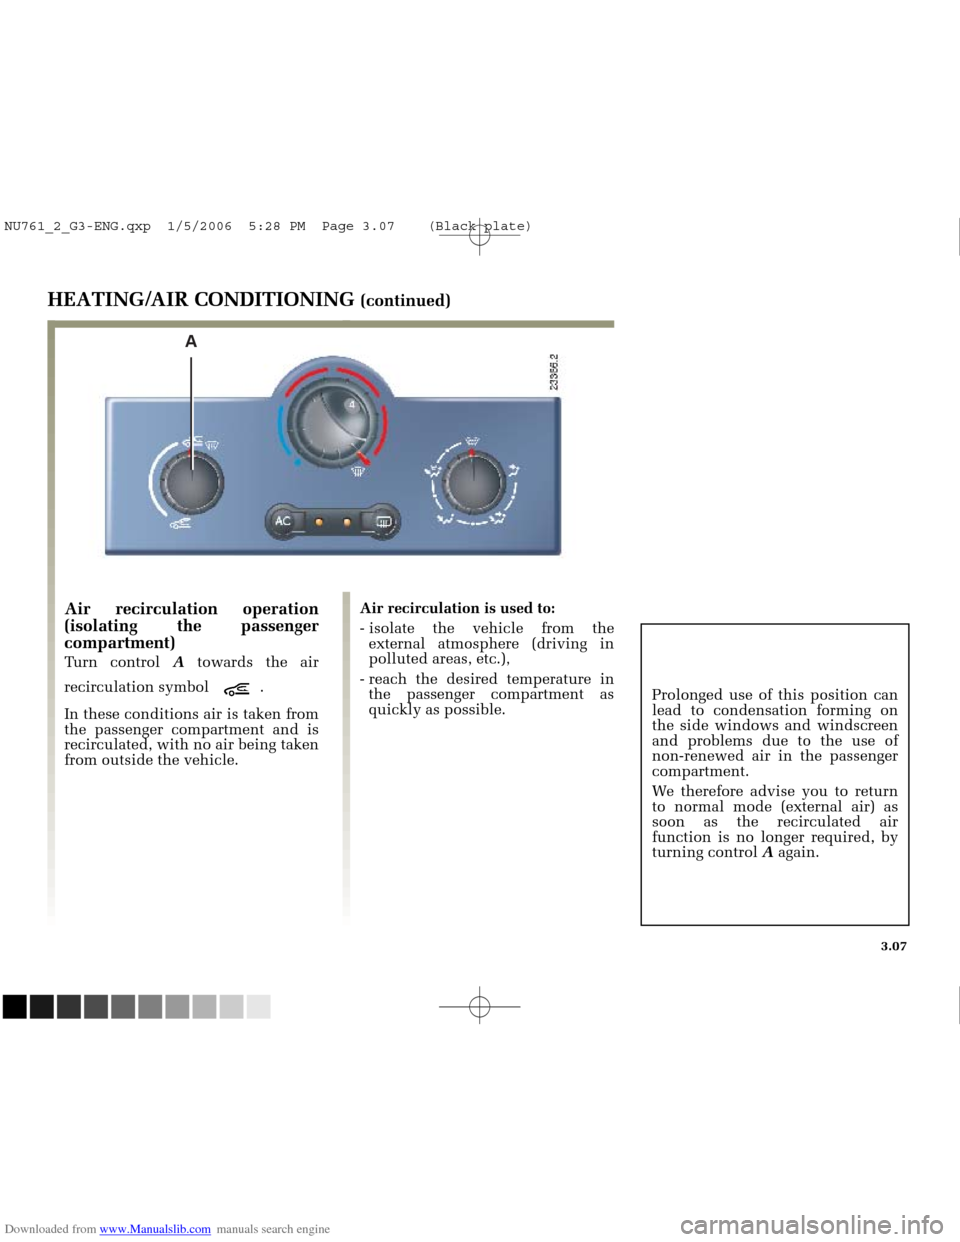
A
NU761_2_G3-FRA.qxd 4/11/05 10:51 Page 3.07
3.07
HEATING/AIR CONDITIONING (continued)
Air recirculation operation
(isolating the passenger
compartment)
Turn control Atowards the air
recirculation symbol .
In these conditions air is taken from
the passenger compartment and is
recirculated, with no air being taken
from outside the vehicle.
Air recirculation is used to:
- isolate the vehicle from the external atmosphere (driving in
polluted areas, etc.),
- reach the desired temperature in the passenger compartment as
quickly as possible. Prolonged use of this position can
lead to condensation forming on
the side windows and windscreen
and problems due to the use of
non-renewed air in the passenger
compartment.
We therefore advise you to return
to normal mode (external air) as
soon as the recirculated air
function is no longer required, by
turning control
Aagain.
NU761_2_G3-ENG.qxp 1/5/2006 5:28 PM Page 3.07 (Black plate)
Page 146 of 250
Downloaded from www.Manualslib.com manuals search engine
12345 67 813 12 11 10
14 9
NU761_2_G3-FRA.qxd 4/11/05 10:51 Page 3.08
3.08
CLIMATE CONTROL
The controls
1
- “Clear view” button to demist
and de-ice the windows.
2 - “Clear view” function indicator
light.
3 - Switching the air conditioning
on and off.
4 and 7- Air temperature adjustment. 5
- Display.
6 - Switching automatic mode on
and off.
8 and 10- Air distribution adjustment
for the passenger
compartment.
9 and 11- Ventilation speed
adjustment. 12
- Heated rear screen and heated
door mirrors (depending on
vehicle).
13 - Heated rear screen indicator
light.
14 - Air recirculation control.
Information and advice for use Refer to the end of the section on
heating/air conditioning.
Buttons 1and 12are
supplemented by operating
warning lights ( 2and 13):
- indicator light lit up, the function is switched on,
- indicator light off, the function is switched off.
NU761_2_G3-ENG.qxp 1/5/2006 5:28 PM Page 3.08 (Black plate)