Page 123 of 250
Downloaded from www.Manualslib.com manuals search engine
NU761_2_G2-FRA.qxd 4/11/05 10:48 Page 2.23
ANTI-LOCK BRAKING SYSTEM: ABS (continued)
One of two situations may arise if
there is a fault in the ABS system:
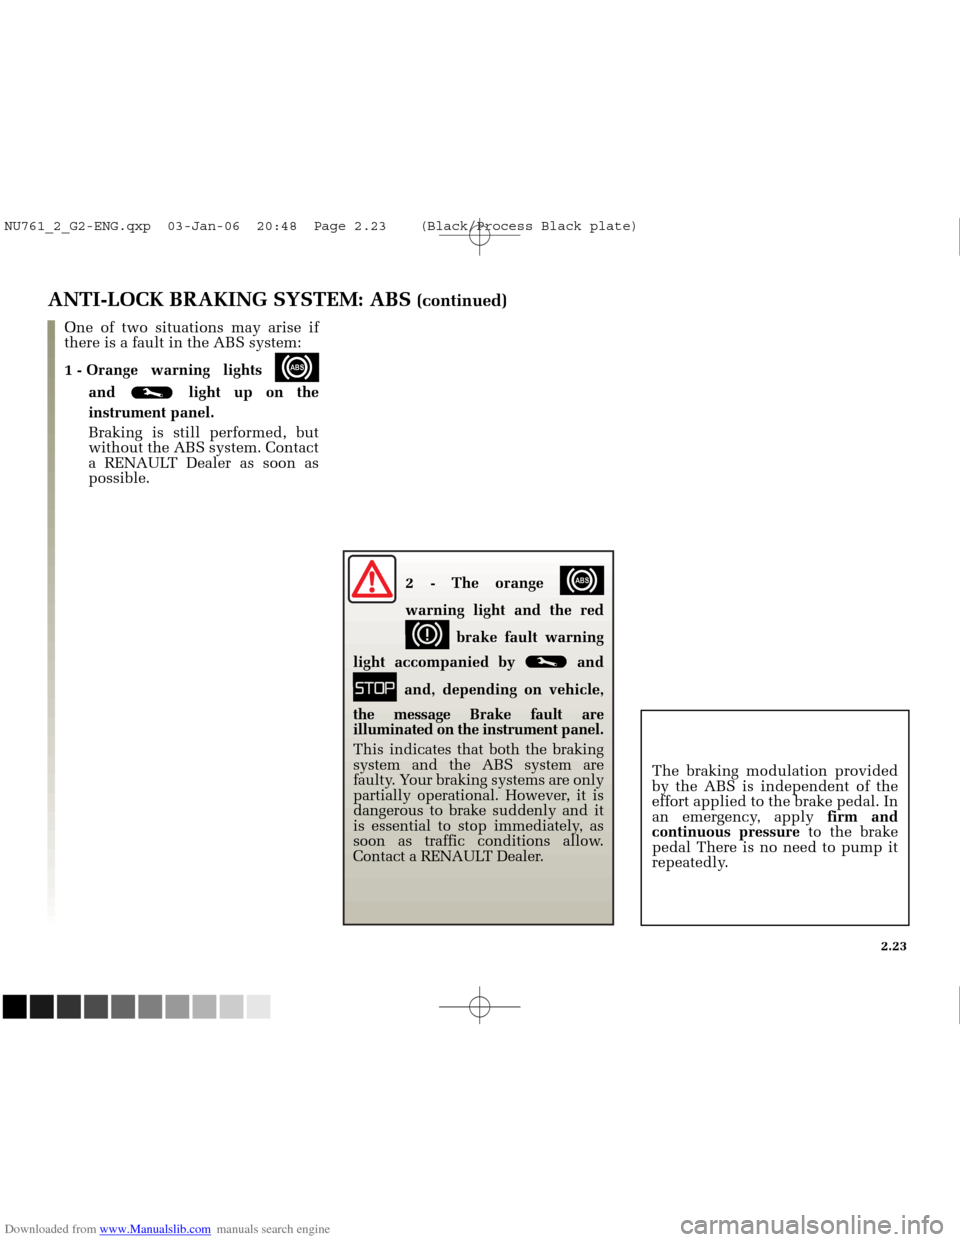
1 - Orange warning lights
x
and light up on the
instrument panel.
Braking is still performed, but
without the ABS system. Contact
a RENAULT Dealer as soon as
possible.
The braking modulation provided
by the ABS is independent of the
effort applied to the brake pedal. In
an emergency, apply firm and
continuous pressure to the brake
pedal There is no need to pump it
repeatedly.
2.23
2 - The orange x
warning light and the red
dbrake fault warning
light accompanied by and
ûand, depending on vehicle,
the message Brake fault are
illuminated on the instrument panel.
This indicates that both the braking
system and the ABS system are
faulty. Your braking systems are only
partially operational. However, it is
dangerous to brake suddenly and it
is essential to stop immediately, as
soon as traffic conditions allow.
Contact a RENAULT Dealer.
NU761_2_G2-ENG.qxp 03-Jan-06 20:48 Page 2.23 (Black/Process Black\
plate)
Page 124 of 250
Downloaded from www.Manualslib.com manuals search engine
NU761_2_G2-FRA.qxd 4/11/05 10:48 Page 2.24
2.24
EMERGENCY BRAKE ASSIST
This system is complementary to
ABS and helps reduce vehicle
stopping distances.
Operating principle
The system is for detecting an
emergency braking situation. In this
case, the braking assistance
immediately develops maximum
power and may trigger ABS
regulation.
ABS braking is maintained as long
as the brake pedal is not released.
Hazard warning lights switching
on
Depending on the vehicle, these
may light up in the event of sudden
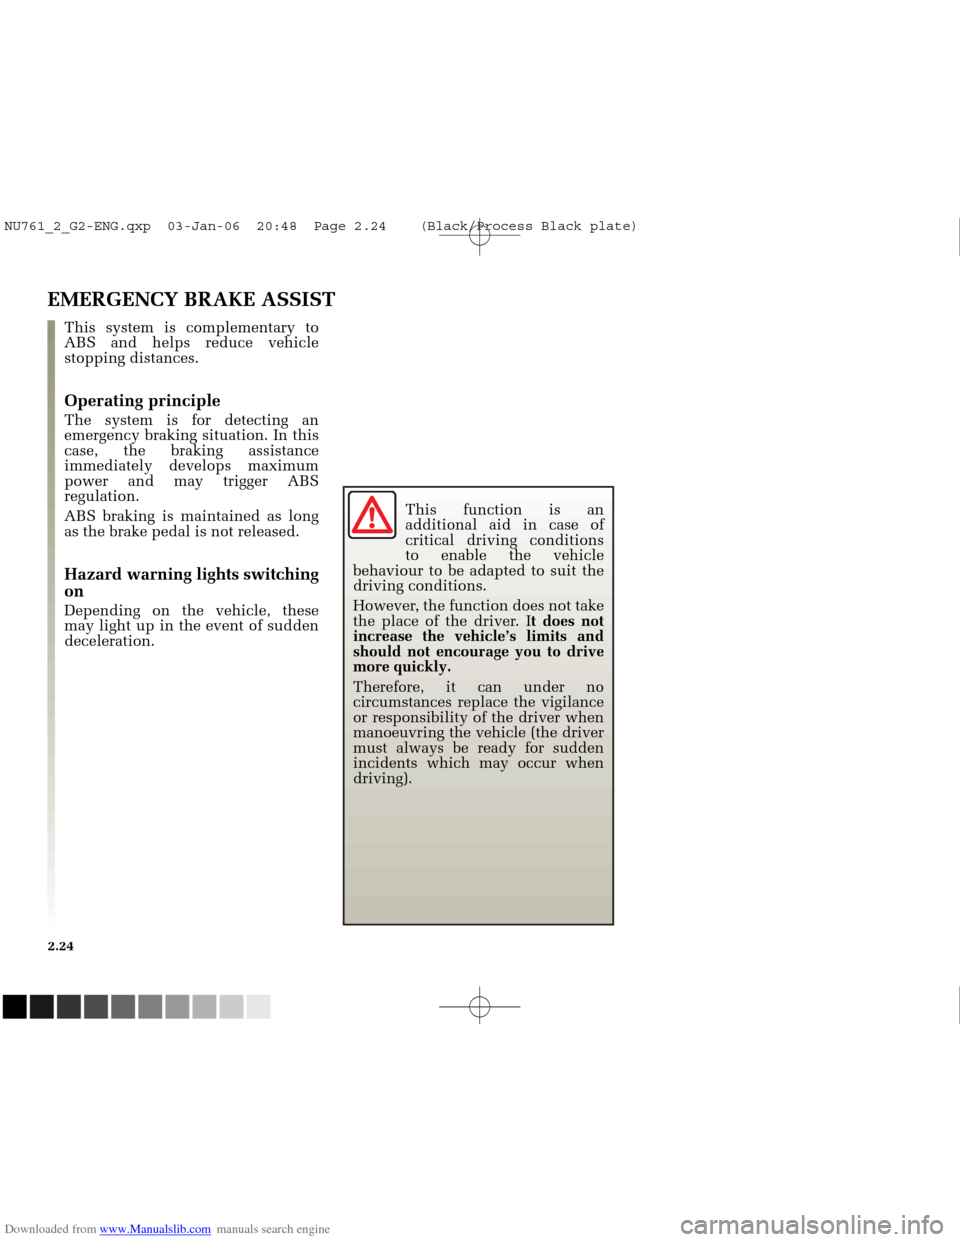
deceleration.This function is an
additional aid in case of
critical driving conditions
to enable the vehicle
behaviour to be adapted to suit the
driving conditions.
However, the function does not take
the place of the driver. I t does not
increase the vehicle’s limits and
should not encourage you to drive
more quickly.
Therefore, it can under no
circumstances replace the vigilance
or responsibility of the driver when
manoeuvring the vehicle (the driver
must always be ready for sudden
incidents which may occur when
driving).
NU761_2_G2-ENG.qxp 03-Jan-06 20:48 Page 2.24 (Black/Process Black\
plate)
Page 131 of 250
Downloaded from www.Manualslib.com manuals search engine
2
5
3
4
1
NU761_2_G2-FRA.qxd 4/11/05 10:48 Page 2.31
CRUISE CONTROL/SPEED LIMITER: cruise control function (continued)
Recalling the cruising speed
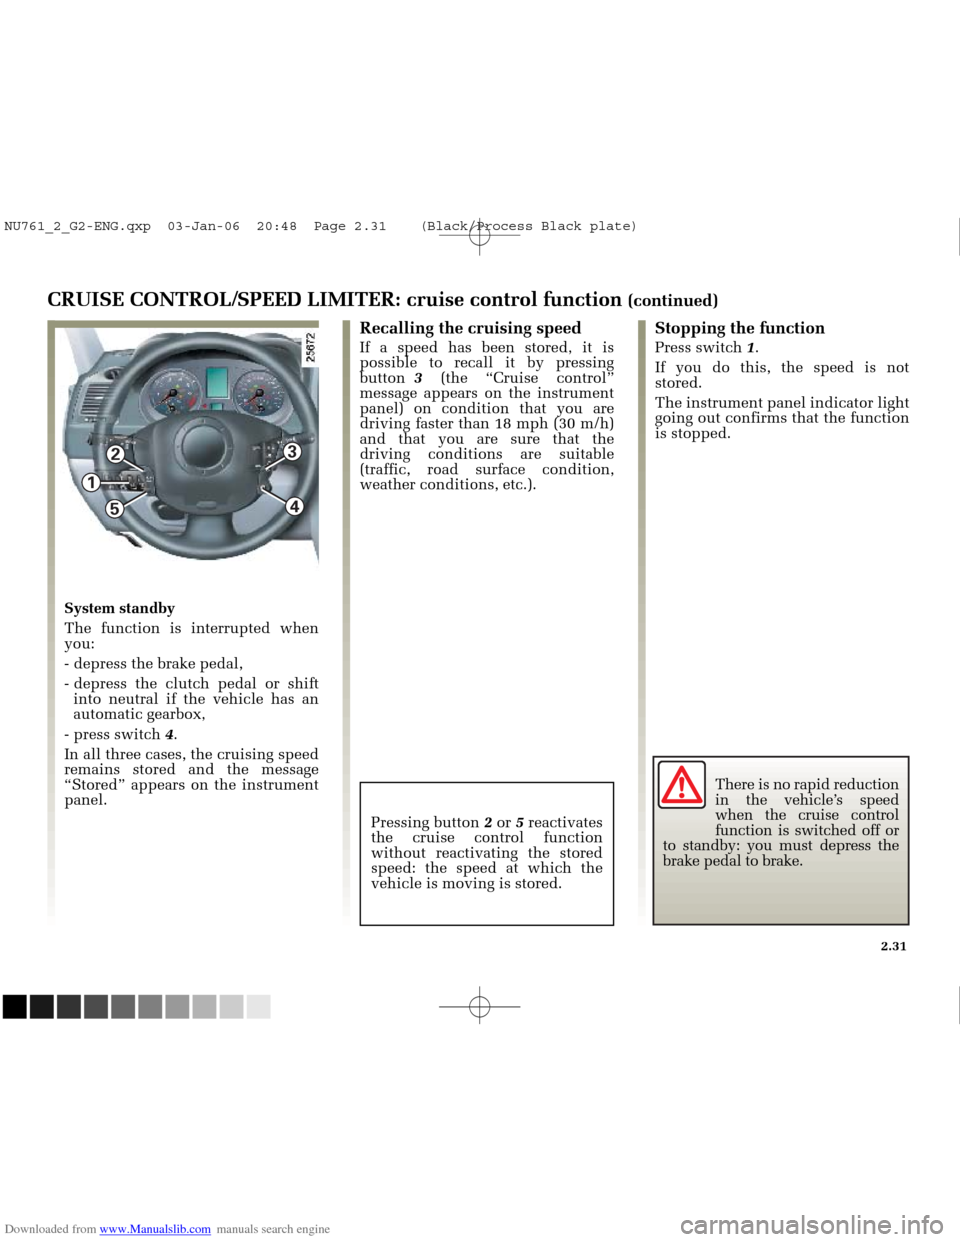
If a speed has been stored, it is
possible to recall it by pressing
button 3 (the “Cruise control”
message appears on the instrument
panel) on condition that you are
driving faster than 18 mph (30 m/h)
and that you are sure that the
driving conditions are suitable
(traffic, road surface condition,
weather conditions, etc.).
Stopping the function
Press switch 1.
If you do this, the speed is not
stored.
The instrument panel indicator light
going out confirms that the function
is stopped.
Pressing button 2or 5reactivates
the cruise control function
without reactivating the stored
speed: the speed at which the
vehicle is moving is stored.
System standby
The function is interrupted when
you:
- depress the brake pedal,
- depress the clutch pedal or shift into neutral if the vehicle has an
automatic gearbox,
- press switch 4.
In all three cases, the cruising speed
remains stored and the message
“Stored” appears on the instrument
panel.
2.31
There is no rapid reduction
in the vehicle’s speed
when the cruise control
function is switched off or
to standby: you must depress the
brake pedal to brake.
NU761_2_G2-ENG.qxp 03-Jan-06 20:48 Page 2.31 (Black/Process Black\
plate)
Page 134 of 250
Downloaded from www.Manualslib.com manuals search engine
1
1
NU761_2_G2-FRA.qxd 4/11/05 10:48 Page 2.34
2.34
AUTOMATIC GEARBOX
Operation
With the lever in position Por N,
switch on the ignition.
Foot on the brake pedal (the warning
light goes out), move the lever out of
position P.
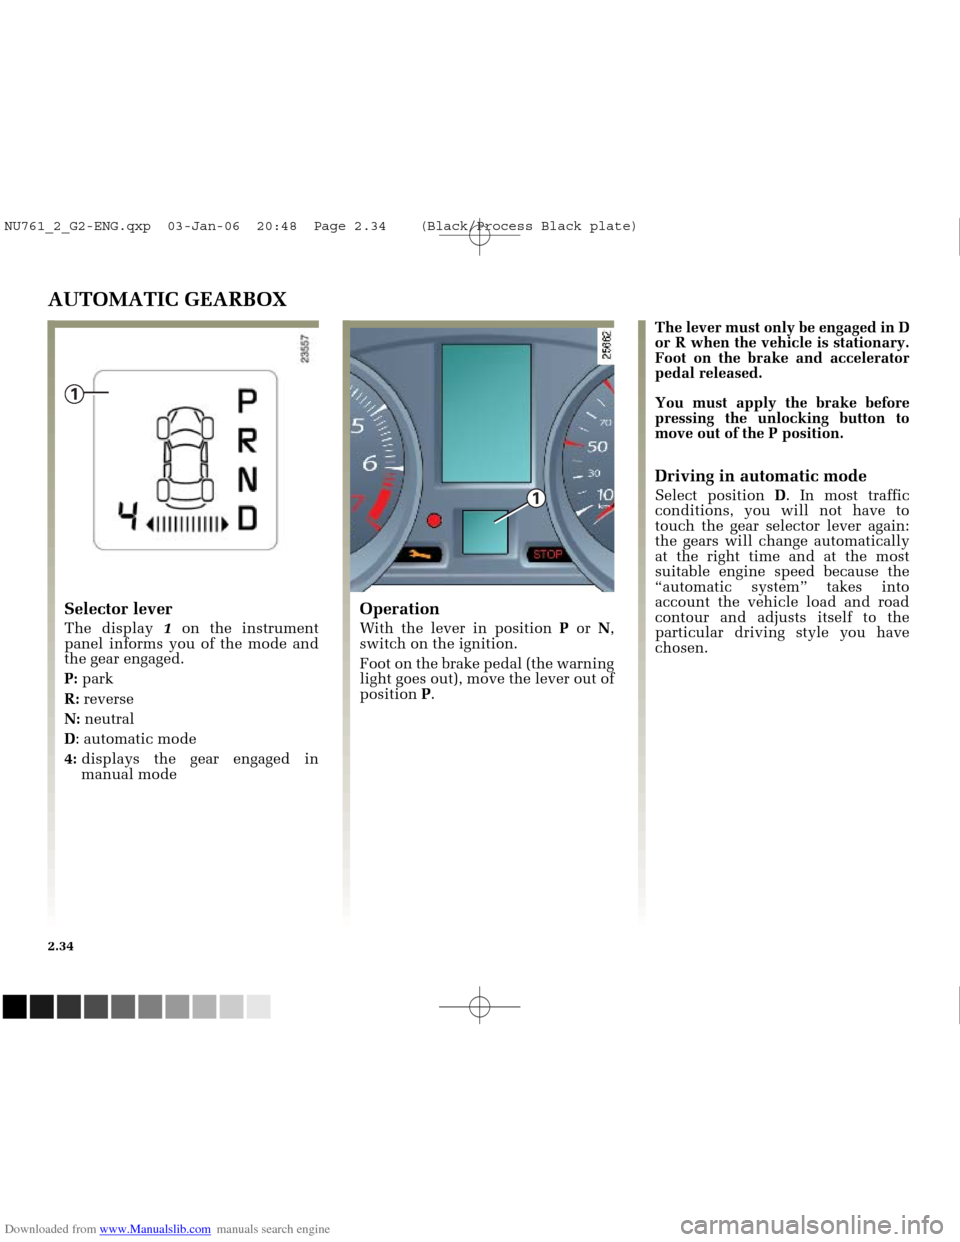
Selector lever
The display 1on the instrument
panel informs you of the mode and
the gear engaged.
P: park
R: reverse
N: neutral
D : automatic mode
4: displays the gear engaged in
manual mode The lever must only be engaged in D
or R when the vehicle is stationary.
Foot on the brake and accelerator
pedal released.
You must apply the brake before
pressing the unlocking button to
move out of the P position.
Driving in automatic mode
Select position
D. In most traffic
conditions, you will not have to
touch the gear selector lever again:
the gears will change automatically
at the right time and at the most
suitable engine speed because the
“automatic system” takes into
account the vehicle load and road
contour and adjusts itself to the
particular driving style you have
chosen.
NU761_2_G2-ENG.qxp 03-Jan-06 20:48 Page 2.34 (Black/Process Black\
plate)
Page 137 of 250
Downloaded from www.Manualslib.com manuals search engine
NU761_2_G2-FRA.qxd 4/11/05 10:49 Page 2.37
AUTOMATIC TRANSMISSION (continued)
Operating faults
- when driving , if the message
“Check gearbox” along with the
warning light appears on the
instrument panel, this indicates a
fault.
Consult your RENAULT Dealer as
soon as possible.
- when driving , if the message
“Gearbox overheating” along with
the warning light appears on
the instrument panel, avoid leaving
the lever in position D(or R), traffic
permitting: systematically return to
position Nwhile stopping.
Consult your RENAULT Dealer as
soon as possible.
- Recovering a vehicle with an
automatic transmission : refer to
the information on Towing in
Section 5.
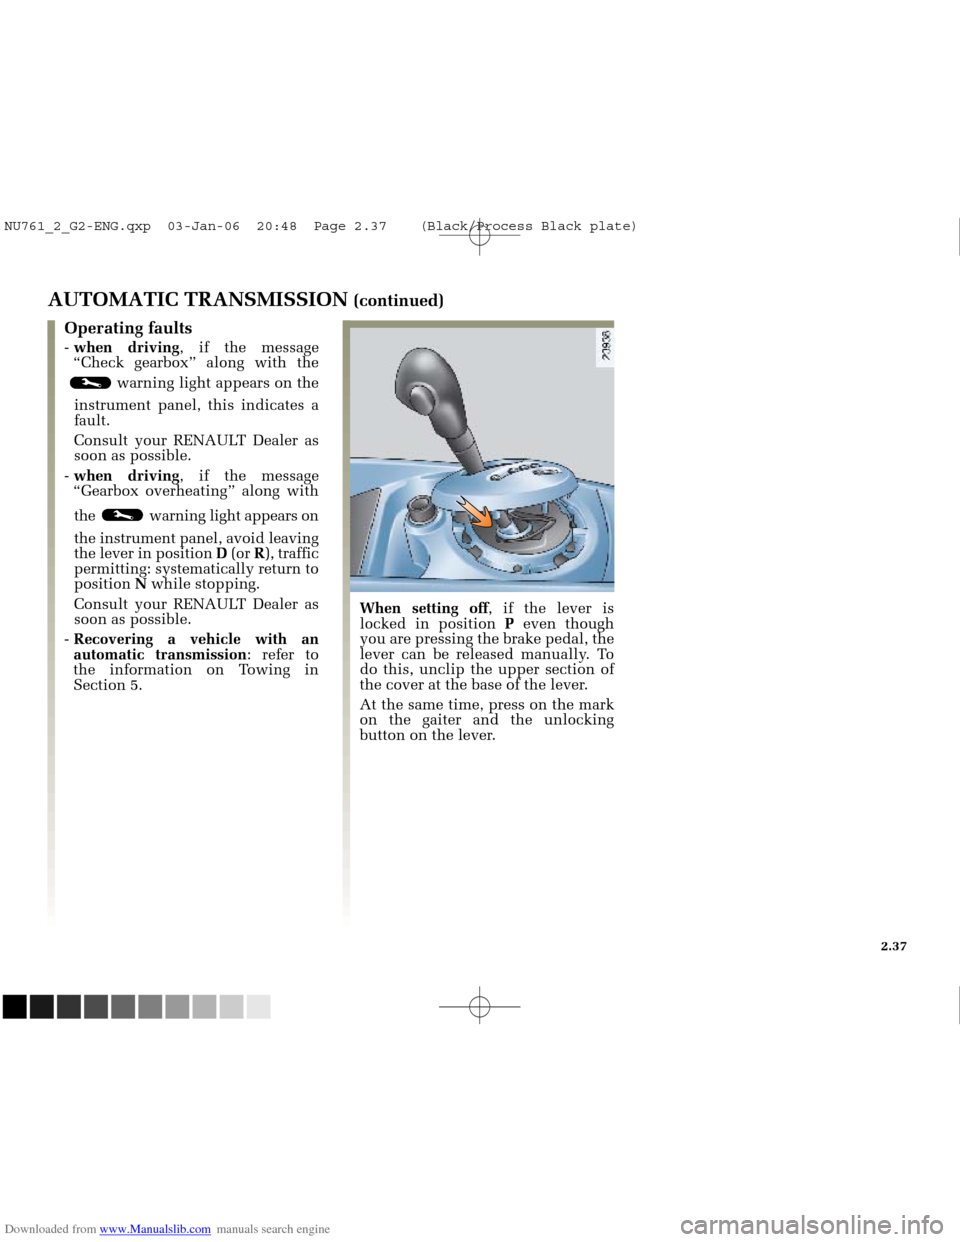
When setting off , if the lever is
locked in position Peven though
you are pressing the brake pedal, the
lever can be released manually. To
do this, unclip the upper section of
the cover at the base of the lever.
At the same time, press on the mark
on the gaiter and the unlocking
button on the lever.
2.37
NU761_2_G2-ENG.qxp 03-Jan-06 20:48 Page 2.37 (Black/Process Black\
plate)
Page 170 of 250
Downloaded from www.Manualslib.com manuals search engine
1
2
NU761_2_G3-FRA.qxd 4/11/05 10:52 Page 3.32
3.32
REAR PARCEL SHELF
Removal
Unhook the two shelf retaining
cords 1. Lift the rear parcel shelf slightly and
pull it towards you.
To refit it, proceed in reverse order
to removal. Special point for utility versions,
unclip the fixings
2from each side
of the shelf, then take the shelf out
through the rear door.
To refit it, proceed in reverse order
to removal.
Do not place any objects,
especially heavy or hard
objects, on the parcel shelf.
These may pose a risk to
the vehicle occupants if the driver
has to brake suddenly or if the
vehicle is involved in an accident.
NU761_2_G3-ENG.qxp 1/5/2006 5:28 PM Page 3.32 (Black plate)
Page 175 of 250
Downloaded from www.Manualslib.com manuals search engine
NU761_2_G4-FRA.qxd 14/11/05 10:10 Page 4.01
Section 4: Maintenance
Bonnet ........................................................................\
..............................................................................................4.02 - 4.03
Engine oil level/Oil change
........................................................................\
.......................................................4.04 ➟4.07
Levels : Engine coolant
........................................................................\
....................................................... .....................4.08
brake fluid
........................................................................\
....................................................... ............................4.09
Windscreen/headlight washer reservoir
........................................................................\
...............................4.10
Filters
........................................................................\
....................................................... ...................................................4.10
Battery
........................................................................\
....................................................... ..................................................4.11
Bodywork maintenance
........................................................................\
....................................................... ........4.12 - 4.13
Interior trim maintenance
........................................................................\
....................................................... ................4.14
4.01
NU761_2_G4-ENG.qxp 1/5/2006 5:29 PM Page 4.01 (Black plate)
Page 183 of 250
Downloaded from www.Manualslib.com manuals search engine
1
NU761_2_G4-FRA.qxd 14/11/05 10:11 Page 4.09
4.09
LEVELS (continued)
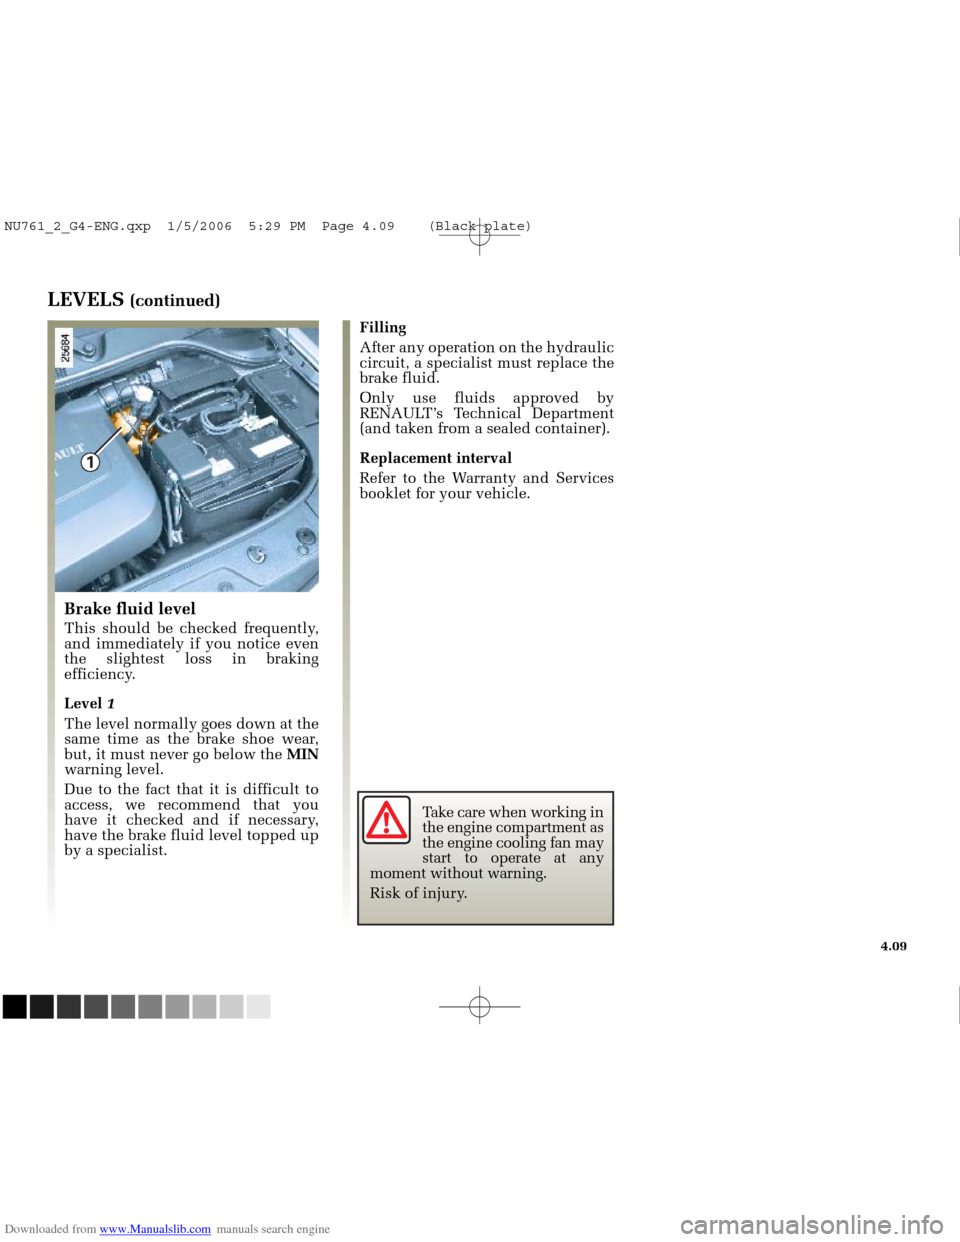
Brake fluid level
This should be checked frequently,
and immediately if you notice even
the slightest loss in braking
efficiency.
Level 1
The level normally goes down at the
same time as the brake shoe wear,
but, it must never go below the MIN
warning level.
Due to the fact that it is difficult to
access, we recommend that you
have it checked and if necessary,
have the brake fluid level topped up
by a specialist. Filling
After any operation on the hydraulic
circuit, a specialist must replace the
brake fluid.
Only use fluids approved by
RENAULT’s Technical Department
(and taken from a sealed container).
Replacement interval
Refer to the Warranty and Services
booklet for your vehicle.
Take care when working in
the engine compartment as
the engine cooling fan may
start to operate at any
moment without warning.
Risk of injury.
NU761_2_G4-ENG.qxp 1/5/2006 5:29 PM Page 4.09 (Black plate)