2005 NISSAN ALTIMA 3,5 SE battery
[x] Cancel search: batteryPage 93 of 304

,orposition.Be sure you do not put anything on top of
the autolight sensor
s1located on the top
side of the instrument panel. The autolight
sensor controls the autolight; if it is cov-
ered, the autolight sensor reacts as if it is
dark out and the headlights will illuminate.
If this occurs while parked with the engine
off and the key in the ON position, your
vehicle’s battery could become discharged.Headlight beam select
s1To select the high beam function, push the
lever forward. The high beam lights come on
and the
light illuminates.
s2Pull the lever back to select the low beam.
s3Pulling and releasing the lever flashes the
headlight high beams on and off.
Battery saver system
If the ignition switch is turned OFF while the
headlight switch is in theorposi-
tion, the headlights will turn off after 5 minutes.
LIC0562
Page 109 of 304
WARNING
There are some small distances immedi-
ately before the closed position which
cannot be detected. Make sure that all
passengers have their hands, etc., inside
the vehicle before closing the window.
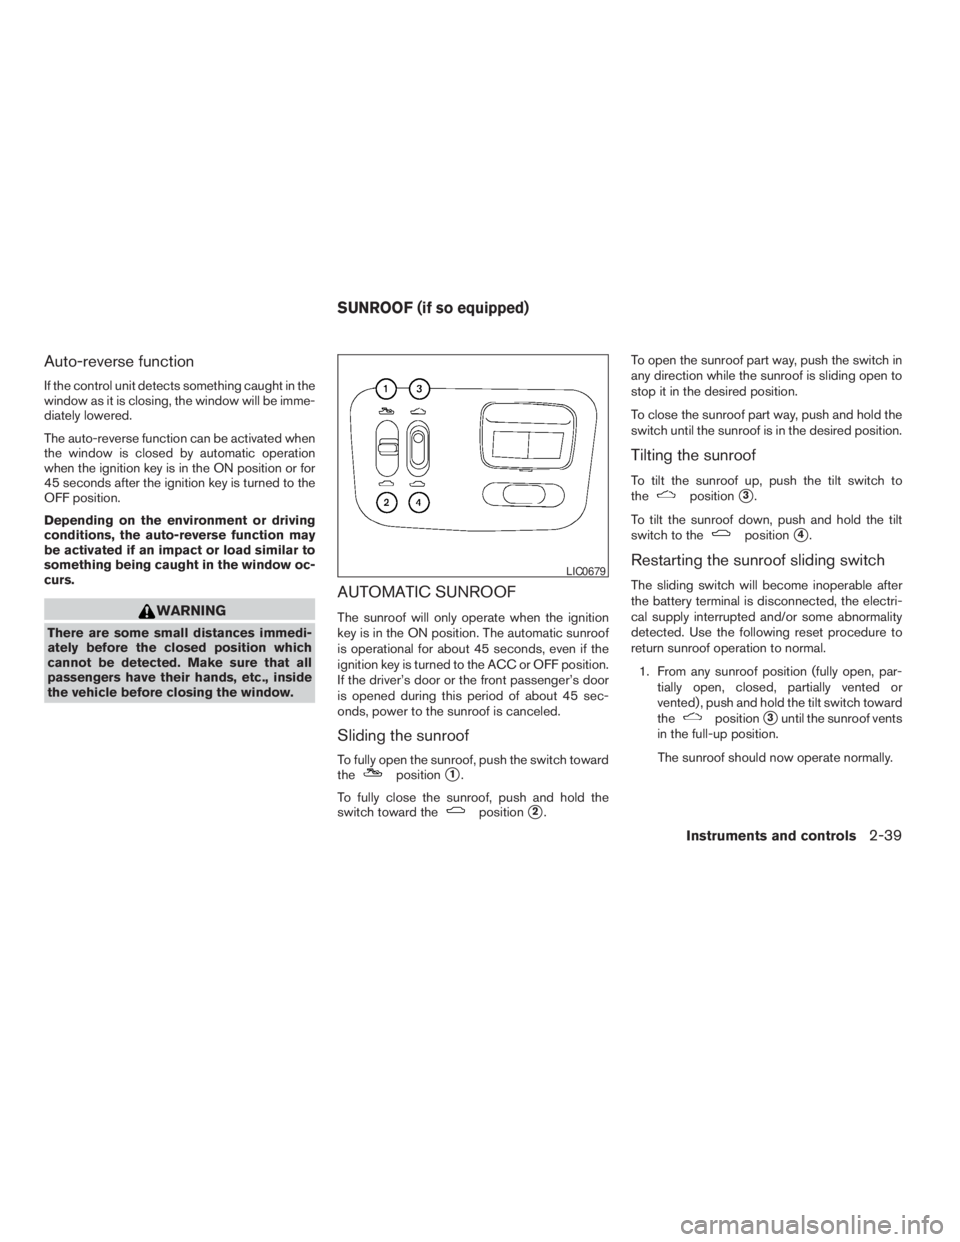
AUTOMATIC SUNROOF
The sunroof will only operate when the ignition
key is in the ON position. The automatic sunroof
is operational for about 45 seconds, even if the
ignition key is turned to the ACC or OFF position.
If the driver’s door or the front passenger’s door
is opened during this period of about 45 sec-
onds, power to the sunroof is canceled.
Sliding the sunroof
To fully open the sunroof, push the switch toward
thepositions1.
To fully close the sunroof, push and hold the
switch toward the
positions2.To open the sunroof part way, push the switch in
any direction while the sunroof is sliding open to
stop it in the desired position.
To close the sunroof part way, push and hold the
switch until the sunroof is in the desired position.
Tilting the sunroof
To tilt the sunroof up, push the tilt switch to
thepositions3.
To tilt the sunroof down, push and hold the tilt
switch to the
positions4.
Restarting the sunroof sliding switch
The sliding switch will become inoperable after
the battery terminal is disconnected, the electri-
cal supply interrupted and/or some abnormality
detected. Use the following reset procedure to
return sunroof operation to normal.
1. From any sunroof position (fully open, par-
tially open, closed, partially vented or
vented) , push and hold the tilt switch toward
the
positions3until the sunroof vents
in the full-up position.
The sunroof should now operate normally.
Instruments and controls2-39
ZREVIEW COPYÐ2005 Altima(l30)
Owners ManualÐUSA_English(nna)
01/04/05Ðarosenma
X
Page 110 of 304
CAUTION
cRemove water drops, snow, ice or sand
from the sunroof before opening.
cDo not place heavy objects on the sun-
roof or surrounding area.
Sunshade
Open and close the sunshade by sliding it for-
ward or backward.
If the sunroof does not close
Have your NISSAN dealer check and repair the
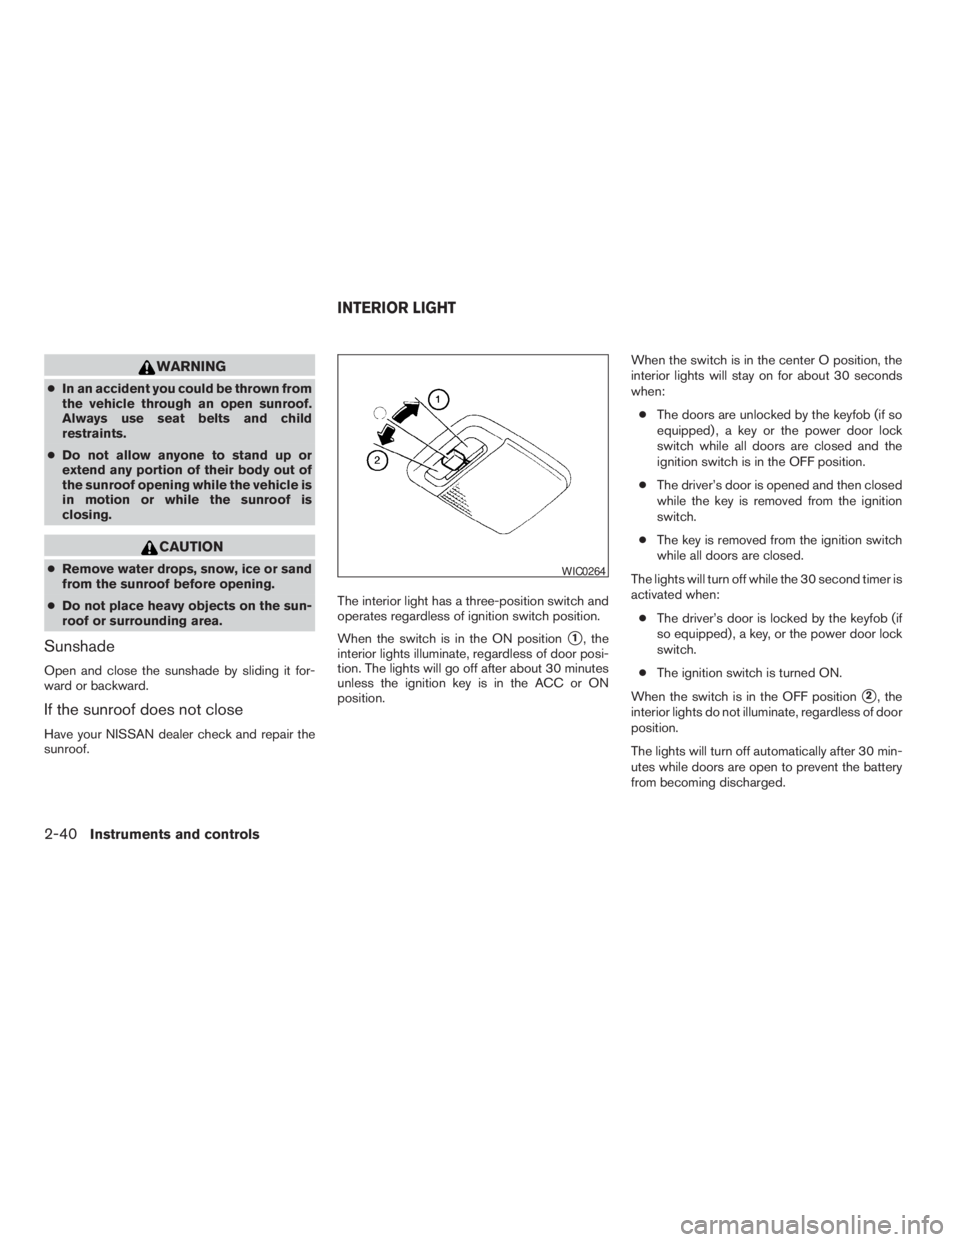
sunroof.The interior light has a three-position switch and
operates regardless of ignition switch position.
When the switch is in the ON position
s1, the
interior lights illuminate, regardless of door posi-
tion. The lights will go off after about 30 minutes
unless the ignition key is in the ACC or ON
position.When the switch is in the center O position, the
interior lights will stay on for about 30 seconds
when:
cThe doors are unlocked by the keyfob (if so
equipped) , a key or the power door lock
switch while all doors are closed and the
ignition switch is in the OFF position.
cThe driver’s door is opened and then closed
while the key is removed from the ignition
switch.
cThe key is removed from the ignition switch
while all doors are closed.
The lights will turn off while the 30 second timer is
activated when:
cThe driver’s door is locked by the keyfob (if
so equipped) , a key, or the power door lock
switch.
cThe ignition switch is turned ON.
When the switch is in the OFF position
s2, the
interior lights do not illuminate, regardless of door
position.
The lights will turn off automatically after 30 min-
utes while doors are open to prevent the battery
from becoming discharged.
Page 111 of 304
CAUTION
Do not use for extended periods of time
with the engine stopped. This could result
in a discharged battery.
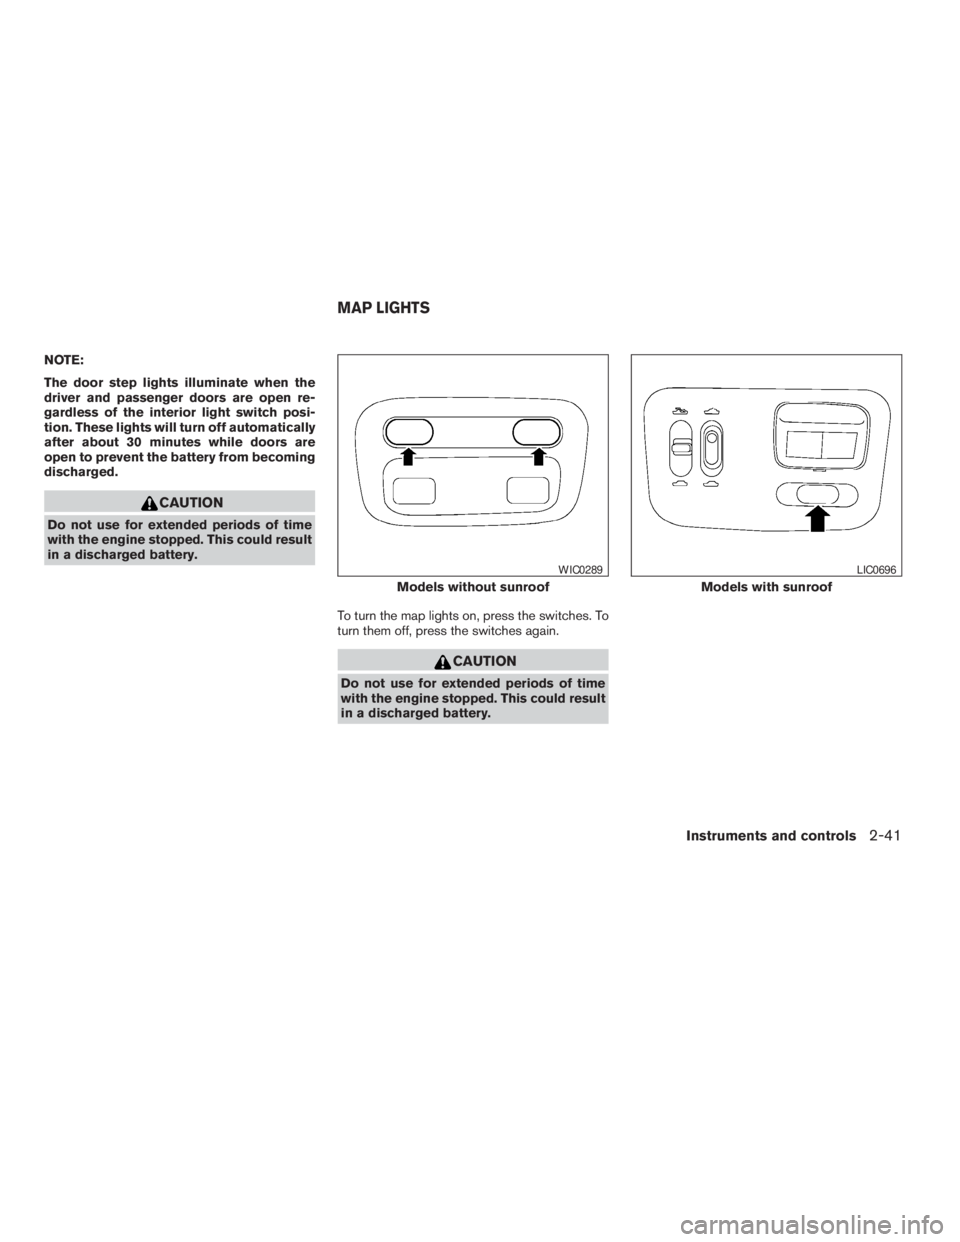
To turn the map lights on, press the switches. To
turn them off, press the switches again.
Models without sunroof
Page 170 of 304
WARNING
The radio should not be tuned while driv-
ing so full attention may be given to ve-
hicle operation.
To manually tune the radio, push the TUNE button
(
or) or turn the tuning knob to right
or left.
To move quickly through the channels, hold either
the
orbutton down for more than
1.5 seconds.
or)
for less than 1.5 seconds to tune from high to low
or low to high frequencies and stop at the next
broadcasting station.SCAN tuning
Push the SCAN button. SCAN illuminates in the
display window. SCAN tuning begins from low to
high frequencies. SCAN tuning stops for 5 sec-
onds at each broadcasting station that has suffi-
cient signal strength. When scanning, SCAN
blinks in the display. Pushing the SCAN button
again during this 5 second period stops SCAN
tuning and the radio remains tuned to that station.
Station memory operations:
18 stations can be set for the FM, AM and SAT
(Satellite-if so equipped) radio to the A, B and C
preset button in any combination of FM, AM or
SAT stations.
1. Choose preset channel A, B or C using the
preset select button.
2. Select the desired FM, AM or SAT station
band.
3. Tune to the desired station using manual,
SEEK or SCAN tuning. Push and hold any of
the desired station memory buttons (1 – 6)
until a beep sound is heard.
4. The channel indicator will then come on and
the sound will resume. Memorizing is now
complete.
5. Other buttons can be set in the same man-
ner.If the battery cable is disconnected, or if the fuse
blows, the radio memory will be canceled. In that
case, reset the desired stations.
Radio data system (RDS):
RDS stands for Radio Data System, and is a data
information service transmitted by some radio
stations on the FM band (not AM band) and/or
SAT radio encoded within a regular radio broad-
cast. Currently, most RDS stations are in large
cities, but many stations are now considering
broadcasting RDS data.
RDS can display:
cStation call sign, such as “WHFR 98.3”.
cStation name, such as “The Groove”.
cMusic or programming type such as “Clas-
sical”, “Country”, or “Rock”.
cTraffic reports about delays or construction.
If the station broadcasts RDS information, the
RDS icon is displayed.
Program type (PTY):
PTY can be used to search for a certain program
type. Certain areas have a limited number of
stations that transmit RDS. Many stations trans-
mit call letters and frequencies only.
4-38Display screen, heater, air conditioner and audio systems
ZREVIEW COPYÐ2005 Altima(l30)
Owners ManualÐUSA_English(nna)
01/04/05Ðarosenma
X
Page 198 of 304

indicator
light may come on. Do not drive on
these types of roads.
cIf wheels or tires other than the recom-
mended ones are used, the traction
control system may not operate prop-
erly and the
indicator light may
come on.
cThe traction control system is not a sub-
stitute for winter tires or tire chains on a
snow covered road.
FREEING A FROZEN DOOR LOCK
To prevent a door lock from freezing, apply de-
icer through the key hole. If the lock becomes
frozen, heat the key before inserting it into the key
hole.
ANTI-FREEZE
In the winter when it is anticipated that the tem-
perature will drop below 32°F (0°C) , check the
anti-freeze to assure proper winter protection.
For details, see ‘‘Engine cooling system’’ in the
‘‘Maintenance and do-it-yourself’’ section of this
manual.
BATTERY
If the battery is not fully charged during extremely
cold weather conditions, the battery fluid may
freeze and damage the battery. To maintain maxi-
mum efficiency, the battery should be checked
regularly. For details, see ‘‘Battery’’ in the ‘‘Main-
tenance and do-it-yourself’’ section of this
manual.
DRAINING OF COOLANT WATER
If the vehicle is to be left outside without anti-
freeze, drain the cooling system, including the
engine block. Refill before operating the vehicle.For details, see ‘‘Changing engine coolant’’ in the
‘‘Maintenance and do-it-yourself’’ section of this
manual.
TIRE EQUIPMENT
1. SUMMER tires have a tread designed to
provide superior performance on dry pave-
ment. However, the performance of these
tires will be substantially reduced in snowy
and icy conditions. If you operate your ve-
hicle on snowy or icy roads, NISSAN recom-
mends the use of MUD & SNOW or ALL
SEASON TIRES on all four wheels. Please
consult a NISSAN dealer for the tire type,
size, speed rating and availability informa-
tion.
2. For additional traction on icy roads, studded
tires may be used. However, some U.S.
states and Canadian provinces prohibit their
use. Check local, state and provincial laws
before installing studded tires.
Skid and traction capabilities of studded
snow tires on wet or dry surfaces may be
poorer than that of non-studded snow tires.
3. Tire chains may be used.
COLD WEATHER DRIVING
5-22Starting and driving
ZREVIEW COPYÐ2005 Altima(l30)
Owners ManualÐUSA_English(nna)
01/04/05Ðarosenma
X
Page 240 of 304
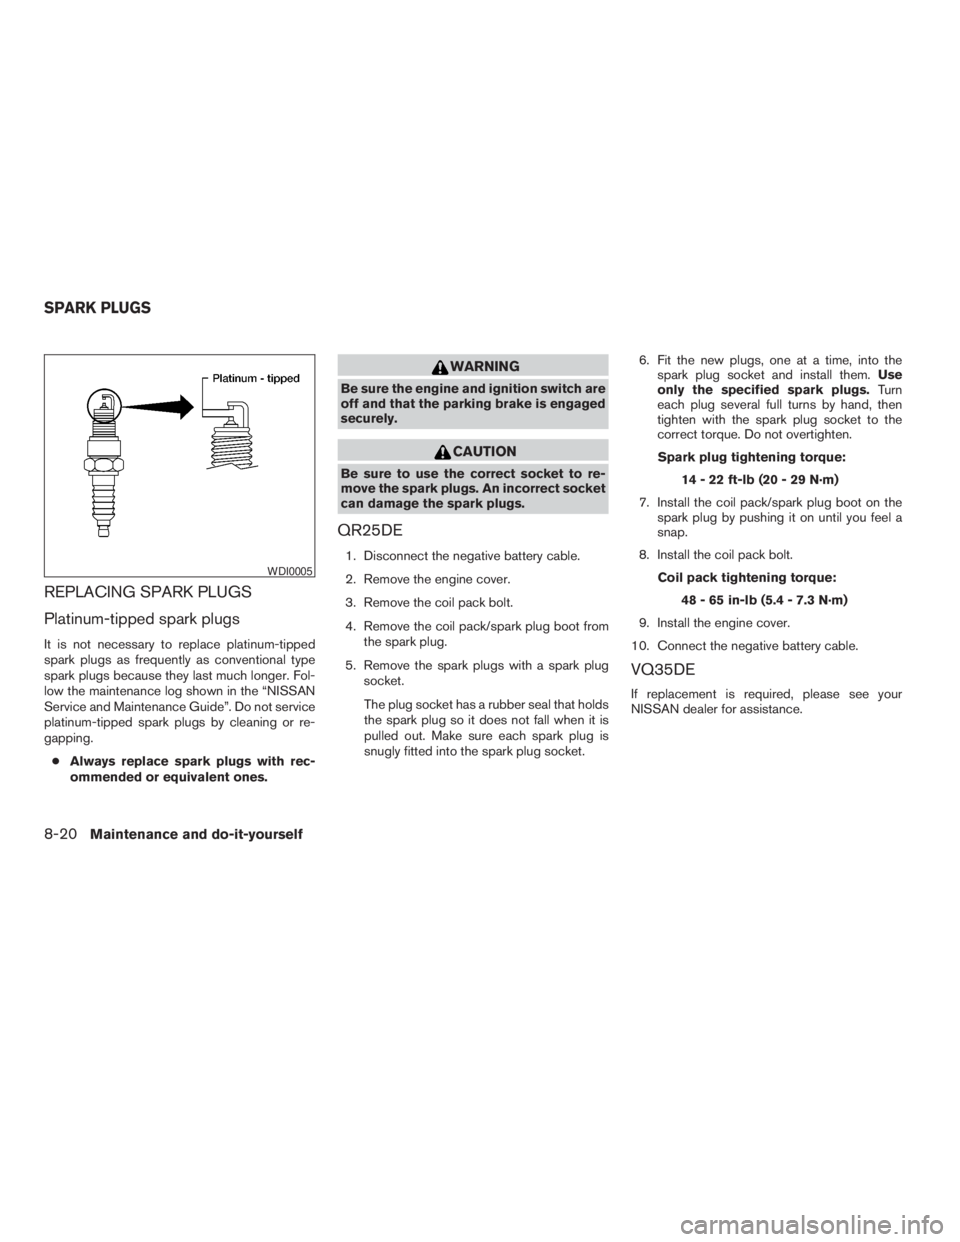
WARNING
Be sure the engine and ignition switch are
off and that the parking brake is engaged
securely.
CAUTION
Be sure to use the correct socket to re-
move the spark plugs. An incorrect socket
can damage the spark plugs.
QR25DE
1. Disconnect the negative battery cable.
2. Remove the engine cover.
3. Remove the coil pack bolt.
4. Remove the coil pack/spark plug boot from
the spark plug.
5. Remove the spark plugs with a spark plug
socket.
The plug socket has a rubber seal that holds
the spark plug so it does not fall when it is
pulled out. Make sure each spark plug is
snugly fitted into the spark plug socket.6. Fit the new plugs, one at a time, into the
spark plug socket and install them.Use
only the specified spark plugs.Turn
each plug several full turns by hand, then
tighten with the spark plug socket to the
correct torque. Do not overtighten.
Spark plug tightening torque:
14 - 22 ft-lb (20 - 29 N·m)
7. Install the coil pack/spark plug boot on the
spark plug by pushing it on until you feel a
snap.
8. Install the coil pack bolt.
Coil pack tightening torque:
48 - 65 in-lb (5.4 - 7.3 N·m)
9. Install the engine cover.
10. Connect the negative battery cable.
VQ35DE
If replacement is required, please see your
NISSAN dealer for assistance.
Page 250 of 304
button, then thebutton two or three times to check the key-
fob operation.
If the battery is removed for any reason
other than replacement, perform step 5.
cAn improperly disposed battery can
hurt the environment. Always confirm
local regulations for battery disposal.
cThe keyfob is water-resistant; how-
ever, if it does get wet, immediately
wipe completely dry.
cThe operational range of the keyfob
extends to approximately 33 ft (10 m)
from the vehicle. This range may vary
with conditions.FCC Notice:
Changes or modifications not expressly ap-
proved by the manufacturer for compliance
could void the user’s authority to operate
the equipment.
This device complies with Part 15 of the
FCC Rules and RSS-210 of Industry
Canada.
Operation is subject to the following two
conditions: (1) This device may not cause
harmful interference, and (2) this device
must accept any interference received, in-
cluding interference that may cause undes-
ired operation of the device.
HEADLIGHTS
Replacing the xenon headlight bulb