2005 MITSUBISHI 380 wheel
[x] Cancel search: wheelPage 1242 of 1500
VEHICLE IDENTIFICATION
GENERAL00-21
OPTION CODES (380 Series)
EXPORT CODES
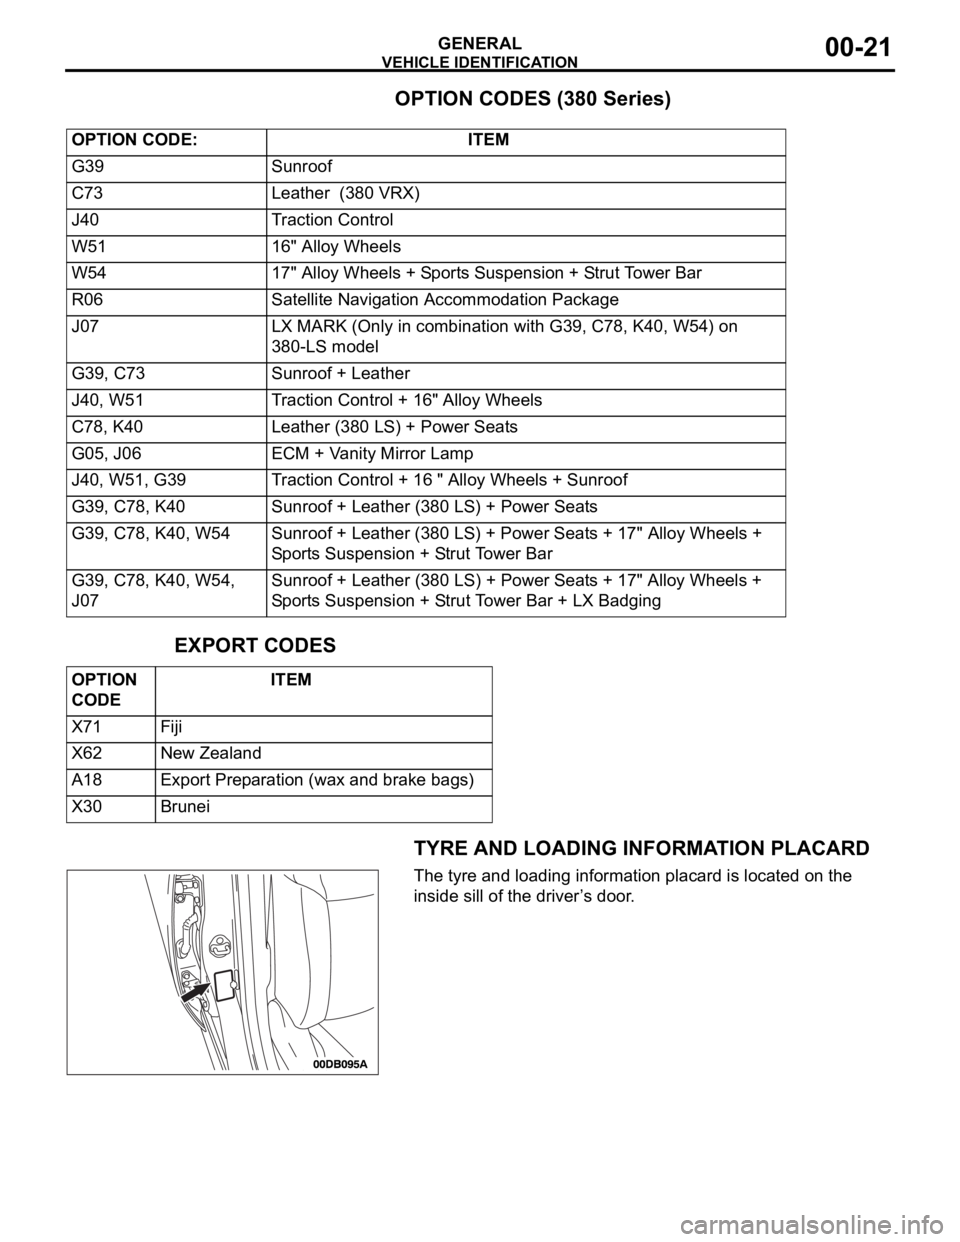
TYRE AND LOADING INFORMATION PLACARD
The tyre and loading information placard is located on the
inside sill of the driver’s door. OPTION CODE: ITEM
G39 Sunroof
C73 Leather (380 VRX)
J40 Traction Control
W51 16" Alloy Wheels
W54 17" Alloy Wheels + Sports Suspension + Strut Tower Bar
R06 Satellite Navigation Accommodation Package
J07 LX MARK (Only in combination with G39, C78, K40, W54) on
380-LS model
G39, C73 Sunroof + Leather
J40, W51 Traction Control + 16" Alloy Wheels
C78, K40 Leather (380 LS) + Power Seats
G05, J06 ECM + Vanity Mirror Lamp
J40, W51, G39 Traction Control + 16 " Alloy Wheels + Sunroof
G39, C78, K40 Sunroof + Leather (380 LS) + Power Seats
G39, C78, K40, W54 Sunroof + Leather (380 LS) + Power Seats + 17" Alloy Wheels +
Sports Suspension + Strut Tower Bar
G39, C78, K40, W54,
J07Sunroof + Leather (380 LS) + Power Seats + 17" Alloy Wheels +
Sports Suspension + Strut Tower Bar + LX Badging
OPTION
CODE ITEM
X71 Fiji
X62 New Zealand
A18 Export Preparation (wax and brake bags)
X30 Brunei
Page 1243 of 1500
PRECAUTIONS BEFORE SERVICE
GENERAL00-22
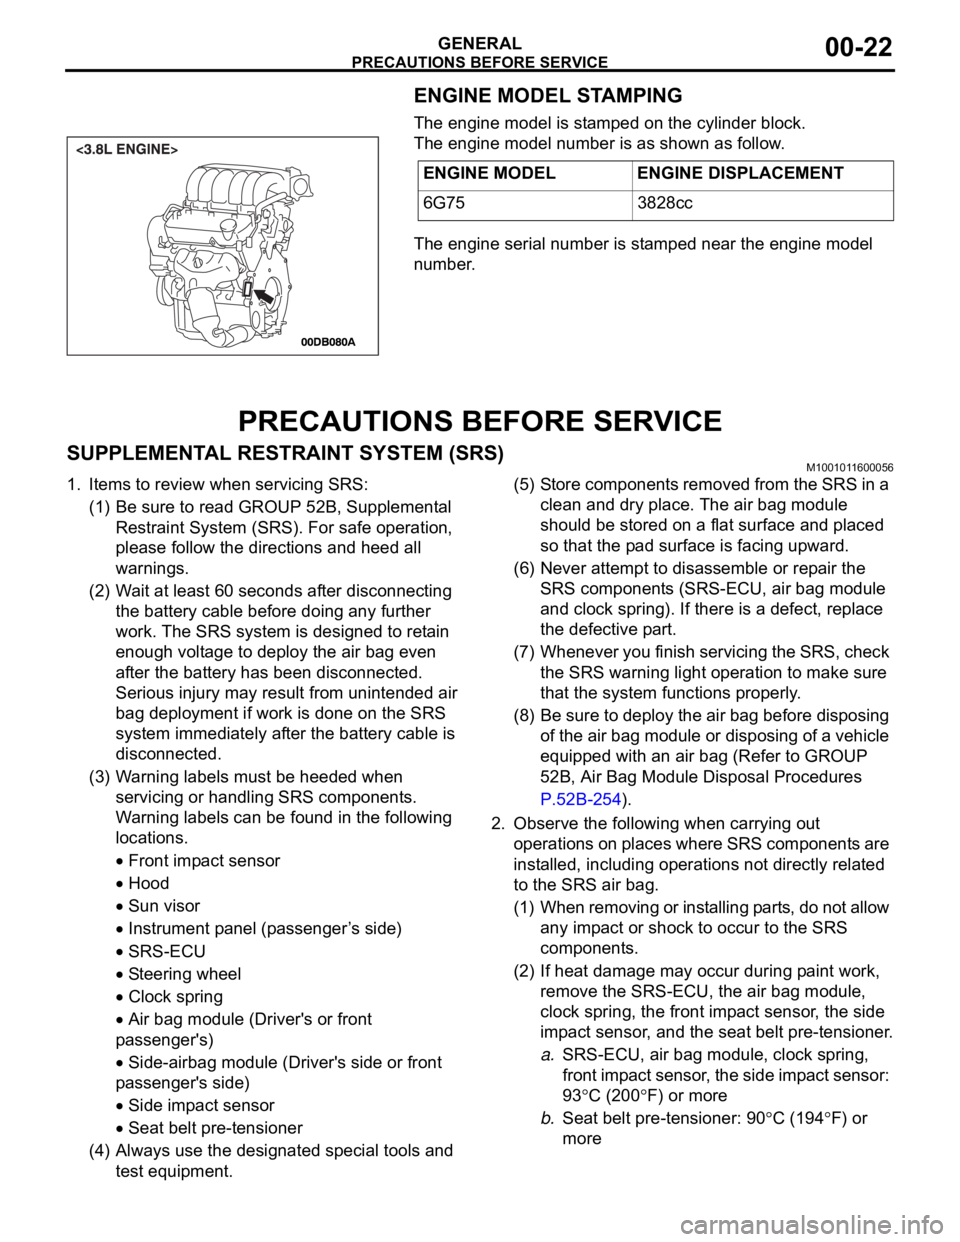
ENGINE MODEL STAMPING
The engine model is stamped on the cylinder block.
The engine model number is as shown as follow.
The engine serial number is stamped near the engine model
number.
PRECAUTIONS BEFORE SERVICE
SUPPLEMENTAL RESTRAINT SYSTEM (SRS)M1001011600056
1. Items to review when servicing SRS:
(1) Be sure to read GROUP 52B, Supplemental
Restraint System (SRS). For safe operation,
please follow the directions and heed all
warnings.
(2) Wait at least 60 seconds after disconnecting
the battery cable before doing any further
work. The SRS system is designed to retain
enough voltage to deploy the air bag even
after the battery has been disconnected.
Serious injury may result from unintended air
bag deployment if work is done on the SRS
system immediately after the battery cable is
disconnected.
(3) Warning labels must be heeded when
servicing or handling SRS components.
Warning labels can be found in the following
locations.
Front impact sensor
Hood
Sun visor
Instrument panel (passenger ’s side)
SRS-ECU
Steering wheel
Clock spring
Air bag module (Driver's or front
passenger's)
Side-airbag module (Driver's side or front
passenger's side)
Side impact sensor
Seat belt pre-tensioner
(4) Always use the designated special tools and
test equipment.(5) Store components removed from the SRS in a
clean and dry place. The air bag module
should be stored on a flat surface and placed
so that the pad surface is facing upward.
(6) Never attempt to disassemble or repair the
SRS components (SRS-ECU, air bag module
and clock spring). If there is a defect, replace
the defective part.
(7) Whenever you finish servicing the SRS, check
the SRS warning light operation to make sure
that the system functions properly.
(8) Be sure to deploy the air bag before disposing
of the air bag module or disposing of a vehicle
equipped with an air bag (Refer to GROUP
52B, Air Bag Module Disposal Procedures
P.52B-254).
2. Observe the following when carrying out
operations on places where SRS components are
installed, including operations not directly related
to the SRS air bag.
(1) When removing or installing parts, do not allow
any impact or shock to occur to the SRS
components.
(2) If heat damage may occur during paint work,
remove the SRS-ECU, the air bag module,
clock spring, the front impact sensor, the side
impact sensor, and the seat belt pre-tensioner.
a.SRS-ECU, air bag module, clock spring,
front impact sensor, the side impact sensor:
93
C (200F) or more
b.Seat belt pre-tensioner: 90
C (194F) or
more ENGINE MODEL ENGINE DISPLACEMENT
6G75 3828cc
Page 1245 of 1500
PRECAUTIONS BEFORE SERVICE
GENERAL00-24
SERVICING ELECTRICAL SYSTEMM1001011900057
Battery posts, terminals and related accessories con-
tain lead and lead compounds. WASH HANDS AFTER
HANDLING.
1. Note the following before proceeding with working on the
electrical system.
Never perform unauthorized modifications to any electrical
device or wiring. Such modifications might lead to a vehicle
malfunction, over-capacity or short-circuit that could result in
a fire in the vehicle.
Before connecting or disconnecting the negative bat-
tery cable, be sure to turn the ignition switch to the
"LOCK" (OFF) position and turn off the lights (If this is
not done, there is the possibility of semiconductor
parts being damaged).
After completion of the work (and the negative battery
terminals is connected), warm up the engine and allow
it to idle for approximately 10 minutes under the condi-
tions described below in order to stabilize engine con-
trol conditions, and then check to be sure that the idle
is satisfactory.
Engine coolant temperature: 85 to 95C (185 to
203
F)
Lights and all accessories: OFF
Transaxle: "N" or "P" position
Steering wheel: straight-forward position
2. When servicing the electrical system, disconnect the
negative cable terminal from the battery.
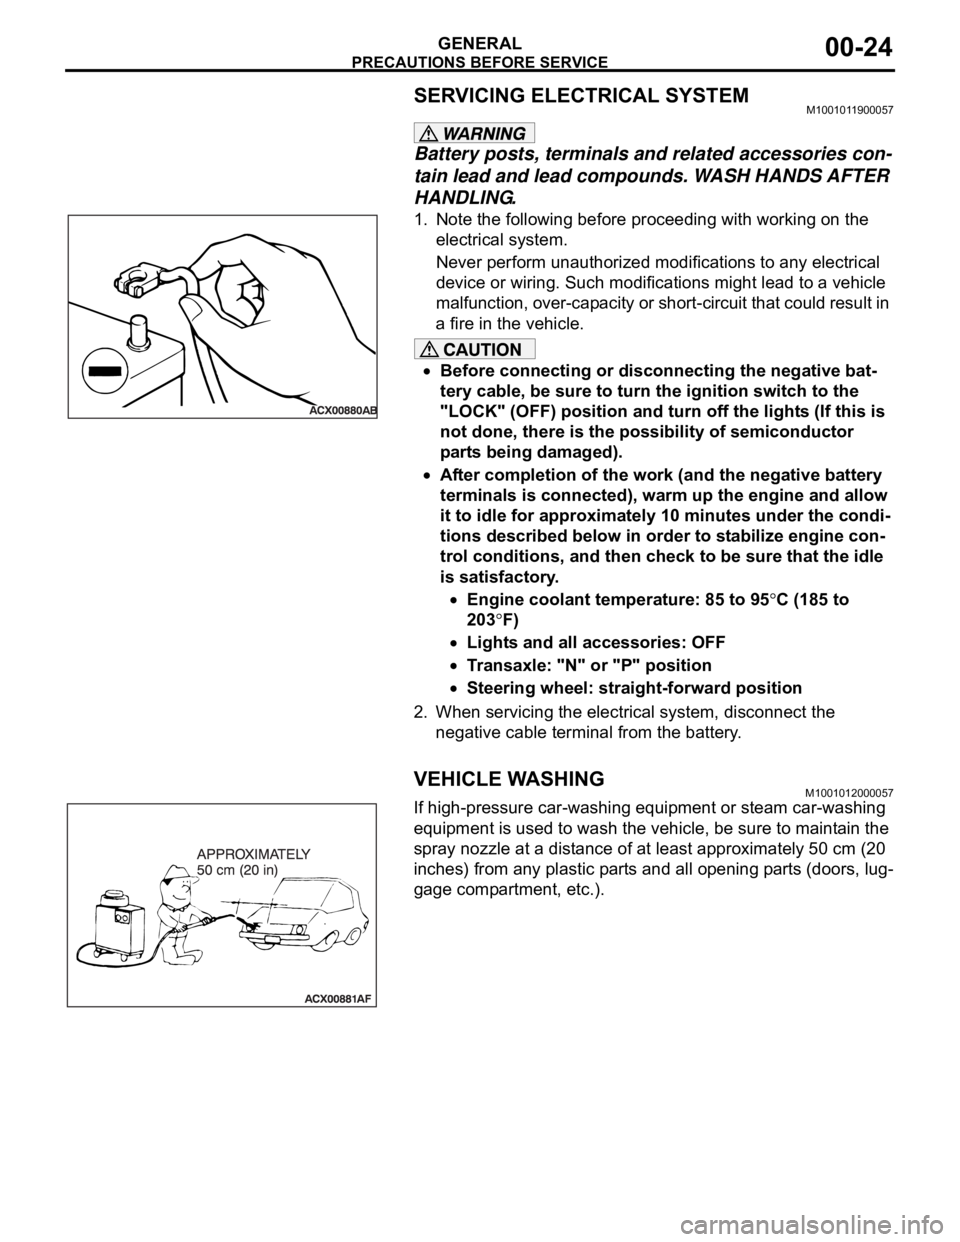
VEHICLE WASHINGM1001012000057
If high-pressure car-washing equipment or steam car-washing
equipment is used to wash the vehicle, be sure to maintain the
spray nozzle at a distance of at least approximately 50 cm (20
inches) from any plastic parts and all opening parts (doors, lug-
gage compartment, etc.).
Page 1247 of 1500
TOWING AND HOISTING
GENERAL00-26
TOWING AND HOISTINGM1001000800380
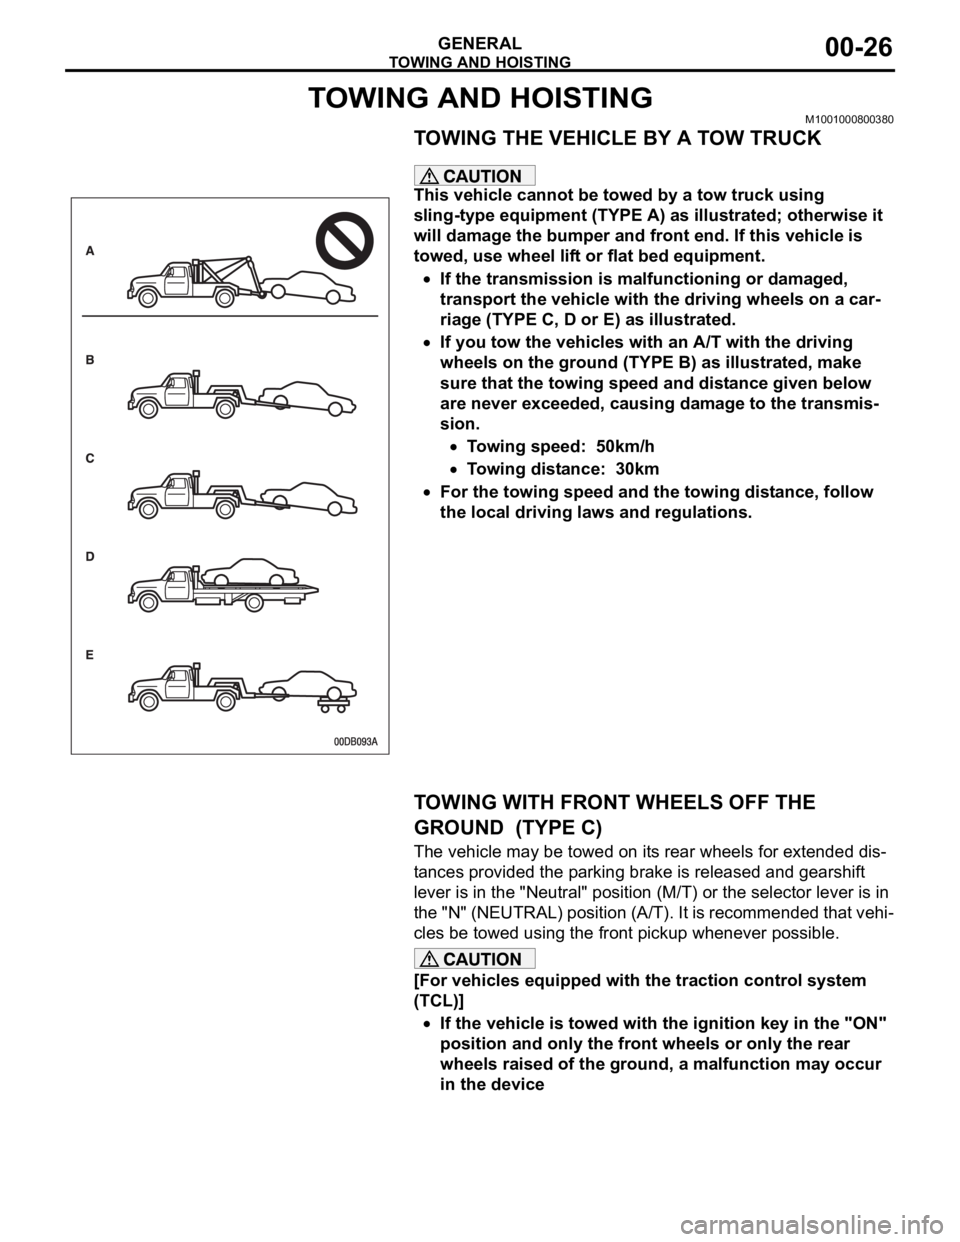
TOWING THE VEHICLE BY A TOW TRUCK
.
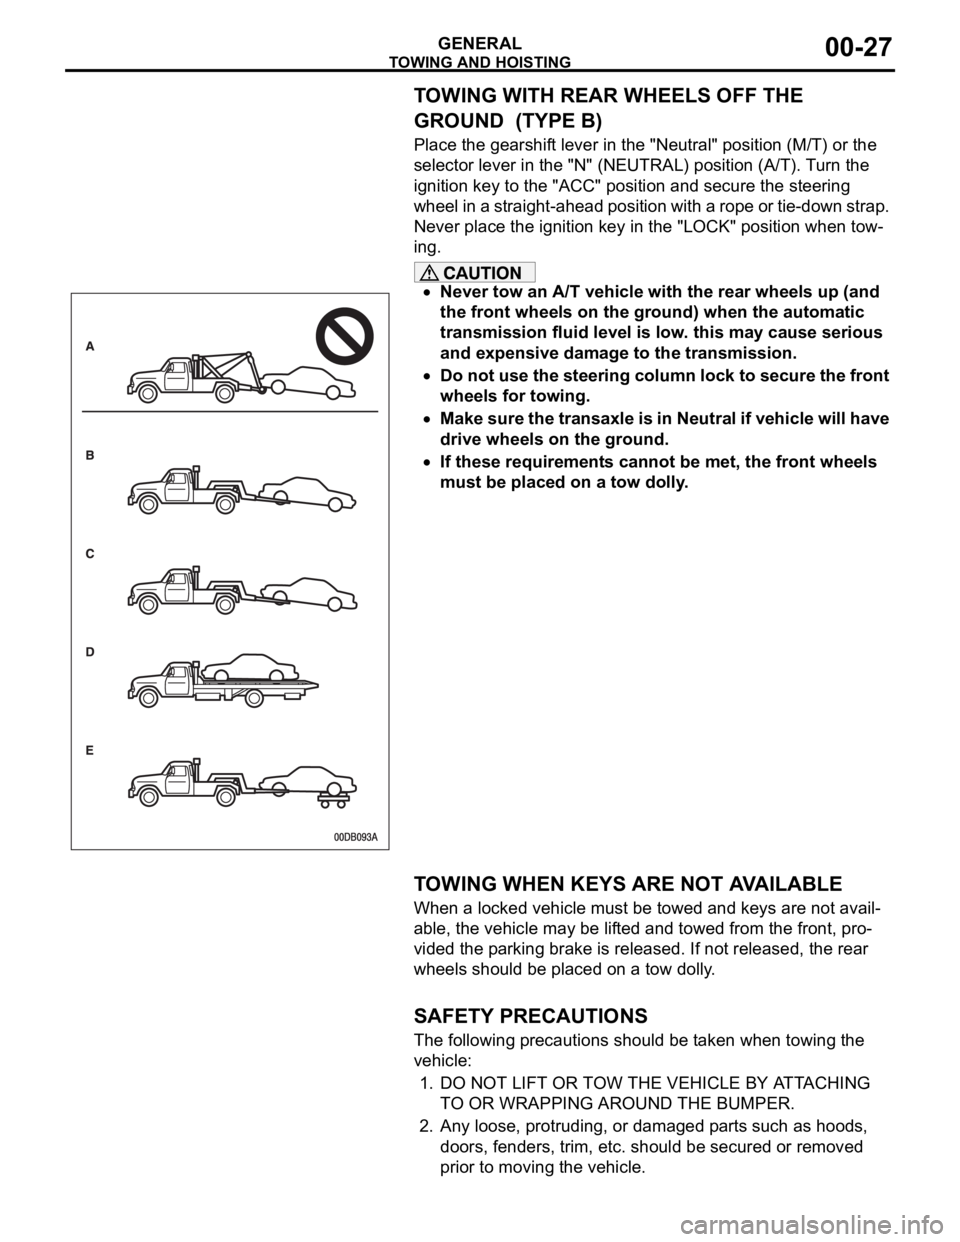
This vehicle cannot be towed by a tow truck using
sling-type equipment (TYPE A) as illustrated; otherwise it
will damage the bumper and front end. If this vehicle is
towed, use wheel lift or flat bed equipment.
If the transmission is malfunctioning or damaged,
transport the vehicle with the driving wheels on a car-
riage (TYPE C, D or E) as illustrated.
If you tow the vehicles with an A/T with the driving
wheels on the ground (TYPE B) as illustrated, make
sure that the towing speed and distance given below
are never exceeded, causing damage to the transmis-
sion.
Towing speed: 50km/h
Towing distance: 30km
For the towing speed and the towing distance, follow
the local driving laws and regulations.
.
TOWING WITH FRONT WHEELS OFF THE
GROUND (TYPE C)
The vehicle may be towed on its rear wheels for extended dis-
tances provided the parking brake is released and gearshift
lever is in the "Neutral" position (M/T) or the selector lever is in
the "N" (NEUTRAL) position (A/T). It is recommended that vehi-
cles be towed using the front pickup whenever possible.
[For vehicles equipped with the traction control system
(TCL)]
If the vehicle is towed with the ignition key in the "ON"
position and only the front wheels or only the rear
wheels raised of the ground, a malfunction may occur
in the device
.
Page 1248 of 1500
TOWING AND HOISTING
GENERAL00-27
TOWING WITH REAR WHEELS OFF THE
GROUND (TYPE B)
Place the gearshift lever in the "Neutral" position (M/T) or the
selector lever in the "N" (NEUTRAL) position (A/T). Turn the
ignition key to the "ACC" position and secure the steering
wheel in a straight-ahead position with a rope or tie-down strap.
Never place the ignition key in the "LOCK" position when tow-
ing.
Never tow an A/T vehicle with the rear wheels up (and
the front wheels on the ground) when the automatic
transmission fluid level is low. this may cause serious
and expensive damage to the transmission.
Do not use the steering column lock to secure the front
wheels for towing.
Make sure the transaxle is in Neutral if vehicle will have
drive wheels on the ground.
If these requirements cannot be met, the front wheels
must be placed on a tow dolly.
.
TOWING WHEN KEYS ARE NOT AVAILABLE
When a locked vehicle must be towed and keys are not avail-
able, the vehicle may be lifted and towed from the front, pro-
vided the parking brake is released. If not released, the rear
wheels should be placed on a tow dolly.
.
SAFETY PRECAUTIONS
The following precautions should be taken when towing the
vehicle:
1. DO NOT LIFT OR TOW THE VEHICLE BY ATTACHING
TO OR WRAPPING AROUND THE BUMPER.
2. Any loose, protruding, or damaged parts such as hoods,
doors, fenders, trim, etc. should be secured or removed
prior to moving the vehicle.
Page 1252 of 1500
GENERAL DATA AND SPECIFICATIONS
GENERAL00-31
GENERAL DATA AND SPECIFICATIONSM1001000900473.
GENERAL SPECIFICATIONS
<3.8L ENGINE>
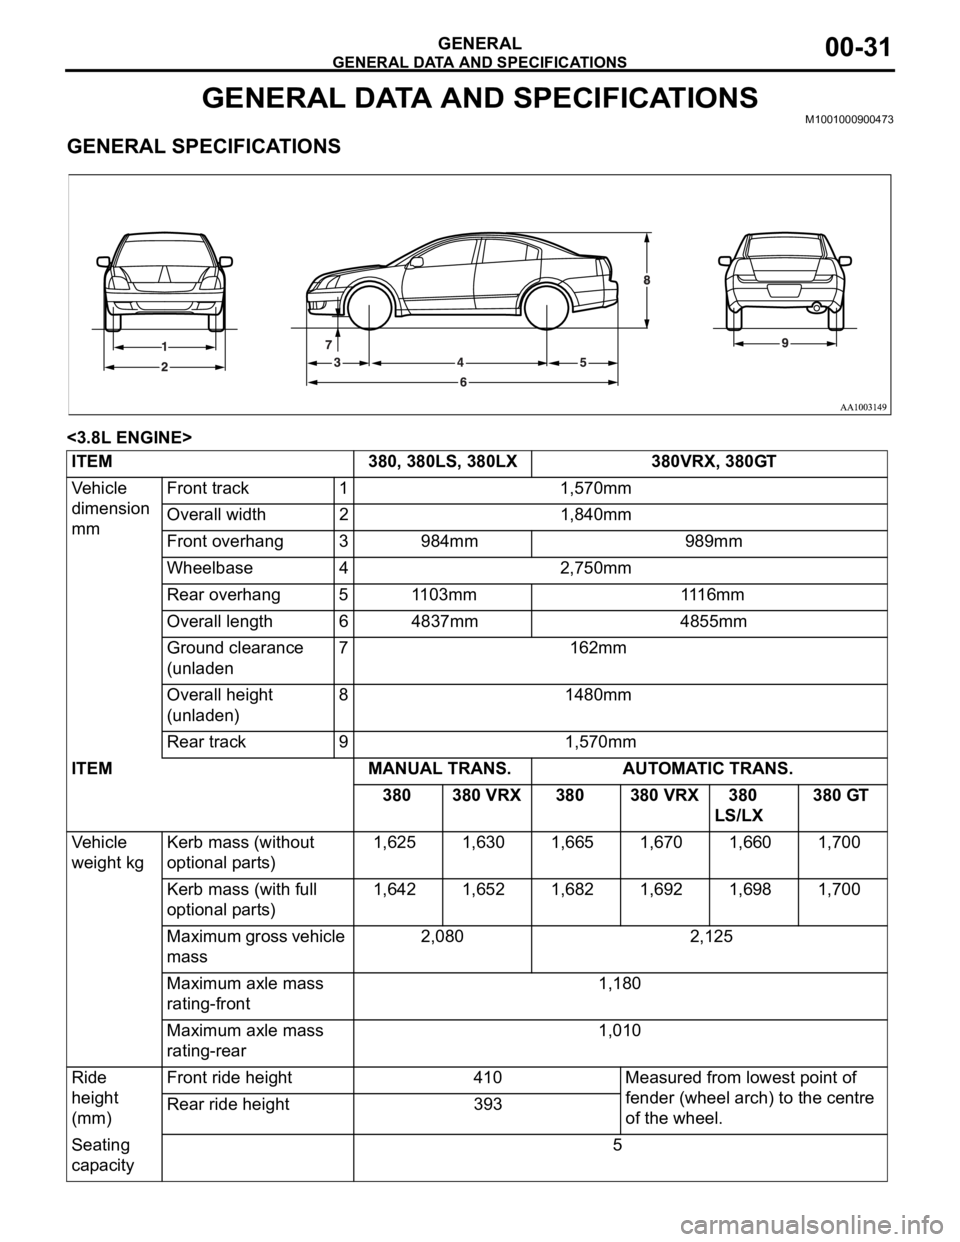
ITEM 380, 380LS, 380LX 380VRX, 380GT
Vehicle
dimension
mmFront track 1 1,570mm
Overall width 2 1,840mm
Front overhang 3 984mm 989mm
Wheelbase 4 2,750mm
Rear overhang 5 1103mm 1116mm
Overall length 6 4837mm 4855mm
Ground clearance
(unladen7 162mm
Overall height
(unladen)8 1480mm
Rear track 9 1,570mm
ITEM MANUAL TRANS. AUTOMATIC TRANS.
380 380 VRX 380 380 VRX 380
LS/LX 380 GT
Vehicle
weight kgKerb mass (without
optional parts) 1,625 1,630 1,665 1,670 1,660 1,700
Kerb mass (with full
optional parts) 1,642 1,652 1,682 1,692 1,698 1,700
Maximum gross vehicle
mass 2,080 2,125
Maximum axle mass
rating-front 1,180
Maximum axle mass
rating-rear 1,010
Ride
height
(mm)Front ride height 410 Measured from lowest point of
fender (wheel arch) to the centre
of the wheel. Rear ride height 393
Seating
capacity 5
Page 1270 of 1500
MAINTENANCE SERVICE
GENERAL00-49
14.Remove the radiator cap after the engine has cooled, and
pour in coolant up to the brim. Reinstall the cap.
Do not overfill the radiator condenser tank assembly.
15.Add coolant to the radiator condenser tank assembly
between the "FULL" and "LOW" mark if necessary.
13. COOLANT HOSES (RADIATOR HOSE,
HEATER HOSE) (INSPECT)
M1001009700034
Inspect the surface of radiator hoses and heater hoses for heat
and mechanical damage. Hard and brittle rubber, cracking,
tears, cuts, abrasions and excessive swelling indicate deterio-
ration of the rubber.
14. DISC BRAKE PADS, ROTORS (INSPECT FOR
WEAR)
M1001003200291
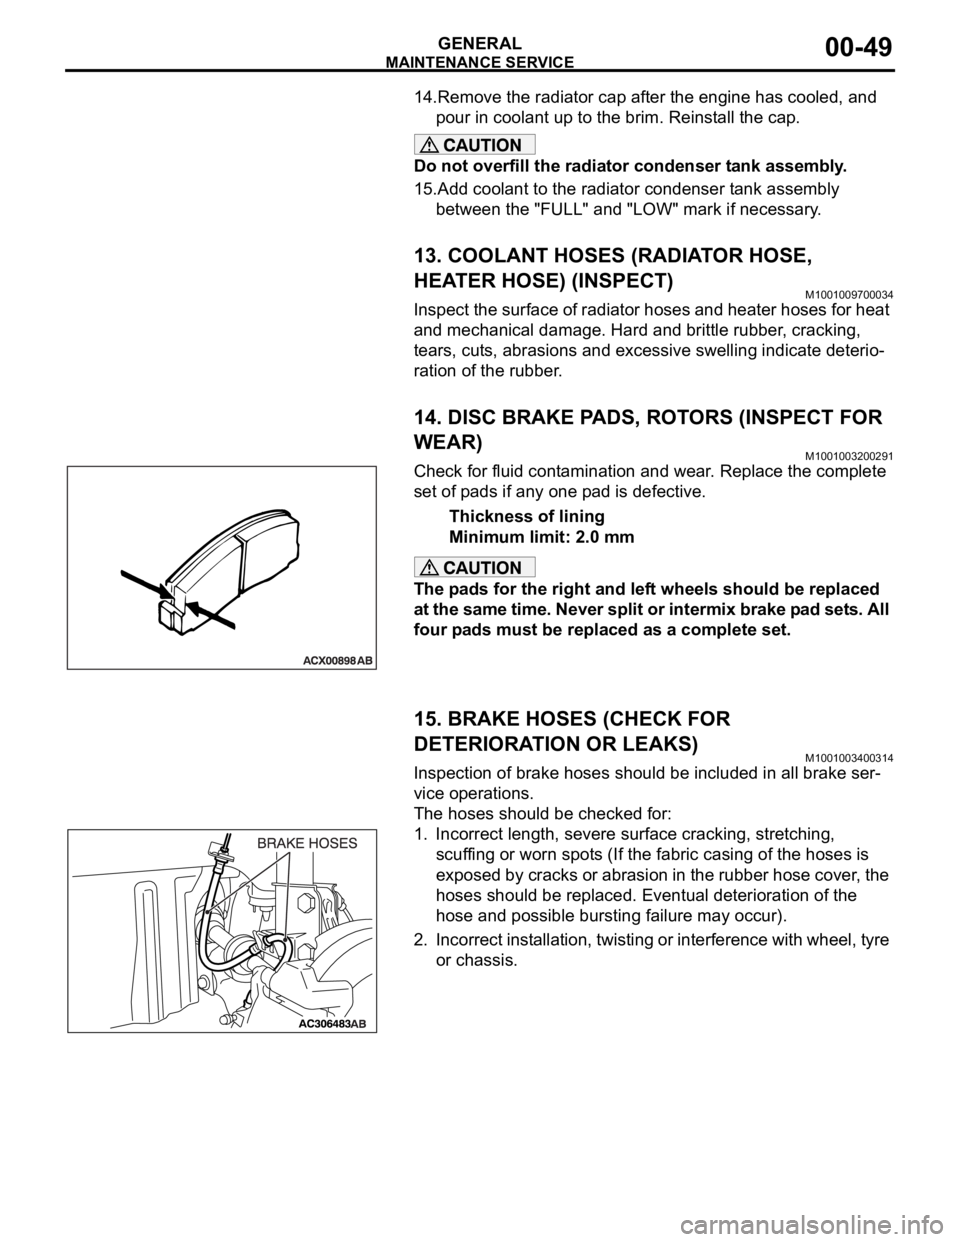
Check for fluid contamination and wear. Replace the complete
set of pads if any one pad is defective.
Thickness of lining
Minimum limit: 2.0 mm
The pads for the right and left wheels should be replaced
at the same time. Never split or intermix brake pad sets. All
four pads must be replaced as a complete set.
15. BRAKE HOSES (CHECK FOR
DETERIORATION OR LEAKS)
M1001003400314
Inspection of brake hoses should be included in all brake ser-
vice operations.
The hoses should be checked for:
1. Incorrect length, severe surface cracking, stretching,
scuffing or worn spots (If the fabric casing of the hoses is
exposed by cracks or abrasion in the rubber hose cover, the
hoses should be replaced. Eventual deterioration of the
hose and possible bursting failure may occur).
2. Incorrect installation, twisting or interference with wheel, tyre
or chassis.
Page 1274 of 1500
MAINTENANCE SERVICE
GENERAL00-53
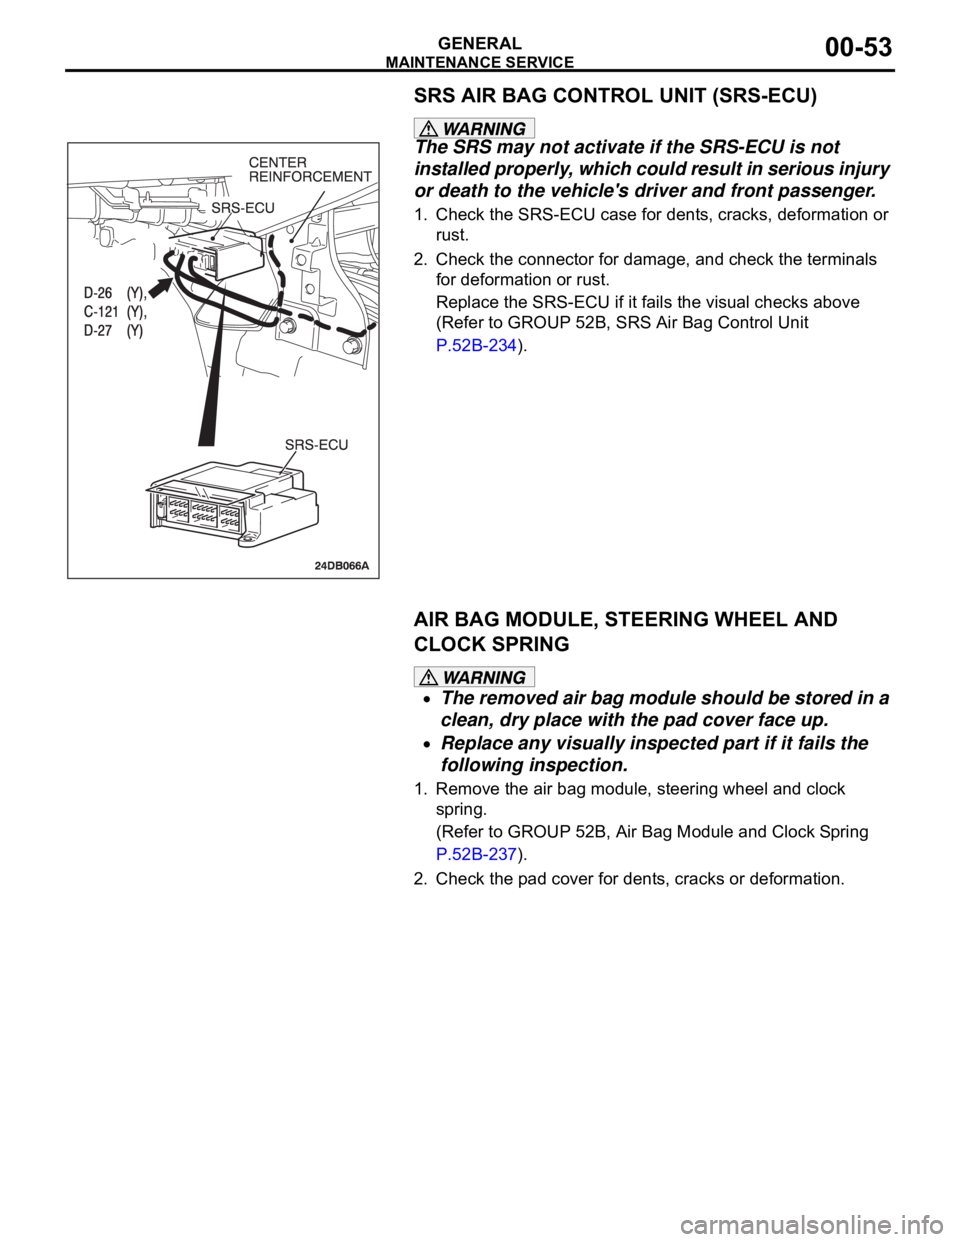
SRS AIR BAG CONTROL UNIT (SRS-ECU)
The SRS may not activate if the SRS-ECU is not
installed properly, which could result in serious injury
or death to the vehicle's driver and front passenger.
1. Check the SRS-ECU case for dents, cracks, deformation or
rust.
2. Check the connector for damage, and check the terminals
for deformation or rust.
Replace the SRS-ECU if it fails the visual checks above
(Refer to GROUP 52B, SRS Air Bag Control Unit
P.52B-234).
AIR BAG MODULE, STEERING WHEEL AND
CLOCK SPRING
The removed air bag module should be stored in a
clean, dry place with the pad cover face up.
Replace any visually inspected part if it fails the
following inspection.
1. Remove the air bag module, steering wheel and clock
spring.
(Refer to GROUP 52B, Air Bag Module and Clock Spring
P.52B-237).
2. Check the pad cover for dents, cracks or deformation.