Page 350 of 417

349 Practical hints
Flat tire
�Flat tire
The vehicle is equipped with the TIREFIT
kit.Preparing the vehicle�
Park the vehicle as far as possible from
moving traffic on a hard surface.
�
Turn on the hazard warning flashers.
�
Turn the steering wheel so that the
front wheels are in a straight ahead po-
sition.
�
Set the parking brake.
�
Move the gear selector lever to P.
�
Turn off the engine (
�page 58).
�
Remove the SmartKey from the starter
switch.
�
Open the driver’s door.
�
Have any passenger exit the vehicle at
a safe distance from the roadway.
Sealing tires with TIREFIT kit
Small tire punctures, particularly those in
the tread, can be sealed with TIREFIT.
TIREFIT can be used in ambient tempera-
tures down to -4°F (-20°C).
�
Foreign objects (e.g. screws or nails)
should not be removed from the tire.
�
Take TIREFIT, the sticker, and the elec-
tric air pump out of the trunk.
!A wheel change should only be carried
out at an authorized Mercedes-Benz
Center. Otherwise there is a danger of
damaging the vehicle by jacking it up
incorrectly.
iOpen door only when conditions are
safe to do so.Warning!
G
Keep TIREFIT away from sparks, open flame
or heat source.
Do not smoke.
Warning!
G
TIREFIT is a limited repair device. TIREFIT
cannot be used for cuts or punctures larger
than approximately 0.16 in (4 mm) and tire
damage caused by driving with extremely
low tire inflation pressure, or on a flat tire, or
a damaged wheel.
Do not drive the vehicle under such circum-
stances.
Contact your nearest Mercedes-Benz
Center for assistance or call Roadside
Assistance. !After using TIREFIT, the tire inflation
pressure sensor may have to be re-
placed.
��
Page 353 of 417
352 Practical hintsFlat tire�
After attaining a tire inflation pressure
of 26 psi (1.8 bar), press0 on electric
air pump switch8.
The electric air pump should now be
switched off.
�
Turn the SmartKey in the ignition to
position0 (
�page 40).
�
Detach the electric air pump.
The air hose may still be hot. Please ex-
ercise appropriate caution.
�
Store the electrical plug and the air
hose behind the flap and place the air
pump back in the trunk.
�
Close the trunk lid.
�
Drive away immediately.
The TIREFIT sealant will distribute itself
evenly inside the tire.
�
After driving vehicle for an initial
ten minutes, check tire inflation pres-
sure using the pressure gauge on the
air pump.
Warning!
G
If a tire inflation pressure of 26 psi (1.8 bar)
is not attained, tire is too severely damaged
for TIREFIT to provide a reliable tire repair.
In this case, TIREFIT cannot properly seal
the tire.
Do not drive the vehicle.
Contact the nearest Mercedes-Benz Center
or call Roadside Assistance.
Warning!
G
Do not exceed vehicle speed of
50 mph (80 km/h). A TIREFIT repair is not
designed to operate at higher speeds.
The sticker must be attached on the instru-
ment cluster where it will be easily seen by
the driver.
Vehicle handling characteristics may
change. Adapt your driving accordingly.
Warning!
G
If tire inflation pressure has fallen below
20 psi (1.3 bar) do not continue to drive the
vehicle.
Park your vehicle safely away from the road-
way and contact the nearest authorized
Mercedes-Benz Center or Roadside
Assistance.
If tire inflation pressure is at least
20 psi (1.3 bar), inflate tire to correct pres-
sure (see placards on driver’s door B-pillar
or on fuel filler flap), and drive vehicle to
nearest tire repair facility to have tire re-
paired or replaced.
Recommended duration of use:
300 miles (500 km) at 50 mph (80 km/h)
with the recommended tire inflation
pressure.
��
Page 355 of 417

354 Practical hintsBatteries Your vehicle is equipped with two batter-
ies:�
The starter battery (located in the
trunk)
�
The battery for electrical consumers
(located in the trunk)Warning!
G
Failure to follow these instructions can re-
sult in severe injury or death.
Never lean over batteries while connecting,
you might get injured.
Observe all safety instructions and precau-
tions when handling automotive batteries
(�page 250).
Battery fluid contains sulfuric acid. Do not
allow this fluid to come in contact with eyes,
skin or clothing. In case it does, immediately
flush affected area with water and seek
medical help if necessary.
A battery will also produce hydrogen gas,
which is flammable and explosive. Keep
flames or sparks away from battery, avoid
improper connection of jumper cables,
smoking, etc.!You must not jump start the vehicle,
otherwise the vehicle electrical sys-
tems could be damaged.
Only use the battery charge unit tested
and approved by Mercedes-Benz for
use on the SLR to charge the battery or
maintain the battery charge. Using oth-
er battery chargers may cause damage
to the vehicle and/or personal injury.
Information on charging the batteries
(�page 355).
Have the batteries checked regularly
by an authorized Mercedes-Benz
Center. Refer to Maintenance Booklet
for maintenance intervals or contact an
authorized Mercedes-Benz Center for
further information.
If it is necessary to replace the batter-
ies, notify an authorized
Mercedes-Benz Center.Warning!
G
Do not place metal objects on the battery as
this could result in a short circuit.
Use leak-proof batteries only to avoid the
risk of acid burns in the event of an
accident.
Page 357 of 417
356 Practical hintsBatteriesCharging with the battery charger
Only use the battery charge unit approved
by Mercedes-Benz and supplied with your
vehicle. This charger is designed to auto-
matically control the charge rate, and
charge the battery or maintain the existing
charge in the battery while the vehicle is
parked and not being driven for long peri-
ods of time (on average approximately
three weeks or more). Not driving the vehi-
cle for such extended periods may cause
the charge in the vehicle battery to drop.
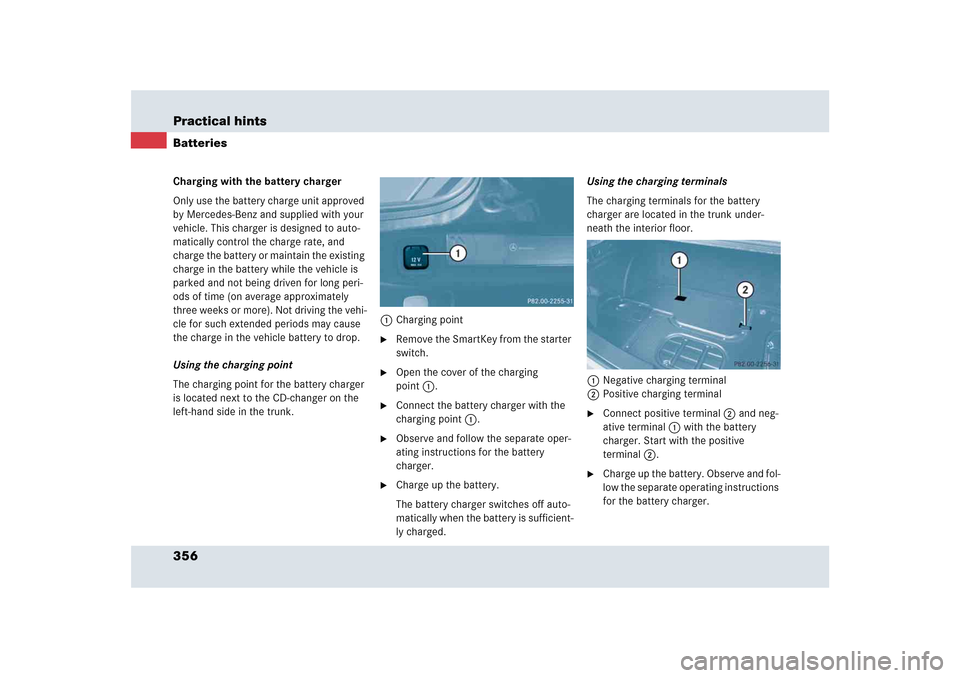
Using the charging point
The charging point for the battery charger
is located next to the CD-changer on the
left-hand side in the trunk.1Charging point
�
Remove the SmartKey from the starter
switch.
�
Open the cover of the charging
point1.
�
Connect the battery charger with the
charging point 1.
�
Observe and follow the separate oper-
ating instructions for the battery
charger.
�
Charge up the battery.
The battery charger switches off auto-
matically when the battery is sufficient-
ly charged.Using the charging terminals
The charging terminals for the battery
charger are located in the trunk under-
neath the interior floor.
1Negative charging terminal
2Positive charging terminal
�
Connect positive terminal2 and neg-
ative terminal1 with the battery
charger. Start with the positive
terminal2.
�
Charge up the battery. Observe and fol-
low the separate operating instructions
for the battery charger.
Page 375 of 417
374 Technical dataWeightsTrunk load max.
220 lbs (100 kg)
Page 394 of 417
393 Index
B
BabySmart
TM
Self-test 75
BabySmart
TM airbag deactivation
system 75, 385
BabySmartTM compatible child
seats 385
Back up lamp 347
Bar 278
BAS 79, 81, 385
BAS/ESP
Indicator lamp 296
Batteries, SmartKey
Check lamp 99
Replacing 344
Batteries, vehicle 250
Charging 355
Consumer battery 250, 354
Maintenance 354
Messages in the multifunction
display 310
Starter battery 250
Battery charger 356
Bead 278Bi-Xenon headlamps 385
Body surface 289
Brake fluid 375, 378
Checking 241
Brake lamp
High mounted 347
Brake pads
Messages in the multifunction
display 317
Brake warning lamp 29, 298
Brake/parking lamp 347
Brakes 230
Break-in period 228
Bulbs
Changing 346
Front 347
Messages in the multifunction
display 323
Rear 347
Button
Audio system 146C
CAC 385
CAN system 386
Capacities
Fuels, coolants, lubricants etc. 375
Cargo area see Trunk
Cassette operation
Playing cassettes 152
Catalytic converter 237
CD changer 156
Loading/unloading a CD
magazine 157
Location 157
CD operation 156
CD player
Operating 123
Cellular phone
Delayed switch-off time 205
Inserting the cradle 205
Making calls in hands-free mode 207
Making calls in private mode 206
Re-inserting 206
Removing the cradle 204
Page 395 of 417
394 IndexCenter air vents 31
Center console
Lower part 32
Upper part 31
Center storage compartment 201
Centigrade
Setting temperature units 129
Central locking
Automatic 103
Central locking switch 31, 103
Switching on/off (control
system) 135
Unlocking from inside 103
Changing
Bulbs 346
CDs 156
Charging the batteries (vehicle) 355
Battery charger 356Checking
Brake fluid 241
Coolant level 241, 249
Engine oil level 241
Tire inflation pressure 242
Vehicle lighting 242
Washer reservoir level 242
Child safety
Airbags 64
Automatic child seat recognition 75
Infant and child restraint systems 62
Cigarette lighter 202
Cleaning
Headlamps 178, 293
Vehicle 290
Windows 292
Windshield 53
Wiper blades 291Cleaning tires 255
Clearing
Service display 286
Clock 128
Closing
Hood 246
Trunk lid 102
Windows 193, 194
Windows with SmartKey 195
Cockpit 26, 386
Cold tire inflation pressure 278
Combination switch 27, 51, 109
High beam flasher 51
Windshield wipers 52
Comfort
Shift program mode 173
Compact guide 341
Control and operation of radio
transmitters 237
Page 398 of 417
397 Index
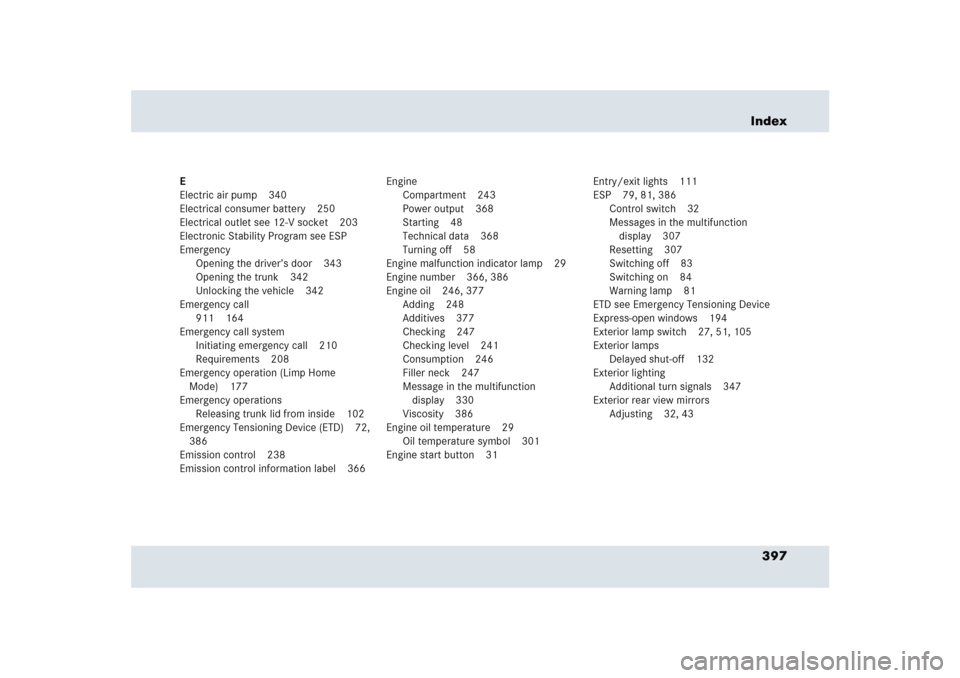
E
Electric air pump 340
Electrical consumer battery 250
Electrical outlet see 12-V socket 203
Electronic Stability Program see ESP
Emergency
Opening the driver’s door 343
Opening the trunk 342
Unlocking the vehicle 342
Emergency call
911 164
Emergency call system
Initiating emergency call 210
Requirements 208
Emergency operation (Limp Home
Mode) 177
Emergency operations
Releasing trunk lid from inside 102
Emergency Tensioning Device (ETD) 72,
386
Emission control 238
Emission control information label 366Engine
Compartment 243
Power output 368
Starting 48
Technical data 368
Turning off 58
Engine malfunction indicator lamp 29
Engine number 366, 386
Engine oil 246, 377
Adding 248
Additives 377
Checking 247
Checking level 241
Consumption 246
Filler neck 247
Message in the multifunction
display 330
Viscosity 386
Engine oil temperature 29
Oil temperature symbol 301
Engine start button 31Entry/exit lights 111
ESP 79, 81, 386
Control switch 32
Messages in the multifunction
display 307
Resetting 307
Switching off 83
Switching on 84
Warning lamp 81
ETD see Emergency Tensioning Device
Express-open windows 194
Exterior lamp switch 27, 51, 105
Exterior lamps
Delayed shut-off 132
Exterior lighting
Additional turn signals 347
Exterior rear view mirrors
Adjusting 32, 43