Page 112 of 498
110 Controls in detailLocking and unlockingAutomatic central locking
The doors and the trunk automatically lock
when the ignition is switched on and the
wheels are turning at vehicle speeds of
approximately 9 mph (15 km/h) or more.
You can open a locked door from the
inside. Open doors only when conditions
are safe to do so.
You can deactivate the automatic locking
mode using the control system, see “Set-
ting automatic locking” (
�page 158).
Locking and unlocking from the inside
You can lock or unlock the doors and the
trunk from inside using the central locking
or unlocking switch. This can be useful, for
example, if you want to lock the vehicle
before starting to drive.
You cannot lock or unlock the fuel filler flap
with the central locking or unlocking
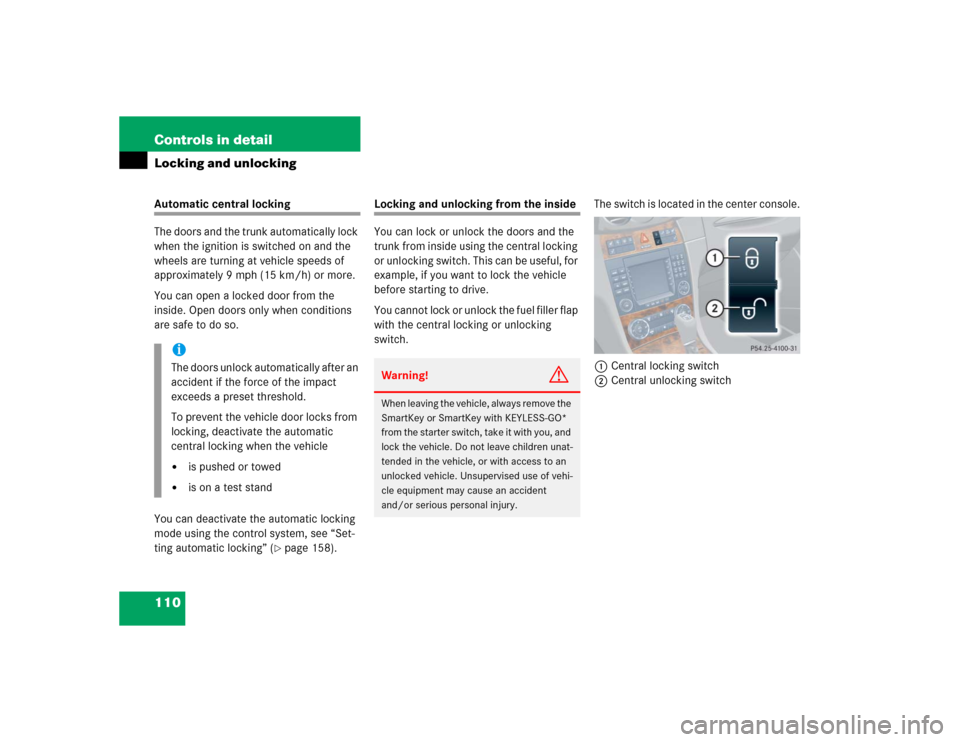
switch.The switch is located in the center console.
1Central locking switch
2Central unlocking switch
iThe doors unlock automatically after an
accident if the force of the impact
exceeds a preset threshold.
To prevent the vehicle door locks from
locking, deactivate the automatic
central locking when the vehicle�
is pushed or towed
�
is on a test stand
Warning!
G
When leaving the vehicle, always remove the
SmartKey or SmartKey with KEYLESS-GO*
from the starter switch, take it with you, and
lock the vehicle. Do not leave children unat-
tended in the vehicle, or with access to an
unlocked vehicle. Unsupervised use of vehi-
cle equipment may cause an accident
and/or serious personal injury.
Page 113 of 498
111 Controls in detail
Locking and unlocking
Locking�
Press central locking switch1.
If both doors are closed, the vehicle
locks.
Unlocking
�
Press central unlocking switch2.
The vehicle unlocks.
iYou can open a locked door from the
inside. Open door only when conditions
are safe to do so.
If the vehicle was previously centrally
locked with the SmartKey or the
SmartKey with KEYLESS-GO*, it will
not unlock using the central unlocking
switch2.
If the vehicle was previously locked
with the central locking switch1�
while in the global remote control
mode, the complete vehicle is
unlocked when a door is opened
from the inside.
�
while in the selective remote con-
trol mode, only the door opened
from inside is unlocked.
Page 114 of 498
112 Controls in detailSeatsFor information on seat adjustment, see
“Adjusting” (
�page 37).
Easy-entry/exit feature
This feature allows for easier entry into and
exit from the vehicle.
The easy-entry/exit feature can be
activated or deactivated in the Convenience
submenu of the control
system (
�page 159).When exiting the vehicle, with the
easy-entry/exit feature activated and
depending on your selection, the steering
wheel tilts upwards and/or the driver’s
seat moves a few inches to the rear when
you:
�
remove the SmartKey from the starter
switch,
or
�
open the driver’s door with the
SmartKey in starter switch position0
or1 or the KEYLESS-GO* start/stop
button (
�page 35) in position1.
Warning!
G
You must make sure that no one can be-
come trapped or injured by the moving
steering wheel and driver’s seat when the
easy-entry / exit feature is activated.
To cancel seat /steering wheel movement,
do one of the following:�
Press seat adjustment switch
(�page 37).
�
Move steering column stalk
(�page 40).
�
Press memory position switch
(�page 122)
Do not leave children unattended in the ve-
hicle, or with access to an unlocked vehicle.
Children could open the driver’s door and
unintentionally activate the easy-entry/exit
feature, which could result in an accident
and/or serious personal injury.
iIf the current position for the steering
wheel is in the uppermost tilt position,
the steering wheel will no longer be
able to move upward when the
easy-entry/exit feature is activated.
Page 118 of 498
116 Controls in detailSeatsFolding head restraints back with re-
lease button
1Release button�
Push release button1.
The head restraints will fold backward.Folding head restraints back with
switch in the center console
1Rear head restraints folding switch
�
Start the engine (
�page 46).
�
Press switch1 to release the head re-
straints.
The head restraints will fold backward.Placing rear head restraints upright
�
Pull the rear head restraint forward un-
til it locks into position.
iYou can also fold the head restraints
back using the switch in the center
console.
Warning!
G
Make sure the head restraints engage when
placing them upright. Otherwise their pro-
tective function cannot be assured.
Page 134 of 498
132 Controls in detailLightingInterior lighting
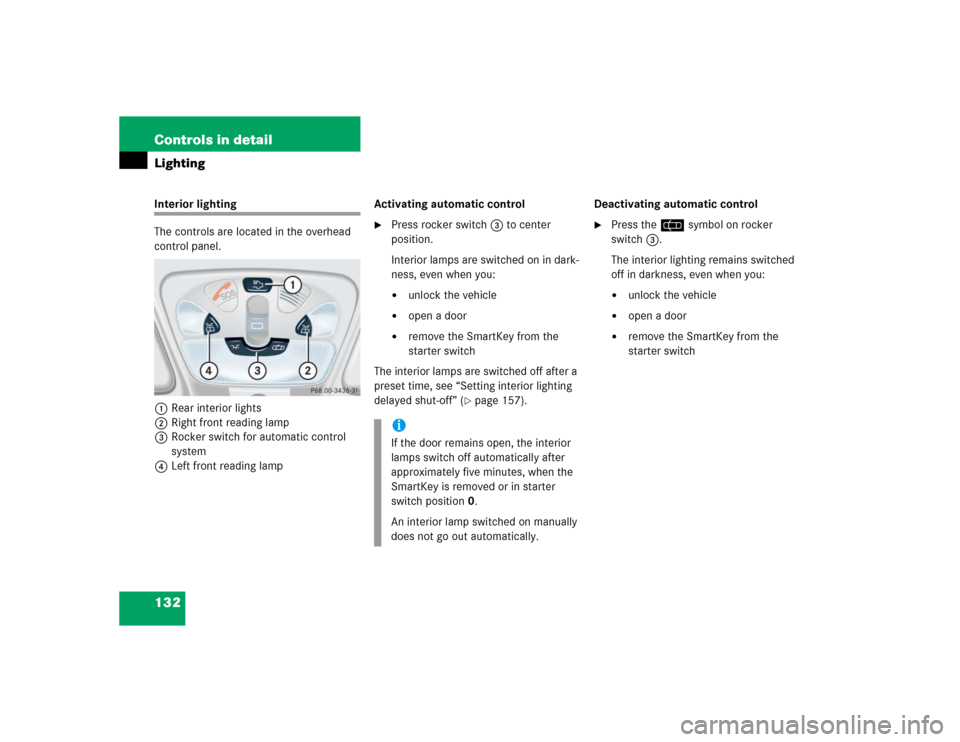
The controls are located in the overhead
control panel.
1Rear interior lights
2Right front reading lamp
3Rocker switch for automatic control
system
4Left front reading lampActivating automatic control
�
Press rocker switch3 to center
position.
Interior lamps are switched on in dark-
ness, even when you:�
unlock the vehicle
�
open a door
�
remove the SmartKey from the
starter switch
The interior lamps are switched off after a
preset time, see “Setting interior lighting
delayed shut-off” (
�page 157).Deactivating automatic control
�
Press the = symbol on rocker
switch3.
The interior lighting remains switched
off in darkness, even when you:�
unlock the vehicle
�
open a door
�
remove the SmartKey from the
starter switch
iIf the door remains open, the interior
lamps switch off automatically after
approximately five minutes, when the
SmartKey is removed or in starter
switch position0.
An interior lamp switched on manually
does not go out automatically.
Page 136 of 498
134 Controls in detailInstrument clusterFor a full view illustration of the instrument
cluster, see “Instrument cluster”
(�page 24).
1Reset button
The instrument cluster is activated when
you
�
open a door
�
switch on ignition (
�page 36)
�
press the reset button1
�
switch on the exterior lamps
You can change the instrument cluster
settings in the Instrument cluster submenu
of the control system (
�page 149).
Instrument cluster illumination
Use the reset button1 to adjust the
illumination brightness for the instrument
cluster.To brighten illumination
�
Turn reset button1 clockwise.
The instrument cluster illumination will
brighten.
To dim illumination
�
Turn reset button1 counterclock-
wise.
The instrument cluster illumination will
dim.
iThe instrument cluster illumination is
dimmed or brightened automatically to
suit ambient light conditions.
The instrument cluster illumination will
also be adjusted automatically when
you switch on the vehicle’s exterior
lamps.
Page 150 of 498
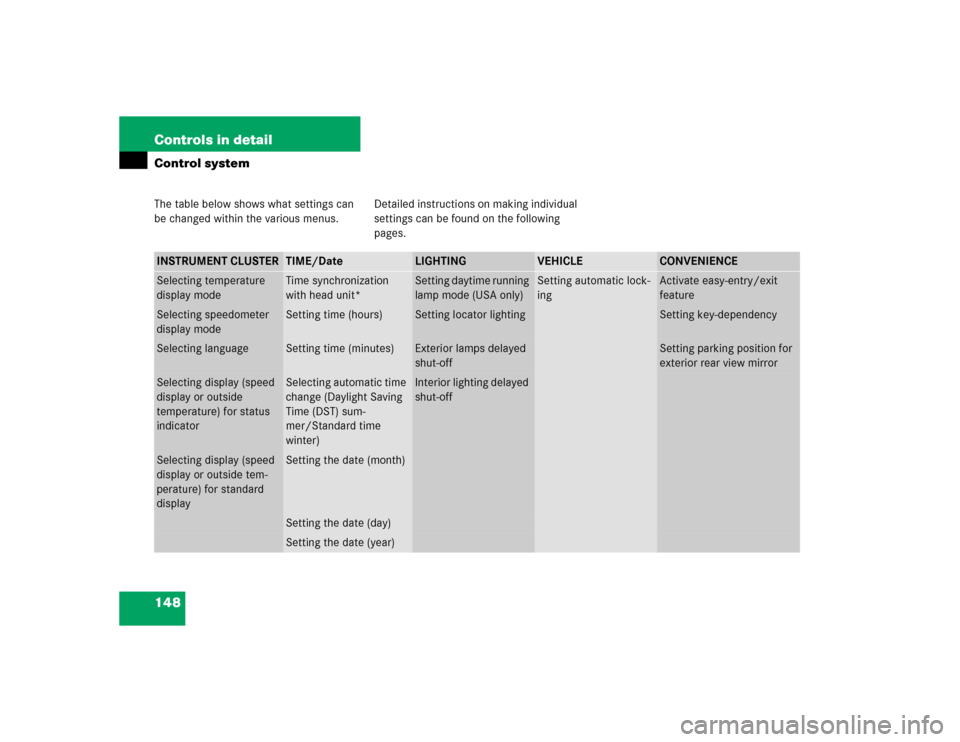
148 Controls in detailControl systemThe table below shows what settings can
be changed within the various menus. Detailed instructions on making individual
settings can be found on the following
pages.INSTRUMENT CLUSTER
TIME/Date
LIGHTING
VEHICLE
CONVENIENCE
Selecting temperature
display mode
Time synchronization
with head unit*
Setting daytime running
lamp mode (USA only)
Setting automatic lock-
ing
Activate easy-entry/exit
feature
Selecting speedometer
display mode
Setting time (hours)
Setting locator lighting
Setting key-dependency
Selecting language
Setting time (minutes)
Exterior lamps delayed
shut-off
Setting parking position for
exterior rear view mirror
Selecting display (speed
display or outside
temperature) for status
indicator
Selecting automatic time
change (Daylight Saving
Time (DST) sum-
mer/Standard time
winter)
Interior lighting delayed
shut-off
Selecting display (speed
display or outside tem-
perature) for standard
display
Setting the date (month)Setting the date (day)Setting the date (year)
Page 154 of 498
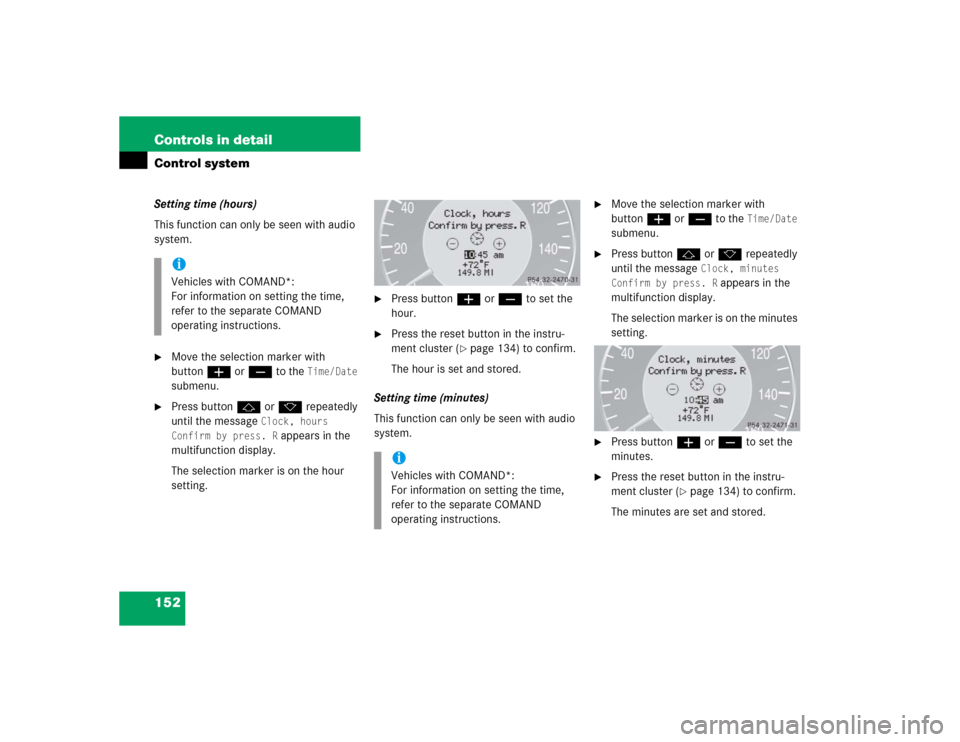
152 Controls in detailControl systemSetting time (hours)
This function can only be seen with audio
system.�
Move the selection marker with
buttonæ orç to the
Time/Date
submenu.
�
Press buttonj ork repeatedly
until the message
Clock, hours
Confirm by press. R
appears in the
multifunction display.
The selection marker is on the hour
setting.
�
Press buttonæ orç to set the
hour.
�
Press the reset button in the instru-
ment cluster (
�page 134) to confirm.
The hour is set and stored.
Setting time (minutes)
This function can only be seen with audio
system.
�
Move the selection marker with
buttonæ orç to the
Time/Date
submenu.
�
Press buttonj ork repeatedly
until the message
Clock, minutes
Confirm by press. R
appears in the
multifunction display.
The selection marker is on the minutes
setting.
�
Press buttonæ orç to set the
minutes.
�
Press the reset button in the instru-
ment cluster (
�page 134) to confirm.
The minutes are set and stored.
iVehicles with COMAND*:
For information on setting the time,
refer to the separate COMAND
operating instructions.
iVehicles with COMAND*:
For information on setting the time,
refer to the separate COMAND
operating instructions.