Page 96 of 474
95
Controls in detail
Locking and unlocking
Opening the trunk lid
A minimum height clearance of 7.1 ft.
(2.16 m) is required to open the trunk lid.
The handle is located above the rear li-
cense plate recess.
1 Handle The vehicle must be unlocked.
�
Pull on handle
1.
The trunk lid unlocks.
�
Lift the trunk lid.
The trunk can also be opened from its in-
side in an emergency, see “Trunk lid emer-
gency release” (
�page 96).
Closing the trunk lid
1 Handle�
Lower trunk lid by pulling firmly on
grip 1.
�
Close trunk lid with hands placed flat
on the trunk lid.
!Always make sure there is sufficient
overhead clearance.
Page 97 of 474
96 Controls in detailLocking and unlocking
Trunk lid emergency release
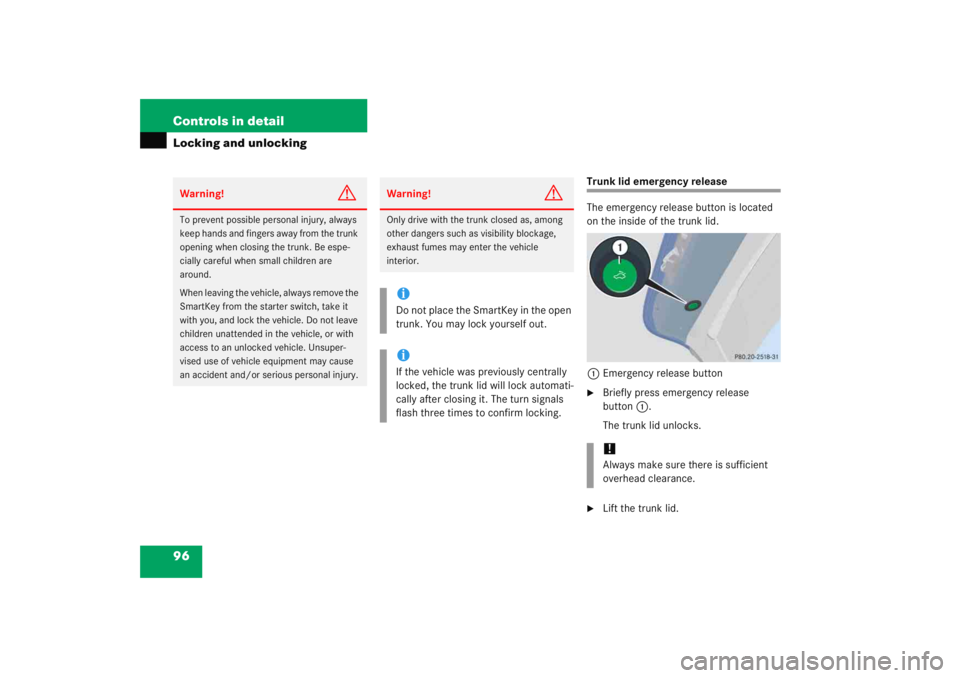
The emergency release button is located
on the inside of the trunk lid.1 Emergency release button�
Briefly press emergency release
button 1.
The trunk lid unlocks.
�
Lift the trunk lid.
Warning!
G
To prevent possible personal injury, always
keep hands and fingers away from the trunk
opening when closing the trunk. Be espe-
cially careful when small children are
around.
When leaving the vehicle, always remove the
SmartKey from the starter switch, take it
with you, and lock the vehicle. Do not leave
children unattended in the vehicle, or with
access to an unlocked vehicle. Unsuper-
vised use of vehicle equipment may cause
an accident and/or serious personal injury.
Warning!
G
Only drive with the trunk closed as, among
other dangers such as visibility blockage,
exhaust fumes may enter the vehicle
interior.iDo not place the SmartKey in the open
trunk. You may lock yourself out.iIf the vehicle was previously centrally
locked, the trunk lid will lock automati-
cally after closing it. The turn signals
flash three times to confirm locking.
!Always make sure there is sufficient
overhead clearance.
Page 98 of 474
97
Controls in detail
Locking and unlocking
Illumination of the emergency release
button:�
The button will flash for 30 minutes
after opening the trunk.
�
The button will flash for 60 minutes
after closing the trunk.
Automatic central locking
The doors and the trunk lid automatically
lock when the ignition is switched on and
the wheels are turning at vehicle speeds of
approximately 9 mph (15 km/h) or more.
You can open a locked door from the in-
side. Open door only when conditions are
safe to do so.
You can deactivate the automatic locking
mode using the control system
(�page 148).
iThe emergency release button unlocks
and opens the trunk while the vehicle is
standing still or in motion.iThe emergency release button does
not open the trunk lid if the vehicle bat-
tery is discharged or disconnected.
iIf the emergency release button is
pressed and the vehicle was centrally
locked from the outside using the
SmartKey, the exterior lamps will flash
and the alarm will sound as the trunk
lid opens. To cancel the alarm, do one
of the following:�
Press button
Œ or‹ on the
SmartKey.
�
Insert the SmartKey in the starter
switch.
iThe doors unlock automatically after an
accident if the force of the impact
exceeds a preset threshold.
To prevent the vehicle door locks from
locking, deactivate the automatic cen-
tral locking when the vehicle�
is pushed or towed
�
is on a test stand
Page 99 of 474
98 Controls in detailLocking and unlockingLocking and unlocking from the inside
You can lock or unlock the doors and the
trunk lid from inside using the central lock-
ing switch. This can be useful, for example,
if you want to lock the vehicle before start-
ing to drive.
You cannot lock or unlock the fuel filler flap
with the central locking switch.Depending on production date, your
vehicle is equipped with either switch de-
sign A or B.
The switches are located in the center
console.
Switch design A1
Central locking switch
2 Central unlocking switch
Switch design B1Central locking switch
2 Central unlocking switch
Warning!
G
When leaving the vehicle, always remove the
SmartKey from the starter switch, take it
with you, and lock the vehicle. Do not leave
children unattended in the vehicle, or with
access to an unlocked vehicle. Unsuper-
vised use of vehicle equipment may cause
an accident and/or serious personal injury.
Page 119 of 474
118 Controls in detailLightingManual control
Switching all front interior lights on and
off�
Press the Wsymbol on rocker
switch 3.
The front interior lights come on.
�
Press rocker switch 3 to center
position to activate the automatic
control.
Switching rear interior lights on and off
�
Press button V.
The lights in the rear passenger
compartment come on.
�
Press button V again.
The lights in the rear passenger
compartment go out. Switching right front reading lamp on
and off
�
Press right button
X.
The right reading lamp comes on.
�
Press right button X again.
The right reading lamp goes out.
Switching left front reading lamp on and
off
�
Press left button X.
The left reading lamp comes on.
�
Press left button X again.
The left reading lamp goes out.
iThe setting selected for the interior
lighting is used for the trunk lighting as
well.
If you leave the trunk lid open for an ex-
tended period of time, the trunk light-
ing will switch off automatically after
approximately ten minutes.
Page 251 of 474
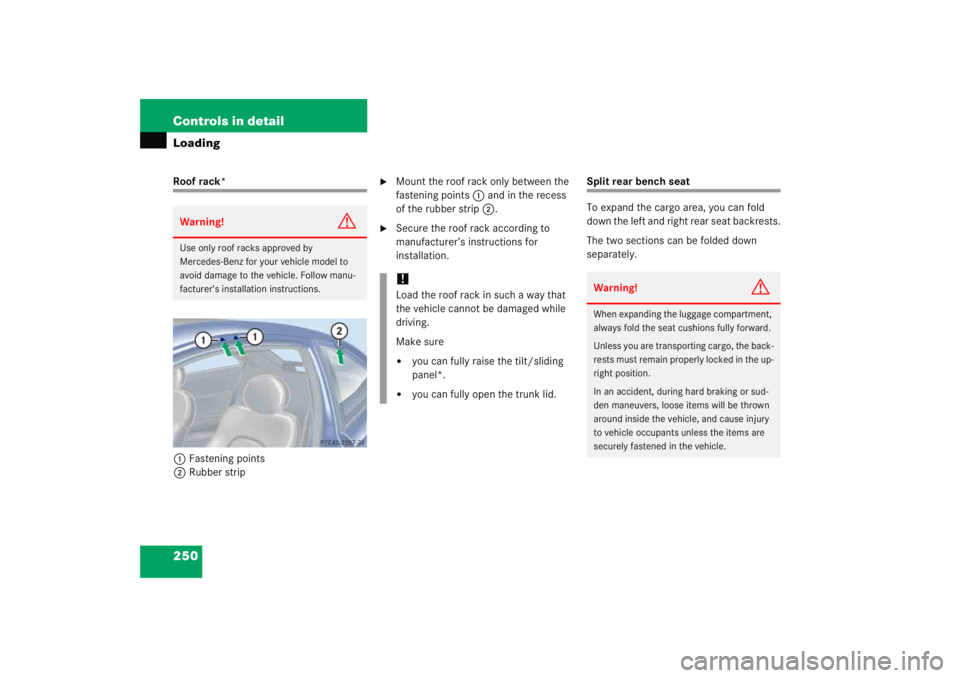
250 Controls in detailLoadingRoof rack*1 Fastening points
2 Rubber strip
�
Mount the roof rack only between the
fastening points 1 and in the recess
of the rubber strip 2.
�
Secure the roof rack according to
manufacturer’s instructions for
installation.
Split rear bench seat
To expand the cargo area, you can fold
down the left and right rear seat backrests.
The two sections can be folded down
separately.
Warning!
G
Use only roof racks approved by
Mercedes-Benz for your vehicle model to
avoid damage to the vehicle. Follow manu-
facturer’s installation instructions.
!Load the roof rack in such a way that
the vehicle cannot be damaged while
driving.
Make sure�
you can fully raise the tilt/sliding
panel*.
�
you can fully open the trunk lid.
Warning!
G
When expanding the luggage compartment,
always fold the seat cushions fully forward.
Unless you are transporting cargo, the back-
rests must remain properly locked in the up-
right position.
In an accident, during hard braking or sud-
den maneuvers, loose items will be thrown
around inside the vehicle, and cause injury
to vehicle occupants unless the items are
securely fastened in the vehicle.
Page 253 of 474
252 Controls in detailLoading
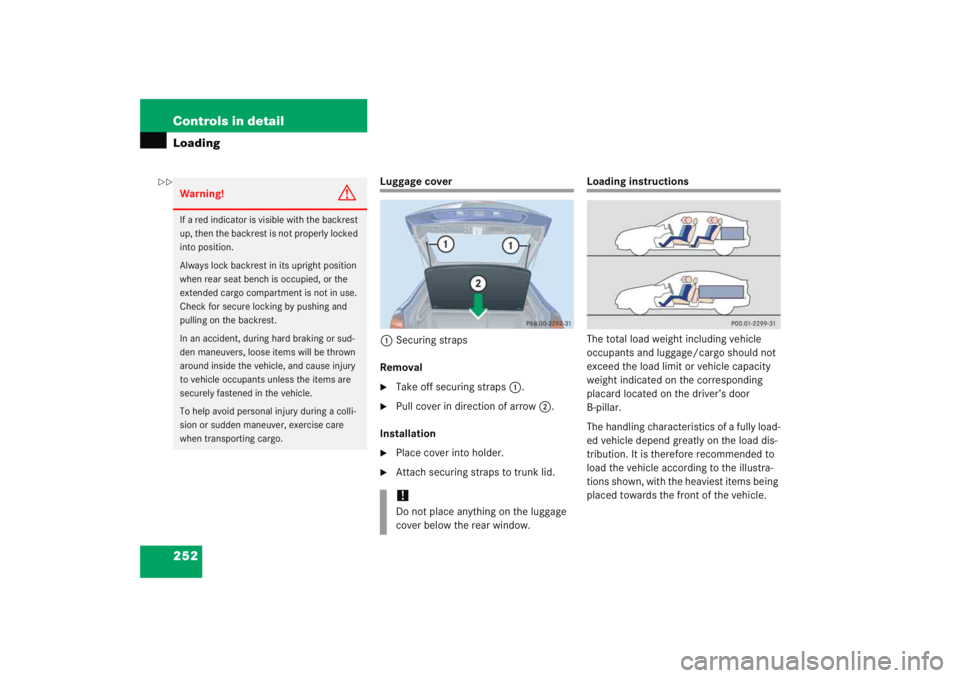
Luggage cover1 Securing straps
Removal�
Take off securing straps 1.
�
Pull cover in direction of arrow 2.
Installation
�
Place cover into holder.
�
Attach securing straps to trunk lid.
Loading instructions
The total load weight including vehicle
occupants and luggage/cargo should not
exceed the load limit or vehicle capacity
weight indicated on the corresponding
placard located on the driver’s door
B-pillar.
The handling characteristics of a fully load-
ed vehicle depend greatly on the load dis-
tribution. It is therefore recommended to
load the vehicle according to the illustra-
tions shown, with the heaviest items being
placed towards the front of the vehicle.
Warning!
G
If a red indicator is visible with the backrest
up, then the backrest is not properly locked
into position.
Always lock backrest in its upright position
when rear seat bench is occupied, or the
extended cargo compartment is not in use.
Check for secure locking by pushing and
pulling on the backrest.
In an accident, during hard braking or sud-
den maneuvers, loose items will be thrown
around inside the vehicle, and cause injury
to vehicle occupants unless the items are
securely fastened in the vehicle.
To help avoid personal injury during a colli-
sion or sudden maneuver, exercise care
when transporting cargo.
!Do not place anything on the luggage
cover below the rear window.
��
Page 254 of 474
253
Controls in detail
Loading
Always place items being carried against
front or rear seat backrests, and fasten
them as securely as possible.
The heaviest portion of the cargo should
always be kept as low as possible since it
influences the handling characteristics of
the vehicle.
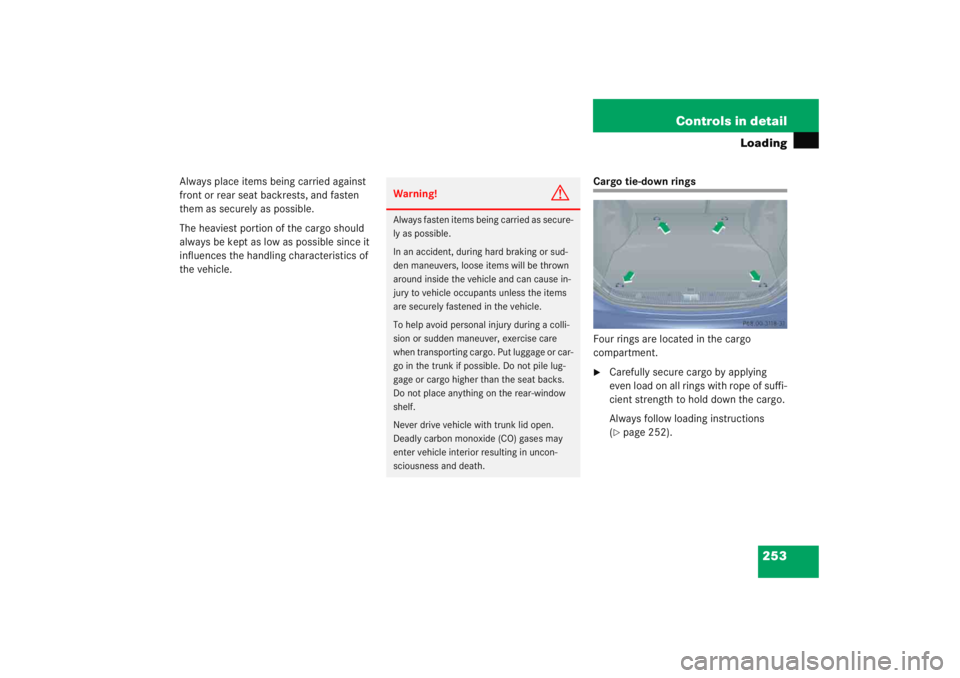
Cargo tie-down rings
Four rings are located in the cargo
compartment.�
Carefully secure cargo by applying
even load on all rings with rope of suffi-
cient strength to hold down the cargo.
Always follow loading instructions
(�page 252).
Warning!
G
Always fasten items being carried as secure-
ly as possible.
In an accident, during hard braking or sud-
den maneuvers, loose items will be thrown
around inside the vehicle and can cause in-
jury to vehicle occupants unless the items
are securely fastened in the vehicle.
To help avoid personal injury during a colli-
sion or sudden maneuver, exercise care
when transporting cargo. Put luggage or car-
go in the trunk if possible. Do not pile lug-
gage or cargo higher than the seat backs.
Do not place anything on the rear-window
shelf.
Never drive vehicle with trunk lid open.
Deadly carbon monoxi
de (CO) gases may
enter vehicle interior resulting in uncon-
sciousness and death.