Page 274 of 318

Maintenance
30
7
1 23456789
MANUAL TRANSAXLE (IF EQUIPPED)
Checking the manual
transaxle oil level
1. Raise and suitably support the vehicle.
2. Remove the fill/check plug on theside of the transaxle. 3. Verify that the oil level reaches the
bottom of the fill/check hole. Fill as
necessary.
If the oil level is low, check for leaks
before adding oil. Do not overfill. Useonly the specified manual transaxleoil. (Refer to “Recommended Lubricants” later in this section.)
4. Install a new washer on the fill/check plug and tighten the plug
1LDN7027
WARNING - Lifting your
vehicle
If you raise your vehicle, always
ensure that it is supported at all
four jacking or lift points for the
vehicle. Do not use jacks meant
for tyre changes. Use only lift
equipment specifically recom-
mended for doing maintenance
work under the vehicle. Place
the vehicle and lift equipment
on a hard, level surface capable
of supporting the full weight of
the vehicle without moving or
deforming. If the support is not
stable, the vehicle could fall andcause serious or fatal injuries.
Follow the instructions with the
lift device.
2LDA7004
Page 275 of 318

731
Maintenance
1 23456789
Changing the manual transaxle oil
1. Raise and suitably support thevehicle.
2. Remove the drain plug on the bot-tom of the transaxle.
3. After the oil has drained complete- ly, install a new washer on the
plug, reinstall the drain plug and 4. Remove the fill/check plug on the
side of the transaxle.
5. Add oil through the fill/check hole until it reaches the bottom of the
fill/check hole.
6. Install a new washer on the fill/check plug.
7. Reinstall and tighten the fill/check
Use only the specified manual
transaxle oil. (Refer to“Recommended Lubricants’’ later in this section.)
1LDN7026
WARNING - Lifting your
vehicle
If you raise your vehicle, always
ensure that it is supported at all
four jacking or lift points for the
vehicle. Do not use jacks meant
for tyre changes. Use only lift
equipment specifically recom-
mended for doing maintenance
work under the vehicle. Place
the vehicle and lift equipment
on a hard, level surface capable
of supporting the full weight of
the vehicle without moving or
deforming. If the support is not
stable, the vehicle could fall andcause serious or fatal injuries.
Follow the instructions with the
lift device.
1LDN7027
Page 277 of 318

733
Maintenance
1 23456789
If the fluid has been warmed to nor-
mal operating temperature of approx-
imately 70~80°C (158~176°F), the
fluid level should be within “HOT”
range.
✽✽ NOTICE
“COLD” scale is for reference only
and should NOT be used to deter-mine transaxle fluid level.
✽
✽ NOTICE
New automatic transaxle fluid
should be red. The red dye is addedso the assembly plant can identify itas automatic transaxle fluid and dis-
tinguish it from engine oil or
antifreeze. The red dye, which is not
an indicator of fluid quality, is not
permanent. As the vehicle is driven,the automatic transaxle fluid will
begin to look darker. The colour
may eventually appear light brown.
Therefore, have an Authorized Kia
dealer change the automatictransaxle fluid according to theScheduled Maintenance at thebeginning of this section.
Changing the automatic transaxle fluid
1. Raise and suitably support the vehicle.
1LDA5009
Type A
1LDE5009
Type B
COLD HOT
WARNING
- Lifting your
vehicle
If you raise your vehicle, always
ensure that it is supported at all
four jacking or lift points for the
vehicle. Do not use jacks meant
for tyre changes. Use only lift
equipment specifically recom-
mended for doing maintenance
work under the vehicle. Place
the vehicle and lift equipment
on a hard, level surface capable
of supporting the full weight of
the vehicle without moving or
deforming. If the support is not
stable, the vehicle could fall andcause serious or fatal injuries.
Follow the instructions with the
lift device.
Page 278 of 318

Maintenance
34
7
1 23456789
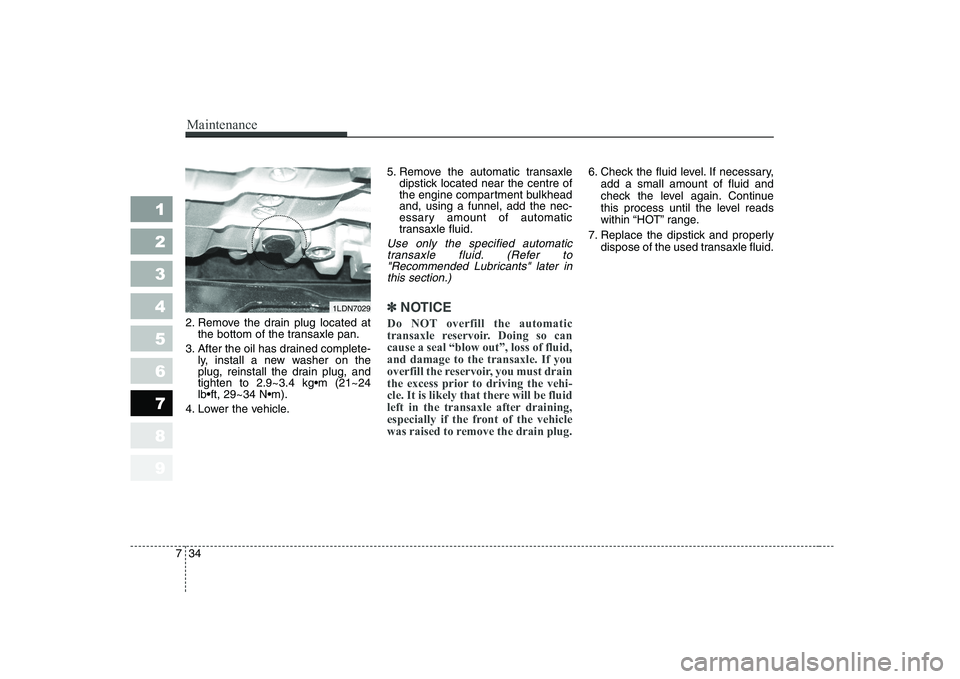
2. Remove the drain plug located at
the bottom of the transaxle pan.
3. After the oil has drained complete- ly, install a new washer on the
plug, reinstall the drain plug, and
4. Lower the vehicle. 5. Remove the automatic transaxle
dipstick located near the centre of
the engine compartment bulkheadand, using a funnel, add the nec-
essary amount of automatic
transaxle fluid.
Use only the specified automatic
transaxle fluid. (Refer to"Recommended Lubricants" later in this section.)
✽✽ NOTICE
Do NOT overfill the automatic
transaxle reservoir. Doing so cancause a seal “blow out”, loss of fluid,and damage to the transaxle. If you
overfill the reservoir, you must drain
the excess prior to driving the vehi-
cle. It is likely that there will be fluid
left in the transaxle after draining,
especially if the front of the vehicle
was raised to remove the drain plug.
6. Check the fluid level. If necessary, add a small amount of fluid and
check the level again. Continue
this process until the level reads
within “HOT” range.
7. Replace the dipstick and properly dispose of the used transaxle fluid.
1LDN7029
Page 279 of 318

735
Maintenance
1 23456789
LUBRICANTS AND FLUIDS
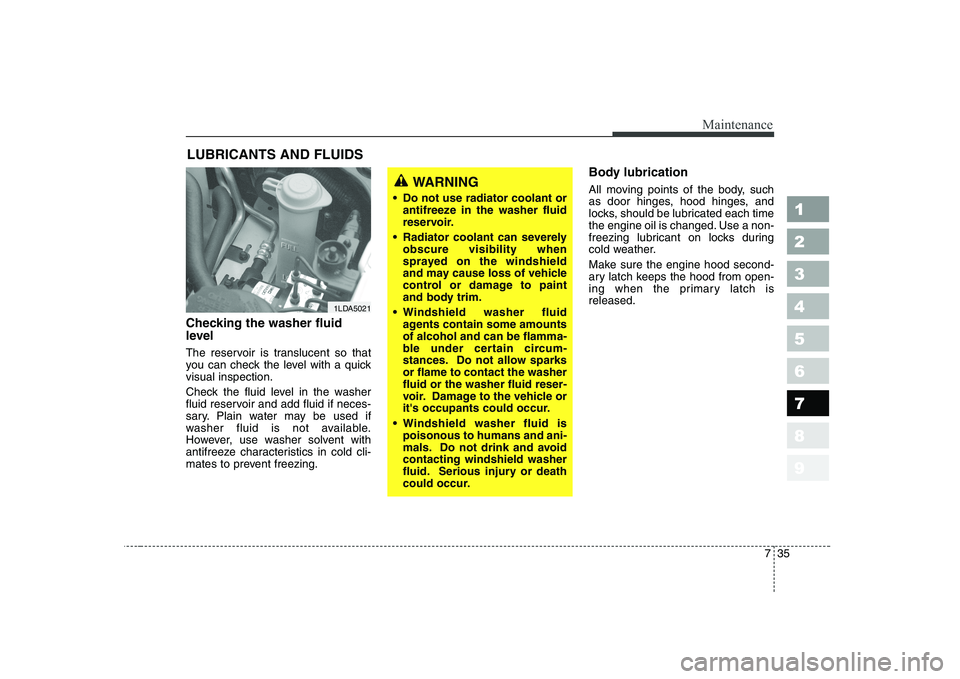
Checking the washer fluid
level
The reservoir is translucent so that
you can check the level with a quickvisual inspection.
Check the fluid level in the washer
fluid reservoir and add fluid if neces-
sary. Plain water may be used if
washer fluid is not available.
However, use washer solvent with
antifreeze characteristics in cold cli-
mates to prevent freezing. Body lubrication
All moving points of the body, such
as door hinges, hood hinges, and
locks, should be lubricated each time
the engine oil is changed. Use a non-
freezing lubricant on locks during
cold weather.
Make sure the engine hood second-
ary latch keeps the hood from open-
ing when the primary latch isreleased.
1LDA5021
WARNING
Do not use radiator coolant or antifreeze in the washer fluid
reservoir.
Radiator coolant can severely obscure visibility when
sprayed on the windshield
and may cause loss of vehicle
control or damage to paint
and body trim.
Windshield washer fluid agents contain some amountsof alcohol and can be flamma-
ble under certain circum-
stances. Do not allow sparksor flame to contact the washerfluid or the washer fluid reser-
voir. Damage to the vehicle or
it's occupants could occur.
Windshield washer fluid is poisonous to humans and ani-
mals. Do not drink and avoidcontacting windshield washer
fluid. Serious injury or death
could occur.
Page 298 of 318
Maintenance
54
7
1 23456789
1. Open the hood.
2. Remove the headlight bulb cover
by turning it counterclockwise.
3. Disconnect the headlight bulb socket-connector.
4. Unsnap the headlight bulb retain- ing wire by depressing the end
and pushing it upward.
5. Remove the bulb from the head- light assembly.
WARNING - Halogen bulbs
Halogen bulbs contain pres-
surized gas that will produce
flying pieces of glass if broken.
Always handle them carefully, and avoid scratches and abra-
sions. If the bulbs are lit, avoid
contact with liquids. Never
touch the glass with bare
hands. Residual oil may cause
the bulb to overheat and burst
when lit. A bulb should be
operated only when installedin a headlight.
(Continued)
(Continued)
If a bulb becomes damaged orcracked, replace it immediate-
ly and carefully dispose of it.
Wear eye protection when changing a bulb. Allow the
bulb to cool down before han-dling it.
1LDA50301LDA7048
Page 304 of 318

Maintenance
60
7
1 23456789
LUBRICANT SPECIFICATIONS
Recommended lubricants
To help achieve proper engine and
powertrain performance and durabil-
ity, use only lubricants of the proper
quality. The correct lubricants alsohelp promote engine efficiency that
results in improved fuel economy. Engine oils labeled Energy
Conserving Oil are now available.
Along with other additional benefits,
they contribute to fuel economy byreducing the amount of fuel neces-
sary to overcome engine friction.
Often, these improvements are diffi-
cult to measure in everyday driving,
but in a year’s time, they can offer
significant cost and energy savings.Recommended SAE viscosity
number
✽✽
NOTICE
Always be sure to clean the area
around any filler plug, drain plug,
or dipstick before checking or drain-
ing any lubricant. This is especially
important in dusty or sandy areasand when the vehicle is used on
unpaved roads. Cleaning the plug
and dipstick areas will prevent dirt
and grit from entering the engine
and other mechanisms that could bedamaged.
*¹ Refer to the recommended SAE viscosity numbers on the next page.
These lubricants and fluids are recommended for use in your vehicle.
Lubricant Classification
API Service SJ, SL or above,
ILSAC GF-3 or above
1.5L API Service CH-4 or above,
ACEA B4 or above
2.0L API Service CF-4 or above,
ACEA B4 or above
Manual transaxle fluid API Service GL-4 (SAE 75W-85, fill-for-life)
Automatic transaxle fluid DIAMOND ATF SP-III or SK ATF SP-III
Power steering fluid PSF-III
Brake/Clutch fluid FMVSS116 DOT-3 or DOT-4
Engine oil *¹
Gasoline Engine
Diesel
Engine
Page 305 of 318

761
Maintenance
1 23456789
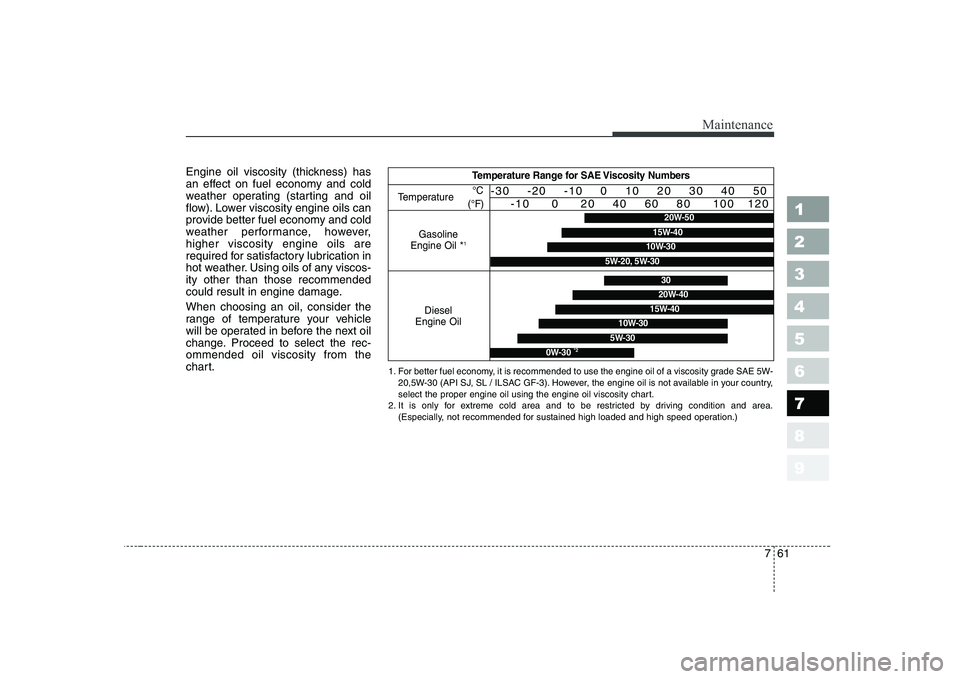
Engine oil viscosity (thickness) has
an effect on fuel economy and cold
weather operating (starting and oil
flow). Lower viscosity engine oils can
provide better fuel economy and cold
weather performance, however,higher viscosity engine oils are
required for satisfactory lubrication in
hot weather. Using oils of any viscos-ity other than those recommended
could result in engine damage. When choosing an oil, consider the
range of temperature your vehicle
will be operated in before the next oil
change. Proceed to select the rec-ommended oil viscosity from the
chart.Temperature Range for SAE Viscosity Numbers
TemperatureGasoline
Engine Oil *
1
°C
(°F)-30 -20 -10 0 10 20 30 40 50 -10 0 20 40 60 80 100 120
1. For better fuel economy, it is recommended to use the engine oil of a viscosity grade SAE 5W-20,5W-30 (API SJ, SL / ILSAC GF-3). However, the engine oil is not available in your country,
select the proper engine oil using the engine oil viscosity chart.
2. It is only for extreme cold area and to be restricted by driving condition and area. (Especially, not recommended for sustained high loaded and high speed operation.)
20W-50
10W-30
15W-40
5W-20, 5W-30
Diesel
Engine Oil
10W-30
30
20W-40
15W-40
0W-30*25W-30