2005 KIA CERATO jacking
[x] Cancel search: jackingPage 240 of 318

619
In case of an emergency
1 23456789
IF YOU HAVE A FLAT TYRE
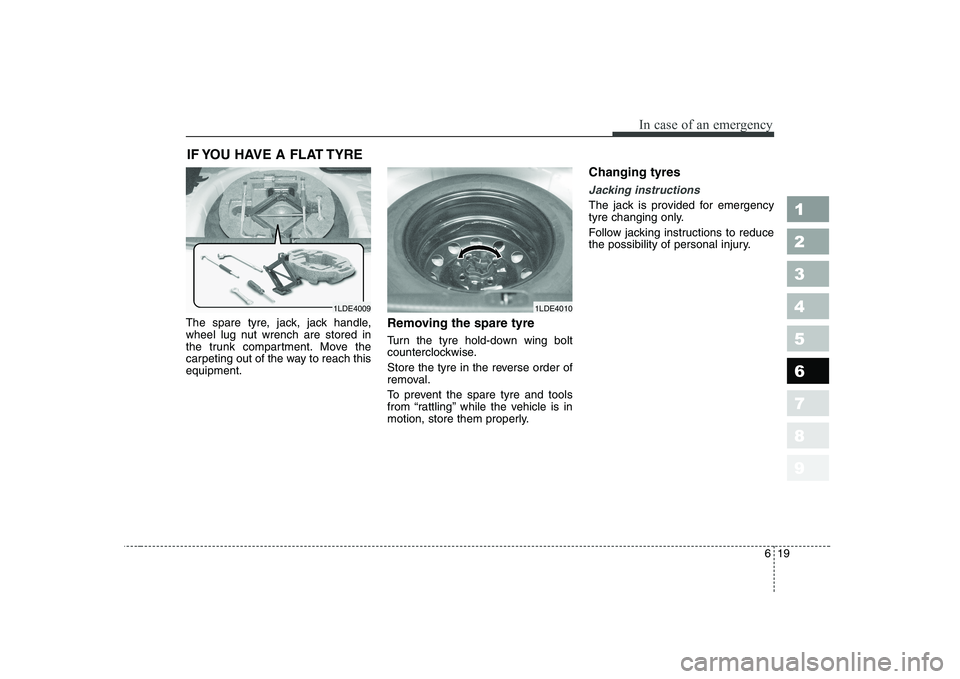
The spare tyre, jack, jack handle,
wheel lug nut wrench are stored in
the trunk compartment. Move the
carpeting out of the way to reach thisequipment. Removing the spare tyre
Turn the tyre hold-down wing bolt
counterclockwise.
Store the tyre in the reverse order of
removal.
To prevent the spare tyre and tools
from “rattling” while the vehicle is in
motion, store them properly.Changing tyres
Jacking instructions
The jack is provided for emergency
tyre changing only.
Follow jacking instructions to reduce
the possibility of personal injury.
1LDE40091LDE4010
Page 241 of 318

In case of an emergency
20
6
1 23456789
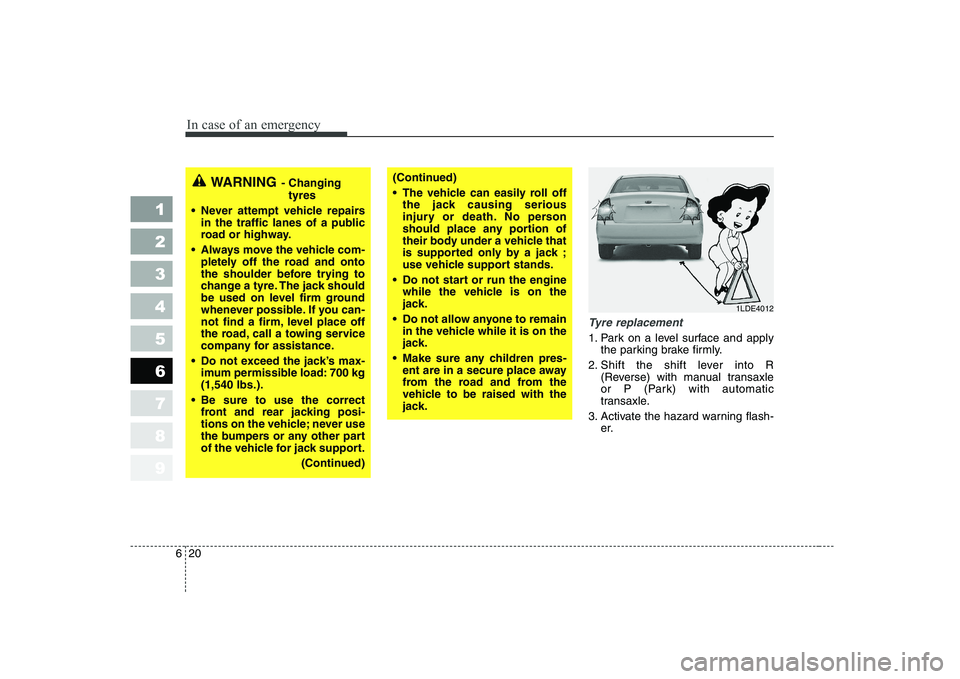
Tyre replacement
1. Park on a level surface and apply
the parking brake firmly.
2. Shift the shift lever into R (Reverse) with manual transaxle
or P (Park) with automatic
transaxle.
3. Activate the hazard warning flash- er.
WARNING - Changing
tyres
Never attempt vehicle repairs in the traffic lanes of a public
road or highway.
Always move the vehicle com- pletely off the road and onto
the shoulder before trying to
change a tyre. The jack should
be used on level firm ground
whenever possible. If you can-
not find a firm, level place off
the road, call a towing service
company for assistance.
Do not exceed the jack’s max- imum permissible load: 700 kg(1,540 lbs.).
Be sure to use the correct front and rear jacking posi-
tions on the vehicle; never use
the bumpers or any other part
of the vehicle for jack support.
(Continued)(Continued)
The vehicle can easily roll offthe jack causing serious
injury or death. No person
should place any portion of
their body under a vehicle that
is supported only by a jack ;
use vehicle support stands.
Do not start or run the engine while the vehicle is on the
jack.
Do not allow anyone to remain in the vehicle while it is on the
jack.
Make sure any children pres- ent are in a secure place away
from the road and from the
vehicle to be raised with the
jack.
1LDE4012
Page 243 of 318

In case of an emergency
22
6
1 23456789
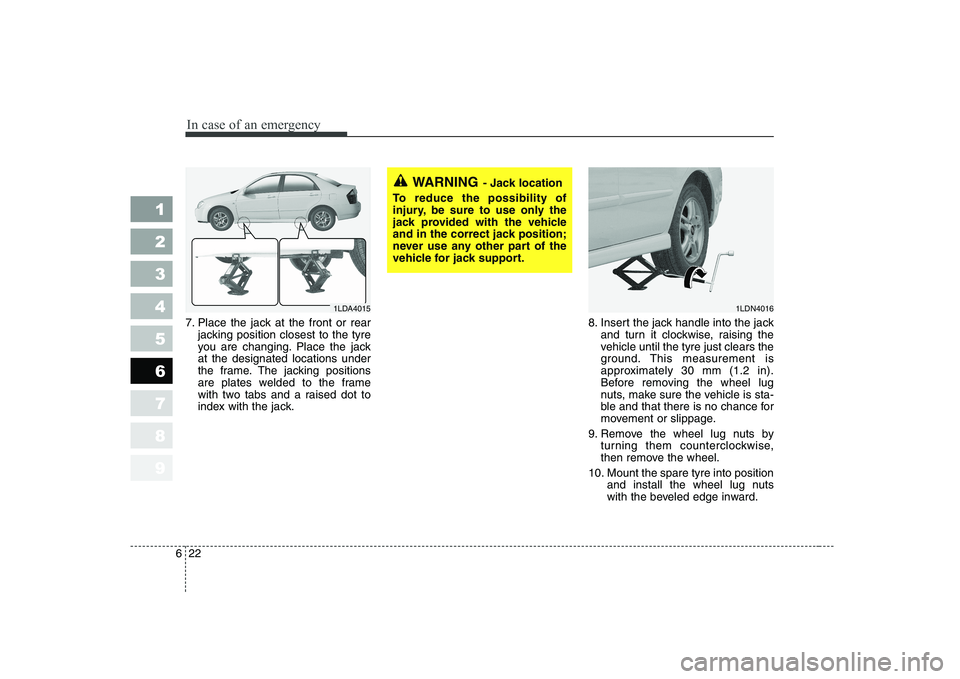
7. Place the jack at the front or rear
jacking position closest to the tyre
you are changing. Place the jackat the designated locations under
the frame. The jacking positions
are plates welded to the frame
with two tabs and a raised dot to
index with the jack. 8. Insert the jack handle into the jack
and turn it clockwise, raising the
vehicle until the tyre just clears the
ground. This measurement is
approximately 30 mm (1.2 in).
Before removing the wheel lug
nuts, make sure the vehicle is sta-
ble and that there is no chance for
movement or slippage.
9. Remove the wheel lug nuts by turning them counterclockwise,
then remove the wheel.
10. Mount the spare tyre into position and install the wheel lug nuts
with the beveled edge inward.
WARNING - Jack location
To reduce the possibility of
injury, be sure to use only the
jack provided with the vehicle
and in the correct jack position;
never use any other part of the
vehicle for jack support.
1LDN40161LDA4015
Page 264 of 318

Maintenance
20
7
1 23456789
1. Warm the engine up for a few min-
utes and then turn it off. Remove
the oil filler cap.
2. Raise and suitably support the vehicle.
3. Drain the oil into a suitable con-tainer by removing the oil drainplug. 4. Remove the engine oil filter with
an oil filter wrench.
✽✽ NOTICE
Do not allow the oil filter gasket to
remain on the oil filter mounting
surface. This will cause oil leakageand engine damage. Remove the oldgasket completely so that a new gas-
ket may be properly seated.
5. Use a clean rag to clean the oil fil- ter mounting surface on the
engine.
6. Apply a small amount of engine oil to the new oil filter O-ring seal.
CAUTION
Both the oil and engine are
hot. Do not burn yourself.
Keep all engine oil out of the reach of children.
1LDN70161LDN7017
WARNING - Lifting your
vehicle
If you raise your vehicle, always
ensure that it is supported at all
four jacking or lift points for the
vehicle. Do not use jacks meant
for tyre changes. Use only lift
equipment specifically recom-
mended for doing maintenance
work under the vehicle. Place
the vehicle and lift equipment
on a hard, level surface capable
of supporting the full weight of
the vehicle without moving or
deforming. If the support is not
stable, the vehicle could fall andcause serious or fatal injuries.
Follow the instructions with the
lift device.
Page 274 of 318

Maintenance
30
7
1 23456789
MANUAL TRANSAXLE (IF EQUIPPED)
Checking the manual
transaxle oil level
1. Raise and suitably support the vehicle.
2. Remove the fill/check plug on theside of the transaxle. 3. Verify that the oil level reaches the
bottom of the fill/check hole. Fill as
necessary.
If the oil level is low, check for leaks
before adding oil. Do not overfill. Useonly the specified manual transaxleoil. (Refer to “Recommended Lubricants” later in this section.)
4. Install a new washer on the fill/check plug and tighten the plug
1LDN7027
WARNING - Lifting your
vehicle
If you raise your vehicle, always
ensure that it is supported at all
four jacking or lift points for the
vehicle. Do not use jacks meant
for tyre changes. Use only lift
equipment specifically recom-
mended for doing maintenance
work under the vehicle. Place
the vehicle and lift equipment
on a hard, level surface capable
of supporting the full weight of
the vehicle without moving or
deforming. If the support is not
stable, the vehicle could fall andcause serious or fatal injuries.
Follow the instructions with the
lift device.
2LDA7004
Page 275 of 318

731
Maintenance
1 23456789
Changing the manual transaxle oil
1. Raise and suitably support thevehicle.
2. Remove the drain plug on the bot-tom of the transaxle.
3. After the oil has drained complete- ly, install a new washer on the
plug, reinstall the drain plug and 4. Remove the fill/check plug on the
side of the transaxle.
5. Add oil through the fill/check hole until it reaches the bottom of the
fill/check hole.
6. Install a new washer on the fill/check plug.
7. Reinstall and tighten the fill/check
Use only the specified manual
transaxle oil. (Refer to“Recommended Lubricants’’ later in this section.)
1LDN7026
WARNING - Lifting your
vehicle
If you raise your vehicle, always
ensure that it is supported at all
four jacking or lift points for the
vehicle. Do not use jacks meant
for tyre changes. Use only lift
equipment specifically recom-
mended for doing maintenance
work under the vehicle. Place
the vehicle and lift equipment
on a hard, level surface capable
of supporting the full weight of
the vehicle without moving or
deforming. If the support is not
stable, the vehicle could fall andcause serious or fatal injuries.
Follow the instructions with the
lift device.
1LDN7027
Page 277 of 318

733
Maintenance
1 23456789
If the fluid has been warmed to nor-
mal operating temperature of approx-
imately 70~80°C (158~176°F), the
fluid level should be within “HOT”
range.
✽✽ NOTICE
“COLD” scale is for reference only
and should NOT be used to deter-mine transaxle fluid level.
✽
✽ NOTICE
New automatic transaxle fluid
should be red. The red dye is addedso the assembly plant can identify itas automatic transaxle fluid and dis-
tinguish it from engine oil or
antifreeze. The red dye, which is not
an indicator of fluid quality, is not
permanent. As the vehicle is driven,the automatic transaxle fluid will
begin to look darker. The colour
may eventually appear light brown.
Therefore, have an Authorized Kia
dealer change the automatictransaxle fluid according to theScheduled Maintenance at thebeginning of this section.
Changing the automatic transaxle fluid
1. Raise and suitably support the vehicle.
1LDA5009
Type A
1LDE5009
Type B
COLD HOT
WARNING
- Lifting your
vehicle
If you raise your vehicle, always
ensure that it is supported at all
four jacking or lift points for the
vehicle. Do not use jacks meant
for tyre changes. Use only lift
equipment specifically recom-
mended for doing maintenance
work under the vehicle. Place
the vehicle and lift equipment
on a hard, level surface capable
of supporting the full weight of
the vehicle without moving or
deforming. If the support is not
stable, the vehicle could fall andcause serious or fatal injuries.
Follow the instructions with the
lift device.