Page 1344 of 3419
TROUBLE DIAGNOSIS - SPECIFICATION VALUE
EC-153
C
D
E
F
G
H
I
J
K
L
MA
EC
Revision: October 20052005 QX56
20. CHECK “A/F ALPHA-B1”, “A/F ALPHA-B2”, AND “B/FUEL SCHDL”
Select “A/F ALPHA-B1”, “A/F ALPHA-B2”, and “B/FUEL SCHDL” in “DATA MONITOR (SPEC)” mode, and
make sure that the each indication is within the SP value.
OK or NG
OK >>INSPECTION END
NG (“B/FUEL SCHDL” is more, “A/F ALPHA-B1”, “A/F ALPHA-B2” are less than the SP value)>>GO TO 21.
21. DISCONNECT AND RECONNECT MASS AIR FLOW SENSOR HARNESS CONNECTOR
1. Stop the engine.
2. Disconnect mass air flow sensor harness connector. Check pin terminal and connector for damage and
then reconnect it again.
>> GO TO 22.
22. CHECK “A/F ALPHA-B1”, “A/F ALPHA-B2”
1. Start engine.
2. Select “A/F ALPHA-B1”, “A/F ALPHA-B2” in “DATA MONITOR (SPEC)” mode, and make sure that the
each indication is within the SP value.
OK or NG
OK >> 1. Detect malfunctioning part of mass air flow sensor circuit and repair it. Refer to EC-183, "DTC
P0102, P0103 MAF SENSOR" .
2. GO TO 29.
NG >> GO TO 23.
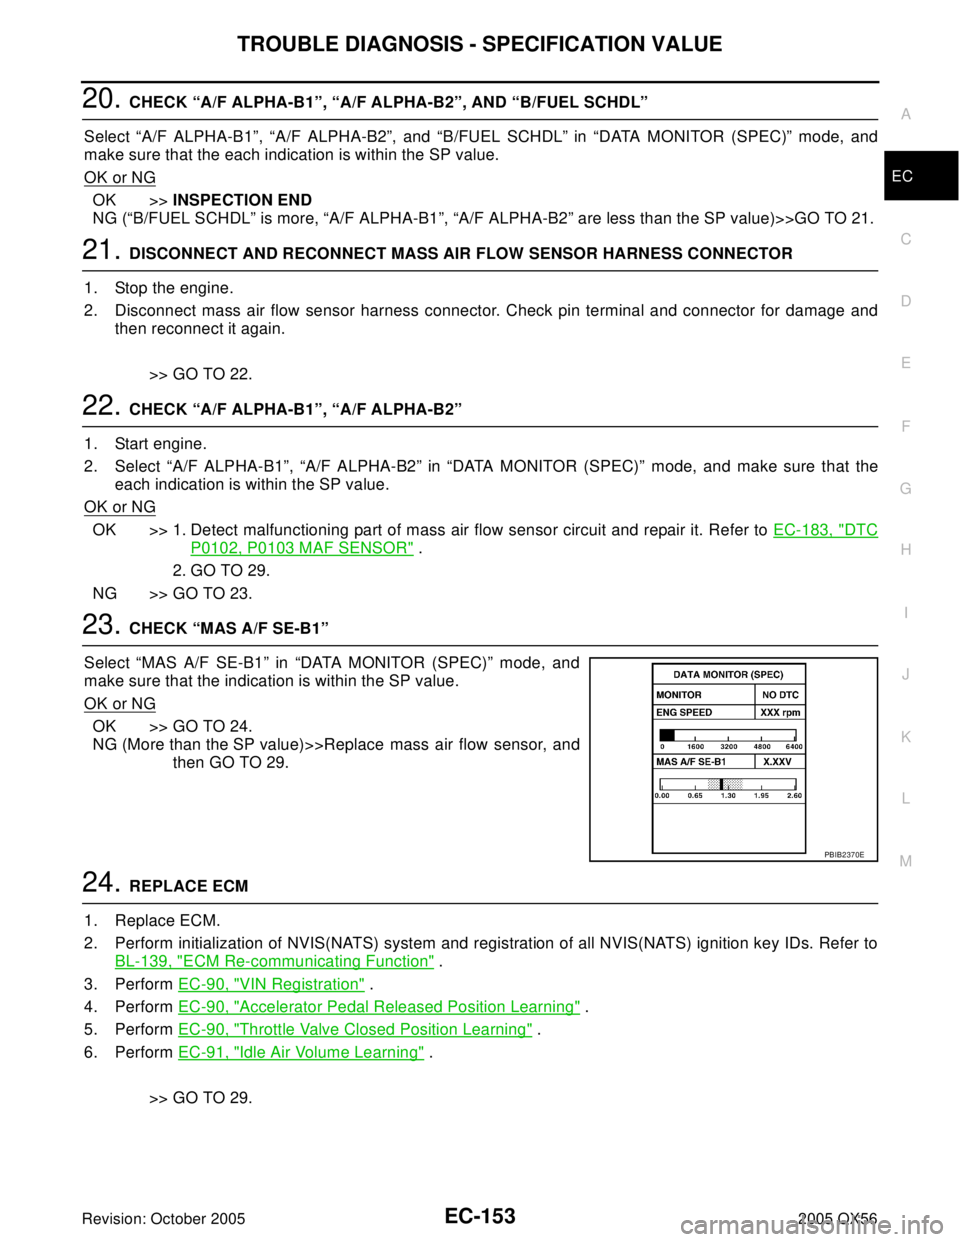
23. CHECK “MAS A/F SE-B1”
Select “MAS A/F SE-B1” in “DATA MONITOR (SPEC)” mode, and
make sure that the indication is within the SP value.
OK or NG
OK >> GO TO 24.
NG (More than the SP value)>>Replace mass air flow sensor, and
then GO TO 29.
24. REPLACE ECM
1. Replace ECM.
2. Perform initialization of NVIS(NATS) system and registration of all NVIS(NATS) ignition key IDs. Refer to
BL-139, "
ECM Re-communicating Function" .
3. Perform EC-90, "
VIN Registration" .
4. Perform EC-90, "
Accelerator Pedal Released Position Learning" .
5. Perform EC-90, "
Throttle Valve Closed Position Learning" .
6. Perform EC-91, "
Idle Air Volume Learning" .
>> GO TO 29.
PBIB2370E
Page 1349 of 3419
EC-158Revision: October 2005
POWER SUPPLY AND GROUND CIRCUIT
2005 QX56
Specification data are reference values and are measured between each terminal and ground.
CAUTION:
Do not use ECM ground terminals when measuring input/output voltage. Doing so may result in dam-
age to the ECM's transistor. Use a ground other than ECM terminals, such as the ground.
Diagnostic ProcedureUBS00H0G
1. INSPECTION START
Start engine.
Is engine running?
Ye s o r N o
Yes >> GO TO 8.
No >> GO TO 2.
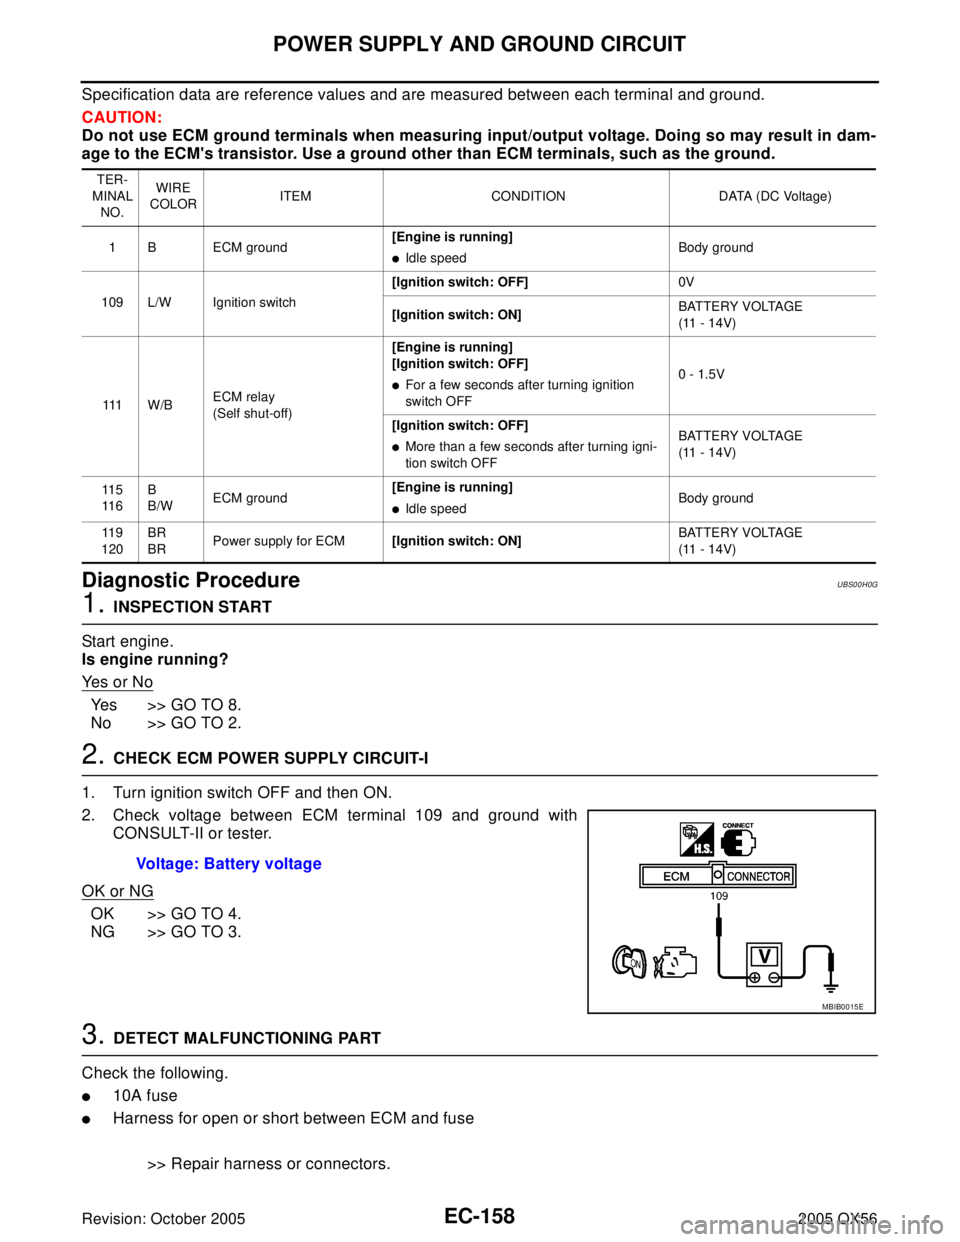
2. CHECK ECM POWER SUPPLY CIRCUIT-I
1. Turn ignition switch OFF and then ON.
2. Check voltage between ECM terminal 109 and ground with
CONSULT-II or tester.
OK or NG
OK >> GO TO 4.
NG >> GO TO 3.
3. DETECT MALFUNCTIONING PART
Check the following.
�10A fuse
�Harness for open or short between ECM and fuse
>> Repair harness or connectors.
TER-
MINAL
NO.WIRE
COLORITEM CONDITION DATA (DC Voltage)
1 B ECM ground[Engine is running]
�Idle speedBody ground
109 L/W Ignition switch[Ignition switch: OFF]0V
[Ignition switch: ON]BATTERY VOLTAGE
(11 - 14V)
111 W /BECM relay
(Self shut-off)[Engine is running]
[Ignition switch: OFF]
�For a few seconds after turning ignition
switch OFF0 - 1.5V
[Ignition switch: OFF]
�More than a few seconds after turning igni-
tion switch OFFBATTERY VOLTAGE
(11 - 14V)
11 5
11 6B
B/WECM ground[Engine is running]
�Idle speedBody ground
11 9
120BR
BRPower supply for ECM[Ignition switch: ON]BATTERY VOLTAGE
(11 - 14V)
Voltage: Battery voltage
MBIB0015E
Page 1350 of 3419
POWER SUPPLY AND GROUND CIRCUIT
EC-159
C
D
E
F
G
H
I
J
K
L
MA
EC
Revision: October 20052005 QX56
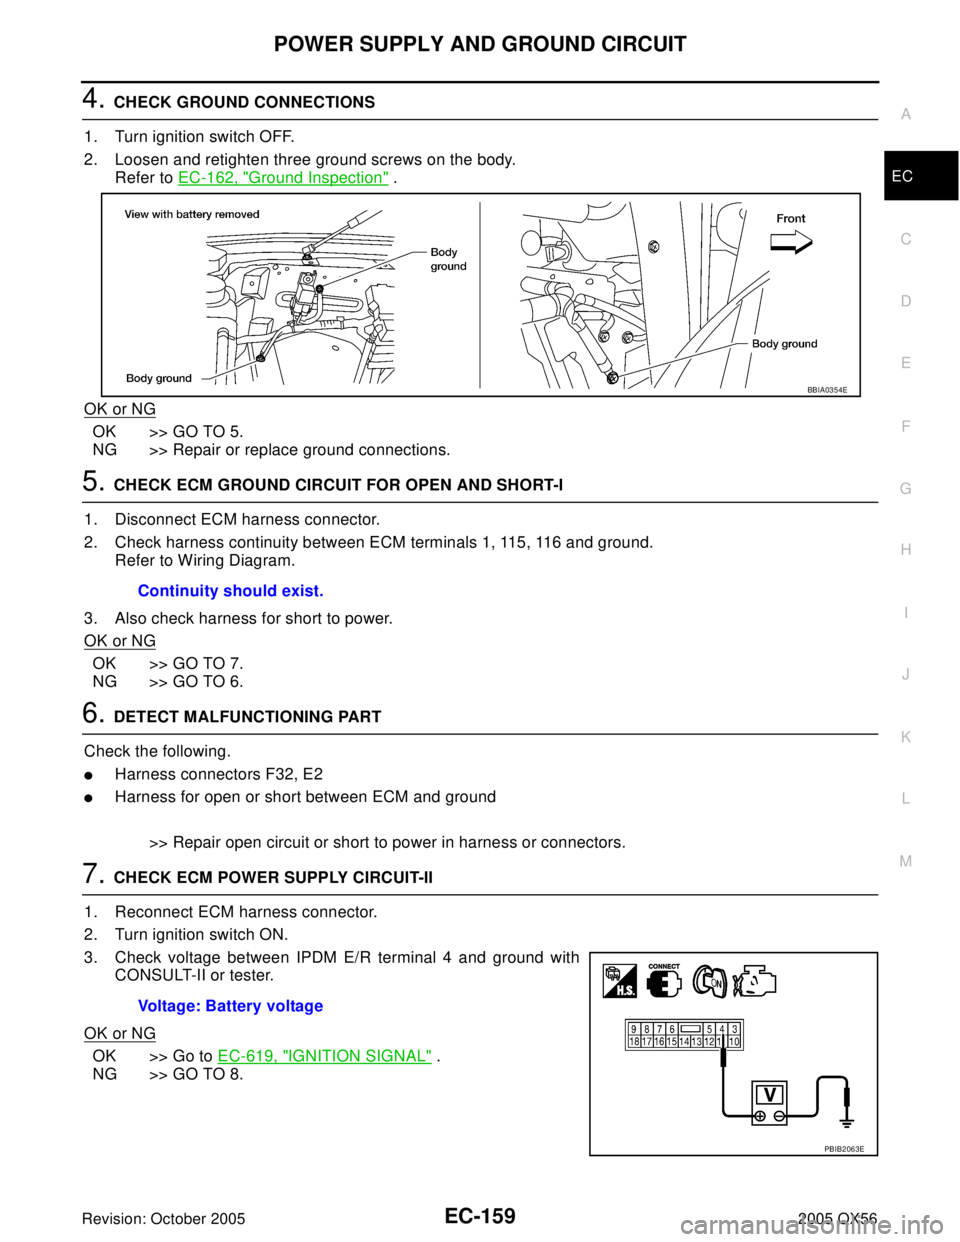
4. CHECK GROUND CONNECTIONS
1. Turn ignition switch OFF.
2. Loosen and retighten three ground screws on the body.
Refer to EC-162, "
Ground Inspection" .
OK or NG
OK >> GO TO 5.
NG >> Repair or replace ground connections.
5. CHECK ECM GROUND CIRCUIT FOR OPEN AND SHORT-I
1. Disconnect ECM harness connector.
2. Check harness continuity between ECM terminals 1, 115, 116 and ground.
Refer to Wiring Diagram.
3. Also check harness for short to power.
OK or NG
OK >> GO TO 7.
NG >> GO TO 6.
6. DETECT MALFUNCTIONING PART
Check the following.
�Harness connectors F32, E2
�Harness for open or short between ECM and ground
>> Repair open circuit or short to power in harness or connectors.
7. CHECK ECM POWER SUPPLY CIRCUIT-II
1. Reconnect ECM harness connector.
2. Turn ignition switch ON.
3. Check voltage between IPDM E/R terminal 4 and ground with
CONSULT-II or tester.
OK or NG
OK >> Go to EC-619, "IGNITION SIGNAL" .
NG >> GO TO 8.
BBIA0354E
Continuity should exist.
Voltage: Battery voltage
PBIB2063E
Page 1351 of 3419
EC-160Revision: October 2005
POWER SUPPLY AND GROUND CIRCUIT
2005 QX56
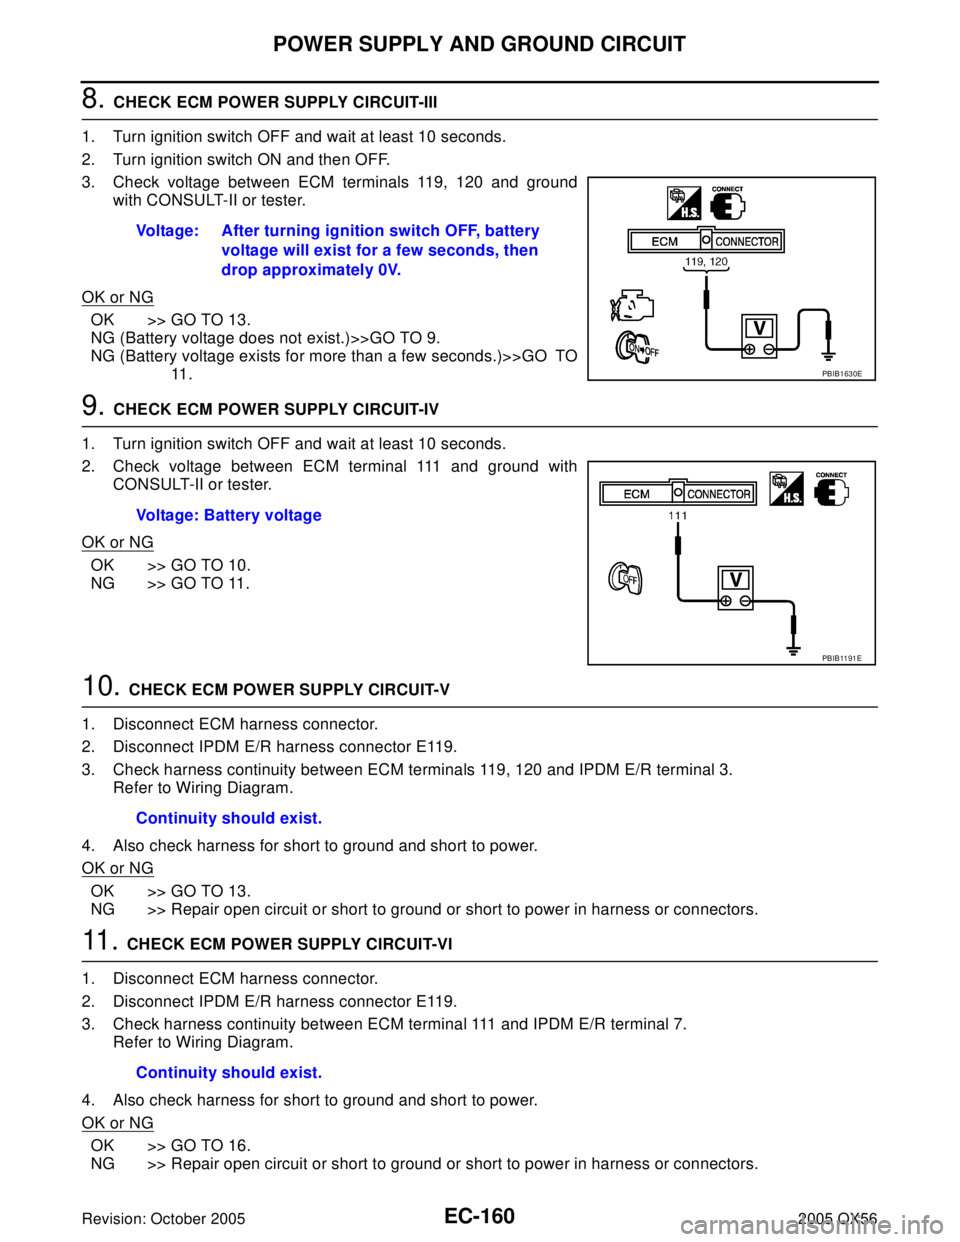
8. CHECK ECM POWER SUPPLY CIRCUIT-III
1. Turn ignition switch OFF and wait at least 10 seconds.
2. Turn ignition switch ON and then OFF.
3. Check voltage between ECM terminals 119, 120 and ground
with CONSULT-II or tester.
OK or NG
OK >> GO TO 13.
NG (Battery voltage does not exist.)>>GO TO 9.
NG (Battery voltage exists for more than a few seconds.)>>GO TO
11 .
9. CHECK ECM POWER SUPPLY CIRCUIT-IV
1. Turn ignition switch OFF and wait at least 10 seconds.
2. Check voltage between ECM terminal 111 and ground with
CONSULT-II or tester.
OK or NG
OK >> GO TO 10.
NG >> GO TO 11.
10. CHECK ECM POWER SUPPLY CIRCUIT-V
1. Disconnect ECM harness connector.
2. Disconnect IPDM E/R harness connector E119.
3. Check harness continuity between ECM terminals 119, 120 and IPDM E/R terminal 3.
Refer to Wiring Diagram.
4. Also check harness for short to ground and short to power.
OK or NG
OK >> GO TO 13.
NG >> Repair open circuit or short to ground or short to power in harness or connectors.
11 . CHECK ECM POWER SUPPLY CIRCUIT-VI
1. Disconnect ECM harness connector.
2. Disconnect IPDM E/R harness connector E119.
3. Check harness continuity between ECM terminal 111 and IPDM E/R terminal 7.
Refer to Wiring Diagram.
4. Also check harness for short to ground and short to power.
OK or NG
OK >> GO TO 16.
NG >> Repair open circuit or short to ground or short to power in harness or connectors.Voltage: After turning ignition switch OFF, battery
voltage will exist for a few seconds, then
drop approximately 0V.
PBIB1630E
Voltage: Battery voltage
PBIB11 91 E
Continuity should exist.
Continuity should exist.
Page 1352 of 3419
POWER SUPPLY AND GROUND CIRCUIT
EC-161
C
D
E
F
G
H
I
J
K
L
MA
EC
Revision: October 20052005 QX56
12. CHECK 20A FUSE
1. Disconnect 20A fuse from IPDM E/R.
2. Check 20A fuse.
OK or NG
OK >> GO TO 16.
NG >> Replace 20A fuse.
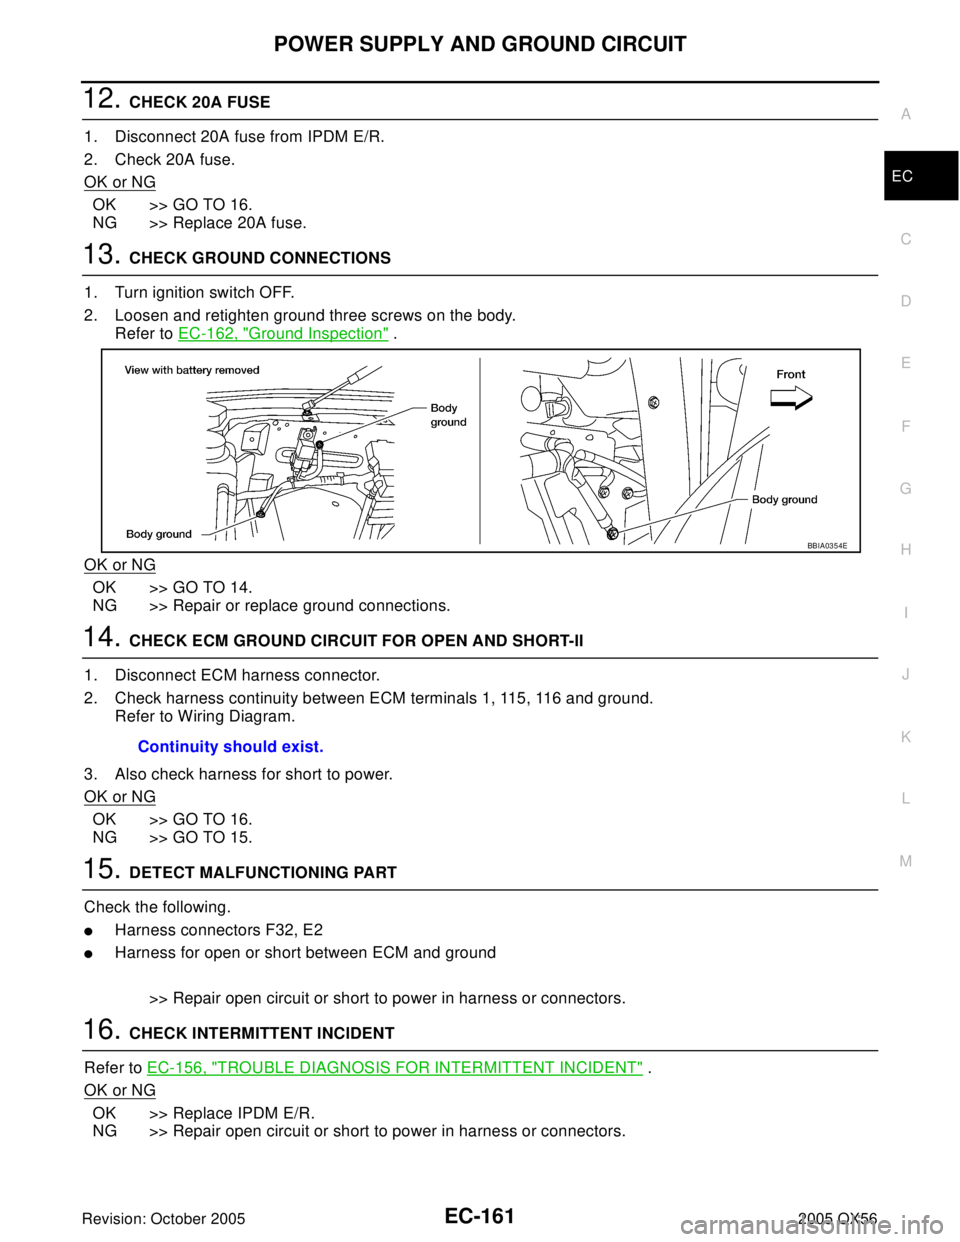
13. CHECK GROUND CONNECTIONS
1. Turn ignition switch OFF.
2. Loosen and retighten ground three screws on the body.
Refer to EC-162, "
Ground Inspection" .
OK or NG
OK >> GO TO 14.
NG >> Repair or replace ground connections.
14. CHECK ECM GROUND CIRCUIT FOR OPEN AND SHORT-II
1. Disconnect ECM harness connector.
2. Check harness continuity between ECM terminals 1, 115, 116 and ground.
Refer to Wiring Diagram.
3. Also check harness for short to power.
OK or NG
OK >> GO TO 16.
NG >> GO TO 15.
15. DETECT MALFUNCTIONING PART
Check the following.
�Harness connectors F32, E2
�Harness for open or short between ECM and ground
>> Repair open circuit or short to power in harness or connectors.
16. CHECK INTERMITTENT INCIDENT
Refer to EC-156, "
TROUBLE DIAGNOSIS FOR INTERMITTENT INCIDENT" .
OK or NG
OK >> Replace IPDM E/R.
NG >> Repair open circuit or short to power in harness or connectors.
BBIA0354E
Continuity should exist.
Page 1354 of 3419

DTC U1000, U1001 CAN COMMUNICATION LINE
EC-163
C
D
E
F
G
H
I
J
K
L
MA
EC
Revision: October 20052005 QX56
DTC U1000, U1001 CAN COMMUNICATION LINEPFP:23710
DescriptionUBS00H0I
CAN (Controller Area Network) is a serial communication line for real time application. It is an on-vehicle mul-
tiplex communication line with high data communication speed and excellent error detection ability. Many elec-
tronic control units are equipped onto a vehicle, and each control unit shares information and links with other
control units during operation (not independent). In CAN communication, control units are connected with 2
communication lines (CAN H line, CAN L line) allowing a high rate of information transmission with less wiring.
Each control unit transmits/receives data but selectively reads required data only.
On Board Diagnosis LogicUBS00H0J
*1: This self-diagnosis has the one trip detection logic.
*2: The MIL will not light up for this diagnosis.
DTC Confirmation ProcedureUBS00H0K
1. Turn ignition switch ON and wait at least 3 seconds.
2. Select “DATA MONITOR” mode with CONSULT-II.
3. If 1st trip DTC is detected, go to EC-165, "
Diagnostic Procedure" .
DTC No. Trouble diagnosis name DTC detecting condition Possible cause
U1000*
1
1000*1
CAN communication line
�ECM cannot communicate to other control
units.
�ECM cannot communicate for more than the
specified time.
�Harness or connectors
(CAN communication line is open or
shorted) U1001*
2
1001*2
Page 1358 of 3419
DTC P0037, P0038, P0057, P0058 HO2S2 HEATER
EC-167
C
D
E
F
G
H
I
J
K
L
MA
EC
Revision: October 20052005 QX56
DTC Confirmation ProcedureUBS00H0Q
NOTE:
If DTC Confirmation Procedure has been previously conducted, always turn ignition switch OFF and wait at
least 10 seconds before conducting the next test.
TESTING CONDITION:
Before performing the following procedure, confirm that battery voltage is between 10.5V and 16V at
idle.
WITH CONSULT-II
1. Turn ignition switch ON and select “DATA MONITOR” mode with CONSULT-II.
2. Start engine and warm it up to the normal operating tempera-
ture.
3. Turn ignition switch OFF and wait at least 10 seconds.
4. Start the engine and keep the engine speed between 3,500 rpm
and 4,000 rpm for at least 1 minute under no load.
5. Let engine idle for 1 minute.
6. If 1st trip DTC is detected, go to EC-171, "
Diagnostic Procedure"
.
WITH GST
Follow the procedure “WITH CONSULT-II” above.
SEF 1 74 Y
Page 1360 of 3419
DTC P0037, P0038, P0057, P0058 HO2S2 HEATER
EC-169
C
D
E
F
G
H
I
J
K
L
MA
EC
Revision: October 20052005 QX56
Specification data are reference values and are measured between each terminal and ground.
CAUTION:
Do not use ECM ground terminals when measuring input/output voltage. Doing so may result in dam-
age to the ECM's transistor. Use a ground other than ECM terminals, such as the ground.
TER-
MINAL
NO.WIRE
COLORITEM CONDITION DATA (DC Voltage)
6GRHeated oxygen sensor 2
heater (bank 1)[Engine is running]
�Warm-up condition
�Engine speed is below 3,600 rpm after the
following conditions are met.
–Keeping the engine speed between 3,500
and 4,000 rpm for 1 minute and at idle for 1
minute under no load.0 - 1.0V
[Ignition switch: ON]
�Engine: Stopped
[Engine is running]
�Engine speed: Above 3,600 rpm.BATTERY VOLTAGE
(11 - 14V)