2005 HYUNDAI TUCSON warning light
[x] Cancel search: warning lightPage 150 of 273
2
DRIVING YOUR HYUNDAI
4
KEY POSITIONS
TO START THE ENGINE
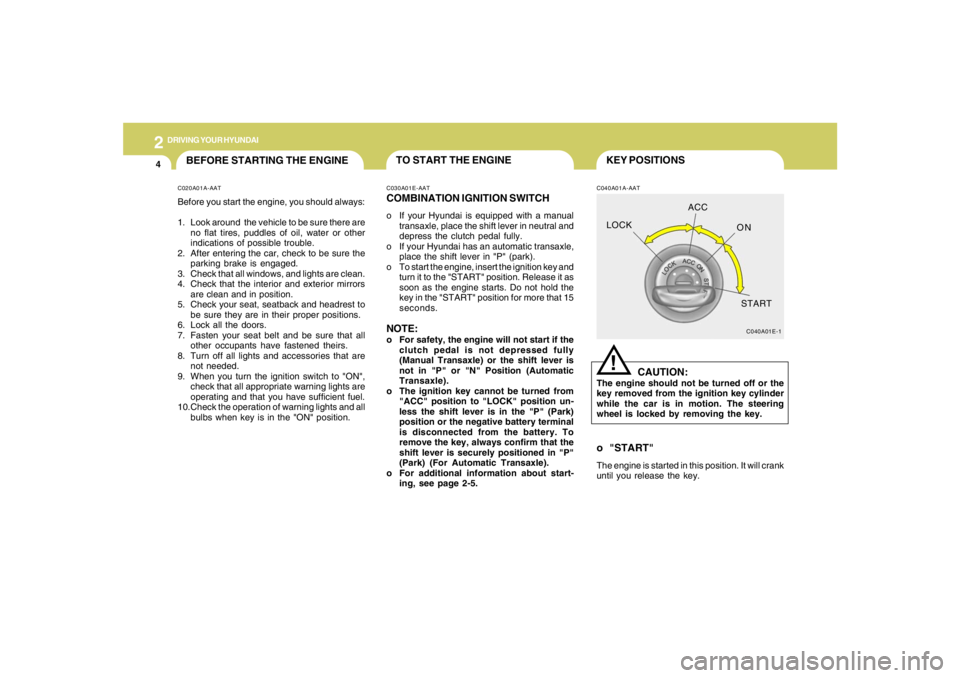
C040A01A-AAT
CAUTION:
The engine should not be turned off or the
key removed from the ignition key cylinder
while the car is in motion. The steering
wheel is locked by removing the key.
!
C030A01E-AATCOMBINATION IGNITION SWITCHo If your Hyundai is equipped with a manual
transaxle, place the shift lever in neutral and
depress the clutch pedal fully.
o If your Hyundai has an automatic transaxle,
place the shift lever in "P" (park).
o To start the engine, insert the ignition key and
turn it to the "START" position. Release it as
soon as the engine starts. Do not hold the
key in the "START" position for more that 15
seconds.NOTE:o For safety, the engine will not start if the
clutch pedal is not depressed fully
(Manual Transaxle) or the shift lever is
not in "P" or "N" Position (Automatic
Transaxle).
o The ignition key cannot be turned from
"ACC" position to "LOCK" position un-
less the shift lever is in the "P" (Park)
position or the negative battery terminal
is disconnected from the battery. To
remove the key, always confirm that the
shift lever is securely positioned in "P"
(Park) (For Automatic Transaxle).
o For additional information about start-
ing, see page 2-5.
o "START"The engine is started in this position. It will crank
until you release the key.
C040A01E-1
LOCKACC
ON
START
BEFORE STARTING THE ENGINEC020A01A-AATBefore you start the engine, you should always:
1. Look around the vehicle to be sure there are
no flat tires, puddles of oil, water or other
indications of possible trouble.
2. After entering the car, check to be sure the
parking brake is engaged.
3. Check that all windows, and lights are clean.
4. Check that the interior and exterior mirrors
are clean and in position.
5. Check your seat, seatback and headrest to
be sure they are in their proper positions.
6. Lock all the doors.
7. Fasten your seat belt and be sure that all
other occupants have fastened theirs.
8. Turn off all lights and accessories that are
not needed.
9. When you turn the ignition switch to "ON",
check that all appropriate warning lights are
operating and that you have sufficient fuel.
10.Check the operation of warning lights and all
bulbs when key is in the "ON" position.
Page 152 of 273
2
DRIVING YOUR HYUNDAI
6
OPERATING THE MANUAL
TRANSAXLE
4. Turn the ignition key to the "START" position
and release it when the engine starts.
After the engine has started, allow the engine
to run for 10 to 20 seconds prior to placing
the vehicle in gear.
The starter should not be operated for more
than 15 seconds at a time. Wait 15-30 sec-
onds between starting attempts to protect
the starter from overheating.
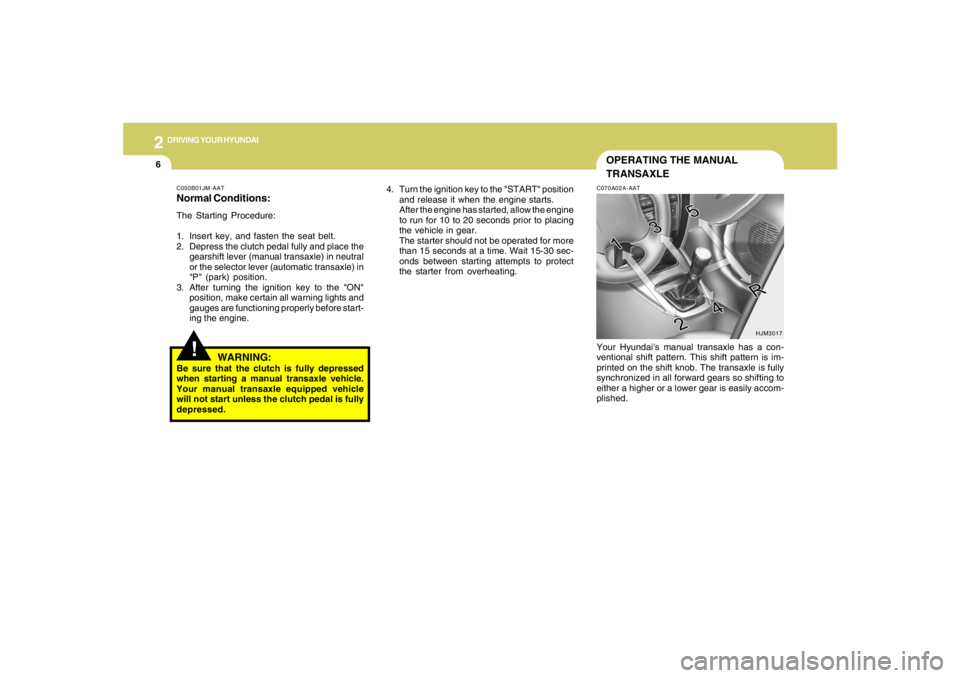
C070A02A-AATYour Hyundai's manual transaxle has a con-
ventional shift pattern. This shift pattern is im-
printed on the shift knob. The transaxle is fully
synchronized in all forward gears so shifting to
either a higher or a lower gear is easily accom-
plished.
HJM3017
C050B01JM-AATNormal Conditions:The Starting Procedure:
1. Insert key, and fasten the seat belt.
2. Depress the clutch pedal fully and place the
gearshift lever (manual transaxle) in neutral
or the selector lever (automatic transaxle) in
"P" (park) position.
3. After turning the ignition key to the "ON"
position, make certain all warning lights and
gauges are functioning properly before start-
ing the engine.
WARNING:
Be sure that the clutch is fully depressed
when starting a manual transaxle vehicle.
Your manual transaxle equipped vehicle
will not start unless the clutch pedal is fully
depressed.
!
Page 159 of 273
2
DRIVING YOUR HYUNDAI
13
!
Driving HintsTCS does not actively apply brakes. Be sure to
decelerate the car sufficiently before entering
curves.
CAUTION:
When the TCS indicator blinks, SLIP con-
trol function has been activated. It also
means that the road is slippery or your car
is accelerating excessively. In this situa-
tion, gently release foot pressure from the
accelerator pedal and maintain moderate
speed.
!
WARNING:
Traction control is a driving aid; all normal
precautions for driving in inclement weath-
er and on slippery driving surfaces should
be observed.
C310B02O-AATTCS ON/OFF ModeWhen the TCS is operating, the TCS indicator
in the instrument cluster will blink.
If you turn the system off by pressing the TCS
switch, the TCS-OFF indicator will come on and
stay on. In the TCS-OFF mode, the SLIP control
will be deactivated. Adjust you driving accord-
ingly. To turn the system back on, press the
switch again. The TCS-OFF indicator should go
off.NOTE:1) The TCS mode will automatically be
turned ON after the engine is turned off
and restarted.
2) When the traction control system is op-
erating properly, you can feel a slight
pulsation in the vehicle. This is only the
effect of brake control and indicates
nothing unusual.
3) When the engine starts, a click may be
heard from the engine compartment;
this is the sound of the traction control
being checked.
4) When moving out of the mud or fresh
snow, pressing the accelerator pedal
may not cause the engine speed to in-
crease due to TCS operation.
C310D01JM-AATIndicators and WarningThe indicators should illuminate when the igni-
tion key is turned to ON or START but should
go out after approximately three seconds.
If the indicators do not illuminate, or the TCS or
TCS-OFF indicator does not go out after 3
seconds, have the system checked by an
authorized dealer.
Should there be any unusual conditions in the
TCS System while driving, TCS-OFF indicator
illuminates as a warning.
If TCS-OFF indicator illuminates, pull your car
to a safe place and stop the engine.
Then, start the engine again to check if the TCS-
OFF indicator goes out.
If the indicator remains lit even after the engine
has been started, have your car checked by an
authorized Hyundai dealer.NOTE:When the TCS-OFF indicator illuminates,
traction control is automatically deacti-
vated.
Page 164 of 273
2
DRIVING YOUR HYUNDAI
18
GOOD BRAKING PRACTICESC130A01A-AAT
WARNING:
Nothing should be carried on top of the
cargo area cover behind the rear seat. If
there were an accident or a sudden stop,
such objects could move forward and cause
damage to the vehicle or injure the occu-
pants.
!
o After being parked, check to be sure the
parking brake is not engaged and that the
parking brake indicator light is out before
driving away.
o Driving through water may get the brakes
wet. They can also get wet when the car is
washed. Wet brakes can be dangerous!
Your car will not stop as quickly if the brakes
are wet. Wet brakes may cause the car to
pull to one side. To dry the brakes, apply the
brakes lightly while driving slowly until the
braking action returns to normal, taking care
to keep the car under control at all times. If
the braking action does not return to normal,
stop as soon as it is safe to do so and call your
Hyundai dealer for assistance.
4WD LOCK SYSTEMC360A01O-GAT(With Electronic Control 4WD)
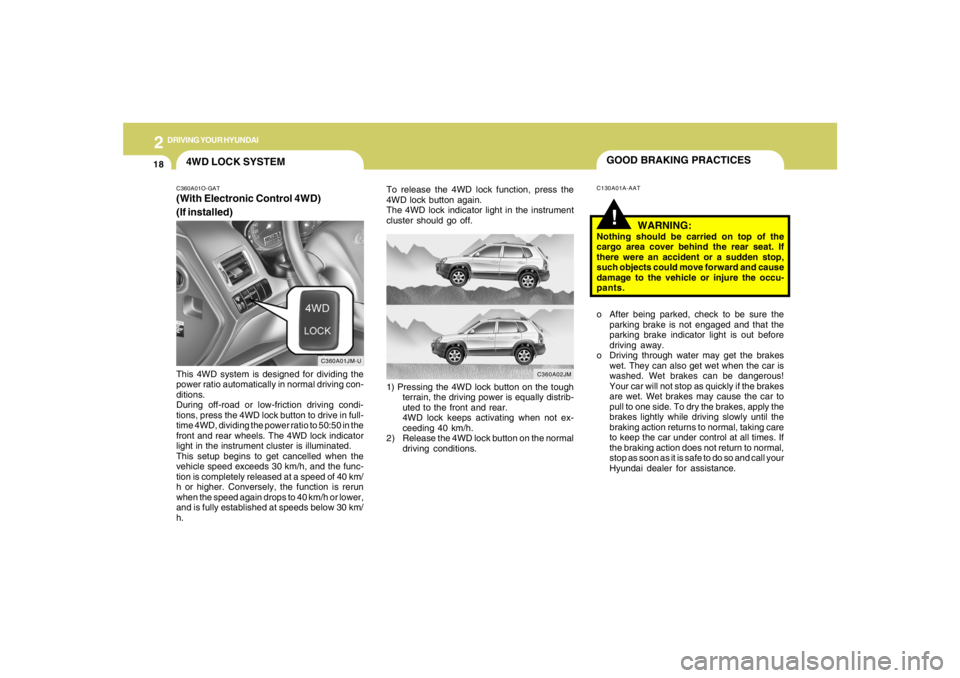
(If installed)This 4WD system is designed for dividing the
power ratio automatically in normal driving con-
ditions.
During off-road or low-friction driving condi-
tions, press the 4WD lock button to drive in full-
time 4WD, dividing the power ratio to 50:50 in the
front and rear wheels. The 4WD lock indicator
light in the instrument cluster is illuminated.
This setup begins to get cancelled when the
vehicle speed exceeds 30 km/h, and the func-
tion is completely released at a speed of 40 km/
h or higher. Conversely, the function is rerun
when the speed again drops to 40 km/h or lower,
and is fully established at speeds below 30 km/
h.To release the 4WD lock function, press the
4WD lock button again.
The 4WD lock indicator light in the instrument
cluster should go off.
C360A01JM-U
1) Pressing the 4WD lock button on the tough
terrain, the driving power is equally distrib-
uted to the front and rear.
4WD lock keeps activating when not ex-
ceeding 40 km/h.
2) Release the 4WD lock button on the normal
driving conditions.
C360A02JM
Page 178 of 273
32WHAT TO DO IN AN EMERGENCY
IF THE ENGINE WILL NOT START!
D010A01A-AAT D010B02A-AAT
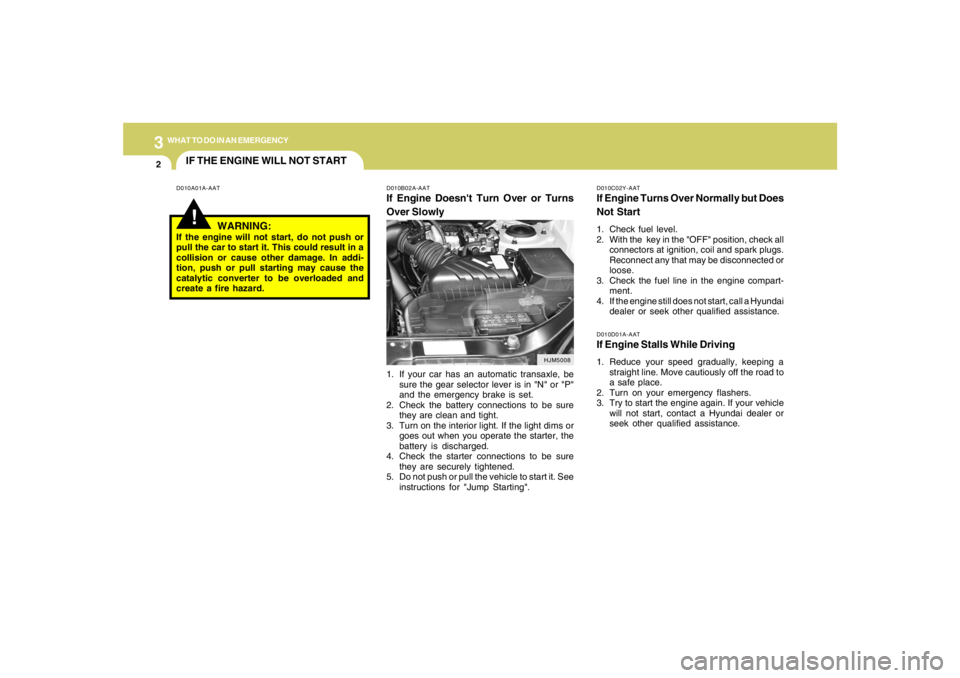
If Engine Doesn't Turn Over or Turns
Over Slowly
D010C02Y-AATIf Engine Turns Over Normally but Does
Not Start1. Check fuel level.
2. With the key in the "OFF" position, check all
connectors at ignition, coil and spark plugs.
Reconnect any that may be disconnected or
loose.
3. Check the fuel line in the engine compart-
ment.
4. If the engine still does not start, call a Hyundai
dealer or seek other qualified assistance.D010D01A-AATIf Engine Stalls While Driving1. Reduce your speed gradually, keeping a
straight line. Move cautiously off the road to
a safe place.
2. Turn on your emergency flashers.
3. Try to start the engine again. If your vehicle
will not start, contact a Hyundai dealer or
seek other qualified assistance.
WARNING:
If the engine will not start, do not push or
pull the car to start it. This could result in a
collision or cause other damage. In addi-
tion, push or pull starting may cause the
catalytic converter to be overloaded and
create a fire hazard.
1. If your car has an automatic transaxle, be
sure the gear selector lever is in "N" or "P"
and the emergency brake is set.
2. Check the battery connections to be sure
they are clean and tight.
3. Turn on the interior light. If the light dims or
goes out when you operate the starter, the
battery is discharged.
4. Check the starter connections to be sure
they are securely tightened.
5. Do not push or pull the vehicle to start it. See
instructions for "Jump Starting".
HJM5008
Page 179 of 273
3
WHAT TO DO IN AN EMERGENCY
3
JUMP STARTING!
o If you should accidentally get acid on your
skin or in your eyes, immediately remove
any contaminated clothing and flush the area
with clear water for at least 15 minutes. Then
promptly obtain medical attention. If you
must be transported to an emergency facil-
ity, continue to apply water to the affected
area with a sponge or cloth.
o The gas produced by the battery during the
jump-start operation is highly explosive. Do
not smoke or allow a spark or an open flame
in the vicinity.
o The battery being used to provide the jump
start must be 12-volt. If you cannot deter-
mine that it is a 12-volt battery, do not attempt
to use it for the jump start.
o To jump start a car with a discharged battery,
follow this procedure exactly:
1. If the booster battery is installed in another
vehicle, be sure the two vehicles are not
touching.
2. Turn off all unnecessary lights and acces-
sories in both vehicles.
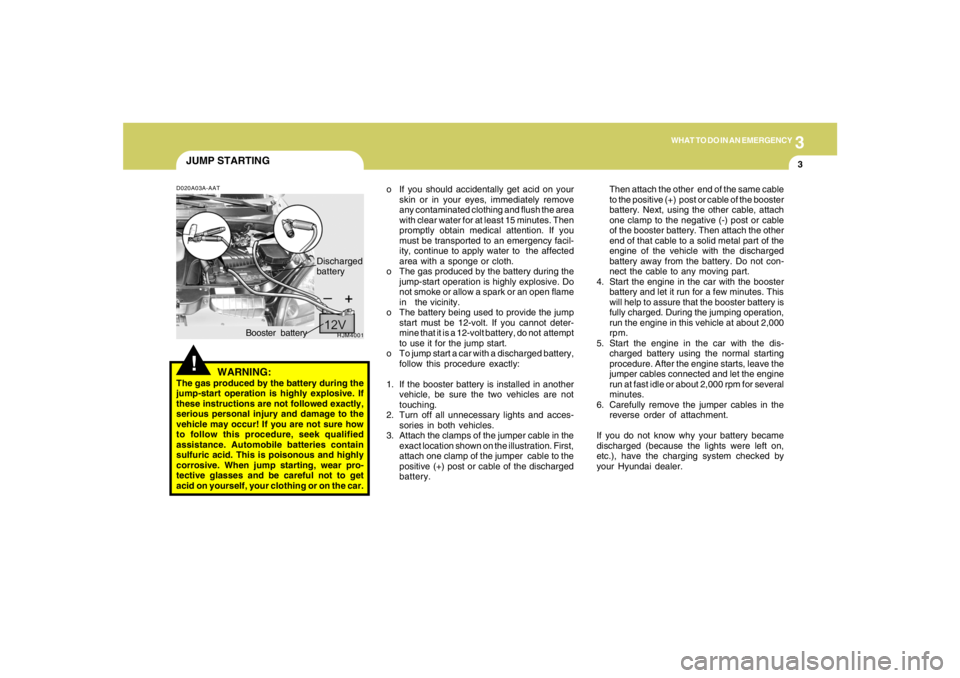
3. Attach the clamps of the jumper cable in the
exact location shown on the illustration. First,
attach one clamp of the jumper cable to the
positive (+) post or cable of the discharged
battery.Then attach the other end of the same cable
to the positive (+) post or cable of the booster
battery. Next, using the other cable, attach
one clamp to the negative (-) post or cable
of the booster battery. Then attach the other
end of that cable to a solid metal part of the
engine of the vehicle with the discharged
battery away from the battery. Do not con-
nect the cable to any moving part.
4. Start the engine in the car with the booster
battery and let it run for a few minutes. This
will help to assure that the booster battery is
fully charged. During the jumping operation,
run the engine in this vehicle at about 2,000
rpm.
5. Start the engine in the car with the dis-
charged battery using the normal starting
procedure. After the engine starts, leave the
jumper cables connected and let the engine
run at fast idle or about 2,000 rpm for several
minutes.
6. Carefully remove the jumper cables in the
reverse order of attachment.
If you do not know why your battery became
discharged (because the lights were left on,
etc.), have the charging system checked by
your Hyundai dealer.
D020A03A-AAT
WARNING:
The gas produced by the battery during the
jump-start operation is highly explosive. If
these instructions are not followed exactly,
serious personal injury and damage to the
vehicle may occur! If you are not sure how
to follow this procedure, seek qualified
assistance. Automobile batteries contain
sulfuric acid. This is poisonous and highly
corrosive. When jump starting, wear pro-
tective glasses and be careful not to get
acid on yourself, your clothing or on the car.
HJM4001
Booster batteryDischarged
battery
Page 185 of 273
3
WHAT TO DO IN AN EMERGENCY
9
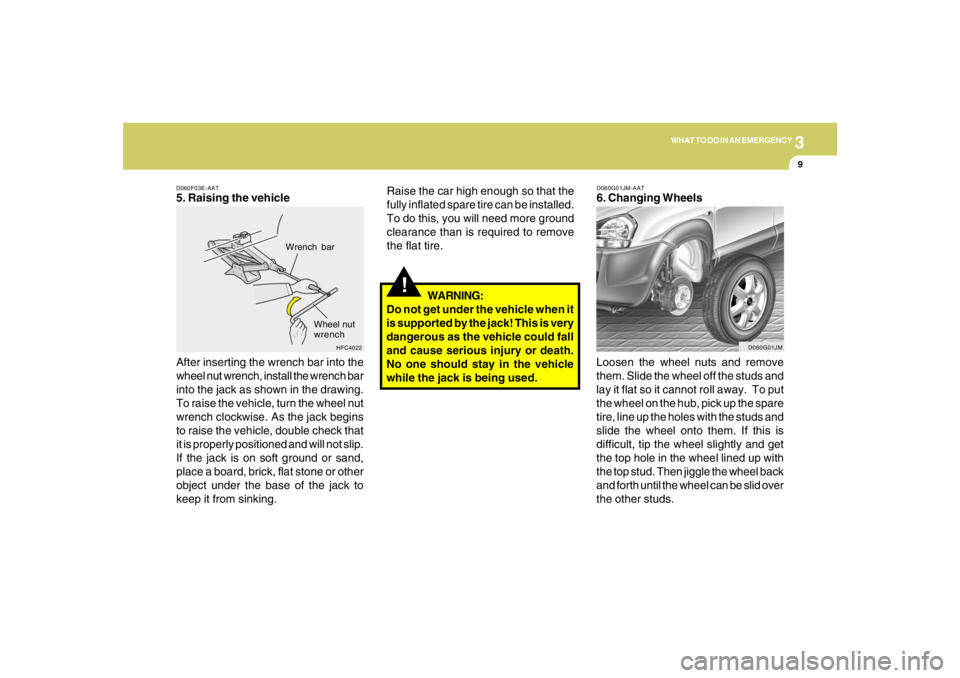
D060F03E-AAT5. Raising the vehicle
After inserting the wrench bar into the
wheel nut wrench, install the wrench bar
into the jack as shown in the drawing.
To raise the vehicle, turn the wheel nut
wrench clockwise. As the jack begins
to raise the vehicle, double check that
it is properly positioned and will not slip.
If the jack is on soft ground or sand,
place a board, brick, flat stone or other
object under the base of the jack to
keep it from sinking.
HFC4022
Wrench bar
Wheel nut
wrench
!
Raise the car high enough so that the
fully inflated spare tire can be installed.
To do this, you will need more ground
clearance than is required to remove
the flat tire.
WARNING:
Do not get under the vehicle when it
is supported by the jack! This is very
dangerous as the vehicle could fall
and cause serious injury or death.
No one should stay in the vehicle
while the jack is being used.
D060G01JM-AAT6. Changing Wheels
Loosen the wheel nuts and remove
them. Slide the wheel off the studs and
lay it flat so it cannot roll away. To put
the wheel on the hub, pick up the spare
tire, line up the holes with the studs and
slide the wheel onto them. If this is
difficult, tip the wheel slightly and get
the top hole in the wheel lined up with
the top stud. Then jiggle the wheel back
and forth until the wheel can be slid over
the other studs.
D060G01JM
Page 229 of 273
6
DO-IT-YOURSELF MAINTENANCE
23
CHECKING THE BATTERY!
G210A01A-AAT
WARNING:
Batteries can be dangerous! When working
with batteries, carefully observe the follow-
ing precautions to avoid serious injuries.
The fluid in the battery contains a strong solution
of sulfuric acid, which is poisonous and highly
corrosive. Be careful not to spill it on yourself or
the car. If you do spill battery fluid on yourself,
immediately do the following:
HJM5008
!
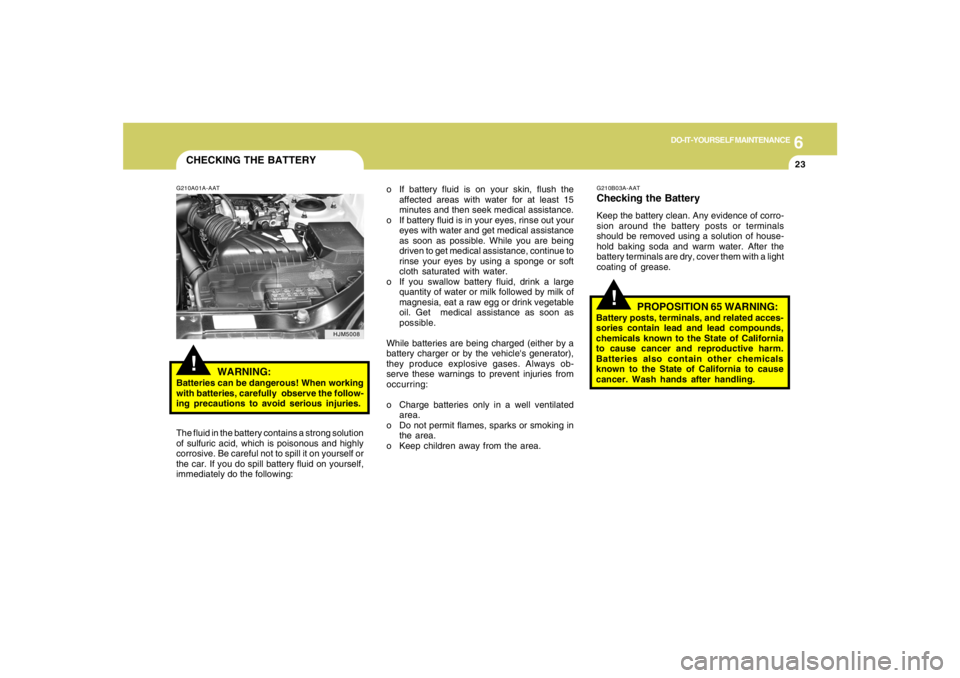
G210B03A-AATChecking the BatteryKeep the battery clean. Any evidence of corro-
sion around the battery posts or terminals
should be removed using a solution of house-
hold baking soda and warm water. After the
battery terminals are dry, cover them with a light
coating of grease. o If battery fluid is on your skin, flush the
affected areas with water for at least 15
minutes and then seek medical assistance.
o If battery fluid is in your eyes, rinse out your
eyes with water and get medical assistance
as soon as possible. While you are being
driven to get medical assistance, continue to
rinse your eyes by using a sponge or soft
cloth saturated with water.
o If you swallow battery fluid, drink a large
quantity of water or milk followed by milk of
magnesia, eat a raw egg or drink vegetable
oil. Get medical assistance as soon as
possible.
While batteries are being charged (either by a
battery charger or by the vehicle's generator),
they produce explosive gases. Always ob-
serve these warnings to prevent injuries from
occurring:
o Charge batteries only in a well ventilated
area.
o Do not permit flames, sparks or smoking in
the area.
o Keep children away from the area.
PROPOSITION 65 WARNING:
Battery posts, terminals, and related acces-
sories contain lead and lead compounds,
chemicals known to the State of California
to cause cancer and reproductive harm.
Batteries also contain other chemicals
known to the State of California to cause
cancer. Wash hands after handling.