2005 Hyundai Matrix hood release
[x] Cancel search: hood releasePage 161 of 407

1. Front Fog Light Switch (If installed)
2. Headlight Leveling Switch (If installed)
3. Rear Fog Light Switch (If installed)
4. Multi-Function Light Switch
5. Indicator and Warning Light
6. Horn and Driver's Airbag (If installed)
7. Windshield Wiper/Washer Switch
8. Instrument Cluster
9. Hazard Warning Light
10.Heating/Air Conditioning Control Panel (If installed)
11.Audio System (If installed)
12.Accessory TrayCAUTION:
When installing a container of liquid air freshener inside the vehicle, do not place it near the instrument cluster nor on the instrument panel pad surface. If there is any leakage from the air freshener onto these areas (instrument cluster, instrument panel pad or air ventilator), it may damage these parts. If the liquid from the air freshener does leak onto these areas, washthem with water immediately.
! 13.Passenger's Airbag (If installed)
14.Passenger's Drink Holder
15.Hood Release Lever
16.Multi Box
17.Ashtray
18.Cigarette Lighter
19.Shift Lever (If installed)
20.Drink Holder
21.Parking Brake Lever
22.Glove Box
23.Center Console (If installed)
Page 163 of 407

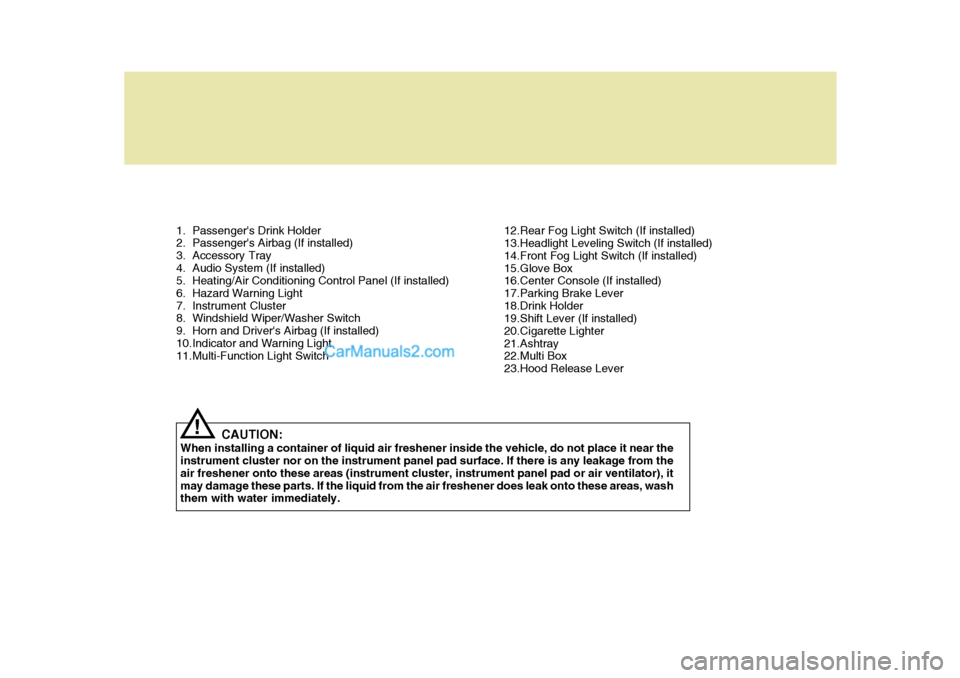
1. Passenger's Drink Holder
2. Passenger's Airbag (If installed)
3. Accessory Tray
4. Audio System (If installed)
5. Heating/Air Conditioning Control Panel (If installed)
6. Hazard Warning Light
7. Instrument Cluster
8. Windshield Wiper/Washer Switch
9. Horn and Driver's Airbag (If installed)
10.Indicator and Warning Light
11.Multi-Function Light SwitchCAUTION:
When installing a container of liquid air freshener inside the vehicle, do not place it near theinstrument cluster nor on the instrument panel pad surface. If there is any leakage from the air freshener onto these areas (instrument cluster, instrument panel pad or air ventilator), itmay damage these parts. If the liquid from the air freshener does leak onto these areas, wash them with water immediately.
! 12.Rear Fog Light Switch (If installed)
13.Headlight Leveling Switch (If installed)
14.Front Fog Light Switch (If installed)
15.Glove Box
16.Center Console (If installed)
17.Parking Brake Lever
18.Drink Holder
19.Shift Lever (If installed)
20.Cigarette Lighter
21.Ashtray
22.Multi Box
23.Hood Release Lever
Page 165 of 407

Fuel Recommendations ............................................... 1-2
Breaking In Your New Hyundai .................................... 1-3
Keys .............................................................................. 1-4
Immobilizer System ...................................................... 1-5
Door .............................................................................. 1-7
Theft-Alarm System ....................................................1-10
Window ....................................................................... 1-13
Seat ............................................................................ 1-14
Seat Belts ................................................................... 1-21
Child Restraint System............................................... 1-28
Supplemental Restraint (AIRBAG) System ............... 1-37
Instrument Cluster and Indicator ................................ 1-44
Warning and Indicator Lights ..................................... 1-48
Trip Computer ............................................................ 1-56
Multi-function Light Switch ......................................... 1-57
Windshield Wiper/Washer Switch .............................. 1-59
Sunroof ....................................................................... 1-67
Mirror .......................................................................... 1-72
Hood Release ............................................................. 1-75
Heating and Cooling Control ...................................... 1-82
Stereo Sound System ................................................ 1-91
Audio System ............................................................. 1-93
Antenna .................................................................... 1-124FEATURES OF YOUR HYUNDAI
1
1
Page 213 of 407

1
FEATURES OF YOUR HYUNDAI
49
!
B260H03A-AAT
Parking Brake/Low Brake
Fluid Level Warning Light other time, you should slow the vehicle and bring it to a complete stop in a safelocation off the roadway. The brake warning light indicates that the brake fluid level in the brake mas-ter cylinder is low and hydraulic brake fluid conforming to DOT 3 or DOT 4 specifications should be added. Afteradding fluid, if no other trouble is found, the car should be immediately and carefully driven to a Hyundai dealer forinspection. If further trouble is experi- enced, the vehicle should not be driven at all but taken to a dealer by aprofessional towing service or some other safe method. Your Hyundai is equipped with dual-diagonal braking systems. This means you still have braking on two wheels even if one of the dual systems shouldfail. With only one of the dual systems working, more than normal pedal travel and greater pedal pressure are re-quired to stop the car. Also, the car will not stop in as short a distance with only half of the brake system working. If thebrakes fail while you are driving, shift to a lower gear for additional engine braking and stop the car as soon as itis safe to do so.
WARNING:
If you suspect brake trouble, have your brakes checked by a Hyundaidealer as soon as possible. Driving your car with a problem in either the brake electrical system or brakehydraulic system is dangerous, and could result in a serious injury or death. Warning Light Operation The parking brake/brake fluid level warning light should come on when the parking brake is applied and the igni-tion switch is turned to "ON" or "START". After the engine is started, the light should go out when the park-ing brake is released. If the parking brake is not applied, the warning light should come on when theignition switch is turned to "ON" or "START", then go out when the engine starts. If the light comes on at any
B260J01S-GAT Charging System
Warning Light
The charging system warning light should come on when the ignition isturned on, then go out when the engine is running. If the light stays on while the engine is running, there is a malfunc-tion in the electrical charging system. If the light comes on while you are driv- ing, stop, turn off the engine and checkunder the hood. First, make certain the generator drive belt is in place. If it is, check the tension of the belt.And then, have the system checked by your Hyundai dealer.
CAUTION:
If the drive belt (generator belt) is loosen, broken, or mission while the vehicle is driving, there may be a serious malfunction, engine couldoverheat because this belt also drives the water pump.
!
Page 239 of 407

1
FEATURES OF YOUR HYUNDAI
75HOOD RELEASE
B570A01FC-GAT
1. Pull the release knob to unlatch the hood. CAUTION:
Make sure that the support rod has been released prior to closing the hood.
!
3. Hold the hood open with the support
rod.
Before closing the hood, return the support rod to its clip to prevent it fromrattling. Lower the hood until it is about 30 cm (1 ft.) above the closed position and let it drop. Make sure that it locksinto place.
HFC2018
HFC2019
HIGH-MOUNTED REAR STOP LIGHT
B550A01S-GAT (If installed) In addition to the lower-mounted rear stop lights on either side of the car, the high mounted rear stop light in thecenter of the rear window or inserted in the rear spoiler also lights when the brakes are applied. B550A01FC
2. Push the secondary latch leversidewards and lift the hood.
Page 240 of 407

1FEATURES OF YOUR HYUNDAI
76
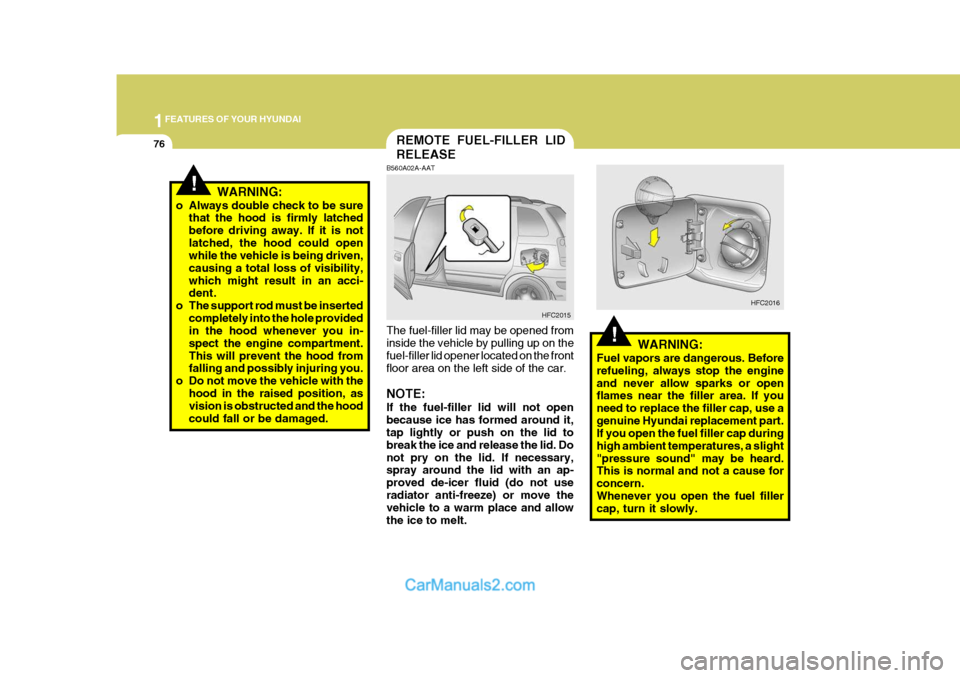
!WARNING:
Fuel vapors are dangerous. Before refueling, always stop the engineand never allow sparks or open flames near the filler area. If you need to replace the filler cap, use agenuine Hyundai replacement part. If you open the fuel filler cap during high ambient temperatures, a slight"pressure sound" may be heard. This is normal and not a cause for concern.Whenever you open the fuel filler
cap, turn it slowly. HFC2016
REMOTE FUEL-FILLER LID RELEASE
B560A02A-AAT The fuel-filler lid may be opened from inside the vehicle by pulling up on the fuel-filler lid opener located on the frontfloor area on the left side of the car. NOTE: If the fuel-filler lid will not open because ice has formed around it, tap lightly or push on the lid to break the ice and release the lid. Donot pry on the lid. If necessary, spray around the lid with an ap- proved de-icer fluid (do not useradiator anti-freeze) or move the vehicle to a warm place and allow the ice to melt. HFC2015
!WARNING:
o Always double check to be sure that the hood is firmly latched before driving away. If it is notlatched, the hood could open while the vehicle is being driven, causing a total loss of visibility,which might result in an acci- dent.
o The support rod must be inserted completely into the hole providedin the hood whenever you in- spect the engine compartment.This will prevent the hood from falling and possibly injuring you.
o Do not move the vehicle with the hood in the raised position, asvision is obstructed and the hood could fall or be damaged.
Page 405 of 407

10INDEX
4
Heating and VentilationAir flow control ....................................................... 1-84
Air intake control .................................................... 1-86
Bi-level heating ....................................................... 1-87
Fan speed control .................................................. 1-83
Heating controls ..................................................... 1-86
Temperature control ............................................... 1-83
High-mounted Rear Stoplight.................................... 1-75
Hood Release ........................................................... 1-75
Horn .......................................................................... 1-81
I Ignition Sw itch ............................................................. 2-3
Immobilizer S ystem ..................................................... 1-5
Instrument Cluster and Indicator .................. 1-44 ~ 1-47
Interior Light Interior light ............................................................ 1-70
Map light ................................................................ 1-69
Intermittent Wiper ..................................................... 1-61
J Jump Starting .............................................................. 3-3
K
Keys ............................................................................ 1-4 If you lose your keys ............................................. 3-15
Positions ................................................................... 2-4 L
Lubrication Chart
......................................................... 9-4
Luggage Net ............................................................. 1-78
MMaintenance Intervals Explanation of scheduled maintenance items ..............
..................................................................... 5-8 ~ 5-11
Maintenance under severe usage conditions .......... 5-7Scheduled maintenance ................................. 5-4 ~ 5-6
Service requ irements............................................... 5-2
Mirror Day-night inside rearview ....................................... 1-73
Outside rear view ................................................... 1-72
Multi Box ................................................................... 1-71
OOdometer .................................................................. 1-55
Outside Rearview Mirror Heater ............................... 1-73
PParking Brake ........................................................... 1-66
Power Outle t ............................................................. 1-65
Power Steering Flui d Level ..................................... 6-32
Pre-tensioner Seat Belt ............................................. 1-35