2005 Hyundai Azera lock
[x] Cancel search: lockPage 52 of 297
1
FEATURES OF YOUR HYUNDAI
35
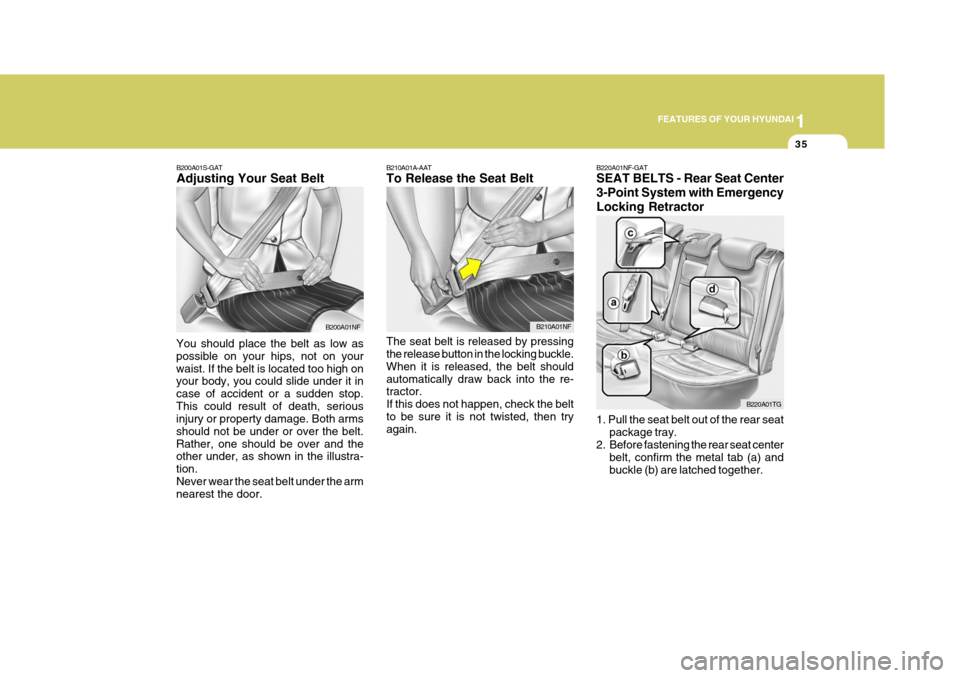
B210A01A-AAT To Release the Seat Belt The seat belt is released by pressing the release button in the locking buckle. When it is released, the belt shouldautomatically draw back into the re- tractor. If this does not happen, check the beltto be sure it is not twisted, then try again. B210A01NF
B200A01S-GAT Adjusting Your Seat Belt
You should place the belt as low as possible on your hips, not on yourwaist. If the belt is located too high on your body, you could slide under it in case of accident or a sudden stop.This could result of death, serious injury or property damage. Both arms should not be under or over the belt.Rather, one should be over and the other under, as shown in the illustra- tion.Never wear the seat belt under the arm nearest the door. B200A01NFB220A01NF-GAT SEAT BELTS - Rear Seat Center 3-Point System with EmergencyLocking Retractor 1. Pull the seat belt out of the rear seat
package tray.
2. Before fastening the rear seat center belt, confirm the metal tab (a) and buckle (b) are latched together. B220A01TG
Page 53 of 297
1FEATURES OF YOUR HYUNDAI
36
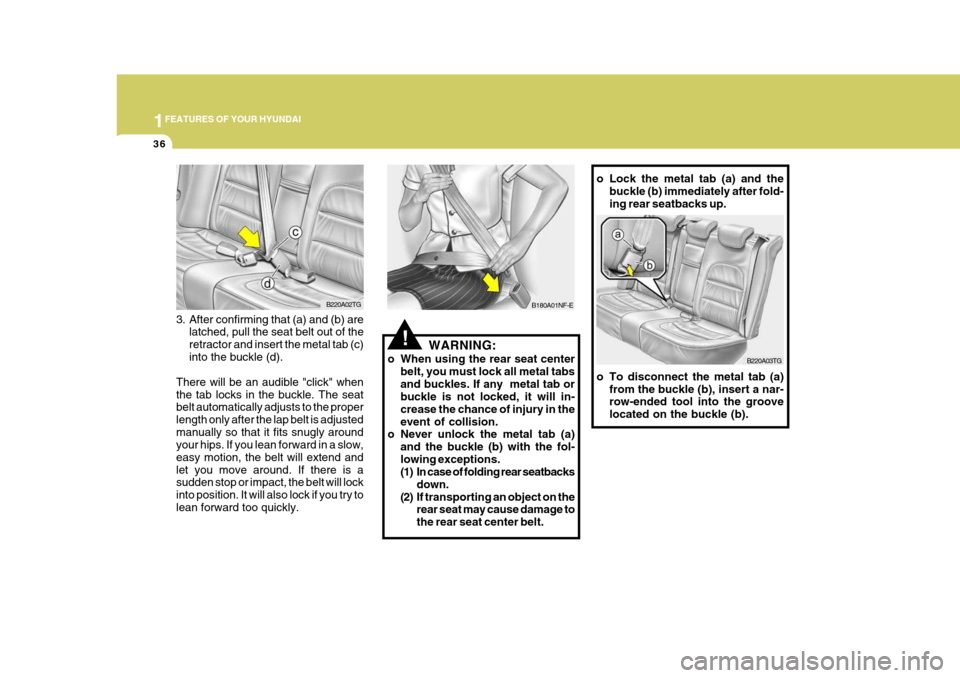
o Lock the metal tab (a) and the
buckle (b) immediately after fold- ing rear seatbacks up.
o To disconnect the metal tab (a) from the buckle (b), insert a nar- row-ended tool into the groove located on the buckle (b). B220A03TG
!WARNING:
o When using the rear seat center belt, you must lock all metal tabs and buckles. If any metal tab or buckle is not locked, it will in- crease the chance of injury in theevent of collision.
o Never unlock the metal tab (a)
and the buckle (b) with the fol-lowing exceptions.
(1) In case of folding rear seatbacks down.
(2) If transporting an object on the rear seat may cause damage to the rear seat center belt. B180A01NF-E
B220A02TG
3. After confirming that (a) and (b) are latched, pull the seat belt out of the retractor and insert the metal tab (c)into the buckle (d).
There will be an audible "click" whenthe tab locks in the buckle. The seat belt automatically adjusts to the proper length only after the lap belt is adjustedmanually so that it fits snugly around your hips. If you lean forward in a slow, easy motion, the belt will extend andlet you move around. If there is a sudden stop or impact, the belt will lock into position. It will also lock if you try tolean forward too quickly.
Page 54 of 297
1
FEATURES OF YOUR HYUNDAI
37
!
!
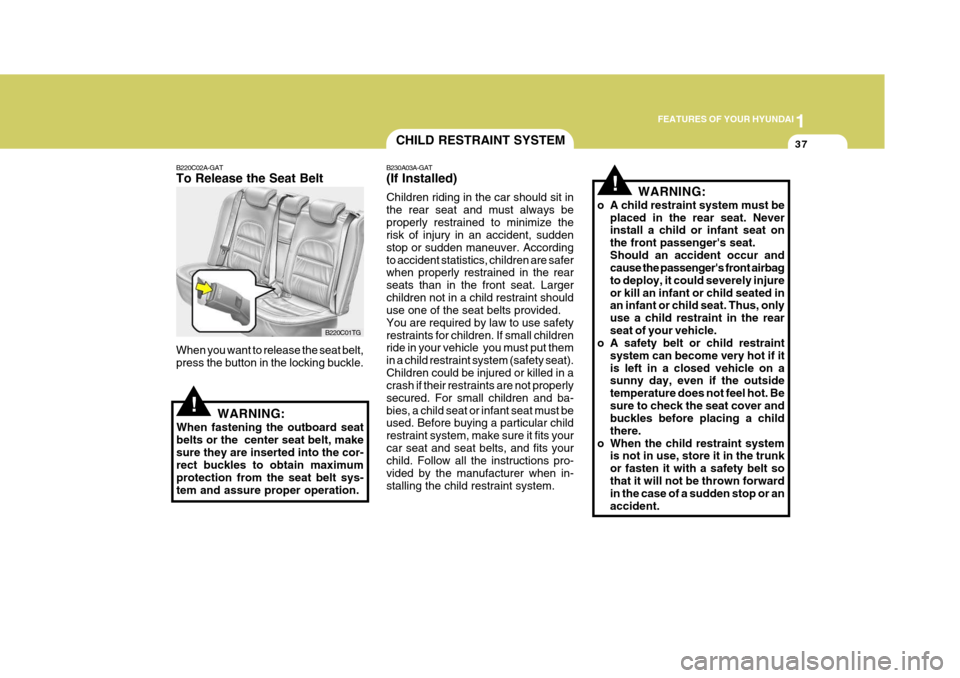
B220C02A-GAT To Release the Seat Belt When you want to release the seat belt, press the button in the locking buckle.
WARNING:
When fastening the outboard seatbelts or the center seat belt, makesure they are inserted into the cor- rect buckles to obtain maximum protection from the seat belt sys-tem and assure proper operation. B220C01TG
CHILD RESTRAINT SYSTEM
B230A03A-GAT (If Installed) Children riding in the car should sit in the rear seat and must always beproperly restrained to minimize the risk of injury in an accident, sudden stop or sudden maneuver. Accordingto accident statistics, children are safer when properly restrained in the rear seats than in the front seat. Largerchildren not in a child restraint should use one of the seat belts provided. You are required by law to use safetyrestraints for children. If small children ride in your vehicle you must put them in a child restraint system (safety seat).Children could be injured or killed in a crash if their restraints are not properly secured. For small children and ba-bies, a child seat or infant seat must be used. Before buying a particular child restraint system, make sure it fits yourcar seat and seat belts, and fits your child. Follow all the instructions pro- vided by the manufacturer when in-stalling the child restraint system. WARNING:
o A child restraint system must be placed in the rear seat. Never install a child or infant seat on the front passenger's seat.Should an accident occur and cause the passenger's front airbag to deploy, it could severely injureor kill an infant or child seated in an infant or child seat. Thus, only use a child restraint in the rearseat of your vehicle.
o A safety belt or child restraint
system can become very hot if itis left in a closed vehicle on a sunny day, even if the outside temperature does not feel hot. Besure to check the seat cover and buckles before placing a child there.
o When the child restraint system is not in use, store it in the trunkor fasten it with a safety belt sothat it will not be thrown forward in the case of a sudden stop or an accident.
Page 56 of 297

1
FEATURES OF YOUR HYUNDAI
39
!
B230G01NF
B230G01JM-GAT Installation on the Outboard Rear Seats To install a child restraint system on the outboard rear seats, extend the shoul- der/lap belt from its retractor. Buckle the seat belt and allow the seat belt totake up any slack. Make sure that the lap portion of the belt is tight around the child restraint system and the shoulderportion of the belt is positioned so that it cannot interfere with the child's head or neck. After installation of the childrestraint system, try to move it in all directions to be sure the child restraint system is securely installed.
If you need to tighten the belt, pull more webbing toward the retractor. When youunbuckle the seat belt and allow it to retract, the retractor will automatically revert back to its normal seated pas-senger emergency locking usage con- dition. NOTE:
o Before installing the child re-
straint system, read the instruc- tions supplied by the child re- straint system manufacturer.
o If the seat belt does not operate as described, have the systemchecked immediately by yourauthorized Hyundai dealer. WARNING:
o Do not install any child restraint system in the front passenger seat. Should an accident occur and cause the passenger's front airbagto deploy, it could severely injure or kill an infant or child seated in an infant or child seat. Therefore,only use a child restraint system in the rear seat of your vehicle.
o Before installing Child Restraint
System to vehicles fitted with Cur-tain Airbags, always refer to safety notices for Curtain Airbag sys- tems on this manual. Whenever installing child restraints, use onlyapproved devices and refer to "Child Restraint System" to en- sure correct installation and occu-pant protection is maximized.
Page 60 of 297
1
FEATURES OF YOUR HYUNDAI
43
L3 : Suitable for Bebe confort iSEOS (E2 039014) approved for the use in this mass group
NOTE: Use it after adjusting the headrest to the lowest level.
L4 : Suitable for GRACO Autobaby (E11 03. 44.160/E11 03.44.161) approved for the use in this mass group
L5 : Suitable for Romer Lord Plus (E1 03301136) approved for the use inthis mass group
L6 : Suitable for Euro Kids Star (E1 03301128/E1 03301129)approved for the use in this mass group
L7 : Suitable for BeSafe iZi COMFORT (E4 03443206) approved for thisuse in this mass group
NOTE: Use it after removing the headrest or adjusting the headrest to thelowest level. L8 : Suitable for MAXI-COSI Priori XP
(E1 03301153) approved for theuse in this mass group
L9 : Suitable for Bebe confort HiPSOS
(E2 031011) approved for this usein this mass group
NOTE: Use it after removing the headrest.
X : Seat position not suitable for chil- dren in this mass group
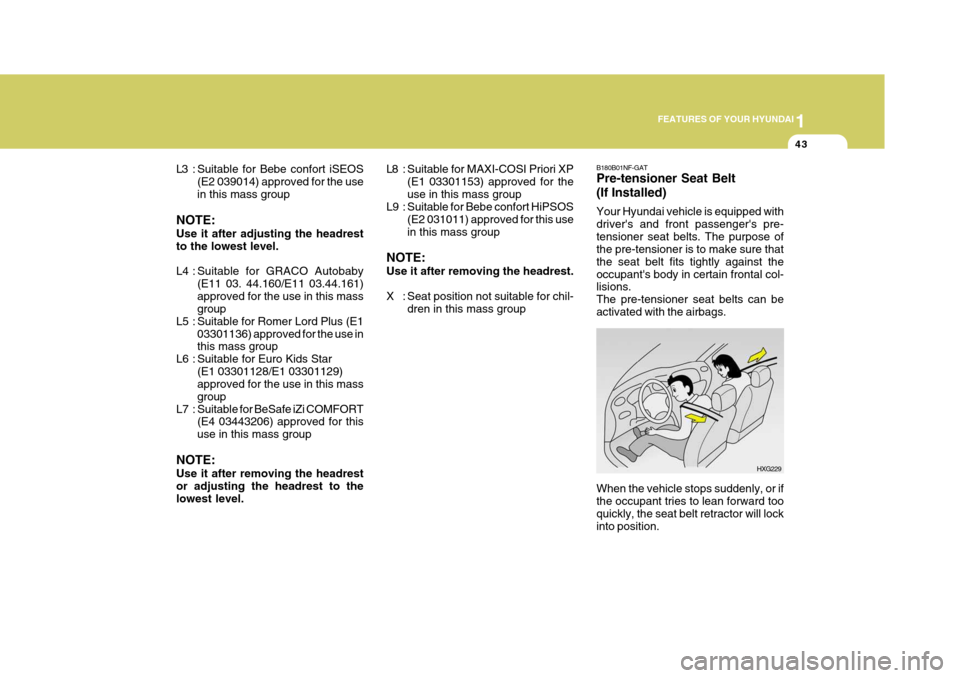
When the vehicle stops suddenly, or if the occupant tries to lean forward tooquickly, the seat belt retractor will lock into position.
HXG229
B180B01NF-GAT Pre-tensioner Seat Belt (If Installed) Your Hyundai vehicle is equipped with driver's and front passenger's pre-tensioner seat belts. The purpose of the pre-tensioner is to make sure that the seat belt fits tightly against theoccupant's body in certain frontal col- lisions. The pre-tensioner seat belts can beactivated with the airbags.
Page 68 of 297
1
FEATURES OF YOUR HYUNDAI
51
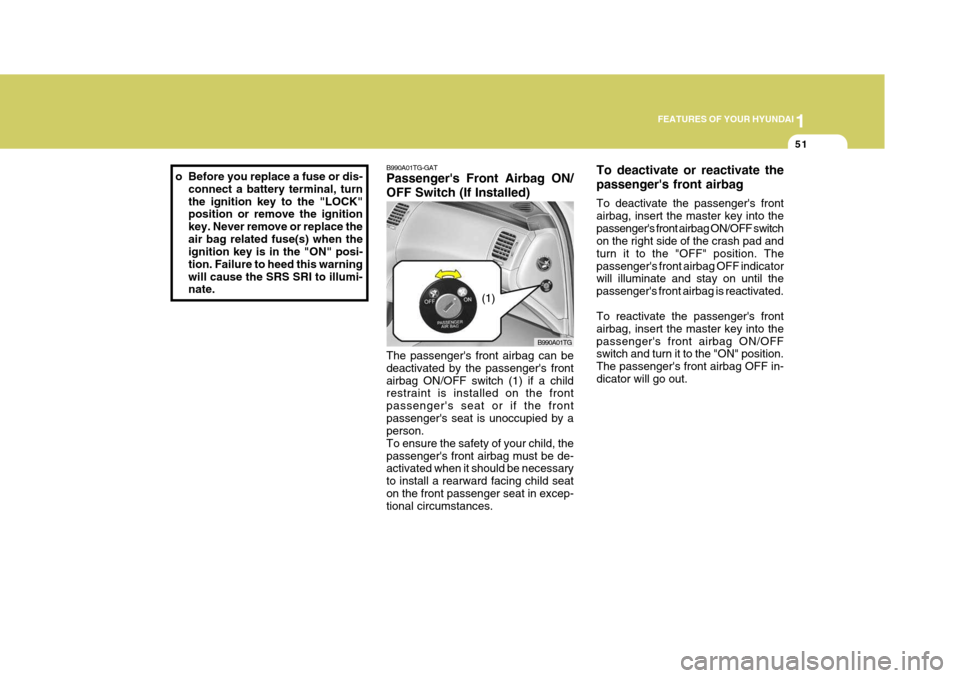
B990A01TG-GAT Passenger's Front Airbag ON/ OFF Switch (If Installed)
B990A01TG
The passenger's front airbag can be deactivated by the passenger's frontairbag ON/OFF switch (1) if a child restraint is installed on the front passenger's seat or if the frontpassenger's seat is unoccupied by a person. To ensure the safety of your child, thepassenger's front airbag must be de- activated when it should be necessary to install a rearward facing child seaton the front passenger seat in excep- tional circumstances. To deactivate or reactivate the passenger's front airbag To deactivate the passenger's front airbag, insert the master key into thepassenger's front airbag ON/OFF switch on the right side of the crash pad and
turn it to the "OFF" position. Thepassenger's front airbag OFF indicator will illuminate and stay on until the passenger's front airbag is reactivated. To reactivate the passenger's front airbag, insert the master key into thepassenger's front airbag ON/OFF switch and turn it to the "ON" position. The passenger's front airbag OFF in-dicator will go out.
(1)o Before you replace a fuse or dis-
connect a battery terminal, turn the ignition key to the "LOCK" position or remove the ignition key. Never remove or replace theair bag related fuse(s) when the ignition key is in the "ON" posi- tion. Failure to heed this warningwill cause the SRS SRI to illumi- nate.
Page 85 of 297

1FEATURES OF YOUR HYUNDAI
68
!
B260P01TG-GAT
ABS Service Reminder
Indicator (SRI)
When the key is turned to the "ON" position, the Anti-Lock Brake SystemSRI will come on and then go off in a few seconds. If the ABS SRI remains on, comes on while driving, or does notcome on when the key is turned to the "ON" position, this indicates that there may be a problem with the ABS.If this occurs, have your vehicle checked by your Hyundai dealer as soon as possible. The normal brakingsystem will still be operational, but without the assistance of the anti-lock brake system.
WARNING:
If the both ABS SRI and Parking Brake/Low Brake fluid level warn- ing lights remain "ON" or come on while driving, there may be a prob-lem with E.B.D. (Electronic brake force distribution). If this occurs, avoid sudden stopsand have your vehicle checked by your Hyundai dealer as soon as pos- sible.
CAUTION:
If there is a malfunction of the passenger's front airbag ON/OFF switch, the passenger's front airbagOFF indicator will not illuminate and the passenger's front airbag will inflate in frontal impact crasheseven if the passenger's front airbag ON/OFF switch is set to the "OFF" position.If the passenger's front airbag OFF indicator will not illuminate when the passenger's front airbag ON/OFF switch is set to the "OFF" po- sition, have an authorized Hyundai dealer inspect the passenger's frontairbag ON/OFF switch and the SRS airbag system as soon as possible.
!
B230T02NF-GAT
Passenger's Front Airbag
OFF Indicator Light
(If Installed)
The passenger's front airbag OFF in- dicator illuminates for about 4 seconds after the ignition key is turned to the"ON" position or after the engine is started, and then it will go off in 3 seconds.The passenger's front airbag OFF in- dicator also comes on when the passenger's front airbag ON/OFFswitch is set to "OFF" position and turns off when the passenger's front airbag ON/OFF switch is set to "ON"position.
Page 87 of 297
1FEATURES OF YOUR HYUNDAI
70INSTRUMENT CLUSTER
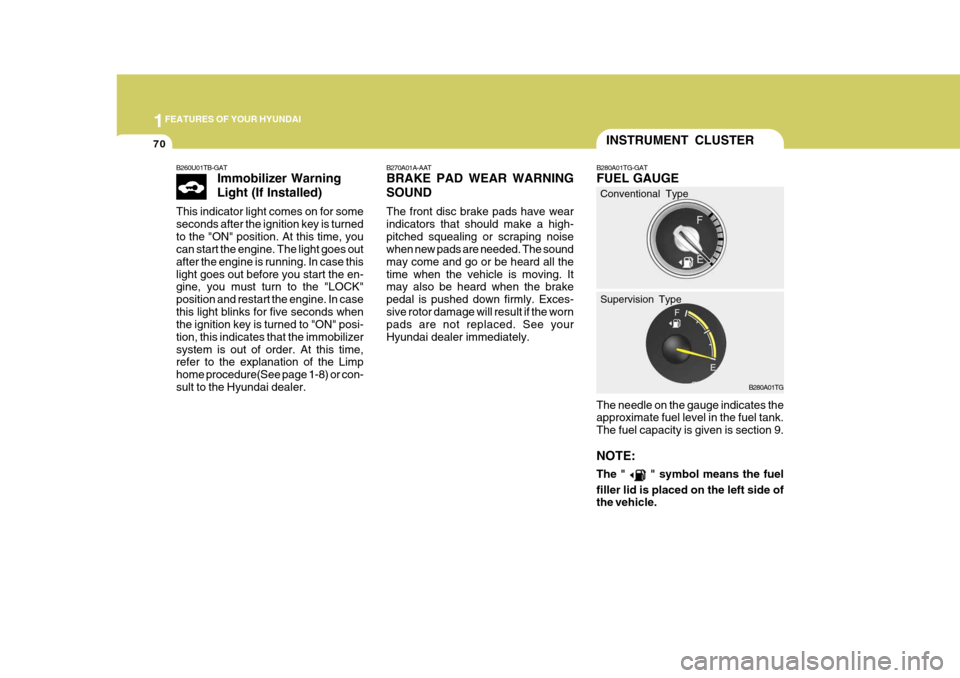
B270A01A-AAT BRAKE PAD WEAR WARNING SOUND The front disc brake pads have wear indicators that should make a high-pitched squealing or scraping noise when new pads are needed. The sound may come and go or be heard all thetime when the vehicle is moving. It may also be heard when the brake pedal is pushed down firmly. Exces-sive rotor damage will result if the worn pads are not replaced. See your Hyundai dealer immediately. B280A01TG-GAT FUEL GAUGE
The needle on the gauge indicates the approximate fuel level in the fuel tank. The fuel capacity is given is section 9. NOTE: The "
" symbol means the fuel
filler lid is placed on the left side of the vehicle. B280A01TG
Conventional Type Supervision Type
B260U01TB-GAT
Immobilizer Warning Light (If Installed)
This indicator light comes on for some seconds after the ignition key is turnedto the "ON" position. At this time, you can start the engine. The light goes out after the engine is running. In case thislight goes out before you start the en- gine, you must turn to the "LOCK" position and restart the engine. In casethis light blinks for five seconds when the ignition key is turned to "ON" posi- tion, this indicates that the immobilizersystem is out of order. At this time, refer to the explanation of the Limp home procedure(See page 1-8) or con-sult to the Hyundai dealer.