Page 18 of 288
Balance:Press to adjust the audio between the left and right speakers.
Use
//SEEK.
Fade:Press to adjust the audio between the front and rear speakers.
Use
//SEEK.
Speed sensitive volume (if equipped):Radio volume automatically
changes slightly with vehicle speed to compensate for road and wind
noise. Press MENU to access and use
//SEEKto adjust.
Setting the clock:Press MENU until SELECT HOUR or SELECT
MINUTE is displayed. Use
/to manually increase/decrease Press
MENU again to disengage clock mode.
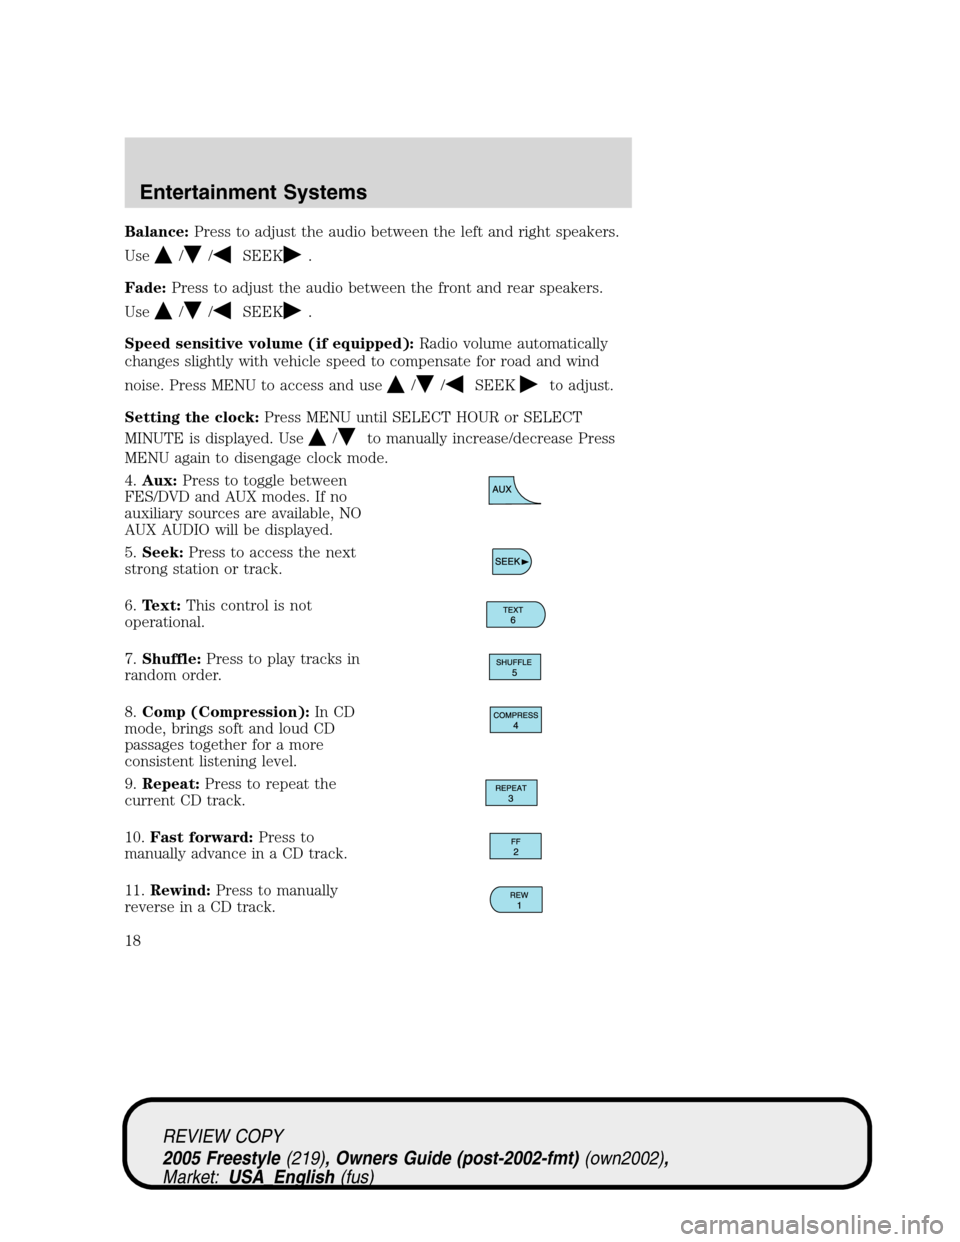
4.Aux:Press to toggle between
FES/DVD and AUX modes. If no
auxiliary sources are available, NO
AUX AUDIO will be displayed.
5.Seek:Press to access the next
strong station or track.
6.Text:This control is not
operational.
7.Shuffle:Press to play tracks in
random order.
8.Comp (Compression):In CD
mode, brings soft and loud CD
passages together for a more
consistent listening level.
9.Repeat:Press to repeat the
current CD track.
10.Fast forward:Press to
manually advance in a CD track.
11.Rewind:Press to manually
reverse in a CD track.
REVIEW COPY
2005 Freestyle(219), Owners Guide (post-2002-fmt)(own2002),
Market:USA_English(fus)
Entertainment Systems
18
Page 21 of 288
Bass:Press to adjust the bass setting. Use//SEEK.
Treble:Press to adjust the treble setting. Use
//SEEK.
Balance:Press to adjust the audio between the left and right speakers.
Use
//, SEEK.
Fade:Press to adjust the audio between the front and rear speakers.
Use
//, SEEK.
Occupancy mode:(Available on Audiophile radios only):
Use
//SEEKselect and optimize sound for ALL SEATS,
DRIVERS SEAT or REAR SEATS.
Speed sensitive volume:Radio volume automatically changes slightly
with vehicle speed to compensate for road and wind noise.
Use
//SEEKto adjust.
Setting the clock:Press until SELECT HOUR or SELECT MINS is
displayed. Press
//SEEKto adjust the hours/minutes.
RDS(Available on Audiophile radios only): Allows you to search
RDS-equipped stations for a certain category of music format: Classic,
Country, Info, Jazz/RB, Religious, Rock, Soft, Top 40. RDS (only available
in FM mode) must be activated to access Find and Show functions.
To activate, press and hold MENU until RDS (ON/OFF) appears in the
display. Press MENU repeatedly to scroll through Find, Show and RDS.
Use
/.SEEKto toggle RDS ON/OFF. When RDS is Off, you
will not be able to access Find and Show functions.
Find:Allows you to search RDS-equipped stations for the desired music
category. Use
/to find the desired program type, then use
SEEKor SCAN to begin the search.
Show:Allows you to display the name of the radio station or program
type. Use
//SEEKto show type, name or none.
Track/Folder Mode:Available only on MP3 discs in CD mode. In Track
Mode, pressing
SEEKwill scroll through all tracks on the disc.
In Folder mode, pressing
SEEKwill scroll only through tracks
within the selected folder.
REVIEW COPY
2005 Freestyle(219), Owners Guide (post-2002-fmt)(own2002),
Market:USA_English(fus)
Entertainment Systems
21
Page 51 of 288
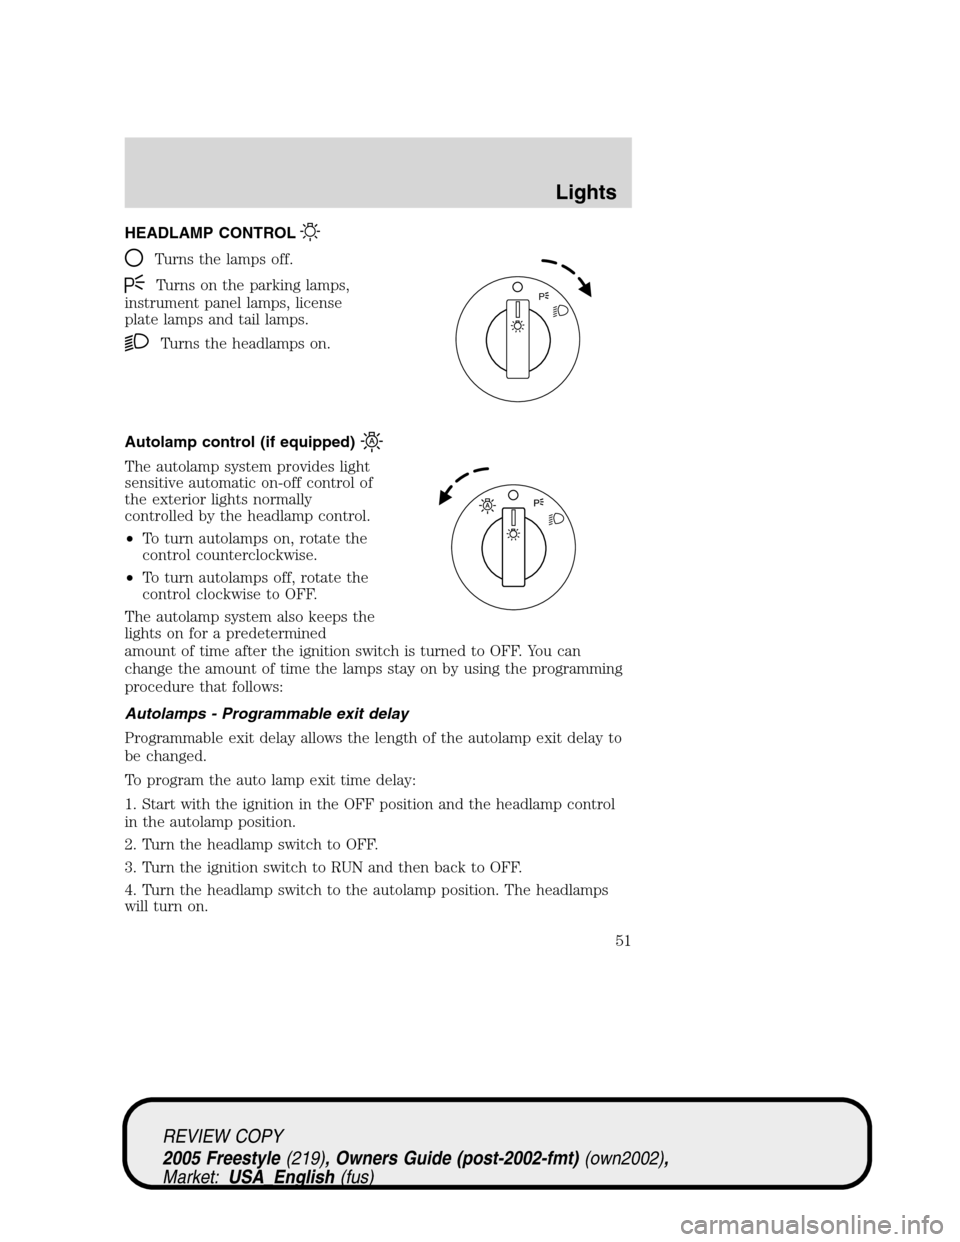
HEADLAMP CONTROL
Turns the lamps off.
Turns on the parking lamps,
instrument panel lamps, license
plate lamps and tail lamps.
Turns the headlamps on.
Autolamp control (if equipped)
The autolamp system provides light
sensitive automatic on-off control of
the exterior lights normally
controlled by the headlamp control.
•To turn autolamps on, rotate the
control counterclockwise.
•To turn autolamps off, rotate the
control clockwise to OFF.
The autolamp system also keeps the
lights on for a predetermined
amount of time after the ignition switch is turned to OFF. You can
change the amount of time the lamps stay on by using the programming
procedure that follows:
Autolamps - Programmable exit delay
Programmable exit delay allows the length of the autolamp exit delay to
be changed.
To program the auto lamp exit time delay:
1. Start with the ignition in the OFF position and the headlamp control
in the autolamp position.
2. Turn the headlamp switch to OFF.
3. Turn the ignition switch to RUN and then back to OFF.
4. Turn the headlamp switch to the autolamp position. The headlamps
will turn on.
P
REVIEW COPY
2005 Freestyle(219), Owners Guide (post-2002-fmt)(own2002),
Market:USA_English(fus)
Lights
Lights
51
Page 55 of 288
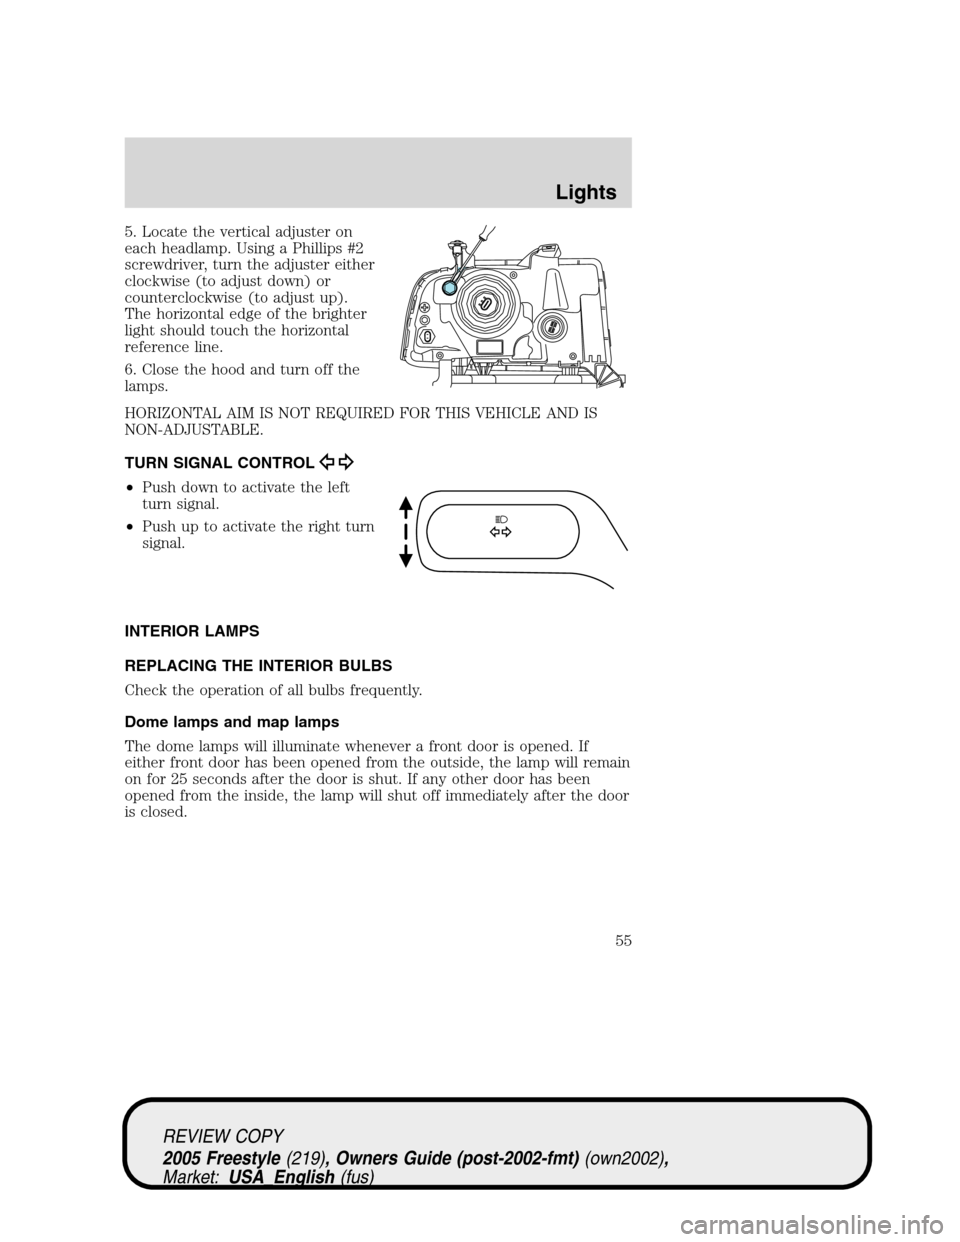
5. Locate the vertical adjuster on
each headlamp. Using a Phillips #2
screwdriver, turn the adjuster either
clockwise (to adjust down) or
counterclockwise (to adjust up).
The horizontal edge of the brighter
light should touch the horizontal
reference line.
6. Close the hood and turn off the
lamps.
HORIZONTAL AIM IS NOT REQUIRED FOR THIS VEHICLE AND IS
NON-ADJUSTABLE.
TURN SIGNAL CONTROL
•Push down to activate the left
turn signal.
•Push up to activate the right turn
signal.
INTERIOR LAMPS
REPLACING THE INTERIOR BULBS
Check the operation of all bulbs frequently.
Dome lamps and map lamps
The dome lamps will illuminate whenever a front door is opened. If
either front door has been opened from the outside, the lamp will remain
on for 25 seconds after the door is shut. If any other door has been
opened from the inside, the lamp will shut off immediately after the door
is closed.
REVIEW COPY
2005 Freestyle(219), Owners Guide (post-2002-fmt)(own2002),
Market:USA_English(fus)
Lights
55
Page 57 of 288
Function Number of bulbsTrade
number
High-mount brake lamp 5 W5W
Foglamp (if equipped) 2 H11 LL
Map lamp 2 12V6W
Dome/reading lamps 6 578
All replacement bulbs are clear in color except where noted.
To replace all instrument panel lights - see your dealer.
Replacing the interior bulbs
Check the operation of all bulbs frequently.
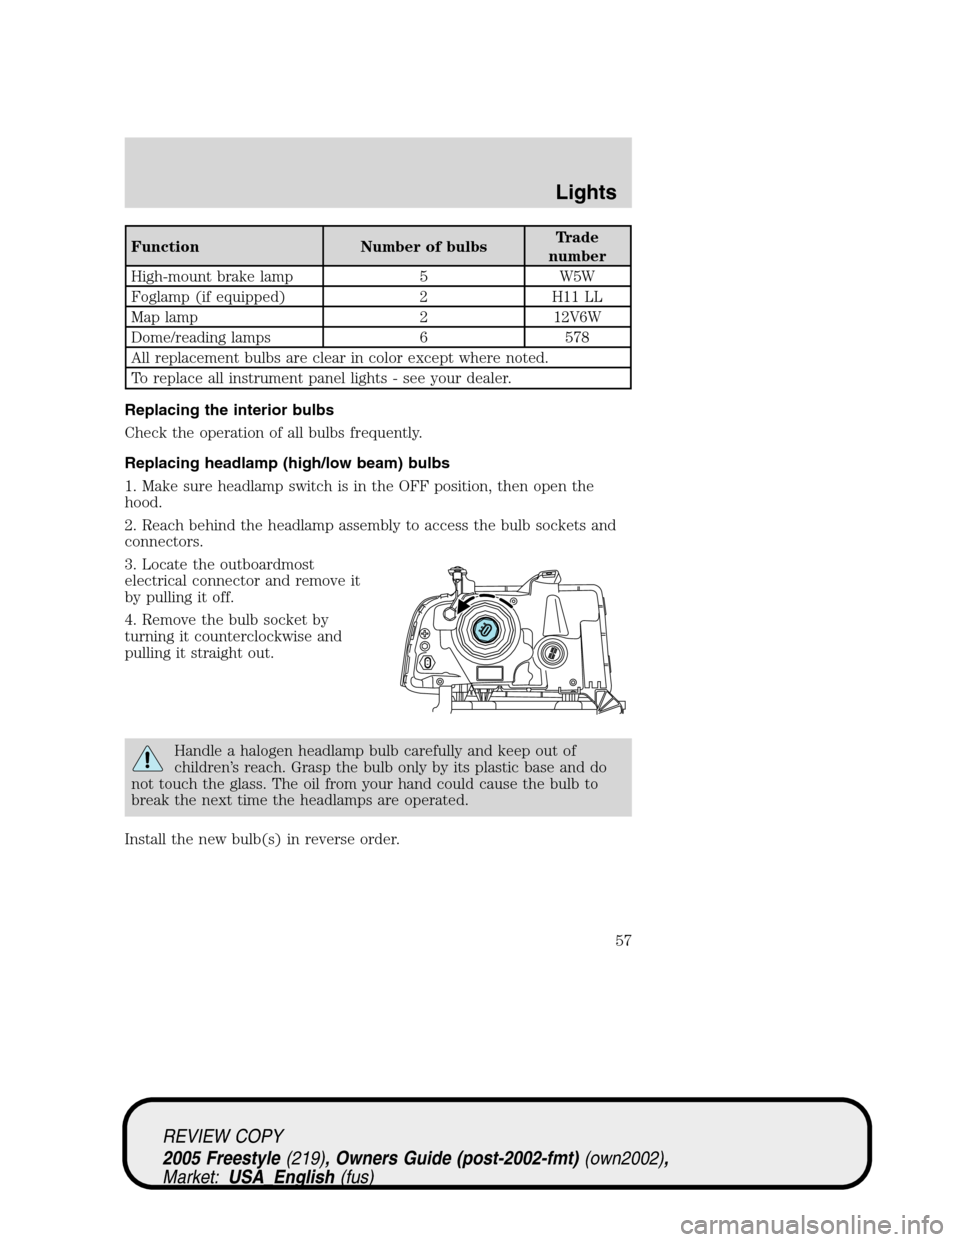
Replacing headlamp (high/low beam) bulbs
1. Make sure headlamp switch is in the OFF position, then open the
hood.
2. Reach behind the headlamp assembly to access the bulb sockets and
connectors.
3. Locate the outboardmost
electrical connector and remove it
by pulling it off.
4. Remove the bulb socket by
turning it counterclockwise and
pulling it straight out.
Handle a halogen headlamp bulb carefully and keep out of
children’s reach. Grasp the bulb only by its plastic base and do
not touch the glass. The oil from your hand could cause the bulb to
break the next time the headlamps are operated.
Install the new bulb(s) in reverse order.
REVIEW COPY
2005 Freestyle(219), Owners Guide (post-2002-fmt)(own2002),
Market:USA_English(fus)
Lights
57
Page 58 of 288
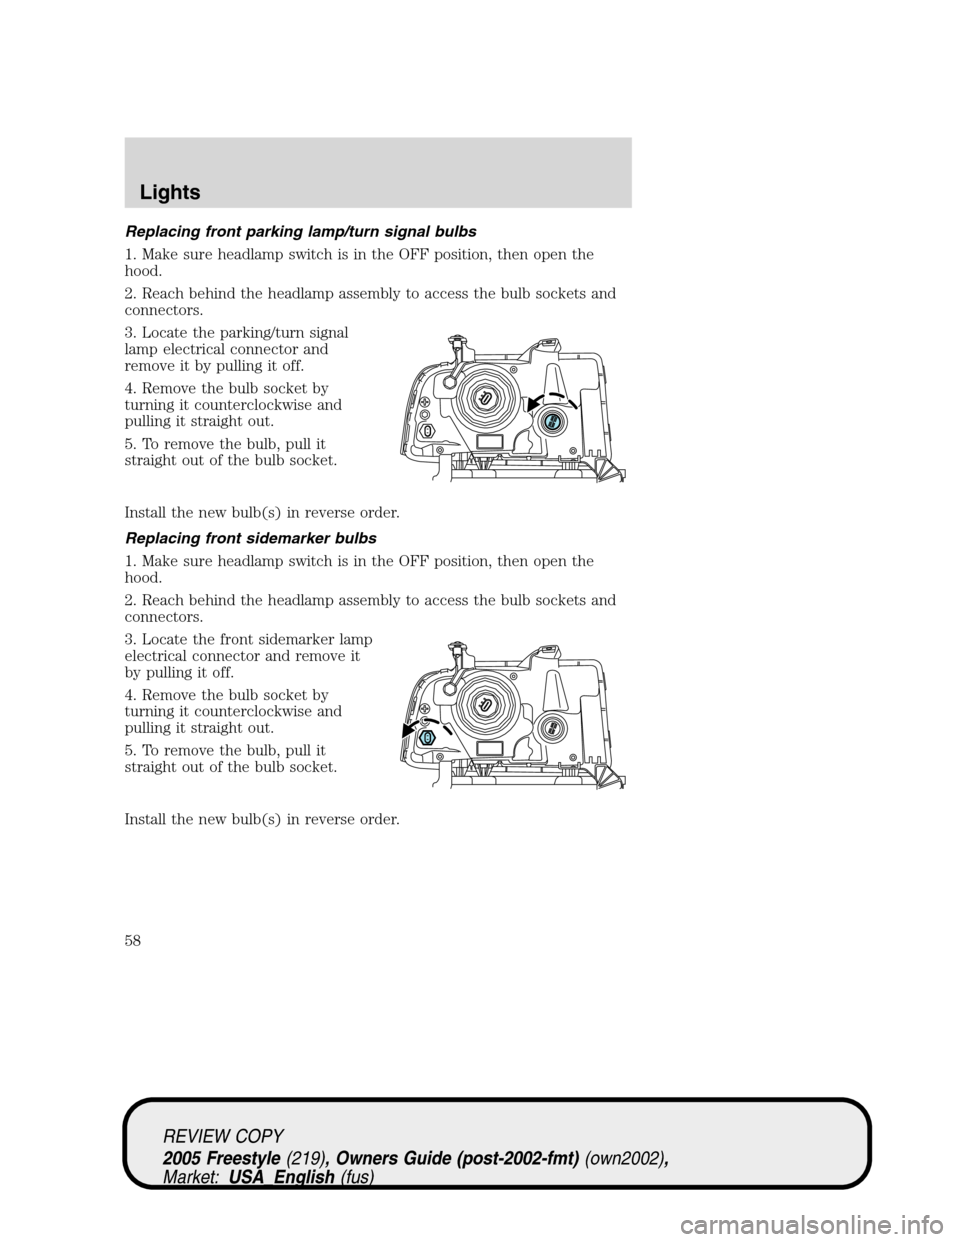
Replacing front parking lamp/turn signal bulbs
1. Make sure headlamp switch is in the OFF position, then open the
hood.
2. Reach behind the headlamp assembly to access the bulb sockets and
connectors.
3. Locate the parking/turn signal
lamp electrical connector and
remove it by pulling it off.
4. Remove the bulb socket by
turning it counterclockwise and
pulling it straight out.
5. To remove the bulb, pull it
straight out of the bulb socket.
Install the new bulb(s) in reverse order.
Replacing front sidemarker bulbs
1. Make sure headlamp switch is in the OFF position, then open the
hood.
2. Reach behind the headlamp assembly to access the bulb sockets and
connectors.
3. Locate the front sidemarker lamp
electrical connector and remove it
by pulling it off.
4. Remove the bulb socket by
turning it counterclockwise and
pulling it straight out.
5. To remove the bulb, pull it
straight out of the bulb socket.
Install the new bulb(s) in reverse order.
REVIEW COPY
2005 Freestyle(219), Owners Guide (post-2002-fmt)(own2002),
Market:USA_English(fus)
Lights
58
Page 59 of 288
Replacing stop/tail/turn/backup bulbs
The stop, tail, turn and backup lamp bulbs are located in the tail lamp
assembly. Follow the same steps to replace either bulb.
1. Make sure the headlamp switch is
in the OFF position and open the
liftgate.
2. Remove the two screws in the
liftgate opening, then pull the lamp
assembly away from the vehicle.
3. Remove the bulb socket by
rotating it counterclockwise, then
pulling it out of the lamp assembly.
4. Pull the bulb straight from the
socket.
Install new bulb(s) in reverse order.
Replacing high-mount brake lamp bulbs
1. Make sure the ignition control is
in the OFF position.
2. Remove the two screws.
3. Unclip the bulb holder from the
reflector.
4. Pull the bulb straight out.
Install in reverse order.
REVIEW COPY
2005 Freestyle(219), Owners Guide (post-2002-fmt)(own2002),
Market:USA_English(fus)
Lights
59
Page 60 of 288
Replacing license plate lamp bulbs
1. Make sure the headlamp switch is
in the OFF position.
2. Remove the two screws from the
license plate lamp assembly.
3. Remove bulb socket by turning
counterclockwise.
4. Carefully pull the bulb out from
the socket.
Install new bulb(s) in reverse order.
Replacing foglamp bulbs
1. Make sure the foglamp switch is
in the OFF position.
2. Remove the bulb socket from the
foglamp by turning
counterclockwise.
3. Disconnect the electrical
connector.
Install the new bulb in reverse order.
REVIEW COPY
2005 Freestyle(219), Owners Guide (post-2002-fmt)(own2002),
Market:USA_English(fus)
Lights
60