Page 185 of 272

•Transmission and clutch
removed for clarity.
3. With a grease gun, lubricate the clutch release bearing (at one
location) and the clutch release shaft (at two locations) using the grease
fittings provided.
4. Lubricate clutch release wear pads at the two locations where they
contact the clutch release bearing using a brush or similar tool.
5. Install the inspection cover onto the clutch housing.
TRANSMISSION FLUID
Always dispose of used automotive fluids in a responsible manner.
Follow your community’s standards for disposing of these types of fluids.
Call your recycling center to find out about recycling automotive fluids.
Automatic transmission fluid
Refer to your Allison Automatic Transmission Operator’s Manual for
scheduled intervals for transmission fluid checks and changes. Your
transmission does not consume fluid. However, the fluid level should be
checked if the transmission is not working properly, i.e., if the
transmission slips or shifts slowly or if you notice some sign of fluid
leakage.
Automatic transmission fluid expands when warmed. To obtain an
accurate fluid check, drive the vehicle until it is warmed up
(approximately 20 miles [30 km]). If your vehicle has been operated for
an extended period at high speeds, in city traffic or during hot weather,
the vehicle should be turned off for about 30 minutes to allow fluid to
cool before checking.
1. Drive the vehicle 20 miles (30 km) or until it reaches normal operating
temperature.
2. Park the vehicle on a level surface and engage the parking brake.
2005 F650/750(f67)
Supplement
USA English(fus)
Maintenance and specifications
185
Page 186 of 272

3. With the parking brake engaged and your foot on the brake pedal,
start the engine and move the gearshift lever through all of the gear
ranges. Allow sufficient time for each gear to engage.
4. Place the gearshift lever in N (Neutral) or P (Park) and leave the
engine running.
5. Remove the dipstick, wiping it clean with a clean, dry lint free rag.
6. Install the dipstick making sure it is fully seated in the filler tube.
7. Remove the dipstick and inspect the fluid level.
If you must add transmission fluid, make sure the correct type of fluid is
being used. The type of fluid used is indicated in your Allison Automatic
Transmission Operator’s Manual.
Fluid levels above the safe range may result in transmission failure; an
overfill condition of transmission fluid may cause shift and/or
engagement concerns and/or possible damage.
Use of a non-approved automatic transmission fluid may cause
internal transmission component damage.
Manual transmission fluid
Refer to your general maintenance information section for transmission
fluid level checks and fluid change intervals.
Your manual transmission may be filled with an optional synthetic fluid
which allows the use of extended service intervals. A tag on the filler
plug will identify the use of the synthetic fluid.
Use only fluid that meets manufacturer specifications (refer to
Lubricant specificationsin this chapter.
Use of a non-approved transmission fluid may cause internal
transmission component damage.
Check your transmission fluid level using the following procedure:
1. Park the vehicle on level ground.
2. Set the parking brake and shift into 1 (First) and turn the engine off.
3. Clean any dirt from around the filler plug.
4. Remove the filler plug and inspect the fluid level.
5. The fluid level should be up to the bottom of the filler plug opening.
6. If necessary, add enough fluid through the filler plug opening so that
the fluid level is at the bottom of the opening.
7. Clean and install the filler plug securely.
2005 F650/750(f67)
Supplement
USA English(fus)
Maintenance and specifications
186
Page 187 of 272

Drain and refill your transmission fluid using the following procedure:
1. Drain the transmission while the fluid is warm.
2. Park the vehicle on level ground.
3. Set the parking brake and shift into 1 (First) and turn the engine off.
4. Clean any dirt from around the filler and drain plugs.
5. Remove the filler and drain plugs and drain the fluid into a suitable
container. Dispose all used automotive fluids in a responsible manner
following your local authorized standards.
6. Clean and install the drain plug securely.
7. Add enough fluid through the filler plug opening so that the fluid level
is up to the bottom of the opening.
8. Clean and install the filler plug securely.
ENGINE AND SUBSYSTEM MAINTENANCE
Note:Information in this section pertains to the 6.0L Power Stroke
engine only. For information pertaining to other engines, see the
respective engine operator manual.
Note:To prevent damage to the engine control module, never
spray-wash it directly. Never spray any connector.
For effective emissions control and low operating cost, it is important
that maintenance operations listed in this section be performed at the
specified periods or mileage intervals indicated (kilometers, miles, hours,
or months, whichever comes first).
Service intervals are based upon average operating conditions. Where
dusty, frequent start and stop or heavily laden operations are
encountered, more frequent servicing will be required.
As the vehicle (engine) owner, you are responsible for the performance
of all scheduled maintenance. The required maintenance operations may
be performed by the owner at a service establishment of the owner’s
choosing. Any replacement parts used for required maintenance services
or repairs should be genuine manufacturer service parts or equivalent in
quality and performance to genuine manufacturer service parts. Use of
inferior parts hinders operations of the engine and emissions controls
and can reduce engine life and/or jeopardize the warranty.
Receipts covering the performance of regular maintenance should be
retained in the event questions arise concerning maintenance. The
receipts should be transferred to each subsequent owner of the vehicle
(engine).
2005 F650/750(f67)
Supplement
USA English(fus)
Maintenance and specifications
187
Page 188 of 272

Catalytic converter
If your Diesel engine is equipped with a catalytic converter, it is
important to review the maintenance schedule to insure proper
functioning of the catalytic converter. Also, take precautions not to
damage the catalytic converter when servicing your engine or storing
your vehicle.
Note:If your vehicle is equipped with a catalytic converter/muffler,do
notblend waste oil with Diesel fuel. Operate only on low sulfur (less
than 500 parts per million sulfur) Diesel fuel with a cetane value of 45 or
higher.
Note:If your vehicle is equipped with a vertical exhaust pipe, it is very
important to have and maintain a rain cap on the exhaust pipe to
prevent water from entering the exhaust system and catalytic converter.
Any water entering the catalytic converter may damage the catalyst and
affect the function of the converter.
Air induction system
Once each year, perform a complete inspection of the air induction
system. In areas where road salt is used, the inspection consists of
disassembling the joints of each aluminum component and inspecting for
salt build-up, presence of chlorine that can cause aluminum particles to
flake off and enter the engine combustion chambers.
If evidence of corrosion is found (usually at the pipe connections), use a
wire brush to clean the inside of the pipes and inside the rubber hoses.
If the intake pipes are pitted at the joint ends, use RTV silicone to seal
the joints. Be certain that no excess material is on the inside of the pipes
that can be pulled into the engine. If the service condition of the pipes,
hoses or clamps is questionable, replace the defective part(s).
Be sure that prior to reassembly all dust and debris has been cleaned out
of the pipes and couplings with a clean, damp rag.
To reduce the risk of personal injury or death when performing
maintenance to any turbocharged engine with engine air inlet
piping disconnected, a turbocharger compressor air inlet protective
shield should be installed over the turbocharger air inlet.
Cummins B and Caterpillar engines
Refer to the respective engine operator manual for air filter replacement
procedure.
2005 F650/750(f67)
Supplement
USA English(fus)
Maintenance and specifications
188
Page 189 of 272

FUEL INFORMATION
Important safety precautions
Do not overfill the fuel tank. The pressure in an overfilled tank
may cause leakage and lead to fuel spray and fire.
The fuel system may be under pressure. If the fuel cap is venting
vapor or if you hear a hissing sound, wait until it stops before
completely removing the cap.
Automotive fuels can cause serious injury or death if misused or
mishandled.
Observe the following guidelines when handling fuel:
•Extinguish all smoking materials
and any open flames before
fueling your vehicle.
•Always turn off the vehicle before
fueling.
•Automotive fuels can be harmful
or fatal if swallowed. If fuel is swallowed, call a physician immediately,
even if no symptoms are immediately apparent. The toxic effects of
fuel may not be visible for hours.
•Avoid inhaling fuel vapors. Inhaling too much fuel vapor of any kind
can lead to eye and respiratory tract irritation. In severe cases,
excessive or prolonged breathing of fuel vapor can cause serious
illness and permanent injury.
•Avoid getting fuel liquid in your eyes. If fuel is splashed in the eyes,
remove contact lenses (if worn), flush with water for 15 minutes and
seek medical attention. Failure to seek proper medical attention could
lead to permanent injury.
•Fuels can also be harmful if absorbed through the skin. If fuel is
splashed on the skin and/or clothing, promptly remove contaminated
clothing and wash skin thoroughly with soap and water. Repeated or
prolonged skin contact with fuel liquid or vapor causes skin irritation.
If you must replace the fuel filler cap, replace it with a genuine
Ford or Motorcraft part. The customer warranty may be void for
2005 F650/750(f67)
Supplement
USA English(fus)
Maintenance and specifications
189
Page 190 of 272

any damage to the fuel tank or fuel system if a genuine Ford or
Motorcraft fuel filler cap is not used.
If you do not use the proper fuel filler cap, excessive pressure or
vacuum in the fuel tank may damage the fuel system or cause
the fuel system to work improperly in a collision, which may result in
possible personal injury.
Choosing the right fuel
The engine is designed to use low sulfur number 1D or 2D diesel fuel
only. At temperatures below–20
oF(–7oC), number 1D or winter blend
number 2D fuel is recommended. (SeeCold weather operationin the
Drivingsection.) Diesel fuel containing no more than 5% of biodiesel
may be used. Biodiesel fuel is a product derived from renewable fuel
sources such as vegetable oil, animal fat and cooking oil.
Do not use home heating oil or any diesel fuel not intended for
highway use. Red dye is used to identify fuels intended for
agricultural and non-highway use. Damage to the fuel injection
system, engine and exhaust catalyst can occur if an improper fuel
is used. Do not add gasoline, gasohol or alcohol to diesel fuel.
This practice creates a serious fire hazard and engine
performance problems.
Use low sulfur (less than 0.05% by weight) fuel as required by the EPA
for emission compliance.
Do not mix diesel fuel with gasoline, gasohol or alcohol. This
could cause an explosion resulting in personal injury.
Do not use starting fluid such as ether or gasoline. Such fluids
can cause immediate explosive damage to the engine and
possible personal injury.
Fuel quality
It should not be necessary to add any aftermarket additives to your fuel
tank if you use a properly formulated diesel fuel that meets ASTM D 975
specification. Aftermarket additives can damage the injector system or
engine. Repairs to correct the effects of using an aftermarket product in
your fuel may not be covered by your warranty.
2005 F650/750(f67)
Supplement
USA English(fus)
Maintenance and specifications
190
Page 191 of 272

Do not blend used engine oil with diesel fuel under any
circumstances.Blending used oil with the fuel will significantly increase
your vehicle’s exhaust emissions and reduce engine life due to increased
internal wear.
Many of the world’s automakers approved the World-wide Fuel Charter
that recommends diesel fuel specifications to provide improved
performance and emission control system protection for your vehicle.
Diesel fuel that meet the World-wide Fuel Charter should be used when
available. Ask your fuel supplier about fuel that meet the World-Wide
Fuel Charter.
Running out of fuel
Avoid running out of fuel as this will allow air to enter the fuel system,
which will make restarting the vehicle difficult.
If you have run out of fuel:
•If your vehicle is equipped with dual fuel tanks,add at least 4–5
gallons (15–19 liters) of fuel to each tank before attempting to restart
the engine.
•If your vehicle is equipped with a Caterpillar engine,the fuel
system must be primed before attempting to restart the engine. Refer
to the engine operator’s manual for instructions on priming the engine.
•Use caution not to overheat and damage the starterby cranking
the engine for an excessive period of time. You may need to crank the
engine for a longer time than normal. If the engine fails to start in 30
seconds, turn the ignition to the OFF position and wait for two
minutes before cranking the engine again.
•Any remaining trapped air will self-purge from the fuel system once
the engine starts running.
•
The engine may run rough and produce white smoke while air is in the
fuel system. This is normal and should stop after a short period of time.
Fuel filter/water separator
Do not drain water separator while engine is running. Fuel may
ignite if separator is drained while engine is running or vehicle is
moving.
The fuel filter/water separator removes any contaminated particles
and/or water from the fuel before the fuel enters the engine.
The fuel filter/water separator should be drained as recommended in the
general maintenance information section.
2005 F650/750(f67)
Supplement
USA English(fus)
Maintenance and specifications
191
Page 192 of 272

Draining the fuel filter/water separator - Caterpillar engine
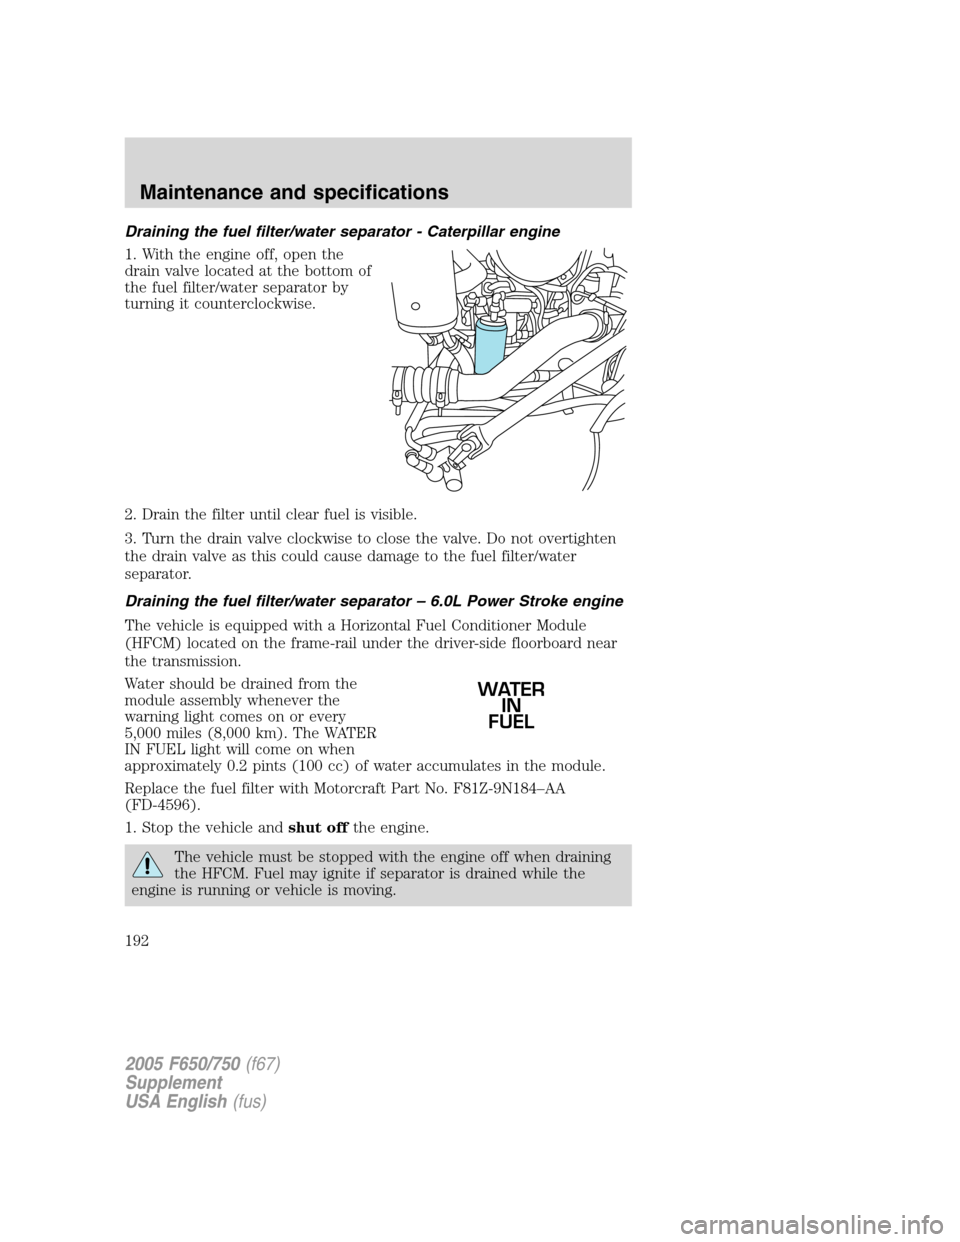
1. With the engine off, open the
drain valve located at the bottom of
the fuel filter/water separator by
turning it counterclockwise.
2. Drain the filter until clear fuel is visible.
3. Turn the drain valve clockwise to close the valve. Do not overtighten
the drain valve as this could cause damage to the fuel filter/water
separator.
Draining the fuel filter/water separator–6.0L Power Stroke engine
The vehicle is equipped with a Horizontal Fuel Conditioner Module
(HFCM) located on the frame-rail under the driver-side floorboard near
the transmission.
Water should be drained from the
module assembly whenever the
warning light comes on or every
5,000 miles (8,000 km). The WATER
IN FUEL light will come on when
approximately 0.2 pints (100 cc) of water accumulates in the module.
Replace the fuel filter with Motorcraft Part No. F81Z-9N184–AA
(FD-4596).
1. Stop the vehicle andshut offthe engine.
The vehicle must be stopped with the engine off when draining
the HFCM. Fuel may ignite if separator is drained while the
engine is running or vehicle is moving.
WATER
IN
FUEL
2005 F650/750(f67)
Supplement
USA English(fus)
Maintenance and specifications
192