2005 DODGE STRATUS COUPE towing
[x] Cancel search: towingPage 261 of 396
EMERGENCIES
CONTENTS
mIf the vehicle breaks down................263
NIf the engine quits.....................263
mOperation under adverse driving conditions...263
NIf your vehicle becomes stuck in sand, mud or
snow..............................263
NOnawetroad........................264
NOn snowy or icy roads..................265
mSpare tire, jack and tool set storage.........266
NHandling spare tire....................266
NJack...............................267
mCompact spare tire.....................267
mWheel covers (if so equipped).............268
mJacking and tire changing................270
NJacking up the vehicle..................270
mEngine overheating.....................279
mJump-starting the engine.................280
NIf your vehicle has anti-lock brakes.........284
mTowing..............................284
mFuses...............................286
NFuse block...........................287
mFusible links..........................287
NFuse load capacities....................288
mReplacement of light bulbs................293
NBulb capacity.........................293
8
Page 280 of 396
WARNING!
²When working near the radiator cooling fan, dis-
connect the fan motor lead or turn the ignition key
to the OFF position. The fan is temperature con-
trolled and can start at any time the ignition key is
in the ON position.
²You or others can be badly burned by hot coolant
or steam from your radiator. If you see or hear
steam coming from under the hood, don't open
the hood until the radiator has had time to cool.
Never try to open a cooling system pressure cap
when the radiator is hot.
JUMP-STARTING THE ENGINE
If the engine cannot be started because the battery is
weak or dead, the battery from another vehicle can be
used with booster cables to start the engine.
WARNING!
When using jumper cables to start a vehicle, follow
procedures exactly and exercise extreme caution.
CAUTION!
Do not try to start your vehicle by pushing or towing.
Vehicles equipped with an automatic transaxle can-
not be started this way. Pushing or towing a vehicle
equipped with a manual transaxle may overheat and
damage the catalytic converter. Also, there is a
greater risk of an accident when a vehicle is being
pushed or towed.
1. Remove any metal jewelry such as watch bands or
bracelets that might make an inadvertent electrical con-
tact.
2. Position the vehicles close enough together so the
booster cables can reach, but be sure the vehicles aren't
touching each other. If they are, it could cause a ground
280 EMERGENCIES
Page 284 of 396
WARNING!
²Charging the battery installed in the vehicle
might cause the battery to catch fire and explode.
Or, damage to the vehicle could result. If it has to
be charged in that condition for unavoidable
reasons, disconnect the vehicle side negative lead.
²Keep sparks, cigarettes and flames away from the
battery because the battery may produce an explosion.
²Use adequate ventilation when charging or using
the battery in an enclosed space.
²Remove all the caps before charging the battery.
²Electrolyte (battery acid) is corrosive diluted sulfuric
acid. If electrolyte comes in contact with your hands,
eyes, clothes, or the painted surface of your vehicle,
thoroughly flush with water. If electrolyte gets in
your eyes, flush them thoroughly with water imme-
diately, and get prompt medical attention.
WARNING!
²Always wear protective clothing and goggles
when working near the battery.
²Keep the battery out of the reach of children.
If your vehicle has anti-lock brakes
If the vehicle is driven without sufficient battery charge,
after the engine has been started by using booster cables,
the engine may misfire. This can cause the anti-lock
braking system warning light to blink on and off. This is
a result of insufficient battery voltage; it is not a malfunc-
tion of the brake system. If this happens, fully charge the
battery before driving.
TOWING
When towing your vehicle, all state and local regulations for
towing must be followed. Incorrect towing equipment could
damage your vehicle. When towing is required, contact a
professional towing service and make sure that flat bed type,
dolly type or wheel lift type towing equipment is used. Do
not attempt to be towed by another vehicle with a rope using
the tie-down hooks.
284 EMERGENCIES
Page 285 of 396
CAUTION!
²Tie-down hooks should never be used for towing
purposes.
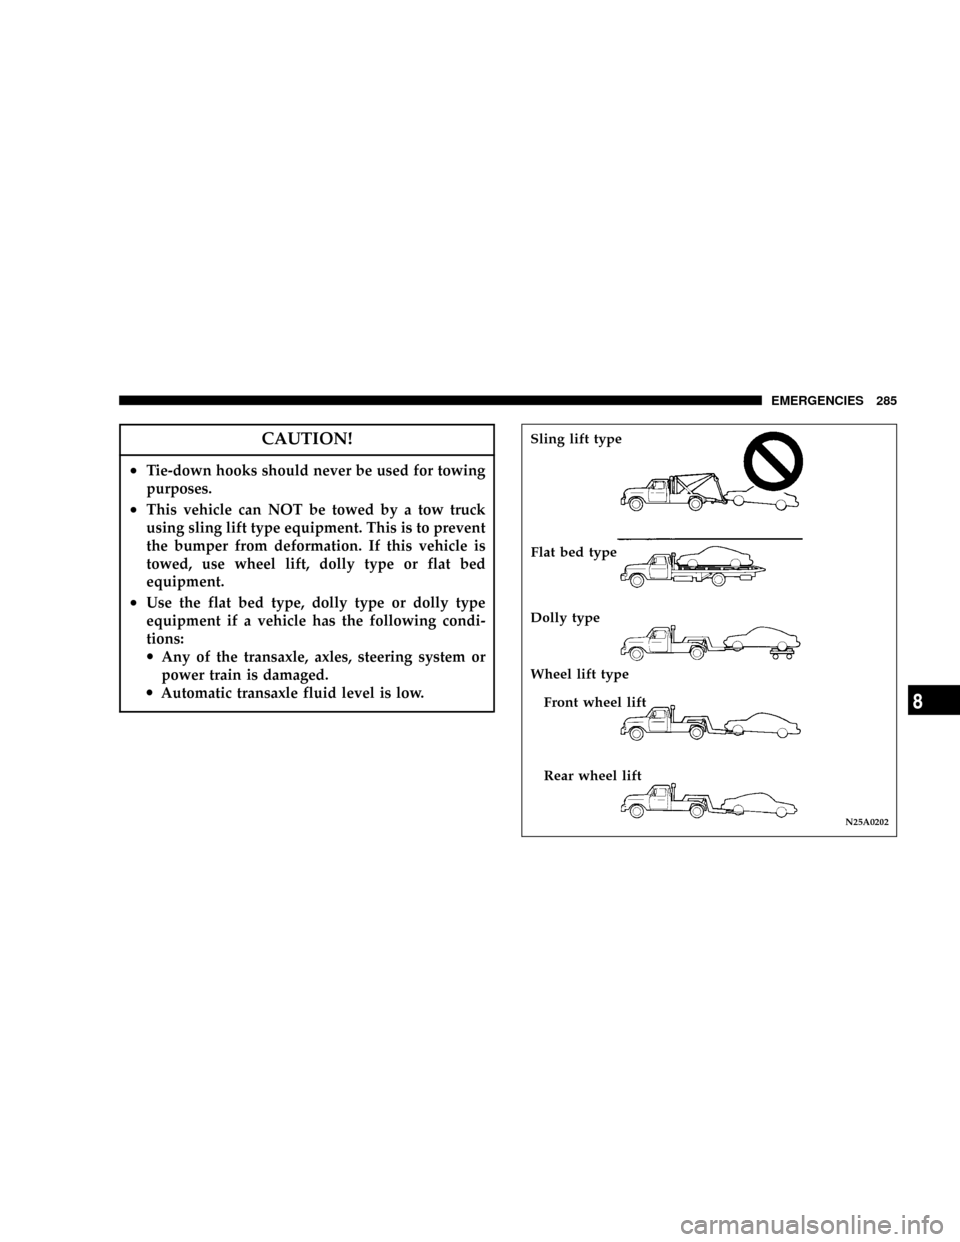
²This vehicle can NOT be towed by a tow truck
using sling lift type equipment. This is to prevent
the bumper from deformation. If this vehicle is
towed, use wheel lift, dolly type or flat bed
equipment.
²Use the flat bed type, dolly type or dolly type
equipment if a vehicle has the following condi-
tions:
·Any of the transaxle, axles, steering system or
power train is damaged.
·Automatic transaxle fluid level is low.
N25A0202
Sling lift type
Flat bed type
Dolly type
Wheel lift type
Front wheel lift
Rear wheel lift
EMERGENCIES 285
8
Page 286 of 396
CAUTION!
²Towing should only be done by a professional
tow service particularly if it will involve towing
on winding roads, hills or heavy traffic. If you
have any doubts, use a professional tow service.
TowingÐfront wheel lift
Place the gearshift lever (manual transaxle) to Neutral or
the selector lever (automatic transaxle) in the ªNº (NEU-
TRAL) position. Release the parking brake.
TowingÐrear wheel lift
Turn the ignition key to the ªACCº position and secure
the steering wheel in a straight-ahead position with a
rope or similar device. Never place the ignition key in the
ªLOCKº position. This will result in damage to the
steering lock mechanism.
If you have to tow an automatic transaxle model with the rear
wheels raised (with the front wheels on the ground):
Observe the following restricted towing speeds and distances.
·Speed: 30 mph (50 km/h)
·Distance: 18 miles (30 km)
CAUTION!
Never tow an automatic transaxle model with the
rear wheels raised (with the front wheels on the
ground) when the automatic transaxle fluid level is
low. This may cause serious and expensive damage
to the transaxle.
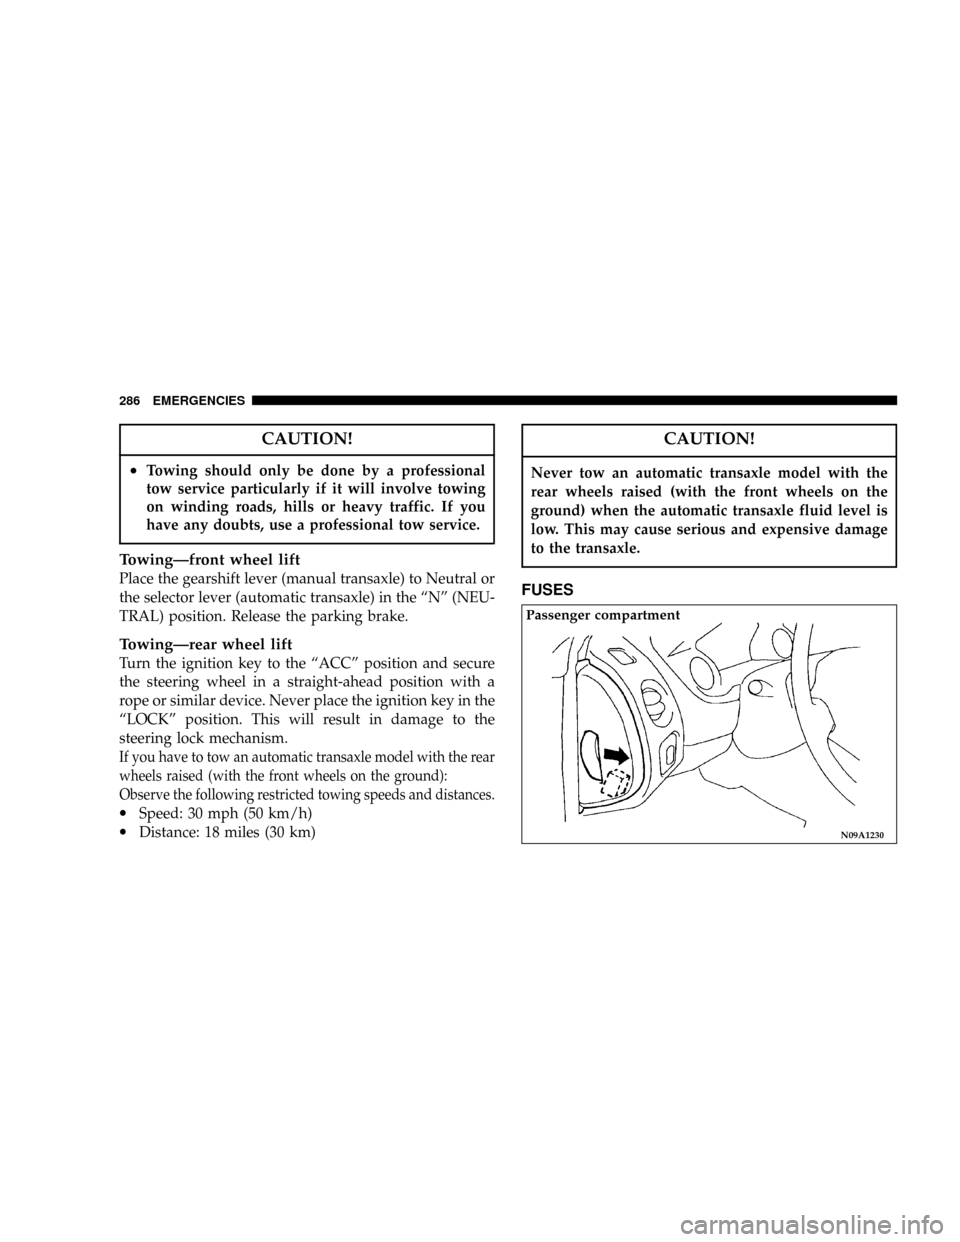
FUSES
N09A1230
Passenger compartment
286 EMERGENCIES
Page 314 of 396

EMISSIONS TESTING
In some localities, it may be or will become a legal
requirement to ensure that all emissions components and
systems are functioning properly as a part of the test
procedure. The test center accomplishes this by checking
the On Board Diagnostic System system (OBD) with an
electronic scan tool. If your vehicle has recently been
serviced, the OBD system may have been reset to a9not
ready9condition because the OBD system has not had
sufficient time since the servicing to reconfirm that
emissions components are operating properly. In most
cases, a reasonable mix and amount of normal city and
highway driving and at least one overnight-off period
will be required to prepare your vehicle for this check;
however your authorized dealer has the equipment and
procedures required to make certain that the OBD system
of your vehicle is ready for the required testing.
ONBOARD DIAGNOSTIC SYSTEM (OBD II)
To meet new government regulations and promote
cleaner air, your vehicle is equipped with a sophisticated
onboard diagnostic system called OBD II. This system
monitors the performance of the emissions, engine, andautomatic transaxle control systems. When these systems
are operating properly, your vehicle will provide excel-
lent performance and fuel economy, as well as engine
emissions well within current government regulations.
If any of these systems require service, the
OBD II system will turn on the Malfunction
Indicator Light. It will also store diagnostic
codes and other information to assist your
service technician in making repairs. Al-
though your vehicle will usually be driveable and not
need towing, see your dealer for service as soon as
possible.
CAUTION!
Prolonged driving with the light on could cause
further damage to the emission control system. It
could also affect fuel economy and driveability. The
vehicle must be serviced before any state emissions
tests can be performed.
314 MAINTENANCE
Page 344 of 396

2. Determine the combined weight of the driver and
passengers that will be riding in your vehicle.
3. Subtract the combined weight of the driver and pas-
sengers from XXX kilograms or XXX pounds.
4. The resulting figure equals the available amount of
cargo and luggage load capacity. For example, if the
9XXX9amount equals 1400 lbs. and there will be five 150
lb. passengers in your vehicle, the amount of available
cargo and luggage load capacity is 650 lbs. (1400-750 (5 x
150) = 650 lbs.)
5. Determine the combined weight of luggage and cargo
being loaded on the vehicle. That weight may not safely
exceed the available cargo and luggage load capacity
calculated in Step 4.
6. If your vehicle will be towing a trailer, load from your
trailer will be transferred to your vehicle. Consult this
manual to determine how this reduces the available
cargo and luggage load capacity of your vehicle.
NOTE: The above steps for determining correct load
limit were written in accordance with U.S.A. regulations.
Your vehicle cannot tow a trailer, so step 6 is irrelevant.
NOTE:
(1) The following table shows examples on how to
calculate total cargo/load capacity of your vehicle with
varying seating configurations and number and size of
occupants. This table is for illustration purposes only and
may not be accurate for the seating and load capacity of
your vehicle.
(2) For the following example the combined weight of
occupants and cargo should never exceed 865 lbs.
(392kg).
(3) Under a maximum loaded vehicle condition, gross
axle weight ratings (GAWR's) for the front and rear axles
must not be exceeded. For further information on
GAWR's, vehicle loading and trailer towing, see the
9Specifications9section of this manual.
344 MAINTENANCE
Page 396 of 396

Tire chains.......................... 348
Tread wear indicators.................. 346
Tools................................ 266
Towing.............................. 284
Trailering........................... 205
Trailer Towing......................... 205
Transaxle
Automatic transaxle................... 155
Autostick........................... 165
Manual transaxle..................... 168
Transmission
Automatic transmission................ 160
Transmitter, Garage Door Opener........... 134
Transporting Pets....................... 103
Trip odometer......................... 108
Trip odometer reset button................ 108
Trunklid .............................. 35
Turbocharger boost gauge................ 108
Turn signal indicators.................109,114
Lever.............................. 124
Uniform Tire Quality Grades.............. 387
Universal Transmitter.................... 134Vanity mirror.......................... 211
Vehicle Identification Number............... 5
Vehicle labeling........................ 372
Vehicle Weights........................ 375
Ventilators............................ 237
Warnings and Cautions.................... 5
Warranty Information.................... 382
Washer fluid level indicator............... 109
Washer
Windshield.......................130,333
Washing.............................. 255
Waxing.............................. 257
Wheel covers.......................... 268
Whip antenna......................... 221
Windshield washers..................130,333
Windshield wiper blades................. 333
Windshield wipers...................... 128
396 INDEX