2005 CHEVROLET SILVERADO reset
[x] Cancel search: resetPage 152 of 580
Outside Power Camper-Type Mirror
If your vehicle is equipped with outside power
camper-type mirrors, they can be adjusted so you can
have a clear view of objects behind you.
To extend the mirrors move the selector switch,
located above the mirror control, to the middle position.
The mirror control will illuminate. Press the left side
of the mirror control to slide the mirror heads away from
the body of the vehicle. Press the right side of the
mirror control to slide the mirror heads toward the body
of the vehicle.
Outside Power Foldaway Mirrors
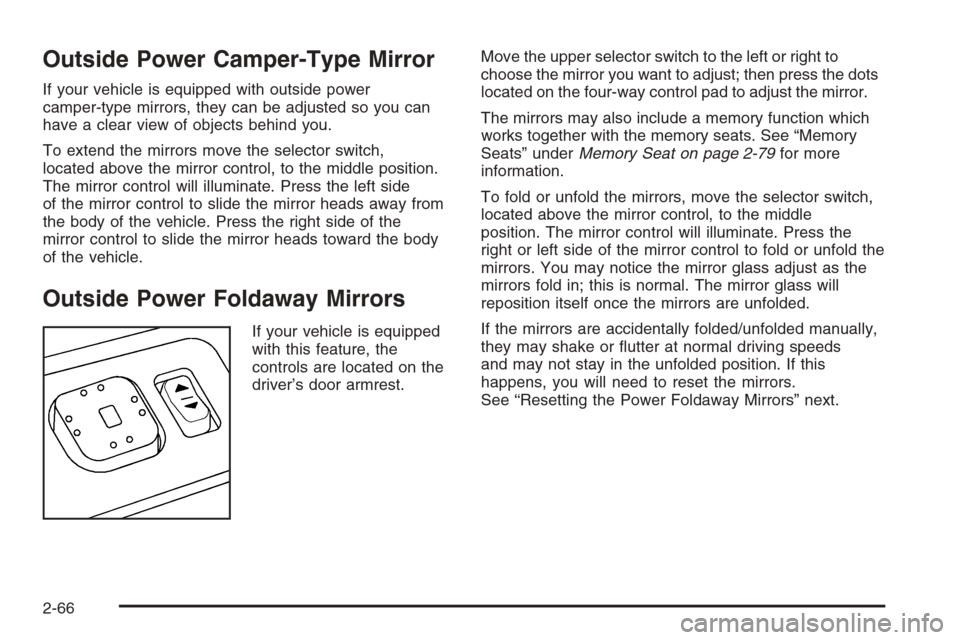
If your vehicle is equipped
with this feature, the
controls are located on the
driver’s door armrest.Move the upper selector switch to the left or right to
choose the mirror you want to adjust; then press the dots
located on the four-way control pad to adjust the mirror.
The mirrors may also include a memory function which
works together with the memory seats. See “Memory
Seats” underMemory Seat on page 2-79for more
information.
To fold or unfold the mirrors, move the selector switch,
located above the mirror control, to the middle
position. The mirror control will illuminate. Press the
right or left side of the mirror control to fold or unfold the
mirrors. You may notice the mirror glass adjust as the
mirrors fold in; this is normal. The mirror glass will
reposition itself once the mirrors are unfolded.
If the mirrors are accidentally folded/unfolded manually,
they may shake or �utter at normal driving speeds
and may not stay in the unfolded position. If this
happens, you will need to reset the mirrors.
See “Resetting the Power Foldaway Mirrors” next.
2-66
Page 153 of 580

Resetting the Power Foldaway Mirrors
You will need to reset the power foldaway mirrors if the
following occurs:
They are accidentally manually folded/unfolded.
The mirrors will not stay in the unfolded position.
The mirrors shake and �utter at normal driving
speeds.
To reset the power foldaway mirrors, fold and unfold
them at least three times using the mirror controls.
This will reset them to their normal position.
Outside Automatic Dimming Mirror
If your vehicle is equipped with this feature, the driver’s
outside mirror will adjust for the glare of headlamps
behind you. This feature is controlled by the on and off
settings found on the electrochromic mirror.
Outside Curb View Assist Mirrors
If the vehicle has the memory package, the outside
mirrors are able to perform the curb view assist mirror
function. This feature will cause the passenger’s
and/or driver’s mirror to tilt to a preselected position
when the vehicle is in REVERSE (R). This feature may
be useful in allowing the driver to view the curb when
parallel parking. When the vehicle is shifted out of
REVERSE (R) and a short delay has occurred,
the passenger’s and/or driver’s mirror will return to its
original position.
To change the preselected tilt position, adjust the
mirrors to the desired position while the vehicle is in
REVERSE (R). When the vehicle is shifted out of
REVERSE (R), this new position is saved in memory as
the tilt position.
This feature can be turned on or off through the Driver
Information Center (DIC). SeeDriver Information
Center (DIC) on page 3-50for more information.
2-67
Page 160 of 580
Using HomeLink®
Press and hold the appropriate HomeLink®button for
at least half of a second. The indicator light will come on
while the signal is being transmitted.
Erasing HomeLink®Buttons
To erase programming from the three buttons do the
following:
1. Press and hold down the two outside buttons until
the indicator light begins to �ash, after 20 seconds.
Do not hold the two outside buttons for longer
than 30 seconds.
2. Release both buttons.
HomeLink
®is now in the train (learning) mode and can
be programmed at any time beginning with Step 2
under “Programming HomeLink
®” shown earlier in
this section.
Individual buttons cannot be erased, but they can be
reprogrammed. See “Reprogramming a Single
HomeLink
®Button” following this section.
Reprogramming a Single HomeLink®
Button
To program a device to HomeLink®using a HomeLink®
button previously trained, follow these steps:
1. Press and hold the desired HomeLink
®button.
Do not release the button.
2. The indicator light will begin to �ash after
20 seconds. While still holding the HomeLink
®
button, proceed with Step 2 under “Programming
HomeLink®” shown earlier in this section.
Resetting Defaults
To reset HomeLink®to default settings do the following:
1. Hold down the two outside buttons for about
20 seconds until the indicator light begins to �ash.
2. Continue to hold both buttons until the HomeLink
®
indicator light turns off.
3. Release both buttons.
For questions or comments, contact HomeLink
®
at 1-800-355-3515, or on the Internet at
www.homelink.com.
2-74
Page 164 of 580
Sunroof
The vehicle may be equipped with a power sliding
sunroof. To open or close your sunroof, the ignition must
be on or Retained Accessory Power (RAP) must be
active. SeeRetained Accessory Power (RAP) on
page 2-23for more information.
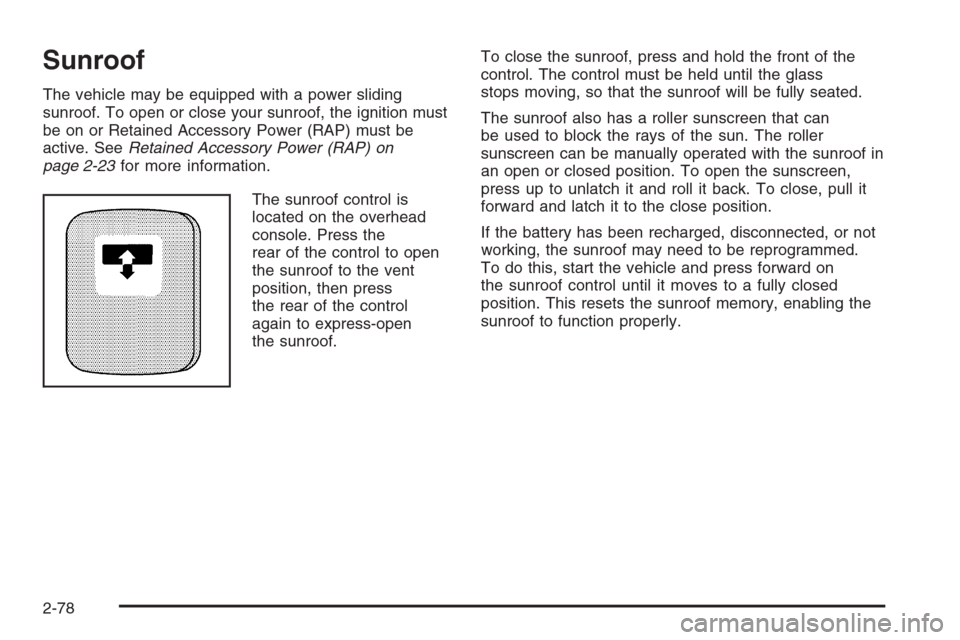
The sunroof control is
located on the overhead
console. Press the
rear of the control to open
the sunroof to the vent
position, then press
the rear of the control
again to express-open
the sunroof.To close the sunroof, press and hold the front of the
control. The control must be held until the glass
stops moving, so that the sunroof will be fully seated.
The sunroof also has a roller sunscreen that can
be used to block the rays of the sun. The roller
sunscreen can be manually operated with the sunroof in
an open or closed position. To open the sunscreen,
press up to unlatch it and roll it back. To close, pull it
forward and latch it to the close position.
If the battery has been recharged, disconnected, or not
working, the sunroof may need to be reprogrammed.
To do this, start the vehicle and press forward on
the sunroof control until it moves to a fully closed
position. This resets the sunroof memory, enabling the
sunroof to function properly.
2-78
Page 176 of 580
Windshield Washer
LQ(Washer Fluid):There is a paddle marked
with the windshield washer symbol at the top of
the multifunction lever. To spray washer �uid on the
windshield, push the paddle. The wipers will clear
the window and then either stop or return to your
preset speed.
{CAUTION:
In freezing weather, do not use your washer
until the windshield is warmed. Otherwise the
washer �uid can form ice on the windshield,
blocking your vision.
Cruise Control
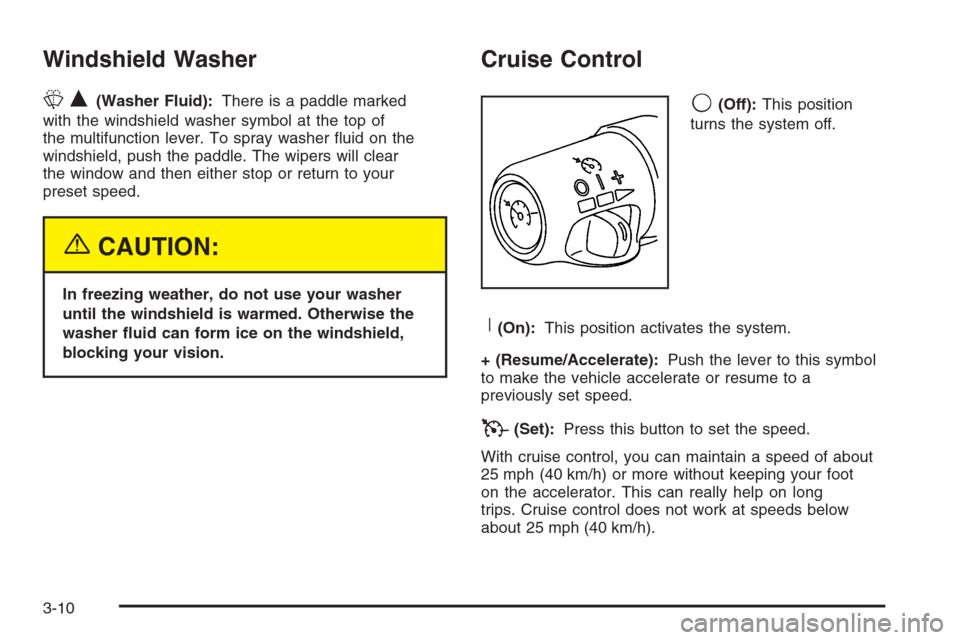
9(Off):This position
turns the system off.
R(On):This position activates the system.
+ (Resume/Accelerate):Push the lever to this symbol
to make the vehicle accelerate or resume to a
previously set speed.
T(Set):Press this button to set the speed.
With cruise control, you can maintain a speed of about
25 mph (40 km/h) or more without keeping your foot
on the accelerator. This can really help on long
trips. Cruise control does not work at speeds below
about 25 mph (40 km/h).
3-10
Page 178 of 580
Resuming a Set Speed
Suppose you set your cruise control at a desired speed
and then you apply the brake. This, of course,
disengages the cruise control. But you don’t need to
reset it.
Once you’re going about 25 mph (40 km/h) or more, you
can move the cruise control switch brie�y from on to
resume/accelerate.
You’ll go right back up to your chosen speed and
stay there.
If you hold the switch at resume/accelerate the vehicle
will keep going faster until you release the switch or
apply the brake. So unless you want to go faster, don’t
hold the switch at resume/accelerate.
Increasing Speed While Using Cruise
Control
There are two ways to go to a higher speed:
Use the accelerator pedal to get to the higher
speed. Press the set button at the end of the lever,
then release the button and the accelerator
pedal. You’ll now cruise at the higher speed. If the
accelerator pedal is held longer than 60 seconds,
cruise control will turn off.
Move the cruise switch from on to
resume/accelerate. Hold it there until you get up to
the speed you want, and then release the switch.
To increase your speed in very small amounts,
move the switch brie�y to resume/accelerate.
Each time you do this, your vehicle will go about
1 mph (1.6 km/h) faster.
Reducing Speed While Using Cruise
Control
Press in the button at the end of the lever until you
reach the lower speed you want, then release it.
To slow down in very small amounts, brie�y press
the set button. Each time you do this, you’ll go
about 1 mph (1.6 km/h) slower.
Passing Another Vehicle While Using
Cruise Control
Use the accelerator pedal to increase your speed.
When you take your foot off the pedal, your vehicle will
slow down to the cruise control speed you set earlier.
3-12
Page 199 of 580
Speedometer and Odometer
Your speedometer lets you see your speed in both
miles per hour (mph) and kilometers per hour (km/h).
Your odometer shows how far your vehicle has
been driven, in either miles (used in the United States)
or kilometers (used in Canada).
Engine Hour Meter Display
The Driver Information Center (DIC) can also display
the number of hours the engine has run. To display the
hour meter, turn the ignition off, press and hold the
reset button for at least four seconds. The hour meter
will be displayed for up to 30 seconds, or until the
ignition is turned on. SeeDIC Operation and Displays
on page 3-51for more information.
Trip Odometer
The trip odometer can tell you how far your vehicle has
been driven since you last set the trip odometer to zero.
Press the reset button, located on the instrument panel
cluster next to the trip odometer display, to toggle
between the trip odometer and the regular odometer.
Holding the reset button for approximately one second
while the trip odometer is displayed will reset it.
To display the odometer reading with the ignition off,
press the reset button.
Tachometer
Your tachometer displays the engine speed in revolutions
per minute (rpm). See “Grade Braking” underTow/Haul
Mode on page 2-30for more information.
Notice:If you operate your vehicle with the
tachometer above 6,000 rpm, your vehicle could be
damaged. The repairs would not be covered by
your warranty. Do not operate the engine with the
tachometer above 6,000 rpm.
Safety Belt Reminder Light
When the key is turned to RUN or START, a chime will
be provided for several seconds to remind people to
buckle their safety belts. The driver safety belt light will
also be provided and stay on for several seconds,
then it will �ash for several more. You should buckle
your seat belt.
If your vehicle is not
equipped with the
passenger sensing system,
this chime and light will be
repeated if the driver
remains unbuckled and the
vehicle is in motion.
3-33
Page 216 of 580
Driver Information Center (DIC)
The Driver Information Center (DIC) display is located
on the instrument panel cluster, below the speedometer.
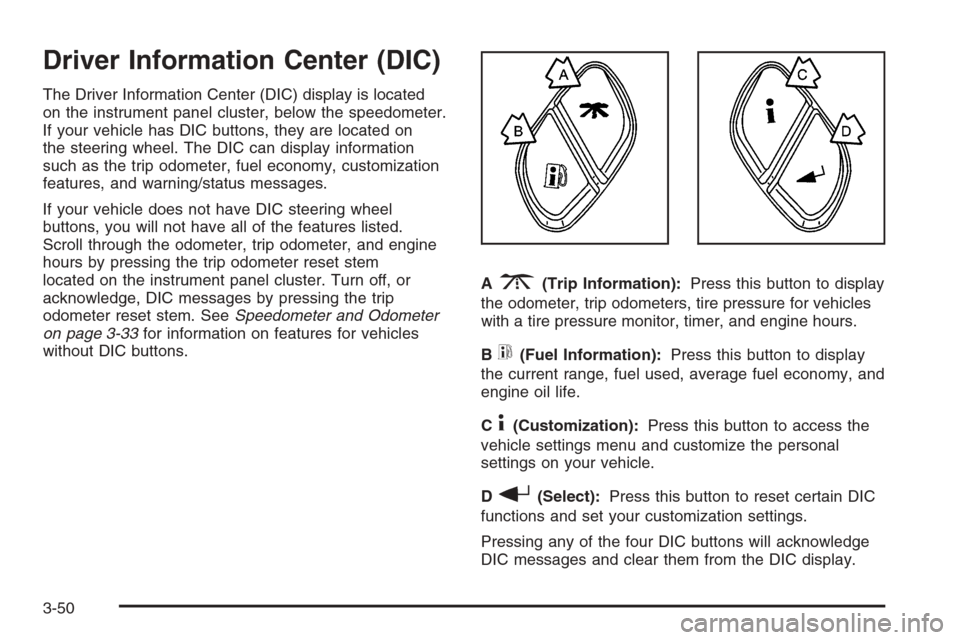
If your vehicle has DIC buttons, they are located on
the steering wheel. The DIC can display information
such as the trip odometer, fuel economy, customization
features, and warning/status messages.
If your vehicle does not have DIC steering wheel
buttons, you will not have all of the features listed.
Scroll through the odometer, trip odometer, and engine
hours by pressing the trip odometer reset stem
located on the instrument panel cluster. Turn off, or
acknowledge, DIC messages by pressing the trip
odometer reset stem. SeeSpeedometer and Odometer
on page 3-33for information on features for vehicles
without DIC buttons.A
3(Trip Information):Press this button to display
the odometer, trip odometers, tire pressure for vehicles
with a tire pressure monitor, timer, and engine hours.
B
t(Fuel Information):Press this button to display
the current range, fuel used, average fuel economy, and
engine oil life.
C
4(Customization):Press this button to access the
vehicle settings menu and customize the personal
settings on your vehicle.
D
r(Select):Press this button to reset certain DIC
functions and set your customization settings.
Pressing any of the four DIC buttons will acknowledge
DIC messages and clear them from the DIC display.
3-50