Page 180 of 580

AUTO (Automatic):Turning the control to this position
puts the system into automatic headlamp mode.
;(Parking Lamps):Turning the control to this
position turns on the parking lamps, together with the
following:
Sidemarker Lamps
Taillamps
License Plate Lamps
Instrument Panel Lights
Roof Marker Lamps (If Equipped)
5(Headlamps):Turning the control to this position
turns on the headlamps, together with the previously
listed lamps and lights.
You can switch your headlamps from high to low-beam
by pushing the turn signal/high-beam lever towards
the instrument panel.
A circuit breaker protects your headlamps. If you have
an electrical overload, your headlamps will �icker on and
off. Have your headlamp wiring checked right away if
this happens.
Headlamps on Reminder
A reminder chime will sound when your headlamps or
parking lamps are manually turned on and your ignition is
off, in LOCK, ACCESSORY, or a door is open. To disable
the chime, turn the light off then back on.
Daytime Running Lamps (DRL)
Daytime Running Lamps (DRL) can make it easier for
others to see the front of your vehicle during the
day. DRL can be helpful in many different driving
conditions, but they can be especially helpful in the short
periods after dawn and before sunset. Fully functional
daytime running lamps are required on all vehicles
�rst sold in Canada.
The DRL system will come on when the following
conditions are met:
The ignition is on
The exterior lamps control is in AUTO
The automatic transmission is not in PARK (P)
The light sensor determines it is daytime
3-14
Page 183 of 580

The fog lamps will be cancelled after the ignition is
turned off. If you still want to use the fog lamps after
you restart the vehicle, you will need to press the
fog lamp button again.
Some localities have laws that require the headlamps
to be on along with the fog lamps.
Auxiliary Roof Mounted Lamp
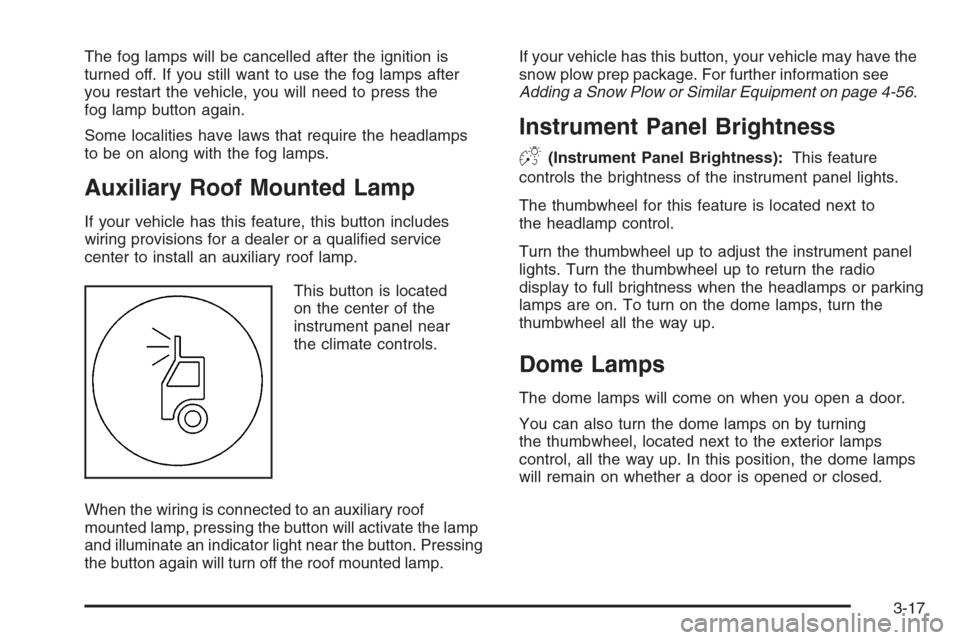
If your vehicle has this feature, this button includes
wiring provisions for a dealer or a quali�ed service
center to install an auxiliary roof lamp.
This button is located
on the center of the
instrument panel near
the climate controls.
When the wiring is connected to an auxiliary roof
mounted lamp, pressing the button will activate the lamp
and illuminate an indicator light near the button. Pressing
the button again will turn off the roof mounted lamp.If your vehicle has this button, your vehicle may have the
snow plow prep package. For further information see
Adding a Snow Plow or Similar Equipment on page 4-56.
Instrument Panel Brightness
D(Instrument Panel Brightness):This feature
controls the brightness of the instrument panel lights.
The thumbwheel for this feature is located next to
the headlamp control.
Turn the thumbwheel up to adjust the instrument panel
lights. Turn the thumbwheel up to return the radio
display to full brightness when the headlamps or parking
lamps are on. To turn on the dome lamps, turn the
thumbwheel all the way up.
Dome Lamps
The dome lamps will come on when you open a door.
You can also turn the dome lamps on by turning
the thumbwheel, located next to the exterior lamps
control, all the way up. In this position, the dome lamps
will remain on whether a door is opened or closed.
3-17
Page 200 of 580

SeePassenger Sensing System on page 1-73for more
information.
If the driver’s belt is buckled, neither the chime nor the
light will come on.
Airbag Readiness Light
There is an airbag readiness light on the instrument
panel cluster, which shows the airbag symbol. The
system checks the airbag’s electrical system for
malfunctions. The light tells you if there is an electrical
problem. The system check includes the airbag
sensors, the airbag modules, the passenger sensing
system (if equipped), the wiring and the crash sensing
and diagnostic module. For more information on the
airbag system, seeAirbag System on page 1-63.
This light will come on
when you start your
vehicle, and it will �ash
for a few seconds.
This means the system
is ready.
If the airbag readiness light stays on after you start
the vehicle or comes on when you are driving,
your airbag system may not work properly. Have your
vehicle serviced right away.
Airbag Off Light
If your vehicle has an airbag off switch, it also has an
airbag off light. SeeAirbag Off Switch on page 1-70for
more on this, including important safety information.
When you turn the right front passenger’s airbag off, this
light will come on and stay on to remind you that the
airbag has been turned off. This light will go off
when you turn the airbag on.
United StatesCanada
3-34
Page 354 of 580

Q:What is total vehicle reserve capacity?
A:This is the difference between your GVWR and the
weight of your truck with full fuel and passengers.
It is the amount of weight you can add to your
vehicle before reaching your GVWR. Keep in mind
that reserve capacity numbers are intended as
a guide when selecting the amount of equipment or
cargo your truck can carry. If you are unsure of
your vehicle’s front, rear, or total weight, go
to a weigh station and weigh your vehicle.
Your dealer can also help you with this.
The total vehicle reserve capacity for your vehicle
can be found in the lower right corner of the
Certi�cation/Tire label as shown previously.
See your dealer for additional advice and information
about using a snow plow on your vehicle. Also,
seeLoading Your Vehicle on page 4-50.
Emergency Roof Lamp Provisions
Vehicles with the RPO VYU snow plow prep package
also have an emergency roof lamp provision package,
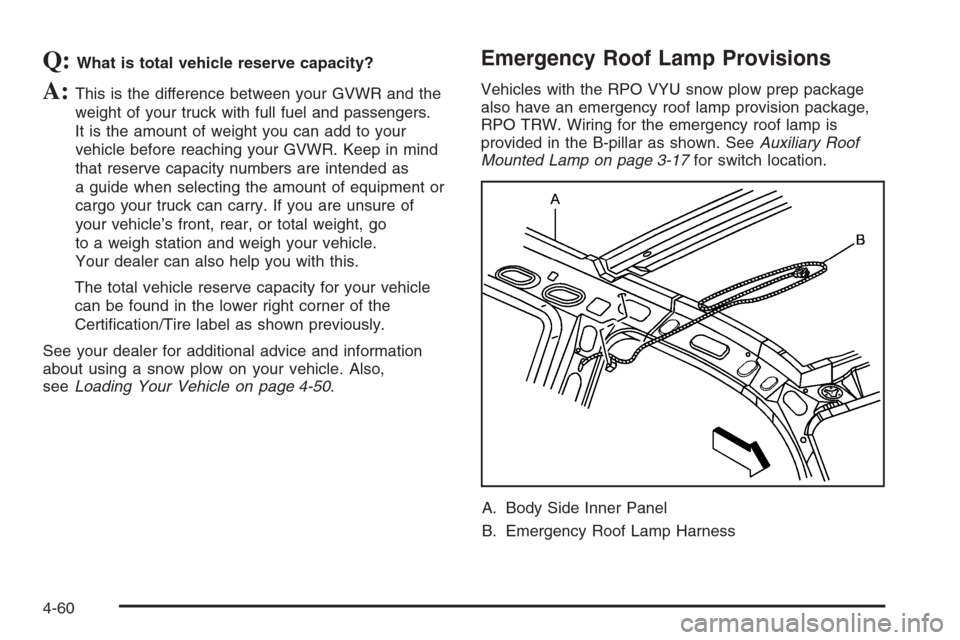
RPO TRW. Wiring for the emergency roof lamp is
provided in the B-pillar as shown. SeeAuxiliary Roof
Mounted Lamp on page 3-17for switch location.
A. Body Side Inner Panel
B. Emergency Roof Lamp Harness
4-60
Page 388 of 580

When You Are Ready to Leave After
Parking on a Hill
1. Apply your regular brakes and hold the pedal down
while you:
Start your engine
Shift into a gear
Release the parking brake
2. Let up on the brake pedal.
3. Drive slowly until the trailer is clear of the chocks.
4. Stop and have someone pick up and store the
chocks.
Maintenance When Trailer Towing
Your vehicle will need service more often when you’re
pulling a trailer. SeeScheduled Maintenance (Gasoline
Engine) on page 6-4for more information. Things that are
especially important in trailer operation are automatic
transmission �uid (don’t over�ll), engine oil, axle
lubricant, belt, cooling system and brake system. Each of
these is covered in this manual, and the Index will help
you �nd them quickly. If you’re trailering, it’s a good idea
to review these sections before you start your trip.
Check periodically to see that all hitch nuts and bolts
are tight.
Trailer Wiring Harness
Your vehicle is equipped with one of the following wiring
harnesses for towing a trailer or hauling a slide-in
camper.
4-94
Page 389 of 580
Basic Trailer Wiring
All regular, extended cab and crew cab pickups have an
eight-wire trailer towing harness.
For vehicles not equipped with heavy duty trailering, the
harness is clipped to the vehicle’s frame behind the
spare tire mount. The harness requires the installation
of a trailer connector, which is available through
your dealer.If your trailer is equipped with electric brakes, you can
get a jumper harness (electric trailer brake control)
with a trailer battery feed fuse from your dealer.
If you need to tow a light-duty trailer with a standard
four-way round pin connector, you can also get an
adapter from your dealer.
4-95
Page 390 of 580
Heavy-DutyTrailer Wiring Harness
PackageFor vehicles equipped with heavy duty trailering, the
harness is connected to the trailer mounted to the hitch
platform. The eight-wire harness contains the following
trailer circuits:
Yellow: Left Stop/Turn Signal
Dark Green: Right Stop/Turn Signal
Brown: Taillamps
White: Ground
Light Green: Back-up Lamps
Light Blue: CHMSL*
Red: Battery Feed**
Dark Blue: Trailer Brake
* The Center High-Mounted Stoplamp (CHMSL) wire is
tied next to the trailer wiring harness for use with a
trailer, slide-in camper or cap.
**If you are charging a remote (non-vehicle) battery,
turn on the headlamps to boost the vehicle system
voltage and properly charge the battery.
4-96
Page 391 of 580
Camper/Fifth-Wheel Trailer Wiring Package
The eight-wire camper harness is located under the
front edge of the pickup box on the driver’s side of the
vehicle, attached to the frame bracket. A connector
will have to be added to the wiring harness which
connects to the camper.
The eight-wire harness contains the following
camper/trailer circuits:
Yellow: Left Stop/Turn Signal
Dark Green: Right Stop/Turn Signal
Brown: Taillamps
White: Ground
Light Green: Back-up Lamps
Light Blue: Center High-Mounted Stoplamp
(CHMSL)
Red: Battery Feed
Dark Blue: Trailer BrakeIf your vehicle is equipped with the “Heavy-Duty
Trailering” option, please refer to “Heavy-Duty Trailer
Wiring Package” earlier in this section.
When the camper-wiring harness is ordered without the
heavy-duty trailering package, an eight-wire harness
with a seven-pin connector and separate CHMSL
connector are located at the rear of the vehicle and are
tied to the vehicle’s frame.
4-97