2005 CHEVROLET SILVERADO bulb
[x] Cancel search: bulbPage 1 of 580

Seats and Restraint Systems........................... 1-1
Front Seats
............................................... 1-3
Rear Seats
............................................... 1-8
Safety Belts
.............................................1-10
Child Restraints
.......................................1-30
Airbag System
.........................................1-63
Restraint System Check
............................1-79
Features and Controls..................................... 2-1
Keys
........................................................ 2-3
Doors and Locks
....................................... 2-8
Windows
.................................................2-16
Theft-Deterrent Systems
............................2-19
Starting and Operating Your Vehicle
...........2-21
Mirrors
....................................................2-58
OnStar
®System
......................................2-68
HomeLink®Wireless Control System
...........2-70
Storage Areas
.........................................2-75
Sunroof
..................................................2-78
Vehicle Personalization
.............................2-79
Instrument Panel............................................. 3-1
Instrument Panel Overview
.......................... 3-4
Climate Controls
......................................3-20
Warning Lights, Gages, and Indicators
........3-31
Driver Information Center (DIC)
..................3-50
Audio System(s)
.......................................3-69Driving Your Vehicle....................................... 4-1
Your Driving, the Road, and Your Vehicle
..... 4-2
Towing
...................................................4-63
Service and Appearance Care.......................... 5-1
Service
..................................................... 5-4
Fuel
......................................................... 5-5
Checking Things Under the Hood
...............5-12
All-Wheel Drive
........................................5-57
Rear Axle
...............................................5-58
Four-Wheel Drive
.....................................5-59
Front Axle
...............................................5-60
Noise Control System
...............................5-61
Bulb Replacement
....................................5-62
Windshield Wiper Blade Replacement
.........5-72
Tires
......................................................5-73
Appearance Care
...................................5-112
Vehicle Identi�cation
...............................5-122
Electrical System
....................................5-123
Capacities and Speci�cations
...................5-133
Maintenance Schedule..................................... 6-1
Maintenance Schedule
................................ 6-2
Customer Assistance and Information.............. 7-1
Customer Assistance and Information
........... 7-2
Reporting Safety Defects
...........................7-10
Index................................................................ 1
2005 Chevrolet Silverado Owner ManualM
Page 174 of 580
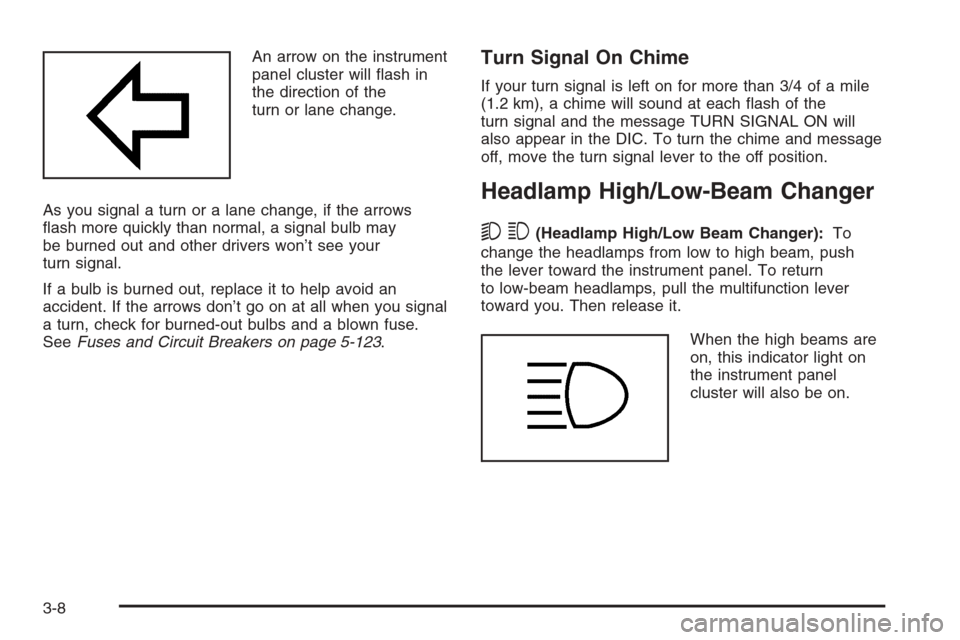
An arrow on the instrument
panel cluster will �ash in
the direction of the
turn or lane change.
As you signal a turn or a lane change, if the arrows
�ash more quickly than normal, a signal bulb may
be burned out and other drivers won’t see your
turn signal.
If a bulb is burned out, replace it to help avoid an
accident. If the arrows don’t go on at all when you signal
a turn, check for burned-out bulbs and a blown fuse.
SeeFuses and Circuit Breakers on page 5-123.Turn Signal On Chime
If your turn signal is left on for more than 3/4 of a mile
(1.2 km), a chime will sound at each �ash of the
turn signal and the message TURN SIGNAL ON will
also appear in the DIC. To turn the chime and message
off, move the turn signal lever to the off position.
Headlamp High/Low-Beam Changer
53(Headlamp High/Low Beam Changer):To
change the headlamps from low to high beam, push
the lever toward the instrument panel. To return
to low-beam headlamps, pull the multifunction lever
toward you. Then release it.
When the high beams are
on, this indicator light on
the instrument panel
cluster will also be on.
3-8
Page 385 of 580
Following Distance
Stay at least twice as far behind the vehicle ahead as
you would when driving your vehicle without a trailer.
This can help you avoid situations that require
heavy braking and sudden turns.
Passing
You’ll need more passing distance up ahead when
you’re towing a trailer. And, because you’re a good deal
longer, you’ll need to go much farther beyond the
passed vehicle before you can return to your lane.
Backing Up
Hold the bottom of the steering wheel with one hand.
Then, to move the trailer to the left, just move that hand
to the left. To move the trailer to the right, move your
hand to the right. Always back up slowly and, if possible,
have someone guide you.
Your vehicle may be equipped with four-wheel steering.
If you use it while backing your trailer, the same
rules apply. However, with four-wheel steering, your rig
will respond more quickly and it may take additional
practice to get used to backing up with four-wheel
steering.
Making Turns
Notice:Making very sharp turns while trailering
could cause the trailer to come in contact with the
vehicle. Your vehicle could be damaged. Avoid
making very sharp turns while trailering.
When you’re turning with a trailer, make wider turns
than normal. Do this so your trailer won’t strike
soft shoulders, curbs, road signs, trees or other objects.
Avoid jerky or sudden maneuvers. Signal well in
advance.
Turn Signals When Towing a Trailer
The arrows on your instrument panel will �ash whenever
you signal a turn or lane change. Properly hooked up,
the trailer lamps will also �ash, telling other drivers
you’re about to turn, change lanes or stop.
When towing a trailer, the arrows on your instrument
panel will �ash for turns even if the bulbs on the trailer
are burned out. Thus, you may think drivers behind
you are seeing your signal when they are not. It’s
important to check occasionally to be sure the trailer
bulbs are still working.
4-91
Page 400 of 580
Bulb Replacement..........................................5-62
Halogen Bulbs..............................................5-62
Headlamps..................................................5-63
Front Turn Signal, Sidemarker and Daytime
Running Lamps.........................................5-64
Roof Marker Lamps......................................5-66
Center High-Mounted Stoplamp (CHMSL)
and Cargo Lamp.......................................5-68
Pickup Box Identi�cation and Fender
Marker Lamps...........................................5-69
Taillamps.....................................................5-69
Replacement Bulbs.......................................5-71
Windshield Wiper Blade Replacement..............5-72
Tires..............................................................5-73
Tire Sidewall Labelling...................................5-74
Tire Terminology and De�nitions.....................5-77
In�ation - Tire Pressure.................................5-80
Dual Tire Operation.......................................5-81
Tire Inspection and Rotation...........................5-82
When It Is Time for New Tires.......................5-84
Buying New Tires.........................................5-84
Uniform Tire Quality Grading..........................5-86
Wheel Alignment and Tire Balance..................5-87Wheel Replacement......................................5-87
Tire Chains..................................................5-89
If a Tire Goes Flat........................................5-90
Changing a Flat Tire.....................................5-91
Removing the Spare Tire and Tools................5-92
Removing the Flat Tire and Installing the
Spare Tire................................................5-96
Secondary Latch System..............................5-105
Storing a Flat or Spare Tire and Tools...........5-108
Spare Tire.................................................5-112
Appearance Care..........................................5-112
Cleaning the Inside of Your Vehicle...............5-113
Fabric/Carpet..............................................5-114
Leather......................................................5-115
Instrument Panel, Vinyl, and Other Plastic
Surfaces.................................................5-115
Care of Safety Belts....................................5-116
Weatherstrips.............................................5-116
Washing Your Vehicle..................................5-116
Cleaning Exterior Lamps/Lenses....................5-117
Finish Care................................................5-117
Windshield and Wiper Blades.......................5-118
Aluminum or Chrome-Plated Wheels..............5-118
Section 5 Service and Appearance Care
5-2
Page 460 of 580
Among those acts presumed to constitute tampering are
the acts listed below.
Insulation:
Removal of the noise shields or any underhood
insulation.
Engine:
Removal or rendering engine speed governor
(if equipped) inoperative so as to allow engine
speed to exceed manufacturer speci�cations.
Fan and Drive:
Removal of fan clutch (if equipped) or rendering
clutch inoperative.
Removal of the fan shroud (if equipped).
Air Intake:
Removal of the air cleaner silencer.
Modi�cation of the air cleaner.
Exhaust:
Removal of the muffler and/or resonator.
Removal of the exhaust pipes and exhaust pipe
clamps.
Bulb Replacement
For the proper type of replacement bulbs, see
Replacement Bulbs on page 5-71.
For any bulb changing procedure not listed in this
section, contact your dealer.
Halogen Bulbs
{CAUTION:
Halogen bulbs have pressurized gas inside and
can burst if you drop or scratch the bulb. You or
others could be injured. Be sure to read and
follow the instructions on the bulb package.
5-62
Page 461 of 580
Headlamps
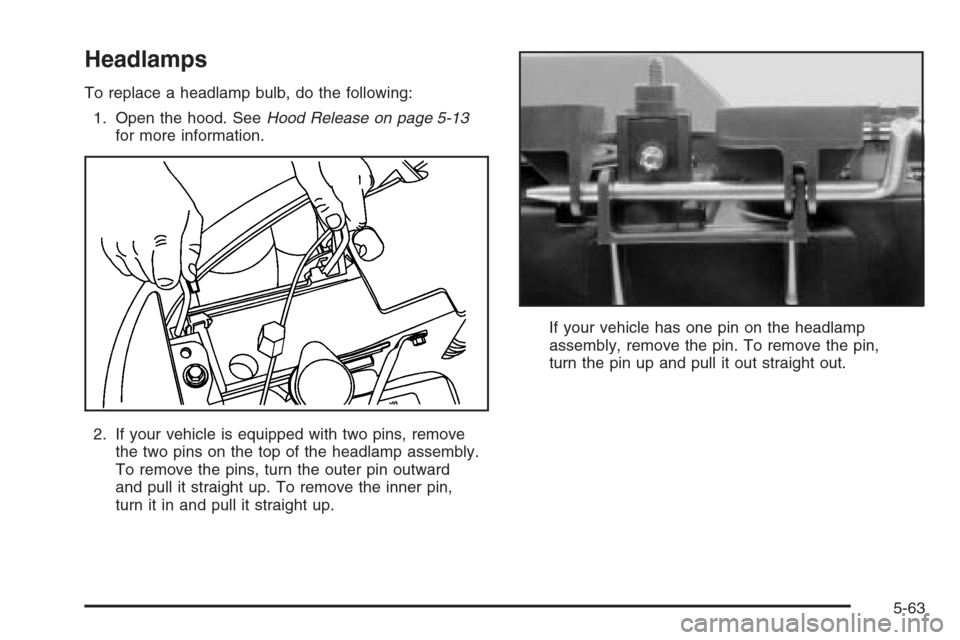
To replace a headlamp bulb, do the following:
1. Open the hood. SeeHood Release on page 5-13
for more information.
2. If your vehicle is equipped with two pins, remove
the two pins on the top of the headlamp assembly.
To remove the pins, turn the outer pin outward
and pull it straight up. To remove the inner pin,
turn it in and pull it straight up.If your vehicle has one pin on the headlamp
assembly, remove the pin. To remove the pin,
turn the pin up and pull it out straight out.
5-63
Page 462 of 580
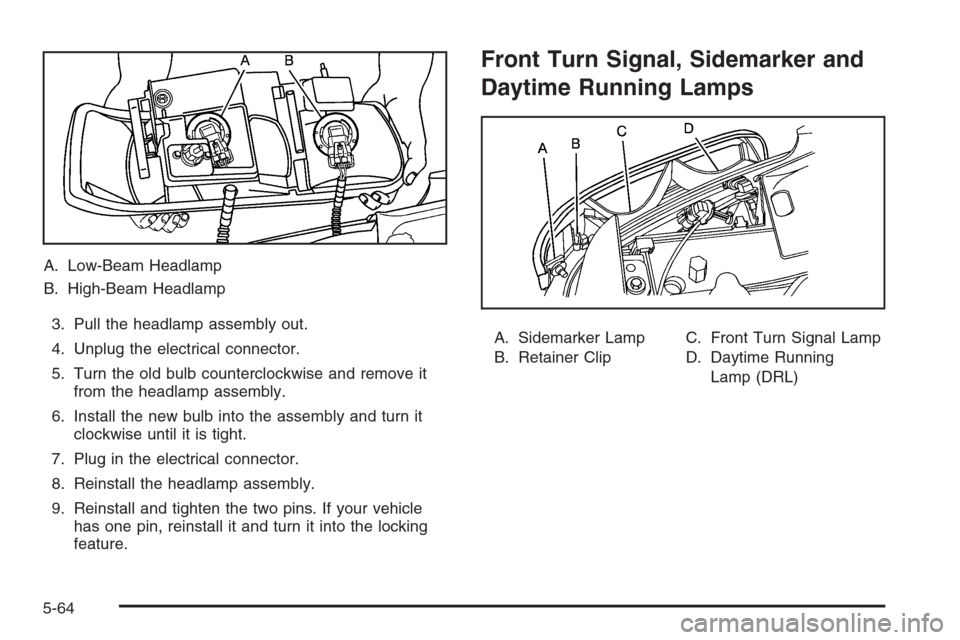
A. Low-Beam Headlamp
B. High-Beam Headlamp
3. Pull the headlamp assembly out.
4. Unplug the electrical connector.
5. Turn the old bulb counterclockwise and remove it
from the headlamp assembly.
6. Install the new bulb into the assembly and turn it
clockwise until it is tight.
7. Plug in the electrical connector.
8. Reinstall the headlamp assembly.
9. Reinstall and tighten the two pins. If your vehicle
has one pin, reinstall it and turn it into the locking
feature.
Front Turn Signal, Sidemarker and
Daytime Running Lamps
A. Sidemarker Lamp
B. Retainer ClipC. Front Turn Signal Lamp
D. Daytime Running
Lamp (DRL)
5-64
Page 463 of 580
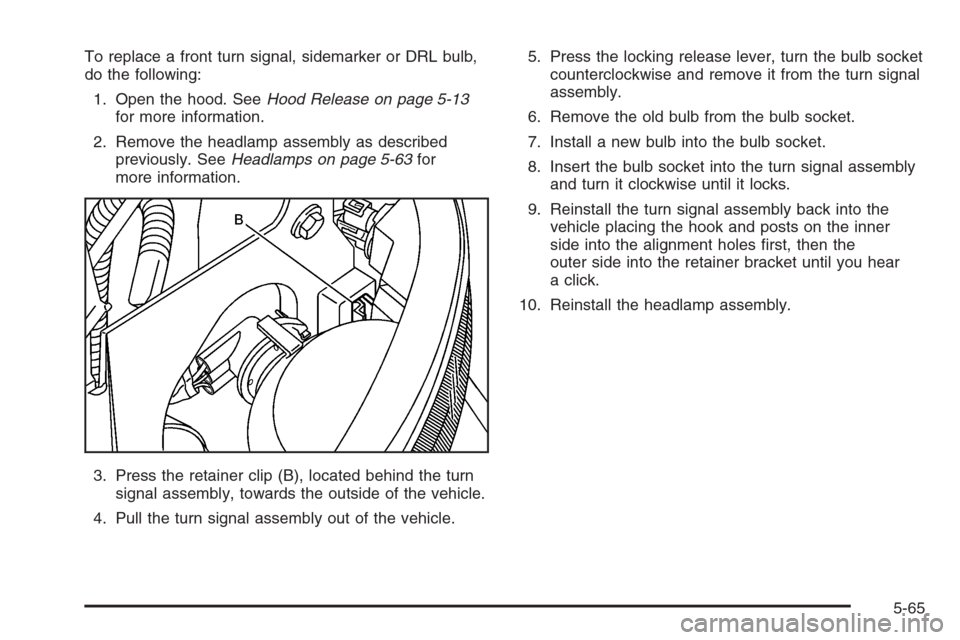
To replace a front turn signal, sidemarker or DRL bulb,
do the following:
1. Open the hood. SeeHood Release on page 5-13
for more information.
2. Remove the headlamp assembly as described
previously. SeeHeadlamps on page 5-63for
more information.
3. Press the retainer clip (B), located behind the turn
signal assembly, towards the outside of the vehicle.
4. Pull the turn signal assembly out of the vehicle.5. Press the locking release lever, turn the bulb socket
counterclockwise and remove it from the turn signal
assembly.
6. Remove the old bulb from the bulb socket.
7. Install a new bulb into the bulb socket.
8. Insert the bulb socket into the turn signal assembly
and turn it clockwise until it locks.
9. Reinstall the turn signal assembly back into the
vehicle placing the hook and posts on the inner
side into the alignment holes �rst, then the
outer side into the retainer bracket until you hear
a click.
10. Reinstall the headlamp assembly.
5-65