2005 CHEVROLET MALIBU mirror
[x] Cancel search: mirrorPage 1 of 434

Seats and Restraint Systems........................... 1-1
Front Seats
............................................... 1-2
Rear Seats
............................................... 1-8
Safety Belts
.............................................1-10
Child Restraints
.......................................1-33
Airbag System
.........................................1-60
Restraint System Check
............................1-75
Features and Controls..................................... 2-1
Keys
........................................................ 2-3
Doors and Locks
......................................2-11
Windows
.................................................2-16
Theft-Deterrent Systems
............................2-17
Starting and Operating Your Vehicle
...........2-21
Mirrors
....................................................2-33
OnStar
®System
......................................2-38
HomeLink®Wireless Control System
...........2-40
Storage Areas
.........................................2-44
Sunroof
..................................................2-47
Instrument Panel............................................. 3-1
Instrument Panel Overview
.......................... 3-4
Climate Controls
......................................3-21
Warning Lights, Gages, and Indicators
........3-30
Driver Information Center (DIC)
..................3-47
Audio System(s)
.......................................3-54Driving Your Vehicle....................................... 4-1
Your Driving, the Road, and Your Vehicle
..... 4-2
Towing
...................................................4-34
Service and Appearance Care.......................... 5-1
Service
..................................................... 5-3
Fuel
......................................................... 5-5
Checking Things Under the Hood
...............5-10
Bulb Replacement
....................................5-41
Windshield Wiper Blade Replacement
.........5-45
Tires
......................................................5-47
Appearance Care
.....................................5-73
Vehicle Identi�cation
.................................5-82
Electrical System
......................................5-83
Capacities and Speci�cations
.....................5-91
Maintenance Schedule..................................... 6-1
Maintenance Schedule
................................ 6-2
Customer Assistance and Information.............. 7-1
Customer Assistance and Information
........... 7-2
Reporting Safety Defects
...........................7-10
Index................................................................ 1
2005 Chevrolet Malibu Owner ManualM
Page 83 of 434
Keys...............................................................2-3
Remote Keyless Entry System.........................2-4
Remote Keyless Entry System Operation...........2-5
Doors and Locks............................................2-11
Door Locks..................................................2-11
Power Door Locks........................................2-12
Door Ajar Reminder......................................2-12
Delayed Locking...........................................2-12
Programmable Automatic Door Locks..............2-13
Lockout Protection........................................2-13
Trunk (Sedan)..............................................2-14
Liftgate (MAXX)............................................2-15
Windows........................................................2-16
Power Windows............................................2-17
Sun Visors...................................................2-17
Theft-Deterrent Systems..................................2-17
Content Theft-Deterrent.................................2-18
PASS-Key
®III+............................................2-19
PASS-Key®III+ Operation..............................2-20Starting and Operating Your Vehicle................2-21
New Vehicle Break-In....................................2-21
Ignition Positions..........................................2-22
Retained Accessory Power (RAP)...................2-22
Starting the Engine.......................................2-23
Adjustable Throttle and Brake Pedal................2-24
Engine Coolant Heater..................................2-24
Automatic Transaxle Operation (Base Model). . . .2-26
Parking Brake..............................................2-29
Shifting Into Park (P).....................................2-29
Shifting Out of Park (P).................................2-31
Parking Over Things That Burn.......................2-31
Engine Exhaust............................................2-32
Running the Engine While Parked...................2-32
Mirrors...........................................................2-33
Manual Rearview Mirror.................................2-33
Manual Rearview Mirror with OnStar
®..............2-33
Automatic Dimming Rearview Mirror with
OnStar
®and Compass...............................2-34
Automatic Dimming Rearview Mirror with
Compass.................................................2-35
Outside Power Mirrors...................................2-37
Outside Power Heated Mirrors........................2-38
Outside Convex Mirror...................................2-38
Section 2 Features and Controls
2-1
Page 99 of 434
Power Windows
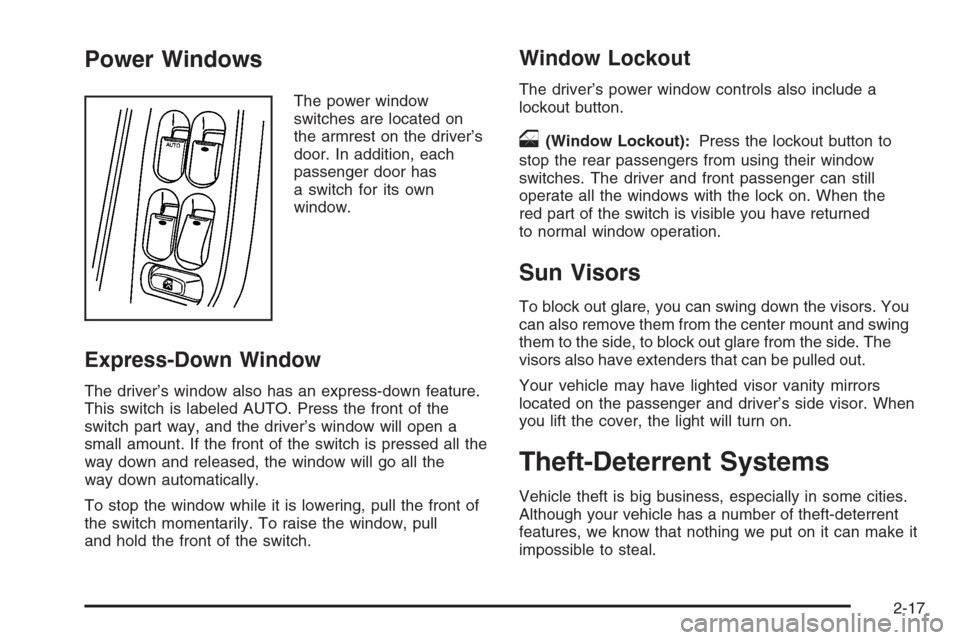
The power window
switches are located on
the armrest on the driver’s
door. In addition, each
passenger door has
a switch for its own
window.
Express-Down Window
The driver’s window also has an express-down feature.
This switch is labeled AUTO. Press the front of the
switch part way, and the driver’s window will open a
small amount. If the front of the switch is pressed all the
way down and released, the window will go all the
way down automatically.
To stop the window while it is lowering, pull the front of
the switch momentarily. To raise the window, pull
and hold the front of the switch.
Window Lockout
The driver’s power window controls also include a
lockout button.
o(Window Lockout):Press the lockout button to
stop the rear passengers from using their window
switches. The driver and front passenger can still
operate all the windows with the lock on. When the
red part of the switch is visible you have returned
to normal window operation.
Sun Visors
To block out glare, you can swing down the visors. You
can also remove them from the center mount and swing
them to the side, to block out glare from the side. The
visors also have extenders that can be pulled out.
Your vehicle may have lighted visor vanity mirrors
located on the passenger and driver’s side visor. When
you lift the cover, the light will turn on.
Theft-Deterrent Systems
Vehicle theft is big business, especially in some cities.
Although your vehicle has a number of theft-deterrent
features, we know that nothing we put on it can make it
impossible to steal.
2-17
Page 115 of 434
{CAUTION:
It can be dangerous to get out of your vehicle
if the shift lever is not fully in PARK (P) with
the parking brake �rmly set. Your vehicle can
roll. Do not leave your vehicle when the engine
is running unless you have to. If you have left
the engine running, the vehicle can move
suddenly. You or others could be injured. To
be sure your vehicle will not move, even when
you are on fairly level ground, always set your
parking brake and move the shift lever to
PARK (P).
Follow the proper steps to be sure your vehicle will not
move. SeeShifting Into Park (P) on page 2-29.
If you are parking on a hill and if you are pulling a
trailer, also seeTowing a Trailer on page 4-38.
Mirrors
Manual Rearview Mirror
This mirror can be adjusted two ways. First, to adjust
the angle of the mirror, move the mirror to a position that
allows you to see out of the back window. To adjust
the height of the mirror, adjust the arm that connects the
mirror to the windshield.
To reduce glare from lights behind you, move the lever
toward you to the night position.
Manual Rearview Mirror with
OnStar
®
If your vehicle has this feature, this mirror has a knob
located at the bottom of the mirror. It is used to change
the mirror from day to night position. To reduce glare
from headlamps behind you while driving at night, rotate
the knob clockwise. For daytime driving rotate the
knob counterclockwise.
There are also three OnStar
®buttons located at the
bottom of the mirror face. See your dealer for more
information on the system and how to subscribe
to OnStar
®. SeeOnStar®System on page 2-38for
more information about the services OnStar®provides.
2-33
Page 116 of 434
Automatic Dimming Rearview Mirror
with OnStar
®and Compass
Your vehicle may have an automatic dimming rearview
mirror with a compass and OnStar®controls. For
more information about OnStar®, seeOnStar®System
on page 2-38.
The automatic dimming feature turns on each time the
vehicle is started. To turn automatic dimming off or
on, press the left button below the mirror. A green
indicator light will be on when automatic dimming is on.
There are also three OnStar
®buttons located at the
bottom of the mirror. See your dealer for more
information on the system and how to subscribe to
OnStar
®. SeeOnStar®System on page 2-38for more
information about the service OnStar®provides.
Compass Operation
Press the on/off button once to turn the compass on
or off.
When the ignition and the compass feature are on,
the compass will show two character boxes for a
few seconds. After a few seconds, the mirror will
display the current compass direction.
Compass Calibration
If after a few seconds the display does not show a
compass direction, (N for North for example), there may
be a strong magnetic �eld interfering with the compass.
Such interference may be caused by a magnetic
antenna mount, note pad holder, or similar object. If the
letter C appears in the compass window, the compass
may need to be reset or calibrated.
The mirror can be calibrated by driving the vehicle in
circles at 5 mph (8 km/h) or less until the display reads a
direction.
Compass Variance
Compass variance is the difference between earth’s
magnetic north and true geographic north. If the mirror
is not adjusted for compass variance, the compass
could give false readings.
The mirror is set in zone eight upon leaving the factory.
It will be necessary to adjust the compass to
compensate for compass variance if the vehicle is
driven outside zone eight. Under certain circumstances,
such as a long distance, cross-country trip, it will be
necessary to adjust the compass variance.
2-34
Page 117 of 434
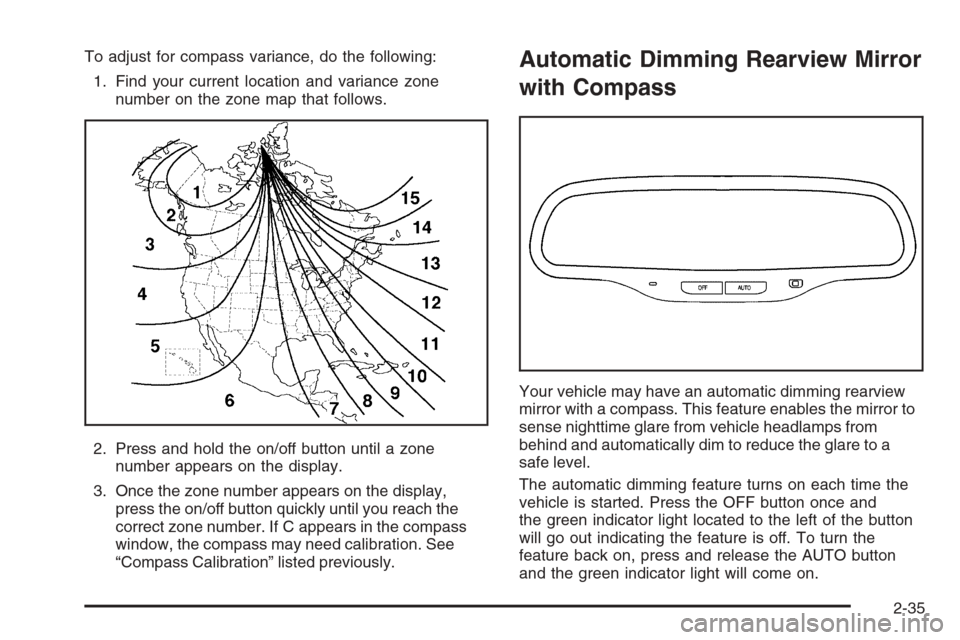
To adjust for compass variance, do the following:
1. Find your current location and variance zone
number on the zone map that follows.
2. Press and hold the on/off button until a zone
number appears on the display.
3. Once the zone number appears on the display,
press the on/off button quickly until you reach the
correct zone number. If C appears in the compass
window, the compass may need calibration. See
“Compass Calibration” listed previously.Automatic Dimming Rearview Mirror
with Compass
Your vehicle may have an automatic dimming rearview
mirror with a compass. This feature enables the mirror to
sense nighttime glare from vehicle headlamps from
behind and automatically dim to reduce the glare to a
safe level.
The automatic dimming feature turns on each time the
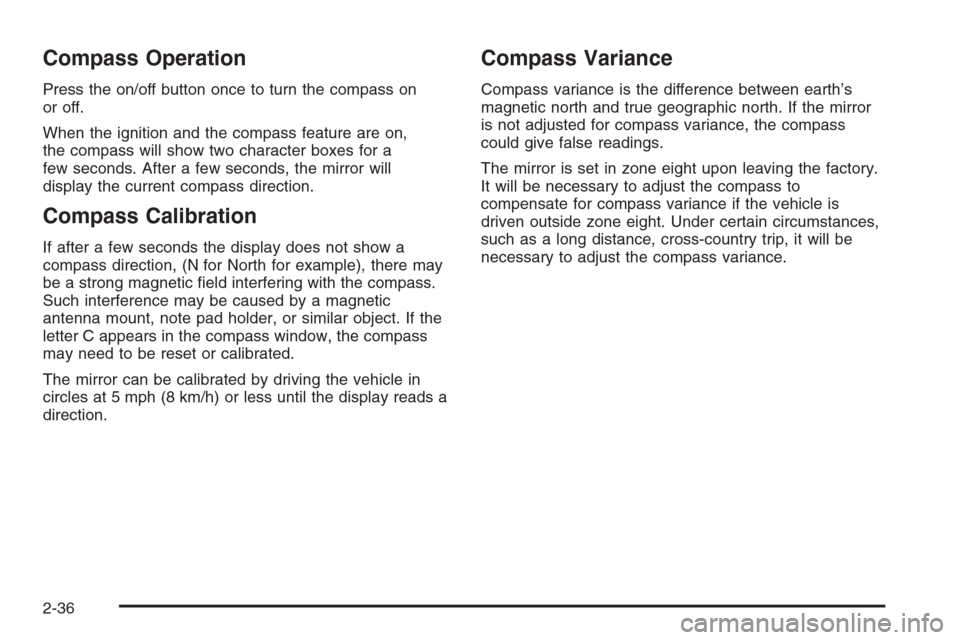
vehicle is started. Press the OFF button once and
the green indicator light located to the left of the button
will go out indicating the feature is off. To turn the
feature back on, press and release the AUTO button
and the green indicator light will come on.
2-35
Page 118 of 434
Compass Operation
Press the on/off button once to turn the compass on
or off.
When the ignition and the compass feature are on,
the compass will show two character boxes for a
few seconds. After a few seconds, the mirror will
display the current compass direction.
Compass Calibration
If after a few seconds the display does not show a
compass direction, (N for North for example), there may
be a strong magnetic �eld interfering with the compass.
Such interference may be caused by a magnetic
antenna mount, note pad holder, or similar object. If the
letter C appears in the compass window, the compass
may need to be reset or calibrated.
The mirror can be calibrated by driving the vehicle in
circles at 5 mph (8 km/h) or less until the display reads a
direction.
Compass Variance
Compass variance is the difference between earth’s
magnetic north and true geographic north. If the mirror
is not adjusted for compass variance, the compass
could give false readings.
The mirror is set in zone eight upon leaving the factory.
It will be necessary to adjust the compass to
compensate for compass variance if the vehicle is
driven outside zone eight. Under certain circumstances,
such as a long distance, cross-country trip, it will be
necessary to adjust the compass variance.
2-36
Page 119 of 434
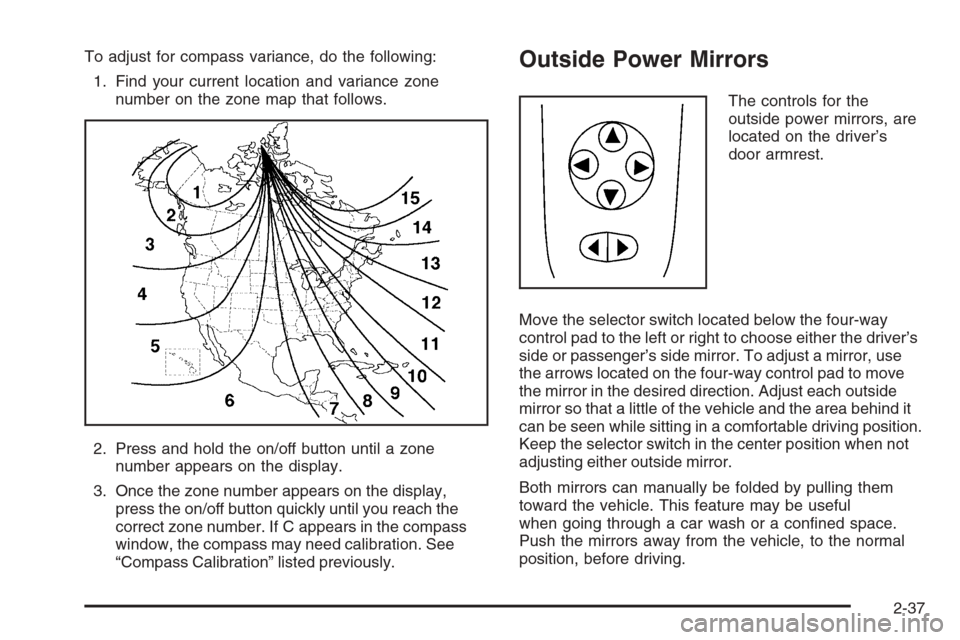
To adjust for compass variance, do the following:
1. Find your current location and variance zone
number on the zone map that follows.
2. Press and hold the on/off button until a zone
number appears on the display.
3. Once the zone number appears on the display,
press the on/off button quickly until you reach the
correct zone number. If C appears in the compass
window, the compass may need calibration. See
“Compass Calibration” listed previously.Outside Power Mirrors
The controls for the
outside power mirrors, are
located on the driver’s
door armrest.
Move the selector switch located below the four-way
control pad to the left or right to choose either the driver’s
side or passenger’s side mirror. To adjust a mirror, use
the arrows located on the four-way control pad to move
the mirror in the desired direction. Adjust each outside
mirror so that a little of the vehicle and the area behind it
can be seen while sitting in a comfortable driving position.
Keep the selector switch in the center position when not
adjusting either outside mirror.
Both mirrors can manually be folded by pulling them
toward the vehicle. This feature may be useful
when going through a car wash or a con�ned space.
Push the mirrors away from the vehicle, to the normal
position, before driving.
2-37