2005 CHEVROLET COLORADO automatic transmission
[x] Cancel search: automatic transmissionPage 149 of 414
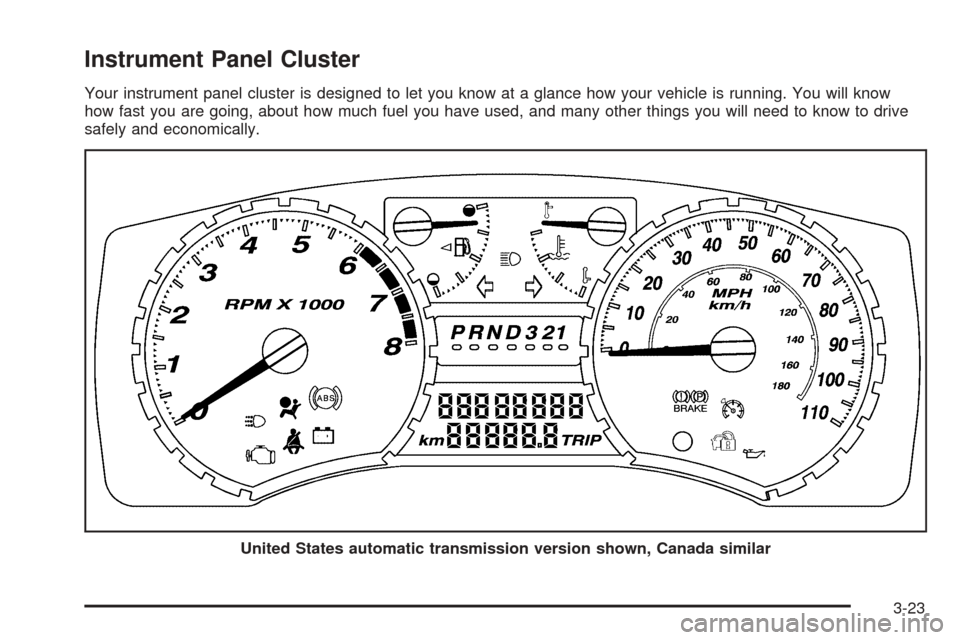
Instrument Panel Cluster
Your instrument panel cluster is designed to let you know at a glance how your vehicle is running. You will know
how fast you are going, about how much fuel you have used, and many other things you will need to know to drive
safely and economically.
United States automatic transmission version shown, Canada similar
3-23
Page 163 of 414
In addition to the engine oil life system monitoring the
oil life, additional maintenance is recommended in
the Maintenance Schedule in this manual. SeeEngine
Oil on page 5-13andScheduled Maintenance on
page 6-4for more information.
Automatic Door Locks
This feature allows you to program your door locks to a
preferred setting.
To set your choice for this feature, perform the following
steps:
1. With the engine off, turn the key to LOCK. Do not
remove the key from the ignition.
2. Press and hold the power door lock button for
approximately three seconds until the DIC
display shows the current door lock mode.
3. To view the next available mode, press and hold
the reset stem for approximately two seconds.
Release the reset stem and press and hold again to
view each mode.
4. Once the desired mode is shown on the DIC
display, brie�y press the reset stem to set your
choice. The DIC display will then clear.The following are the available modes:
Lock 1 (default):On vehicles with an automatic
transmission, this mode locks all of the doors when the
vehicle is shifted out of PARK (P) and unlocks all of
the doors when the vehicle is shifted into PARK (P).
On vehicles with a manual transmission, this mode locks
all of the doors when the vehicle speed is greater
than 15 mph (24 km/h) and unlocks all of the doors
when the key is removed from the ignition.
Lock 2:On vehicles with an automatic transmission,
this mode locks all of the doors when the vehicle
is shifted out of PARK (P) and unlocks the driver’s door
when the vehicle is shifted into PARK (P).
On vehicles with a manual transmission, this mode
locks all of the doors when the vehicle speed is greater
than 15 mph (24 km/h) and unlocks the driver’s door
when the key is removed from the ignition.
Lock 3:On vehicles with an automatic transmission,
this mode locks all of the doors when the vehicle
is shifted out of PARK (P). The doors will not
automatically unlock.
On vehicles with a manual transmission, this mode
locks all of the doors when the vehicle speed is greater
than 15 mph (24 km/h). The doors will not automatically
unlock.
3-37
Page 206 of 414
Remember: Anti-lock does not change the time you
need to get your foot up to the brake pedal or always
decrease stopping distance. If you get too close to
the vehicle in front of you, you will not have time to apply
your brakes if that vehicle suddenly slows or stops.
Always leave enough room up ahead to stop, even
though you have anti-lock brakes.
Using Anti-Lock
Do not pump the brakes. Just hold the brake pedal
down �rmly and let anti-lock work for you. You may feel
the brakes vibrate, or you may notice some noise,
but this is normal.
Braking in Emergencies
With anti-lock brakes, you can steer and brake at the
same time. In many emergencies, steering can help
you more than even the very best braking.
Traction Control System (TCS)
Your vehicle may have a Traction Control System (TCS)
that limits wheel spin. This is especially useful in
slippery road conditions. The system operates only if
it senses that one or both of the rear wheels are
spinning or beginning to lose traction. When this
happens, the system reduces engine power and may
also upshift the transmission to limit wheel spin.
You may feel or hear the system working, but this is
normal.
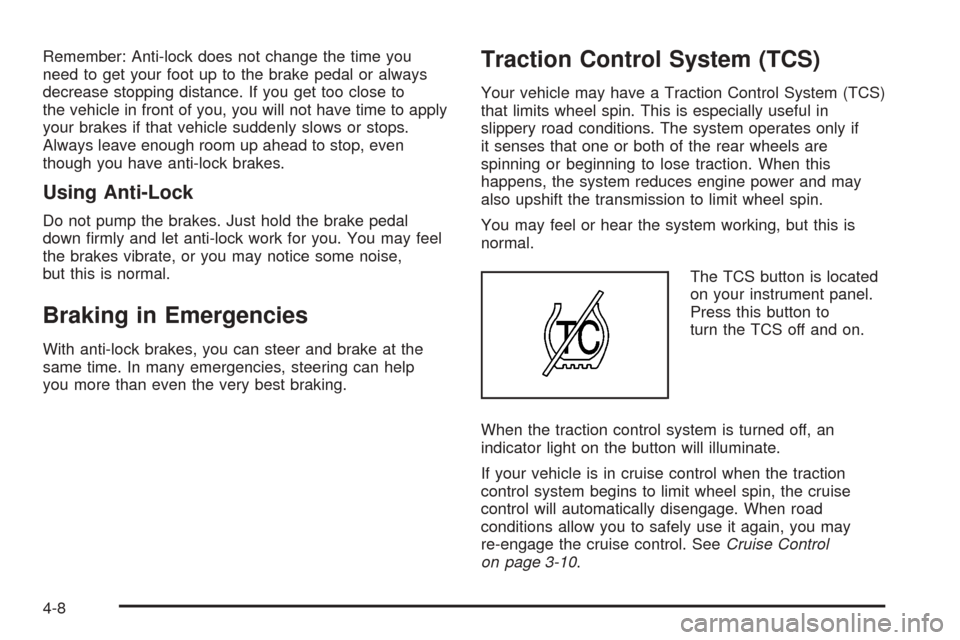
The TCS button is located
on your instrument panel.
Press this button to
turn the TCS off and on.
When the traction control system is turned off, an
indicator light on the button will illuminate.
If your vehicle is in cruise control when the traction
control system begins to limit wheel spin, the cruise
control will automatically disengage. When road
conditions allow you to safely use it again, you may
re-engage the cruise control. SeeCruise Control
on page 3-10.
4-8
Page 207 of 414
TCS operates in all transmission shift lever positions.
But the system can upshift the transmission only as high
as the shift lever position you have chosen, so you
should use the lower gears only when necessary. See
Automatic Transmission Operation on page 2-21
and/orManual Transmission Operation on page 2-23for
more information.
If there is a problem with TCS, TRACTION FAULT will
be displayed on your Driver Information Center
(DIC). SeeDIC Warnings and Messages on page 3-39
for more information.
When this warning is displayed, the system will not limit
wheel spin. Adjust your driving accordingly.
To limit wheel spin, especially in slippery road
conditions, you should always leave TCS on. But you
can turn the system off if you ever need to. You should
turn the system off if your vehicle ever gets stuck in
sand, mud or snow and rocking the vehicle is required.
SeeRocking Your Vehicle to Get It Out on page 4-40
andIf Your Vehicle is Stuck in Sand, Mud, Ice or Snow
on page 4-40for more information.Steering
Power Steering
If you lose power steering assist because the engine
stops or the system is not functioning, you can steer but
it will take much more effort.
Steering Tips
Driving on Curves
It is important to take curves at a reasonable speed.
A lot of the “driver lost control” accidents mentioned on
the news happen on curves. Here is why:
Experienced driver or beginner, each of us is subject to
the same laws of physics when driving on curves.
The traction of the tires against the road surface makes
it possible for the vehicle to change its path when
you turn the front wheels. If there is no traction, inertia
will keep the vehicle going in the same direction. If
you have ever tried to steer a vehicle on wet ice, you
will understand this.
The traction you can get in a curve depends on the
condition of your tires and the road surface, the angle
at which the curve is banked, and your speed. While you
are in a curve, speed is the one factor you can control.
4-9
Page 247 of 414
Here are some important things to consider before you
do recreational vehicle towing:
What’s the towing capacity of the towing vehicle?
Be sure you read the tow vehicle manufacturer’s
recommendations.
How far will you tow? Some vehicles have
restrictions on how far and how long they can tow.
Do you have the proper towing equipment?
See your dealer or trailering professional for
additional advice and equipment recommendations.
Is your vehicle ready to be towed? Just as you
would prepare your vehicle for a long trip, you’ll
want to make sure your vehicle is prepared to
be towed.
Dinghy Towing
Two-Wheel Drive Vehicles
Notice:If you tow your vehicle with all four wheels
on the ground, the drivetrain components could
be damaged. The repairs would not be covered by
your warranty. Do not tow your vehicle with all
four wheels on the ground.
Two-wheel-drive vehicles should not be towed with
all four wheels on the ground. Two-wheel-drive
transmissions have no provisions for internal lubrication
while being towed.
Four-Wheel Drive Vehicles
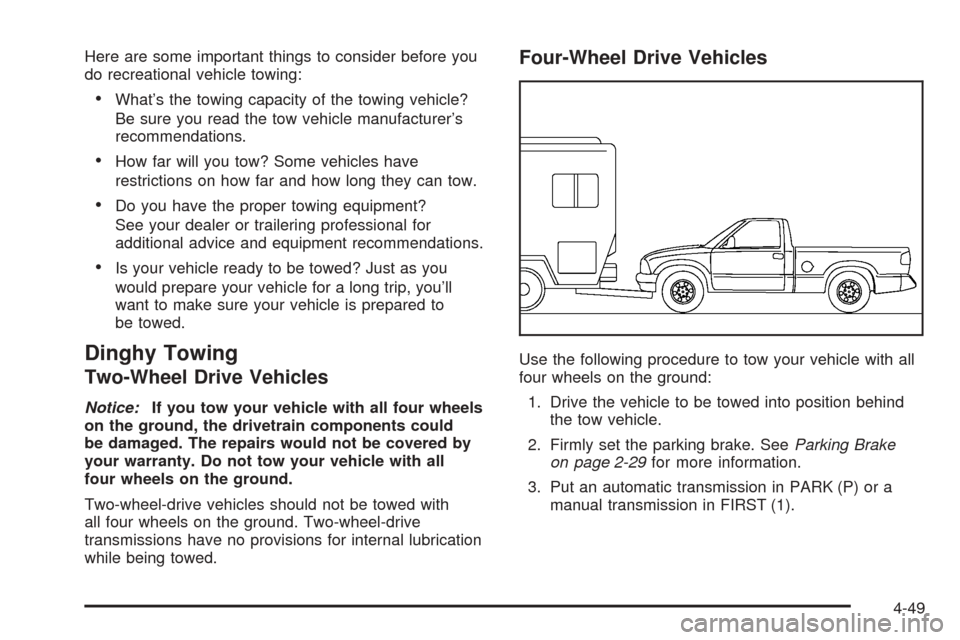
Use the following procedure to tow your vehicle with all
four wheels on the ground:
1. Drive the vehicle to be towed into position behind
the tow vehicle.
2. Firmly set the parking brake. SeeParking Brake
on page 2-29for more information.
3. Put an automatic transmission in PARK (P) or a
manual transmission in FIRST (1).
4-49
Page 248 of 414
4. Securely attach the vehicle being towed to the
tow vehicle.
For manual transmission vehicles, make sure the
wheels are straight before proceeding to the
next steps. On automatic transmission vehicles, use
an adequate clamping device to ensure that the
front wheels are locked into the straight position.
{CAUTION:
Shifting a four-wheel-drive vehicle’s transfer
case into NEUTRAL can cause your vehicle to
roll even if the transmission is in PARK (P) for
an automatic transmission, or if your vehicle is
in gear, for a manual transmission. You or
others could be injured. Make sure the parking
brake is �rmly set before you shift the transfer
case to NEUTRAL.
5. Shift the transfer case to NEUTRAL. See
Four-Wheel Drive on page 2-25for more
information.
6. Release the parking brake only after the vehicle
being towed is �rmly attached to the tow vehicle.7. Turn the ignition to LOCK.
If the tow vehicle will not be started or driven for
six weeks or more, remove the battery cable
from the negative terminal (post) of the battery to
prevent your battery from draining while towing.
After towing see “Shifting Out of NEUTRAL” under
Four-Wheel Drive on page 2-25.
Dolly Towing
Front Towing (Front Wheels Off the
Ground)
Two-Wheel-Drive Vehicles
Notice:If you tow a two-wheel-drive vehicle with
the rear wheels on the ground, the transmission
could be damaged. The repairs would not be
covered by your warranty. Never tow your vehicle
with the rear wheels on the ground.
Two-wheel-drive vehicles should not be towed with the
rear wheels on the ground. Two-wheel-drive
transmissions have no provisions for internal lubrication
while being towed. To dolly tow a two-wheel-drive
vehicle, you must tow the vehicle with the rear wheels
on the dolly. See “Rear Towing (Rear Wheels Off
the Ground)” later in this section for more information.
4-50
Page 249 of 414
Four-Wheel-Drive Vehicles
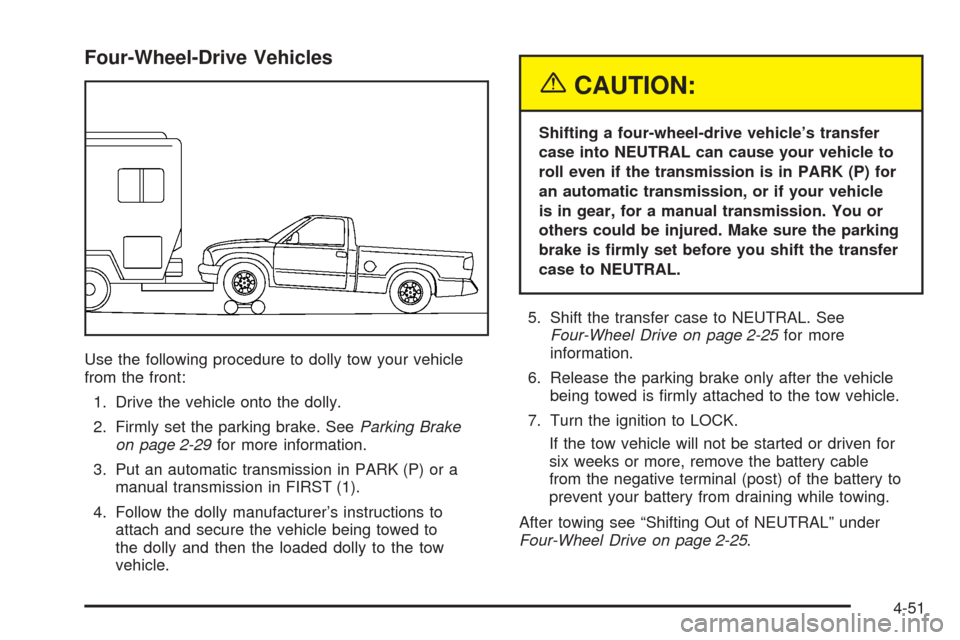
Use the following procedure to dolly tow your vehicle
from the front:
1. Drive the vehicle onto the dolly.
2. Firmly set the parking brake. SeeParking Brake
on page 2-29for more information.
3. Put an automatic transmission in PARK (P) or a
manual transmission in FIRST (1).
4. Follow the dolly manufacturer’s instructions to
attach and secure the vehicle being towed to
the dolly and then the loaded dolly to the tow
vehicle.
{CAUTION:
Shifting a four-wheel-drive vehicle’s transfer
case into NEUTRAL can cause your vehicle to
roll even if the transmission is in PARK (P) for
an automatic transmission, or if your vehicle
is in gear, for a manual transmission. You or
others could be injured. Make sure the parking
brake is �rmly set before you shift the transfer
case to NEUTRAL.
5. Shift the transfer case to NEUTRAL. See
Four-Wheel Drive on page 2-25for more
information.
6. Release the parking brake only after the vehicle
being towed is �rmly attached to the tow vehicle.
7. Turn the ignition to LOCK.
If the tow vehicle will not be started or driven for
six weeks or more, remove the battery cable
from the negative terminal (post) of the battery to
prevent your battery from draining while towing.
After towing see “Shifting Out of NEUTRAL” under
Four-Wheel Drive on page 2-25.
4-51
Page 250 of 414
Rear Towing (Rear Wheels Off the Ground)
Two-Wheel-Drive Vehicles
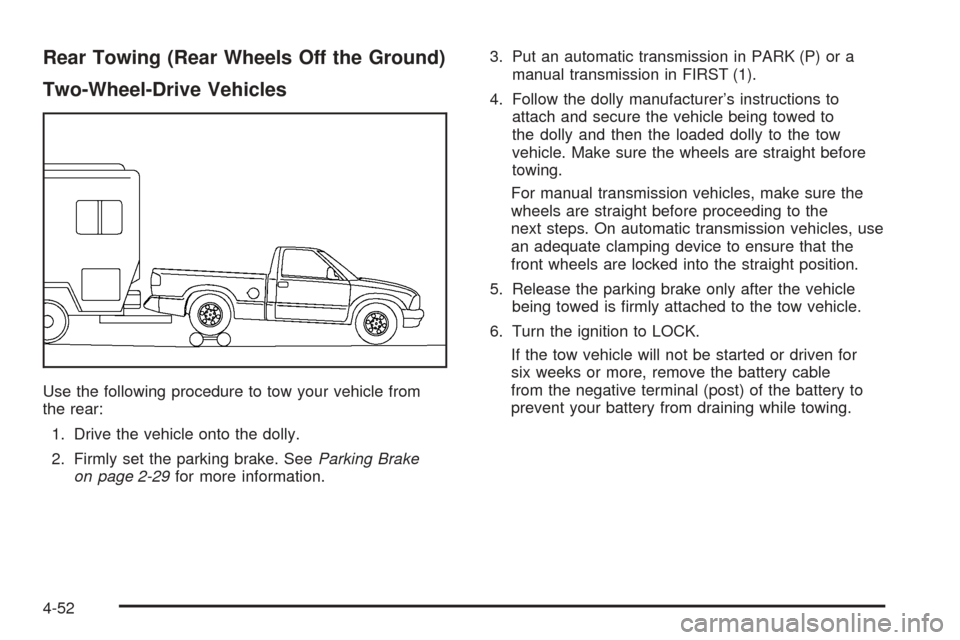
Use the following procedure to tow your vehicle from
the rear:
1. Drive the vehicle onto the dolly.
2. Firmly set the parking brake. SeeParking Brake
on page 2-29for more information.3. Put an automatic transmission in PARK (P) or a
manual transmission in FIRST (1).
4. Follow the dolly manufacturer’s instructions to
attach and secure the vehicle being towed to
the dolly and then the loaded dolly to the tow
vehicle. Make sure the wheels are straight before
towing.
For manual transmission vehicles, make sure the
wheels are straight before proceeding to the
next steps. On automatic transmission vehicles, use
an adequate clamping device to ensure that the
front wheels are locked into the straight position.
5. Release the parking brake only after the vehicle
being towed is �rmly attached to the tow vehicle.
6. Turn the ignition to LOCK.
If the tow vehicle will not be started or driven for
six weeks or more, remove the battery cable
from the negative terminal (post) of the battery to
prevent your battery from draining while towing.
4-52