2005 CHEVROLET COLORADO change time
[x] Cancel search: change timePage 165 of 414

DIC Warnings and Messages
Warning messages are displayed on the DIC to notify
the driver that the status of the vehicle has changed and
that some action may be needed by the driver to
correct the condition. More than one message may
appear at one time. They will appear one after the other.
The messages are displayed for three seconds each.
Some messages may not require immediate action
but you should press and release the trip odometer reset
stem to acknowledge that you received the message
and clear it from the display. Each message must
be acknowledged individually. Some messages cannot
be cleared from the display because they are more
urgent. These messages require action before they can
be removed from the DIC display. The following are
the possible messages that can be displayed and some
information about them.
AC (Air Conditioning) OFF
This message will be displayed when the engine coolant
temperature is too high and the air conditioning in
your vehicle needs to be turned off. SeeEngine
Overheating on page 5-28andClimate Control System
on page 3-19for more information. It will be displayed
along with the ENG HOT message.
ABS (Anti-Lock Brake System)
This message will be displayed if there is a problem
with your anti-lock brake system. Check your anti-lock
brake system as soon as possible and have your vehicle
serviced by your GM dealer. SeeBrakes on page 5-36
andAnti-Lock Brake System Warning Light on
page 3-29for more information. Press and release the
reset stem to acknowledge the message and clear
it from the DIC display.
BATTERY
This message will be displayed when there is a problem
with your vehicle’s battery. SeeBattery on page 5-39
andBattery Warning Light on page 3-27for more
information.
BRAKES
This message will be displayed if there is a problem
with your brakes. Check your brakes as soon as
possible and have your vehicle serviced by your
GM dealer. SeeBrakes on page 5-36andBrake System
Warning Light on page 3-28for more information.
Press and release the reset stem to acknowledge the
message and clear it from the DIC display.
3-39
Page 173 of 414
XM™ Satellite Radio Service
XM™ is a satellite radio service that is based in the
48 contiguous United States. XM™ offers 100 coast to
coast channels including music, news, sports, talk, and
children’s programming. XM™ provides digital quality
audio and text information that includes song title and
artist name. A service fee is required in order to receive
the XM™ service. For more information, contact XM™
at www.xmradio.com or call 1-800-852-XMXM (9696).
Playing the Radio
PWR (Power):Press this knob to turn the system
on and off.
oVOLp(Volume):Turn this knob to increase or to
decrease the volume.
DISPL (Display):Press this knob to switch the display
between the radio station frequency and the time.
When the ignition is turned off, press this knob to display
the time.
For RDS, press the DISPL knob to change what
appears on the display while using RDS. The display
options are station name, RDS station frequency,
PTY, and the name of the program (if available).For XM™ (if equipped), press the DISPL knob while
in XM™ mode to retrieve four different categories
of information related to the current song or
channel: Artist, Song Title, Category or PTY, Channel
Number/Channel Name.
To change the default on the display, press the DISPL
knob until you see the display you want, then hold
this knob for two seconds. The radio will produce one
beep and the selected display will now be the default.
AUTO VOL (Automatic Volume):With automatic
volume, the audio system adjusts automatically to make
up for road and wind noise as you drive.
Set the volume at the desired level. Press this button to
select LOW, MEDIUM, or HIGH. AVOL will appear
on the display. Each higher setting will allow for more
volume compensation at faster vehicle speeds. Then
as you drive, automatic volume increases the volume,
as necessary, to overcome noise at any speed. The
volume level should always sound the same to you as
you drive. NONE will appear on the display if the
radio cannot determine the vehicle speed. To turn
automatic volume off, press this button until OFF
appears on the display.
3-47
Page 181 of 414
4 FWD (Forward):Press and hold this pushbutton to
advance quickly within a track. Press and hold this
pushbutton for less than two seconds to advance at
six times the normal playing speed. Press and hold it for
more than two seconds to advance at 17 times the
normal playing speed. Release this pushbutton to play
the passage. ET and the elapsed time of the track
will appear on the display.
6 RDM (Random):Press this pushbutton to hear the
tracks in random, rather than sequential, order. RDM ON
will appear on the display. RDM T and the track
number will appear on the display when each track
starts to play. Press RDM again to turn off random play.
RDM OFF will appear on the display.
oSEEKp:Press the left arrow to go to the start
of the current or the previous track. Press the right arrow
to go to the start of the next track. Pressing either
arrow for more than two seconds will search the
previous or next tracks at two tracks per second.
Release the button to stop searching and to play
the track.
oTUNEp:Turning the TUNE knob will fast track
reverse or advance through tracks. The track number
will appear on the display for each track.DISPL (Display):Press this knob to see how long the
current track has been playing. ET and the elapsed
time of the track will appear on the display. To change
the default on the display, track or elapsed time,
press this knob until you see the display you want, then
hold the knob for two seconds. The radio will produce
one beep and the selected display will now be the
default.
BAND:Press this button to listen to the radio when a
CD is playing. The inactive CD will remain safely
inside the radio for future listening.
CD AUX (Auxiliary):Press this button to play a CD
when listening to the radio. The CD symbol will appear
on the display when a CD is loaded.
Z(Eject):Press this button to eject a CD. Eject may
be activated with either the ignition or radio off. CDs
may be loaded with the ignition and radio off if this
button is pressed �rst.
3-55
Page 185 of 414
Press and release this pushbutton again to turn off
random play. NO RDM will appear on the display.
oSEEKp:Press the left arrow to go to the start of
the previous track. Press the right arrow to go to the
start of the next track. Pressing either arrow for
more than two seconds will search the previous or next
tracks at two tracks per second. Release the button
to stop searching and to play the track.
oTUNEp:Turning the TUNE knob will fast track
reverse or advance through the tracks in all folders
or playlists. The track number and �le name will appear
on the display for each track. Turning this knob while
in random will fast track reverse or advance the tracks in
sequential order.
DISPL (Display):Press this knob to switch between
track mode, folder/playlist mode, and time of day mode.
The display will show only eight characters, but there
can be up to four pages of text. If there are more
than eight characters in the song, folder, or playlist
name, pressing this knob within two seconds will take
you to the next page of text. If there are no other pages
to be shown, pressing this knob within two seconds
will take you to the next display mode.
Track mode will display the current track number
and the ID3 tag song name.
Folder/playlist mode will display the current folder or
playlist number and the folder/playlist name.
Time of day mode will display the time of day and
the ID3 tag song name.To change the default on the display, press the DISPL
knob until you see the display you want, then hold
this knob for two seconds. The radio will produce one
beep and the selected display will now be the default.
INFO (Information):INFO will appear on the display
whenever a current track has ID3 tag information. Press
this button to display the artist name and album
contained in the tag. INFO will disappear from the
display when the information in the ID3 tag has �nished.
BAND:Press this button to listen to the radio when a
CD is playing. The inactive CD will remain safely
inside the radio for future listening.
CD AUX (Auxiliary):Press this button to play a CD
when listening to the radio. The CD symbol will appear
on the display when a CD is loaded.
Z(Eject):Press this button to eject a CD. Eject may
be activated with either the ignition or radio off. CDs
may be loaded with the ignition and radio off if this
button is pressed �rst.
3-59
Page 187 of 414
INFO (Information):Press this knob to switch the
display between the radio station frequency and
the time. When the ignition is off, press this knob to
display the time.
For RDS, press the INFO knob to change what appears
on the display while using RDS. The display options
are station name, RDS station frequency, PTY, and the
name of the program (if available).
To change the default on the display, press the INFO
knob until you see the display you want, then hold
the knob until you hear a beep. The selected display will
now be the default.
AUTO VOL (Automatic Volume):With automatic
volume, the audio system will adjust automatically to
make up for road and wind noise as you drive by
increasing the volume as vehicle speed increases.
Set the volume at the desired level. Press this button to
select MID, MED, or MAX. AUTO VOL will appear on
the display. Each higher setting will provide more
volume compensation at faster vehicle speeds. To turn
automatic volume off, press this button until AUTO
VOL OFF appears on the display.Finding a Station
BAND:Press this button to switch between FM1, FM2,
or AM. The display will show the selection.
oTUNEp:Turn this knob to select radio stations.
©SEEK¨:Press either the SEEK or the TYPE
arrows to go to the next or to the previous station and
stay there.
The radio will only seek stations with a strong signal
that are in the selected band.
©SCAN¨:Press and hold either the SCAN or the
TYPE arrows for two seconds until SCN appears on
the display and you hear a beep. The radio will go to a
station, play for a few seconds, then go on to the
next station. Press either the SCAN or the TYPE arrows
again to stop scanning.
To scan preset stations, press and hold either the
SCAN or the TYPE arrows for more than four seconds.
PSC will appear on the display and you will hear a
double beep. The radio will go to a preset station, play
for a few seconds, then go on to the next preset
station. Press either the SCAN or the TYPE arrows
again to stop scanning presets.
The radio will only scan stations with a strong signal
that are in the selected band.
3-61
Page 194 of 414
To use repeat, do the following:
To repeat the track you are listening to, press and
release the RPT button. RPT will appear on the
display. Press RPT again to turn off repeat play.
To repeat the CD you are listening to, press and
hold the RPT button for two seconds. RPT will
appear on the display. Press RPT again to turn off
repeat play.
RDM (Random):With random, you can listen to the
tracks in random, rather than sequential, order, on one
CD or on all of the CDs. To use random, do one of
the following:
To play the tracks on the CD you are listening to in
random order, press and release the RDM button.
RANDOM ONE will appear on the display. Press
RDM again to turn off random play.
To play the tracks on all of the CDs that are loaded
in random order, press and hold RDM for more
than two seconds. You will hear a beep and
RANDOM ALL will appear on the display. Press
RDM again to turn off random play.
AUTO EQ (Automatic Equalization):Press AUTO EQ
to select the equalization setting while playing a CD.
The equalization will be stored whenever a CD is played.
For more information on AUTO EQ, see “AUTO EQ”
listed previously in this section.
©SEEK¨:Press the left arrow to go to the start of the
current track, if more than ten seconds have played.
Press the right arrow to go to the next track. If either
arrow is held or pressed more than once, the player will
continue moving backward or forward through the CD.
©SCAN¨:To scan one CD, press and hold either
SCAN arrow for more than two seconds until SCAN
appears on the display and you hear a beep. The radio
will go to the next track, play for 10 seconds, then go
on to the next track. Press either SCAN arrow again, to
stop scanning.
To scan all loaded CDs, press and hold either SCAN
arrow for more than four seconds until CD SCAN
appears on the display and you hear a beep. Use this
feature to listen to 10 seconds of the �rst track of
each loaded CD. Press either SCAN arrow again, to
stop scanning.
INFO (Information):Press this knob to see how long
the current track has been playing. To change the
default on the display, track or elapsed time, press the
knob until you see the display you want, then hold
the knob until the display �ashes. The selected display
will now be the default.
BAND:Press this button to listen to the radio when a
CD is playing. The inactive CD(s) will remain safely
inside the radio for future listening.
3-68
Page 198 of 414
Care of the CD Player
The use of CD lens cleaners for CD players is not
advised, due to the risk of contaminating the lens of the
CD optics with lubricants internal to the CD mechanism.
Fixed Mast Antenna
The �xed mast antenna can withstand most car washes
without being damaged. If the mast should ever
become slightly bent, straighten it out by hand. If the
mast is badly bent, replace it.
Check occasionally to make sure the mast is still
tightened to the fender. If tightening is required, tighten
by hand, then with a wrench one quarter turn.
XM™ Satellite Radio Antenna
System
The XM™ Satellite Radio antenna is located on the roof
of your vehicle. Keep this antenna clear of snow and
ice build up for clear radio reception.
Chime Level Adjustment
The radio is the vehicle chime producer. To change the
volume level, press and hold pushbutton 6 with the
ignition on and the radio power off. The chime volume
level will change from the normal level to loud, and
LOUD will appear on the radio display. To change back
to the default or normal setting, press and hold
pushbutton 6 again. The chime level will change from
the loud level to normal, and NORMAL will appear
on the radio display. Each time the chime volume is
changed, three chimes will sound as an example of the
new volume selected. Removing the radio and not
replacing it with a factory radio or chime module will
disable vehicle chimes.
3-72
Page 206 of 414
Remember: Anti-lock does not change the time you
need to get your foot up to the brake pedal or always
decrease stopping distance. If you get too close to
the vehicle in front of you, you will not have time to apply
your brakes if that vehicle suddenly slows or stops.
Always leave enough room up ahead to stop, even
though you have anti-lock brakes.
Using Anti-Lock
Do not pump the brakes. Just hold the brake pedal
down �rmly and let anti-lock work for you. You may feel
the brakes vibrate, or you may notice some noise,
but this is normal.
Braking in Emergencies
With anti-lock brakes, you can steer and brake at the
same time. In many emergencies, steering can help
you more than even the very best braking.
Traction Control System (TCS)
Your vehicle may have a Traction Control System (TCS)
that limits wheel spin. This is especially useful in
slippery road conditions. The system operates only if
it senses that one or both of the rear wheels are
spinning or beginning to lose traction. When this
happens, the system reduces engine power and may
also upshift the transmission to limit wheel spin.
You may feel or hear the system working, but this is
normal.
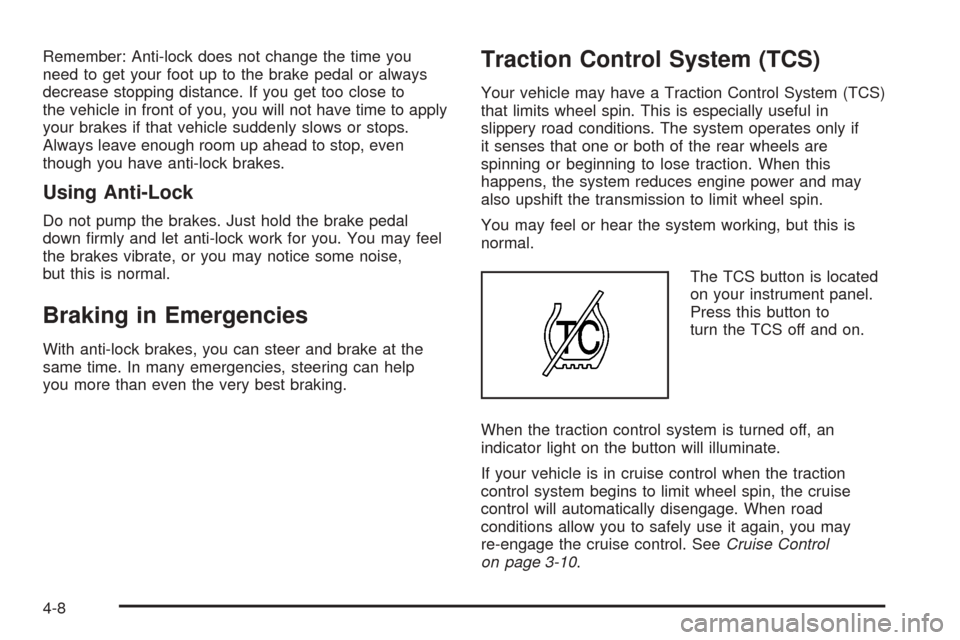
The TCS button is located
on your instrument panel.
Press this button to
turn the TCS off and on.
When the traction control system is turned off, an
indicator light on the button will illuminate.
If your vehicle is in cruise control when the traction
control system begins to limit wheel spin, the cruise
control will automatically disengage. When road
conditions allow you to safely use it again, you may
re-engage the cruise control. SeeCruise Control
on page 3-10.
4-8