2005 CHEVROLET COLORADO service indicator
[x] Cancel search: service indicatorPage 1 of 414

Seats and Restraint Systems........................... 1-1
Front Seats
............................................... 1-3
Rear Seats
............................................... 1-8
Safety Belts
.............................................1-11
Child Restraints
.......................................1-32
Airbag System
.........................................1-62
Restraint System Check
............................1-75
Features and Controls..................................... 2-1
Keys
........................................................ 2-2
Doors and Locks
....................................... 2-7
Windows
.................................................2-12
Theft-Deterrent Systems
............................2-14
Starting and Operating Your Vehicle
...........2-16
Mirrors
....................................................2-35
OnStar
®System
......................................2-39
Storage Areas
.........................................2-41
Instrument Panel............................................. 3-1
Instrument Panel Overview
.......................... 3-4
Climate Controls
......................................3-19
Warning Lights, Gages, and Indicators
........3-22
Driver Information Center (DIC)
..................3-36
Audio System(s)
.......................................3-42Driving Your Vehicle....................................... 4-1
Your Driving, the Road, and Your Vehicle
..... 4-2
Towing
...................................................4-48
Service and Appearance Care.......................... 5-1
Service
..................................................... 5-3
Fuel
......................................................... 5-5
Checking Things Under the Hood
...............5-10
Rear Axle
...............................................5-44
Four-Wheel Drive
.....................................5-44
Front Axle
...............................................5-45
Bulb Replacement
....................................5-46
Windshield Wiper Blade Replacement
.........5-50
Tires
......................................................5-52
Appearance Care
.....................................5-88
Vehicle Identi�cation
.................................5-97
Electrical System
......................................5-98
Capacities and Speci�cations
...................5-103
Maintenance Schedule..................................... 6-1
Maintenance Schedule
................................ 6-2
Customer Assistance and Information.............. 7-1
Customer Assistance and Information
........... 7-2
Reporting Safety Defects
...........................7-10
Index................................................................ 1
2005 Chevrolet Colorado Owner ManualM
Page 99 of 414
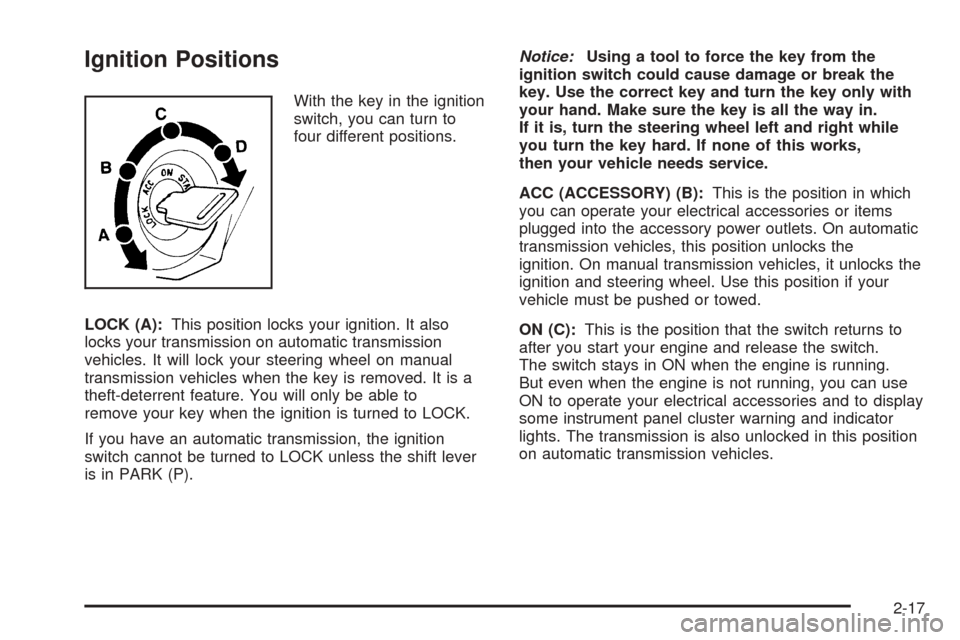
Ignition Positions
With the key in the ignition
switch, you can turn to
four different positions.
LOCK (A):This position locks your ignition. It also
locks your transmission on automatic transmission
vehicles. It will lock your steering wheel on manual
transmission vehicles when the key is removed. It is a
theft-deterrent feature. You will only be able to
remove your key when the ignition is turned to LOCK.
If you have an automatic transmission, the ignition
switch cannot be turned to LOCK unless the shift lever
is in PARK (P).Notice:Using a tool to force the key from the
ignition switch could cause damage or break the
key. Use the correct key and turn the key only with
your hand. Make sure the key is all the way in.
If it is, turn the steering wheel left and right while
you turn the key hard. If none of this works,
then your vehicle needs service.
ACC (ACCESSORY) (B):This is the position in which
you can operate your electrical accessories or items
plugged into the accessory power outlets. On automatic
transmission vehicles, this position unlocks the
ignition. On manual transmission vehicles, it unlocks the
ignition and steering wheel. Use this position if your
vehicle must be pushed or towed.
ON (C):This is the position that the switch returns to
after you start your engine and release the switch.
The switch stays in ON when the engine is running.
But even when the engine is not running, you can use
ON to operate your electrical accessories and to display
some instrument panel cluster warning and indicator
lights. The transmission is also unlocked in this position
on automatic transmission vehicles.
2-17
Page 108 of 414
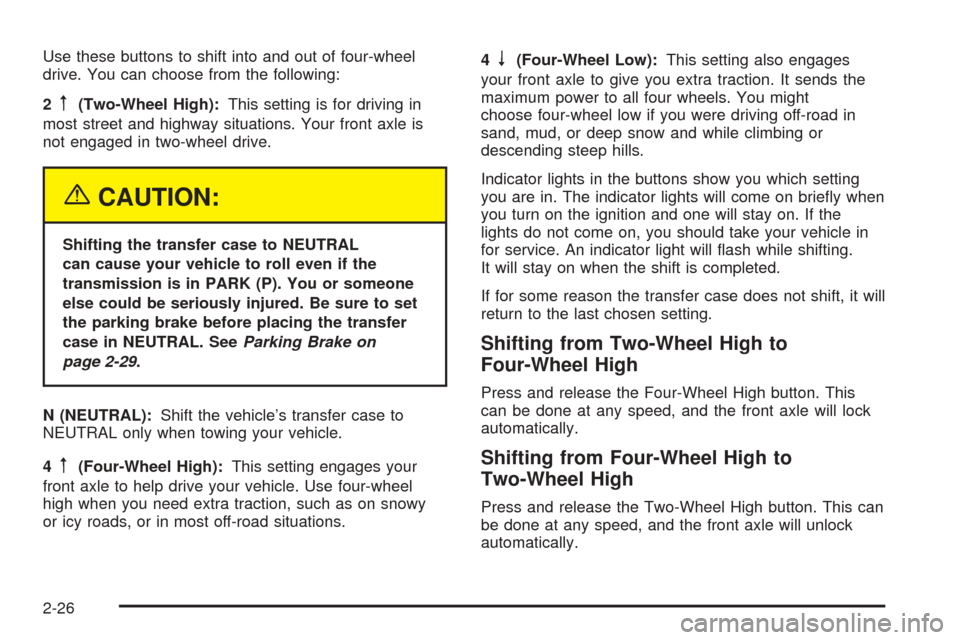
Use these buttons to shift into and out of four-wheel
drive. You can choose from the following:
2
m(Two-Wheel High):This setting is for driving in
most street and highway situations. Your front axle is
not engaged in two-wheel drive.
{CAUTION:
Shifting the transfer case to NEUTRAL
can cause your vehicle to roll even if the
transmission is in PARK (P). You or someone
else could be seriously injured. Be sure to set
the parking brake before placing the transfer
case in NEUTRAL. SeeParking Brake on
page 2-29.
N (NEUTRAL):Shift the vehicle’s transfer case to
NEUTRAL only when towing your vehicle.
4
m(Four-Wheel High):This setting engages your
front axle to help drive your vehicle. Use four-wheel
high when you need extra traction, such as on snowy
or icy roads, or in most off-road situations.4
n(Four-Wheel Low):This setting also engages
your front axle to give you extra traction. It sends the
maximum power to all four wheels. You might
choose four-wheel low if you were driving off-road in
sand, mud, or deep snow and while climbing or
descending steep hills.
Indicator lights in the buttons show you which setting
you are in. The indicator lights will come on brie�y when
you turn on the ignition and one will stay on. If the
lights do not come on, you should take your vehicle in
for service. An indicator light will �ash while shifting.
It will stay on when the shift is completed.
If for some reason the transfer case does not shift, it will
return to the last chosen setting.
Shifting from Two-Wheel High to
Four-Wheel High
Press and release the Four-Wheel High button. This
can be done at any speed, and the front axle will lock
automatically.
Shifting from Four-Wheel High to
Two-Wheel High
Press and release the Two-Wheel High button. This can
be done at any speed, and the front axle will unlock
automatically.
2-26
Page 156 of 414

Engine Coolant Temperature Gage
This gage shows the
engine coolant
temperature.
If the gage pointer is near the top of the gage, the
engine is too hot. It means that your engine coolant has
overheated. If you have been operating your vehicle
under normal driving conditions, you should pull off the
road, stop your vehicle and turn off the engine as
soon as possible.
SeeEngine Overheating on page 5-28for more
information.
Malfunction Indicator Lamp
Check Engine Light
Your vehicle is equipped
with a computer which
monitors operation of the
fuel, ignition, and emission
control systems.
This system is called OBD II (On-Board
Diagnostics-Second Generation) and is intended to
assure that emissions are at acceptable levels for the
life of the vehicle, helping to produce a cleaner
environment. The check engine light comes on to
indicate that there is a problem and service is required.
Malfunctions often will be indicated by the system
before any problem is apparent. This may prevent more
serious damage to your vehicle. This system is also
designed to assist your service technician in correctly
diagnosing any malfunction.
Notice:If you keep driving your vehicle with this
light on, after awhile, your emission controls
may not work as well, your fuel economy may
not be as good, and your engine may not run as
smoothly. This could lead to costly repairs that
may not be covered by your warranty.
3-30
Page 166 of 414
CHANGE OIL
This message will be displayed when the oil needs to
be changed. Check the oil in your vehicle as soon
as possible and have your vehicle serviced by your
GM dealer. SeeEngine Oil on page 5-13andScheduled
Maintenance on page 6-4for more information. Press
the reset stem to acknowledge the message and clear it
from the display.
DOORS
This message will be displayed on your DIC when one
or more of your doors is ajar. You should check all
the doors on your vehicle to make sure they are closed.
The message will clear from the display after all of
the doors are closed.
ENG (Engine) HOT
This message will be displayed when your engine
coolant temperature is hot. Check your engine coolant
temperature gage. SeeEngine Coolant Temperature
Gage on page 3-30for more information. You should
have your vehicle serviced by your GM dealer as soon
as possible if you suspect your engine is overheating.
SeeEngine Overheating on page 5-28for more
information.
FLUID
This message will be displayed if your brake �uid is low.
Check the brake �uid as soon as possible and have
your vehicle serviced by your GM dealer. SeeBrakes on
page 5-36for more information. Press the reset stem
to acknowledge the message and clear it from the DIC
display.
FUEL CAP
This message will be displayed if your vehicle’s fuel cap
is either off or loose. You should pull over and check
to see if your vehicle’s fuel cap is secure as soon
as possible. You may also see the check engine light
on the instrument panel cluster. SeeMalfunction
Indicator Lamp on page 3-30for more information. Press
the reset stem to acknowledge the message and
clear it from the display.
LOW FUEL
This message will be displayed if the level of fuel in
your vehicle is low. You should also check your
fuel gage. SeeFuel Gage on page 3-35for more
information. You should �ll your vehicle’s tank as soon
as possible.
3-40
Page 273 of 414

Notice:Your vehicle was not designed for fuel that
contains methanol. Do not use fuel containing
methanol. It can corrode metal parts in your fuel
system and also damage the plastic and rubber
parts. That damage would not be covered under
your warranty.
Some gasolines that are not reformulated for low
emissions may contain an octane-enhancing additive
called methylcyclopentadienyl manganese tricarbonyl
(MMT); ask the attendant where you buy gasoline
whether the fuel contains MMT. General Motors does
not recommend the use of such gasolines. Fuels
containing MMT can reduce the life of spark plugs and
the performance of the emission control system may
be affected. The malfunction indicator lamp may turn on.
If this occurs, return to your authorized GM dealer for
service.Fuels in Foreign Countries
If you plan on driving in another country outside the
United States or Canada, the proper fuel may be hard
to �nd. Never use leaded gasoline or any other fuel
not recommended in the previous text on fuel. Costly
repairs caused by use of improper fuel would not
be covered by your warranty.
To check the fuel availability, ask an auto club, or
contact a major oil company that does business in the
country where you will be driving.
5-7
Page 304 of 414
Brake Wear
Your vehicle has front disc brakes and rear drum
brakes.
Disc brake pads have built-in wear indicators that
make a high-pitched warning sound when the brake
pads are worn and new pads are needed. The sound
may come and go or be heard all the time your vehicle
is moving, except when you are pushing on the
brake pedal �rmly.
{CAUTION:
The brake wear warning sound means that
soon your brakes will not work well. That
could lead to an accident. When you hear the
brake wear warning sound, have your vehicle
serviced.
Notice:Continuing to drive with worn-out brake
pads could result in costly brake repair.
Some driving conditions or climates may cause a brake
squeal when the brakes are �rst applied or lightly
applied. This does not mean something is wrong with
your brakes.Properly torqued wheel nuts are necessary to help
prevent brake pulsation. When tires are rotated, inspect
brake pads for wear and evenly tighten wheel nuts in
the proper sequence to GM torque speci�cations.
Rear drum brakes do not have wear indicators, but if
you ever hear a rear brake rubbing noise, have the rear
brake linings inspected immediately. Also, the rear
brake drums should be removed and inspected each
time the tires are removed for rotation or changing.
When you have the front brake pads replaced, have the
rear brakes inspected, too.
Brake linings should always be replaced as complete
axle sets.Brake Pedal Travel
See your dealer if the brake pedal does not return to
normal height, or if there is a rapid increase in
pedal travel. This could be a sign of brake trouble.
Brake Adjustment
Every time you make a brake stop, your brakes adjust
for wear.
5-38
Page 404 of 414
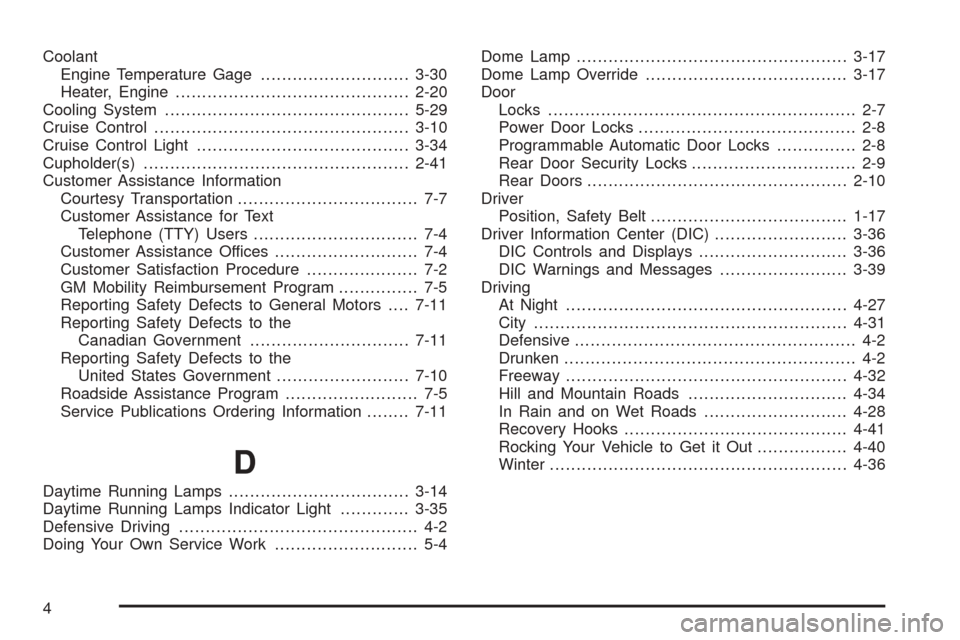
Coolant
Engine Temperature Gage............................3-30
Heater, Engine............................................2-20
Cooling System..............................................5-29
Cruise Control................................................3-10
Cruise Control Light........................................3-34
Cupholder(s)..................................................2-41
Customer Assistance Information
Courtesy Transportation.................................. 7-7
Customer Assistance for Text
Telephone (TTY) Users............................... 7-4
Customer Assistance Offices........................... 7-4
Customer Satisfaction Procedure..................... 7-2
GM Mobility Reimbursement Program............... 7-5
Reporting Safety Defects to General Motors....7-11
Reporting Safety Defects to the
Canadian Government..............................7-11
Reporting Safety Defects to the
United States Government.........................7-10
Roadside Assistance Program......................... 7-5
Service Publications Ordering Information........7-11
D
Daytime Running Lamps..................................3-14
Daytime Running Lamps Indicator Light.............3-35
Defensive Driving............................................. 4-2
Doing Your Own Service Work........................... 5-4Dome Lamp...................................................3-17
Dome Lamp Override......................................3-17
Door
Locks.......................................................... 2-7
Power Door Locks......................................... 2-8
Programmable Automatic Door Locks............... 2-8
Rear Door Security Locks............................... 2-9
Rear Doors.................................................2-10
Driver
Position, Safety Belt.....................................1-17
Driver Information Center (DIC).........................3-36
DIC Controls and Displays............................3-36
DIC Warnings and Messages........................3-39
Driving
At Night.....................................................4-27
City...........................................................4-31
Defensive..................................................... 4-2
Drunken....................................................... 4-2
Freeway.....................................................4-32
Hill and Mountain Roads..............................4-34
In Rain and on Wet Roads...........................4-28
Recovery Hooks..........................................4-41
Rocking Your Vehicle to Get it Out.................4-40
Winter........................................................4-36
4